


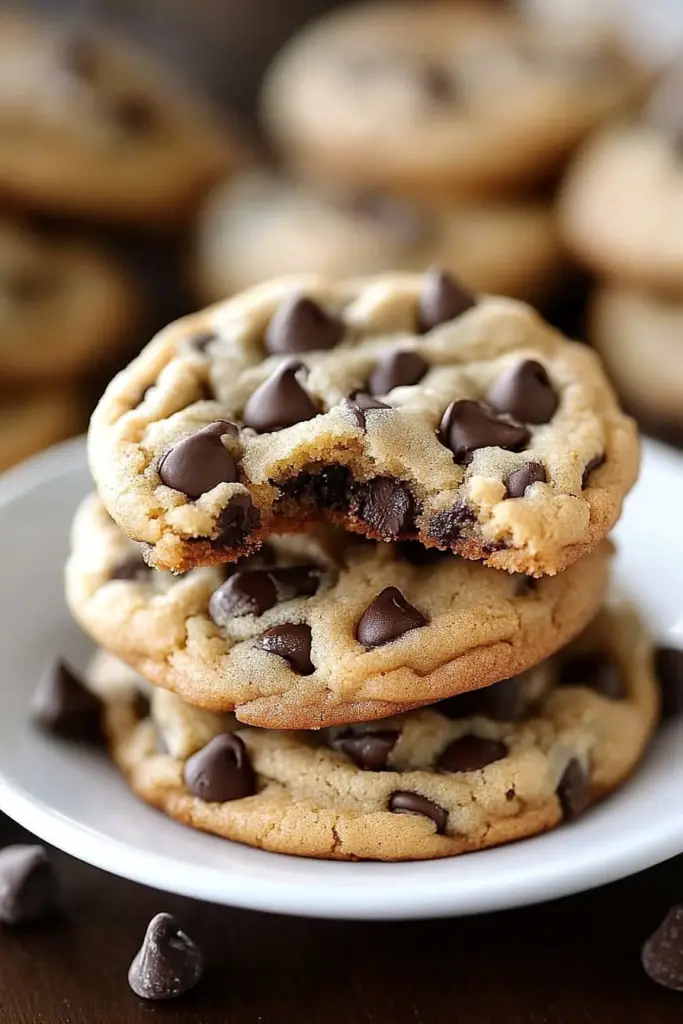
There are some smells that just instantly transport you back to childhood, aren’t there? For me, it’s the warm, sweet aroma of Chocolate Chip Cookies baking in the oven. It’s a scent that says “home,” “comfort,” and “pure joy,” all rolled into one. And today, my friends, I’m so incredibly excited to share my absolute favorite chocolate chip cookie recipe with you. This isn’t just any cookie; it’s the one I’ve tweaked and perfected over countless batches, the one that gets rave reviews from everyone who tries it, and the one that I reach for when I need a little bit of magic. Forget those dry, crumbly disappointments or overly cakey imposters. This recipe delivers perfectly chewy centers, slightly crisp edges, and pockets of gooey, melted chocolate that will make your heart sing. It’s like a warm hug in cookie form, and honestly, what could be better?
What are Chewy Chocolate
So, what exactly makes these “Ultimate Chewy Chocolate Chip Cookies“? Think of them as the gold standard, the quintessential cookie experience that dreams are made of. They’re not just about a basic chocolate chip cookie; they’re about achieving that perfect balance. You know, that delicate dance between a cookie that’s wonderfully soft and chewy on the inside, with just enough crispness around the edges to give it a satisfying bite. It’s essentially a masterclass in texture and flavor, designed to be universally loved. The name itself just evokes that feeling of pure, unadulterated cookie bliss, and that’s exactly what this recipe delivers. It’s simple, it’s classic, but it’s elevated to a whole new level of deliciousness.
Why You’ll Love This Recipe
There are so many reasons why this Chocolate Chip Cookie recipe has become my absolute go-to, and I just know you’re going to fall in love with it too. First off, the FLAVOR! Oh, the flavor. It’s a rich, buttery goodness with just the right amount of sweetness, punctuated by those glorious bursts of melted chocolate. It’s not overly sweet, which I find is a common pitfall with many recipes. The balance is just perfect. Then there’s the SIMPLICITY. Honestly, I’ve made these on busy weeknights when I’ve had a sudden craving, and they’ve come together surprisingly quickly. You don’t need any fancy equipment, just a couple of bowls and a whisk. It’s incredibly straightforward, even if you’re new to baking. And let’s talk COST-EFFICIENCY. Most of the ingredients are pantry staples, so you probably already have them on hand. It’s a truly budget-friendly way to make a decadent treat. What I love most about this recipe, though, is its VERSATILITY. They are fantastic just as they are, but they’re also amazing when you add a sprinkle of sea salt on top, or if you decide to mix in different kinds of chocolate chips or even nuts. They’re perfect for a casual get-together, a special occasion, or just for a little personal indulgence. Compared to other cookie recipes I’ve tried, these always stand out because of their incredible texture and deep flavor. They’re also incredibly forgiving, which is a huge plus for home bakers like me.
How do I make Che
Quick Overview
Making these cookies is a delightfully straightforward process that guarantees a delicious outcome. In a nutshell, you’ll be creaming butter and sugars, adding in eggs and vanilla, then gently incorporating your dry ingredients. The key to that perfect chewy texture lies in the specific ratios and a little trick I’ve learned over the years about not overmixing. Then, it’s just a matter of stirring in those generous amounts of chocolate chips before baking them to golden perfection. It’s a recipe that truly celebrates the joy of simple, homemade baking, resulting in cookies that are consistently fantastic and incredibly satisfying.
Ingredients
For the Main Batter:
1 cup (2 sticks) unsalted butter, softened (I always use good quality butter; it really makes a difference!)
3/4 cup granulated sugar
3/4 cup packed light Brown Sugar (this is key for chewiness!)
2 large eggs (room temperature is best, but not a deal-breaker)
1 teaspoon pure vanilla extract (don’t skimp on the good stuff!)
2 1/4 cups all-purpose flour (spooned and leveled, not scooped!)
1 teaspoon baking soda
1/2 teaspoon salt
For the Chocolatey Goodness:
2 cups (about 12 ounces) semi-sweet chocolate chips (I love a mix of semi-sweet and Dark Chocolate for extra depth!)
(Optional: 1/2 cup chopped nuts like walnuts or pecans)
Step-by-Step Instructions
Step 1: Preheat & Prep Pan
First things first, let’s get your oven preheated to 375 degrees Fahrenheit (190 degrees Celsius). While the oven is warming up, grab your baking sheets and line them with parchment paper or silicone baking mats. This little step is a lifesaver for easy cleanup and ensures your cookies won’t stick. Trust me on this one!
Step 2: Mix Dry Ingredients
In a medium bowl, whisk together the all-purpose flour, baking soda, and salt. Give it a good whisk to make sure everything is evenly distributed. This is important so you don’t end up with pockets of baking soda or salt in your cookies. You want that uniform flavor and texture throughout!
Step 3: Mix Wet Ingredients
In a large bowl, cream together the softened butter, granulated sugar, and packed light brown sugar. Beat them with an electric mixer (or a sturdy whisk if you’re feeling ambitious!) until light and fluffy. This usually takes about 2-3 minutes. Then, beat in the eggs one at a time, mixing well after each addition. Finally, stir in the vanilla extract. Your mixture should look smooth and creamy.
Step 4: Combine
Now, it’s time to bring the wet and dry ingredients together. Gradually add the flour mixture to the butter mixture, mixing on low speed (or stirring gently) until just combined. Be careful not to overmix here! Overmixing develops the gluten in the flour, which can lead to tougher cookies. Stop mixing as soon as you don’t see any more dry streaks of flour. It’s better to have a few tiny flour pockets than to overwork the dough.
Step 5: Prepare Filling (Chocolate Chips!)
This is the fun part! Gently stir in your chocolate chips (and nuts, if you’re using them) until they’re evenly distributed throughout the dough. I like to use a spatula for this so I don’t overmix the dough any further. Make sure every bite is going to have plenty of chocolatey goodness.
Step 6: Layer & Swirl (Not applicable for this recipe, but we’ll imagine!)
Since this is a classic chocolate chip cookie, there isn’t a layering or swirling step. But if this were a more elaborate dessert, this is where you’d gently layer different components or create beautiful swirls with a knife or skewer. For now, we’ll just focus on getting these beauties ready for baking!
Step 7: Bake
Drop rounded tablespoons of dough onto your prepared baking sheets, leaving about 2 inches between each cookie to allow for spreading. I like to use a cookie scoop for uniform size, but two spoons work just fine! Bake for 9-11 minutes, or until the edges are golden brown and the centers still look slightly soft. They’ll continue to cook a bit on the hot baking sheet after you take them out, which is exactly what we want for that chewy texture.
Step 8: Cool & Glaze
Let the cookies cool on the baking sheets for about 5 minutes before carefully transferring them to a wire rack to cool completely. Resist the urge to eat them straight off the pan – I know it’s hard! If you wanted to add a simple glaze (though not necessary for these!), you’d mix powdered sugar with a little milk or lemon juice until you reach your desired consistency and drizzle it over the cooled cookies. For these classic chocolate chip cookies, I often like to sprinkle a little flaky sea salt on top right after they come out of the oven. It elevates the flavor so much!
Step 9: Slice & Serve
Once completely cooled, these chocolate chip cookies are ready to be devoured! They are best served at room temperature. You can stack them on a pretty platter or just eat them right out of the cookie jar. The aroma alone will have everyone flocking to the kitchen!
What to Serve It With
These ultimate chewy chocolate chip cookies are so wonderfully versatile, they fit into pretty much any occasion. For a simple BREAKFAST treat (yes, I’m a firm believer in cookies for breakfast sometimes!), I love pairing them with a strong cup of coffee. They’re also amazing with a glass of cold milk, the classic pairing that never gets old. For a more elegant BRUNCH setting, I might arrange them on a tiered stand with some fresh berries and perhaps a small fruit salad. They add a touch of homemade charm to any spread. As a decadent DESSERT, these cookies are absolute stars. Serve them warm with a scoop of vanilla bean ice cream for the ultimate chocolate chip cookie sundae – it’s pure heaven! Or, offer them alongside a rich chocolate lava cake for a double dose of chocolate indulgence. And for those COZY SNACKS, when you just need a little pick-me-up, these are perfect with a cup of tea or hot chocolate. My family traditions often involve a batch of these appearing on movie nights or after a long day of playing outside. They’re just universally comforting.
Top Tips for Perfecting Your Ultimate Chewy Chocolate Chip Cookies
I’ve made these chocolate chip cookies more times than I can count, and along the way, I’ve picked up a few tricks that really make a difference. Here are my top tips for ensuring cookie perfection every single time.
Creaming Butter and Sugar: This is more important than you might think! When you cream the butter and sugars together until light and fluffy, you’re incorporating air into the dough. This air creates lift and tenderness. Don’t rush this step; give it a good 2-3 minutes with your mixer. The color should become noticeably lighter and the texture airy.
Measuring Flour Correctly: This is a big one! Scooping flour directly from the bag with your measuring cup compacts it, meaning you’ll end up with too much flour. This is a common reason for dry, crumbly cookies. The best way is to “spoon and level”: spoon the flour into your measuring cup until it’s overflowing, then use the back of a knife to level off the excess. It makes a world of difference in texture.
Don’t Overmix the Dough: Once you add the dry ingredients to the wet, mix only until *just* combined. Seriously, stop as soon as you don’t see any dry flour. Overmixing develops gluten, which results in tough, dense cookies instead of tender, chewy ones. It’s okay if there are a few tiny flour streaks; they’ll disappear during baking.
Brown Sugar is Your Friend for Chewiness: The higher ratio of brown sugar to granulated sugar is intentional. Brown sugar contains molasses, which adds moisture and chewiness. If you only have granulated sugar, you can try making your own brown sugar by mixing 1 tablespoon of molasses with 1 cup of granulated sugar, but for this recipe, packed light brown sugar is ideal.
Chocolate Chip Quality and Quantity: Don’t be shy with the chocolate chips! I find 2 cups is the perfect amount for this recipe, but you could even go up to 2.5 cups if you’re a serious chocolate lover. Also, consider using a mix of chocolate chips – semi-sweet, milk, and dark chocolate chips all work beautifully together. Chopped chocolate bars also melt wonderfully and create lovely puddles.
Baking Time is Crucial: Cookies continue to bake on the hot baking sheet for several minutes after you remove them from the oven. You want to pull them out when the edges are golden brown but the centers still look a little soft and underdone. They will firm up as they cool, resulting in that perfect chewy texture. Keep an eye on them, as oven temperatures can vary!
Sea Salt Finish: This is my secret weapon for elevating these cookies. A sprinkle of flaky sea salt (like Maldon) on top of the cookies right after they come out of the oven creates a delightful contrast to the sweetness and really makes the chocolate flavor pop. It’s a small step that makes a huge impact.
Storing and Reheating Tips
Keeping these delicious chocolate chip cookies fresh and tasty is surprisingly easy, but there are a few things to keep in mind to maintain that perfect chewy texture.
Room Temperature Storage: For the best results, store cooled cookies in an airtight container at room temperature. They are usually at their peak chewiness for the first 2-3 days. If you want to keep them super fresh and help maintain that soft center, you can even place a slice of bread in the container with the cookies; it helps to keep them moist. Don’t stack them too high, or the bottom ones might get squished.
Refrigerator Storage: I generally don’t recommend refrigerating these cookies, as the cold can sometimes make them a bit harder. However, if you need to store them for longer, place them in an airtight container. They should last for about 5-7 days this way, but the texture might change slightly, becoming firmer.
Freezer Instructions: These cookies freeze beautifully, both baked and as dough! For baked cookies: Once completely cooled, wrap individual cookies or stacks of them tightly in plastic wrap, then place them in a freezer-safe bag or container. They’ll last for up to 2-3 months. To reheat, you can enjoy them straight from frozen for a cool treat, or warm them up gently in a low oven (around 300°F/150°C) for a few minutes until softened. For cookie dough: Shape the dough into balls and place them on a baking sheet in the freezer until solid. Once frozen, transfer them to a freezer bag. You can bake them directly from frozen, just add a minute or two to the baking time.
Glaze Timing Advice: If you decide to add a glaze, it’s best applied to completely cooled cookies just before serving or storing. If you glaze them and then store them for more than a day, the glaze can sometimes become sticky or start to dissolve, especially in humid conditions. For any storage method, always make sure the cookies are entirely cool before storing them to prevent condensation and sogginess.
Frequently Asked Questions
Final Thoughts
There you have it – my absolute favorite recipe for ultimate chewy chocolate chip cookies! I truly hope you give these a try. They’re more than just a dessert; they’re a little moment of happiness, a taste of nostalgia, and a sure way to bring smiles to the faces of your loved ones. What I adore about this recipe is how it consistently delivers that perfect texture and rich, comforting flavor that we all crave from a classic chocolate chip cookie. It’s proof that sometimes, the simplest things are the most extraordinary. If you enjoy this recipe, you might also love my recipe for Classic Brownies or my Peanut Butter Blossom Cookies for more homemade goodness! Please, if you make these, I would be absolutely thrilled to hear all about it in the comments below! Let me know how they turned out, any variations you tried, or even just how much you enjoyed them. Happy baking, and may your cookie jar always be full!
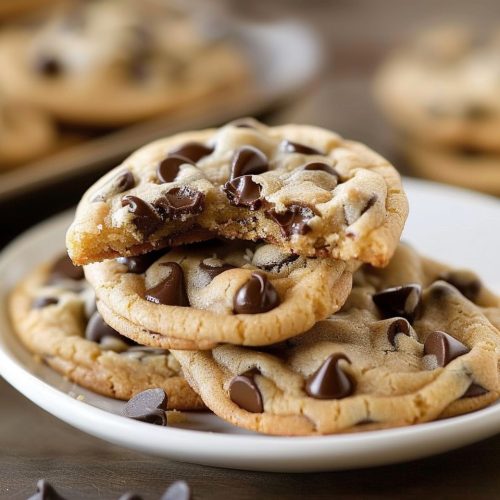
Classic Chocolate Chip Cookies
Ingredients
Main Ingredients
- 2.25 cup all-purpose flour
- 1 teaspoon baking soda
- 1 teaspoon salt
- 1 cup unsalted butter, softened
- 0.75 cup granulated sugar
- 0.75 cup packed brown sugar
- 2 large eggs
- 1 teaspoon vanilla extract
- 2 cups semisweet chocolate chips
Instructions
Preparation Steps
- Preheat oven to 375 degrees F (190 degrees C).
- In a small bowl, whisk together flour, baking soda, and salt. Set aside.2.25 cup all-purpose flour
- In a large bowl, cream together softened butter, granulated sugar, and brown sugar until light and fluffy.2.25 cup all-purpose flour
- Beat in eggs one at a time, then stir in vanilla extract.2.25 cup all-purpose flour
- Gradually add the dry ingredients to the wet ingredients, mixing until just combined. Do not overmix.
- Stir in the chocolate chips.2.25 cup all-purpose flour
- Drop rounded tablespoons of dough onto ungreased baking sheets.
- Bake for 9 to 11 minutes, or until edges are golden brown and centers are still slightly soft.
- Let cookies cool on baking sheets for a few minutes before transferring to wire racks to cool completely.


