


When I first tasted a bloom that looked like a flower on a platter, I was hooked—and a little hungry. That moment stuck with me: the petals splaying open, the crust crackling and golden, the onion inside tender and sweet. This baked version keeps that magic but swaps the fryer for a warm, golden oven spell. It’s incredible how something so dramatic can be simple enough for a Tuesday night. I always do this when I’m feeding a hungry crowd and want something that feels fancy without fuss. The smell alone—garlic, paprika, and toasty flour—draws everyone to the kitchen like a magnet. My kids actually ask for seconds, and they’re not even mad that there’s a little kitchen-scented perfume lingering afterward. This baked blooming onion is a little celebration in a roasting sheet—crunchy, cheesy, and comforting all at once. And yes, the first slice reveals that flower-like bloom you expect, which makes the whole dining room cheer a little louder. It’s a dish that makes memories—the kind of dish you pull out when friends come by, or when you just need a little edible fun to lift the mood.

What is baked onion?
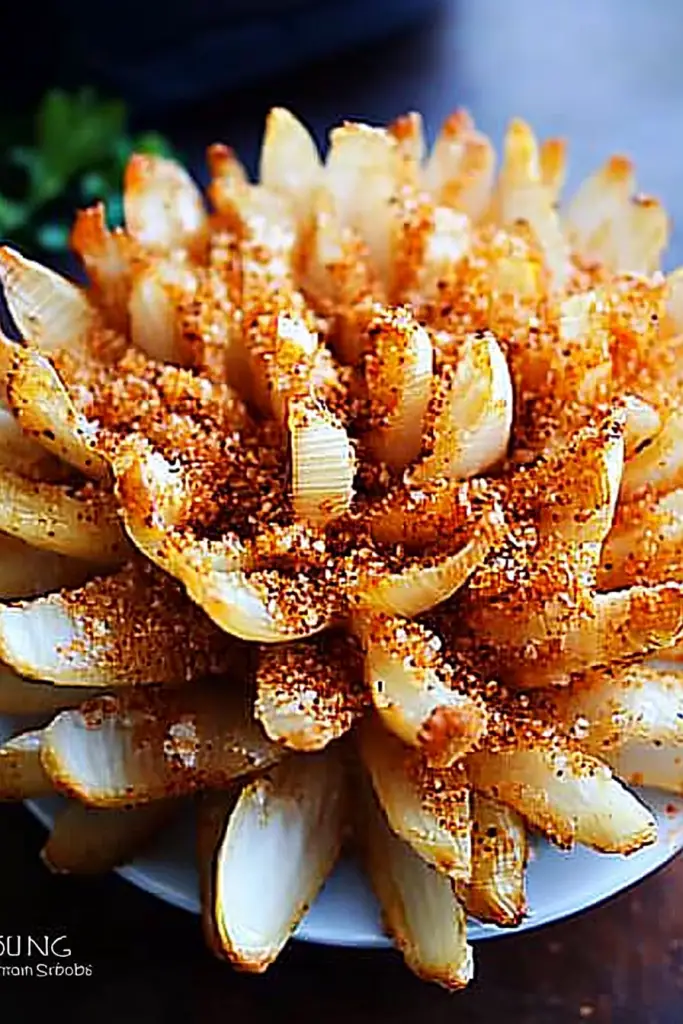
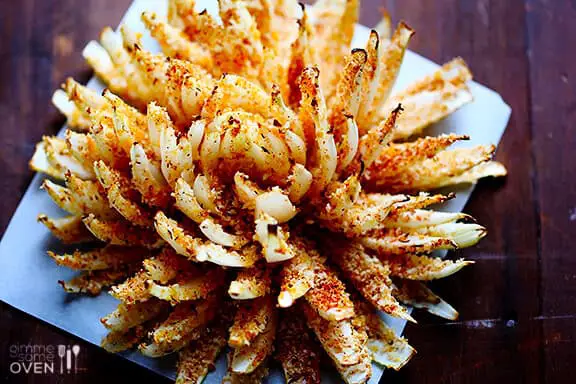
Think of baked blooming onion as a dramatic centerpiece you can pull off with everyday pantry staples. You start with one large onion, trim off the root end, and then slice from the top down toward the base, stopping just before the root so the petals stay connected. When you fan the outer layers apart, you’ve got a flower ready for dipping. The idea is to bathe the petals in a crackly batter that clings to every curve, then bake until the edges are golden and the center stays juicy. It’s essentially a lighter, oven-friendly version of the classic fried blooming onion, with the same wow factor but less grease and more control. The name comes from that flower-like bloom that reveals itself as the coating crisps. I love that you can customize seasonings, tuck a cheesy filling between some petals for extra texture, or keep it simple with garlic and herbs. It’s playful, comforting, and surprisingly practical for a crowd-pleasing starter.
Why you’ll love this recipe?
What I love most about this baked blooming onion is how it sounds fancier than it actually is. The flavor is a little sweet onion meeting garlicky, paprika-kissed crust with a touch of olive oil. The aroma alone makes the kitchen feel cozier, as if everyone’s gathering for a small celebration. The simplicity is a big win: you can assemble the bloom early, tuck it into the fridge, and bake it straight before serving. It’s cost-efficient, too—the onion, flour, spices, and a handful of cheese or herbs stretch a long way, with plenty of room for substitutions if you’re cooking on a budget. And versatility? Oh, yes. You can vary the spice level, switch up the cheese, or go dairy-free with a clever gluten-free batter and a dairy-free glaze. This dish works for game nights, casual dinner parties, or a cozy movie night with friends. What I love most about baked blooming onion is the moment of reveal when you cut into it—the petals peel back like a flower, revealing a soft, fragrant center that invites dipping and sharing. It’s a tiny, edible spectacle that somehow feels effortless.
How do I make baked onions?
Quick Overview
Here’s the gist: you open the onion into a bloom, bathe it in a crisp batter, and bake until the crust is deeply golden and crackly. The dough clings to every petal, and the inside stays sweet and tender. The whole thing comes together with a few simple steps and a hot oven, which means you skip the deep fryer and still get a show-stopping, shareable dish. It’s approachable enough for weeknights but impressive enough for guests. The key is to keep the batter thick enough to cling, and to give the onion room to crisp on all sides during the bake.
Ingredients
For the Main Batter:
- 1 large Vidalia onion, peeled and trimmed
- 1 cup all-purpose flour (or gluten-free blend)
- 1/2 teaspoon baking powder
- 1 teaspoon salt
- 1/2 teaspoon paprika (smoked if you like a deeper smokiness)
- 1/2 teaspoon garlic powder
- 1/2 teaspoon onion powder
- 1 cup cold sparkling water or beer
For the Filling:
- 1/2 cup shredded mozzarella or grated parmesan
- 2 tablespoons finely chopped fresh parsley
- 1 tablespoon melted butter or olive oil
For the Glaze:
- 2 tablespoons melted butter
- 1 teaspoon minced garlic
- 1/2 teaspoon lemon zest
- Optional: 1 teaspoon honey or maple syrup for a touch of sweetness
Tips and sourcing: choose a large, firm onion so the petals have space to separate nicely. Vidalia or Walla Walla onions are wonderfully sweet for a bloom, but yellow onions work too if that’s what you’ve got. For the batter, cold liquid helps keep the crust crisp as it bakes, and a bit of baking powder gives extra lift so the petals look extra fluffy. If you want to make this gluten-free, swap in a 1:1 gluten-free flour blend and add an extra tablespoon of cornstarch to help with crispness. The filling is optional but shop-bought shredded cheese works in a pinch; just avoid pre-shredded blends with anti-caking agents if you can. And if you’re dairy-free, use a plant-based cheese that melts well and a dairy-free butter substitute in the glaze.
Optional dips to serve alongside: a tangy yogurt-herb dip, a chipotle mayo, or a simple marinara with a kick of red pepper flakes. For a quick finish, a squeeze of lemon over the bloom right before serving brightens every bite. If you want a touch of extra color, sprinkle chopped chives or microgreens over the top once it comes out of the oven.
Step-by-Step Instructions
Step 1: Preheat & Prep Pan
Heat your oven to 450°F (230°C) and line a sturdy baking sheet with parchment or a lightly oiled rack. A rack helps air circulate around the bloom so every edge stays crisp. Trim the root end of the onion, then stand it upright and get ready to create petals that open like a flower. If you’ve never done this before, don’t worry—just go slow and keep the slices even.
Step 2: Mix Dry Ingredients
In a wide bowl, whisk together the flour, baking powder, salt, paprika, garlic powder, and onion powder. The goal is a light, plump dry mix that will cling to the petals yet yield a crackly finish once baked. If you’re using gluten-free flour, a little extra starch helps with crispness.
Step 3: Mix Wet Ingredients
Pour the cold sparkling water (or beer) into another bowl. The chill and carbonation keep the batter from becoming doughy. A gentle stir is enough—you don’t want to overmix and develop gluten or gluten-free blends, which can lead to a heavy crust.
Step 4: Combine
Pour the wet into the dry and whisk just until you have a thick, pancake-batter texture. If it looks too thin, add a tablespoon or two of flour. If it’s too thick, splash in a touch more sparkling water. The batter should cling to a spoon with a slow, steady pull.
Step 5: Prepare Filling
In a small bowl, mix the cheese with the chopped parsley and melted butter. This filling will be tucked between some petals to create little pockets of gooey, savory goodness as it bakes. If you prefer a lighter finish, skip the filling or use a light cheese option. The ballet here is between a crisp exterior and a soft, flavorful center.
Step 6: Layer & Swirl
Now the fun part: gently pull apart the outer petals of the onion to create an open bloom. Don’t force it—keep the base intact. Dip the entire bloom into the batter, letting the excess drip off. If you want, you can dab small amounts of the cheese filling between several petals as you go, creating little studded pockets that melt into the onion as it bakes. Return the onion to the prepared sheet, and repeat if you’re cooking a second bloom. The goal is an even layer of batter around each petal so it bakes up crisp all around.
Step 7: Bake
Slide the sheet into the hot oven and bake for 25–35 minutes, until the crust is deeply golden and crisp and the center is tender when tested with a skewer. If you notice the tips of the petals browning too quickly, cover loosely with a bit of foil for the last 5–7 minutes to prevent scorching. A quick rotation midway through baking helps the bloom cook evenly.
Step 8: Cool & Glaze
Remove the bloom from the oven and let it rest for 5–7 minutes. A hot bloom can steam the inside and soften the outer crust, so a brief pause helps maintain the crispness. Brush or drizzle the glaze over and around the bloom while it’s warm so the butter and garlic cling to every edge. If you want extra shine, re-dip just the tips of the petals and give a final sprinkle of salt or herbs.
Step 9: Slice & Serve
Use a sharp knife to slice around the base so you can present the bloom as a series of wedges, keeping the petals attached like a pretty fan. Serve with your chosen dips and a lemon wedge on the side for a bright finish. This is the kind of dish that looks as good as it tastes and invites guests to pull apart the petals themselves. Trust me on this: everyone will crowd the platter, reaching for that crispy edge and the molten cheese pockets tucked in between the layers.
What to Serve It With
Think of this as a centerpiece that can anchor a casual spread. Here are some ideas to pair with your baked blooming onion, organized by occasion:
For Breakfast: A light, lemony yogurt dip and a couple of soft-boiled eggs on the side, plus a strong cup of coffee. The savory-slightly-sweet bite of the bloom balances a zippy morning palate. It’s not everyday breakfast, but it’s a cheerful weekend treat that still feels like home.
For Brunch: Serve with a bright tomato-basil salsa, a herbed crème fraîche, and a sparkling party beverage. Plating the bloom with dollops of yogurt dip and a sprinkle of fresh herbs makes it feel like a show-stopper without extra effort.
As Dessert: If you’ve got a sweet tooth, go for a drizzle of maple glaze and a scoop of vanilla bean Ice Cream on the side. The contrast between the warm, spicy onion and cold sweet ice cream is unexpected, but it works—think churros meets onion, in a totally good way. It’s playful and a little indulgent, perfect for a playful finale.
For Cozy Snacks: A game-night platter with pepperoni, olives, and olives’ tangy dip is a great match. Offer a Creamy Garlic dip and a bright herb dip; the contrast between creamy and crisp is irresistible, and the bloom stays the star of the table while everyone helps themselves.
We often pair this with simple greens and a tangy vinaigrette to cut through the richness. My family has a soft spot for a crunchy pickle relish on the side, which adds a zing that keeps the whole plate lively. I’ve served this at casual gatherings, and the same reaction comes every time: a chorus of “wow” as the petals part and the cheese corners melt into perfect little pockets. It’s a dish that invites sharing, conversation, and a little dance of forks around the platter. If you’re planning a little celebration at home, this is the kind of dish that makes people feel like they’re eating at a restaurant—without ever needing to leave your kitchen.
Top Tips for Perfecting Your Baked Blooming Onion
Here are practical tips I keep in my back pocket, tuned to make sure your baked blooming onion comes out of the oven flawless every time.
Onion Prep: Choose a large, sturdy onion. If the outer layers are a touch papery, peel them off. Let the onion breathe for a few minutes after trimming the root, so the petals separate cleanly when you fan them out. If you notice a lot of moisture inside the onion, pat it dry with a paper towel; excess moisture can weigh down the crust. My trick is to use a dry-hand approach when lifting the petals open so the batter doesn’t run off.
Mixing & Texture: Don’t overmix the batter. A few lumps are fine and actually preferable—the goal is a light, clinging crust. If you find the batter too thick, add a touch more sparkling water; if it’s too thin, whisk in a little more flour. The texture should coat the petals without dripping off in a heavy sheet.
Swirl Customization: Layering a cheese filling between some petals is optional but fun. If you’re doing it, keep the dollops small and spaced so the petals still separate nicely as it bakes. You can also sprinkle a little extra cheese between the layers after the first 15 minutes of bake time for an extra toasty kiss.
Ingredient Swaps: For a dairy-free version, use dairy-free cheese that melts well and swap the glaze for a garlic-lemon olive oil drizzle. If you want extra crunch, mix a tablespoon of cornmeal into the dry batter for a subtle extra crackle. For gluten-free, stick with a quality gluten-free flour blend and consider adding a teaspoon of cornstarch to the batter for extra crispness.
Baking Tips: Space matters. If you crowd the pan, the steam will prevent crisp edges. Bake on a rimmed sheet and rotate halfway so every petal browns evenly. If your oven runs hot, dial down to 425°F and watch the color closely; you want deep golden, not burnt.
Glaze Variations: A simple garlic-lemon glaze is wonderful as is, but you can experiment with a spicy honey glaze, a chili-lime drizzle, or even a tangy yogurt-herb glaze for contrast. Apply glaze while the bloom is warm so it adheres and adds a glossy finish without making the crust soggy.
Lessons Learned: I’ve learned that patience with the bloom matters. If you rush the petals apart, they tear and you lose the dramatic presentation. Let the petal separation happen naturally as you work the onion. And remember, the crust can look deeply browned but still be underdone inside if your onion is particularly thick at the base—give it a few extra minutes and test with a skewer.
Storing and Reheating Tips
Leftovers are rare around here, but when they happen, I treat them kindly. Here are practical storage tips to keep your baked blooming onion tasting great if you’re not diving into it immediately.
Room Temperature: Best eaten on the day, but if you must store briefly, keep it loosely covered for up to 2 hours. After that, the crust starts to soften and lose its crisp edge.
Refrigerator Storage: Store in an airtight container for up to 2 days. Reheating in a 350°F oven on a parchment-lined sheet for 6–8 minutes helps recapture some of that crisp crust, though it won’t be exactly like fresh-out-of-the-oven. If you can, reheat in short bursts and avoid microwaving, which makes the crust soggy.
Freezer Instructions: For best results, freeze the prepared petals before baking. Wrap tightly and freeze up to 1 month. When you’re ready to bake, thaw briefly, then bake as directed. If you did bake and want to freeze, wrap cooled leftovers tightly and reheat in 375°F oven until warmed through and crisp again.
Glaze Timing Advice: If you’re freezing, glaze after reheating rather than before. A hot glaze can soften the crust too much if applied before freezing. If you’re serving later, add a fresh drizzle of glaze right before plating for a crisp, glossy finish.
Frequently Asked Questions
Final Thoughts
I really believe this baked blooming onion is a little celebration you can pull off without a lot of planning. It looks fancy, tastes comforting, and comes together with a handful of pantry staples. It’s the kind of dish that makes people smile in the best way—like you’ve cooked with love, not with a recipe alone. If you’re craving a crowd-pleasing starter that doesn’t require a deep fryer, this is your new go-to. It pairs nicely with a crisp salad, a garlic yogurt dip, and a bottle of sparkling water or a light white wine. Give it a try, and tell me how you updated the filling or glaze to fit your taste. I’d love to hear your variations and see how your bloom turned out. Happy baking!
Baked Blooming Onion
Ingredients
Main Ingredients
- 1 large sweet onion
- 1 cup all-purpose flour
- 2 teaspoon paprika
- 1 teaspoon garlic powder
- 0.5 teaspoon onion powder
- 0.5 teaspoon cayenne pepper
- 0.25 teaspoon black pepper
- 0.5 teaspoon salt
- 2 large eggs beaten
- 2 tablespoon milk
- 2 cups panko breadcrumbs
Instructions
Preparation Steps
- Preheat oven to 400°F (200°C). Line a baking sheet with parchment paper.
- Slice off the top of the onion and the root end, leaving the skin intact. Stand the onion up and make cuts from about 0.5 inch from the root end up to, but not through, the top. Make 12-16 evenly spaced cuts.
- Gently spread the onion petals apart to create the blooming shape. Place the onion in the freezer for about 10-15 minutes to help it hold its shape.
- In a shallow dish, whisk together the flour, paprika, garlic powder, onion powder, cayenne pepper, black pepper, and salt.
- In another shallow dish, whisk together the beaten eggs and milk.
- In a third shallow dish, place the panko breadcrumbs.
- Dip the onion into the flour mixture, ensuring it's coated thoroughly, especially between the petals. Shake off any excess.
- Dip the floured onion into the egg mixture, coating all sides.
- Finally, coat the onion with panko breadcrumbs, pressing gently to help them adhere. Ensure good coverage.
- Place the coated onion on the prepared baking sheet. Bake for 25-30 minutes, or until golden brown and tender.
- Serve immediately with your favorite dipping sauces like ranch, bloomin' onion sauce, or ketchup.


