


Oh, I’m so thrilled you’re here! Today, I’m spilling the beans on a recipe that’s practically a hug in a pan. It’s my go-to when the weather turns crisp, or honestly, whenever I need a little bit of cozy magic. You know those desserts that just feel *right*? This is one of them. It’s not as fussy as a pie, but it has all the comforting flavors that make you want to curl up with a good book. I’ve been tweaking and perfecting this Apple Delight for years, and it’s become such a staple in my kitchen. My family devours it, my friends rave about it, and the best part? It’s surprisingly simple to pull together, even on a weeknight. If you love the idea of a classic Apple Crumble or a spiced apple cake, but want something a little more unique and incredibly forgiving, then this Apple Delight is your new best friend.
What is Apple Delight?
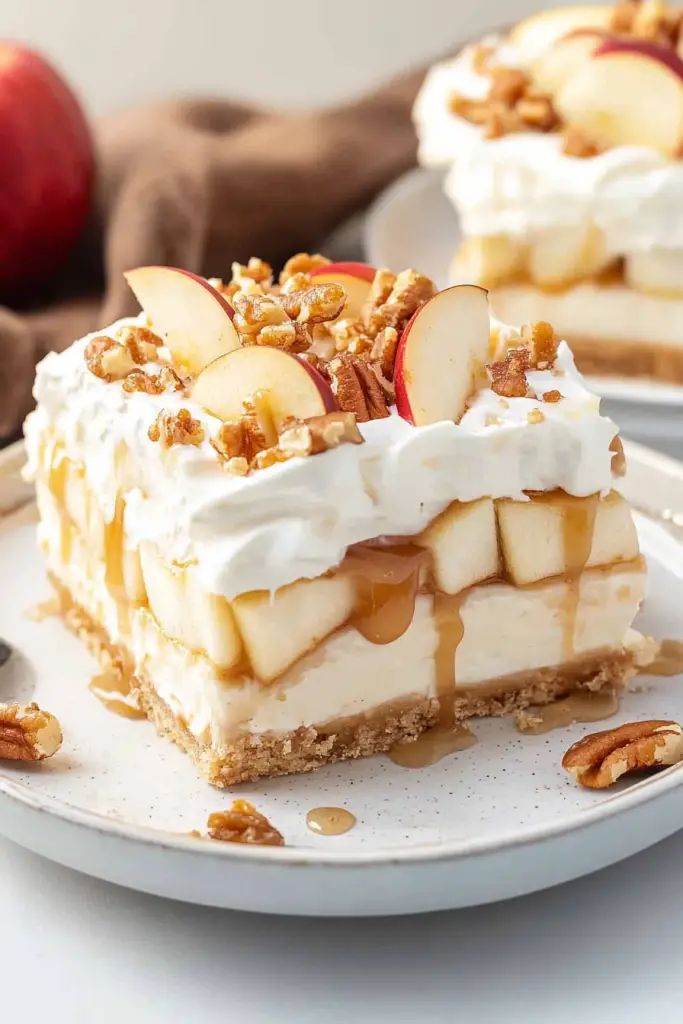
So, what exactly *is* this Apple Delight? Think of it as a wonderfully moist, tender cake that’s studded with chunks of sweet, spiced apples, all topped with a delightful, slightly crisp streusel. It’s not quite a cake, not quite a crisp, but something wonderfully in between. The name itself just evokes a feeling of simple joy, doesn’t it? It’s a dessert designed to bring pure, unadulterated pleasure with every bite. The inspiration behind it came one autumn afternoon when I was craving something with apples but didn’t have the time or patience for a multi-layered apple pie. I wanted that comforting apple goodness, but in a single, glorious bake. This Apple Delight is the result – a harmonious blend of soft, yielding apples, a perfectly balanced Cake Batter, and that irresistible crunchy topping. It’s essentially an ode to autumn’s bounty, made ridiculously easy.
Why you’ll love this recipe?
There are so many reasons why this Apple Delight has earned a permanent spot in my recipe binder, and I just know you’ll fall in love with it too. Firstly, the flavor profile is just heavenly. It’s a warm hug of cinnamon and sweet apples, with a tender, cake-like base that’s not too sweet. The texture contrast between the soft apples, the moist cake, and the crunchy streusel topping is absolutely divine. It’s like a symphony in your mouth! Secondly, and this is a big one for me, it’s incredibly simple to make. You don’t need any fancy techniques or a dozen different bowls. Most of the ingredients are probably already in your pantry, and the steps are straightforward enough that even a beginner baker can achieve fantastic results. I’ve made this countless times when I’ve had unexpected guests drop by, and it always impresses without stressing me out. Cost-efficiency is another win here. Apples are usually pretty affordable, especially when they’re in season, and the other ingredients are pantry staples. You get a seriously impressive dessert without breaking the bank. And don’t even get me started on its versatility! This Apple Delight is fantastic served warm for dessert, but it’s equally amazing at room temperature with a cup of coffee for breakfast or brunch. It truly shines in so many different settings. What I love most about this recipe, though, is its comforting nature. It’s the kind of bake that feels like home, evokes fond memories, and just makes everything feel a little bit better. It’s a true crowd-pleaser that rarely fails to bring smiles.
How do I make Apple Delight?
Quick Overview
This Apple Delight is all about bringing together simple ingredients into something truly special. We’ll start by preparing a tender, spiced cake batter and layering it with juicy, cinnamon-kissed apples. A buttery, crunchy streusel topping goes on last, creating that irresistible contrast. It’s baked until golden and fragrant, then best enjoyed warm. The beauty of this recipe is its forgiving nature; even if your apple chunks aren’t perfectly uniform, or your swirl isn’t magazine-perfect, it still turns out spectacularly. It’s a fuss-free path to deliciousness.
Ingredients
For the Main Batter:
You’ll need 2 cups of all-purpose flour, 1 teaspoon of baking soda, 1/2 teaspoon of salt, and 1 teaspoon of ground cinnamon. I like to use good quality all-purpose flour for a tender crumb. Make sure your baking soda is fresh; it makes all the difference! Don’t skip the salt; it balances the sweetness beautifully. And the cinnamon? It’s non-negotiable for that warm, cozy apple bake flavor. Whisking these dry ingredients together well is important so you don’t end up with pockets of leavening or spice.
For the Filling:
This is where the star comes in! You’ll need about 4 cups of peeled, cored, and diced apples. Honeycrisp, Gala, Fuji, or Granny Smith are all excellent choices. I often use a mix for a more complex flavor and texture. Granny Smiths add a lovely tartness that cuts through the sweetness, while Honeycrisp apples hold their shape beautifully. Toss these apple chunks with 1/4 cup of granulated sugar, 1 tablespoon of all-purpose flour, and 1 teaspoon of ground cinnamon. This little bit of flour helps thicken any juices released as the apples bake, preventing a soggy bottom. The sugar and cinnamon just amplify that classic apple pie essence.
For the Streusel Topping:
This is the crunchy crown of our Apple Delight! You’ll need 1 cup of all-purpose flour, 1/2 cup of packed light Brown Sugar, 1 teaspoon of ground cinnamon, and 1/2 cup (1 stick) of unsalted butter, cold and cut into small cubes. The brown sugar adds a lovely caramel note, and the cold butter is key to creating that crumbly texture. I always use unsalted butter so I can control the salt level myself.
Step-by-Step Instructions
Step 1: Preheat & Prep Pan
First things first, preheat your oven to 375°F (190°C). While the oven is warming up, grab an 8×8 inch baking pan or a similar-sized dish. Grease it generously with butter or cooking spray, or line it with parchment paper for super easy cleanup – trust me, it’s a lifesaver! Making sure your pan is well-prepped means your Apple Delight won’t stick, which is always a good thing.
Step 2: Mix Dry Ingredients
In a medium bowl, whisk together the 2 cups of all-purpose flour, 1 teaspoon of baking soda, 1/2 teaspoon of salt, and 1 teaspoon of ground cinnamon. Give it a good whisk until everything is well combined. This ensures that the leavening and spices are evenly distributed throughout the batter, leading to a consistent texture and flavor in every bite.
Step 3: Mix Wet Ingredients
In a separate, larger bowl, cream together 1 cup (2 sticks) of softened unsalted butter with 1 cup of granulated sugar and 1/2 cup of packed light Brown Sugar until light and fluffy. Beat in 2 large eggs, one at a time, ensuring each is well incorporated before adding the next. Then, stir in 1 teaspoon of vanilla extract and 1/2 cup of milk (whole milk works best for richness, but 2% is fine too). You can even experiment with a splash of buttermilk for extra tenderness!
Step 4: Combine
Gradually add the dry ingredients to the wet ingredients, mixing on low speed or by hand just until combined. Be careful not to overmix! A few streaks of flour are okay; they’ll disappear as you fold in the apples. Overmixing can lead to a tough cake, and we definitely don’t want that. This batter should be thick and luscious.
Step 5: Prepare Filling
In a separate bowl, toss your 4 cups of peeled, cored, and diced apples with 1/4 cup granulated sugar, 1 tablespoon of all-purpose flour, and 1 teaspoon of ground cinnamon. Make sure each apple piece is coated evenly. This is where you can really customize the apple flavor – add a pinch of nutmeg or a tiny bit of ground ginger if you’re feeling adventurous!
Step 6: Layer & Swirl
Spread about half of the cake batter evenly into your prepared baking pan. Scatter about half of the prepared apple filling over the batter. Dollop the remaining batter over the apples, then carefully spread it to cover as much as possible, though it’s okay if some apples peek through. Finally, evenly distribute the remaining apple filling over the top layer of batter. You can give it a gentle swirl with a knife or spatula if you like, but it’s not strictly necessary for this rustic bake. The magic happens as it bakes!
Step 7: Bake
Pop the pan into your preheated oven. Bake for 40-50 minutes, or until a wooden skewer or toothpick inserted into the center comes out clean, or with just a few moist crumbs attached (but no wet batter). The top should be golden brown, and the edges should be starting to pull away slightly from the sides of the pan. Keep an eye on it during the last 10 minutes, as ovens can vary!
Step 8: Cool & Glaze
Once baked, remove the Apple Delight from the oven and let it cool in the pan on a wire rack for at least 20-30 minutes before glazing. While it’s cooling, whisk together the glaze ingredients: 1 cup of powdered sugar, 2-3 tablespoons of milk or cream, and 1/2 teaspoon of vanilla extract. Add the liquid a tablespoon at a time until you reach your desired drizzling consistency. Once the bake is slightly cooled, drizzle the glaze all over the top. This step is optional but highly recommended – it adds a touch of sweetness and elegance!
Step 9: Slice & Serve
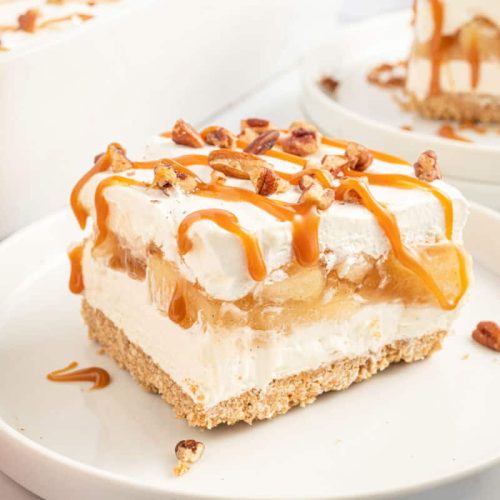
After the glaze has set a bit, slice the Apple Delight into squares. It’s absolutely divine served warm, perhaps with a scoop of vanilla ice cream or a dollop of whipped cream. The warmth really brings out the spiced apple flavor and makes the cake extra tender.
What to Serve It With
This Apple Delight is so wonderfully versatile, it fits into almost any meal or occasion. For a cozy breakfast, I love serving it warm, cut into generous squares, alongside a strong cup of black coffee or a steaming mug of spiced chai. The slightly sweet, cakey texture is the perfect start to the day. For a delightful brunch spread, I’ll often plate it alongside some fresh berries, maybe a side of crispy bacon, and a glass of freshly squeezed orange juice or mimosa. It feels a bit more elegant when served this way, especially with the drizzle of glaze on top. As a dessert, it truly shines. It’s fantastic served warm with a scoop of good quality vanilla bean ice cream – the contrast between the hot cake and the cold, creamy ice cream is pure bliss. A dollop of homemade whipped cream is also a classic choice. Sometimes, for a more decadent dessert, I’ll warm up a little caramel sauce to drizzle over the top. And for those quiet, cozy snack moments, there’s nothing better than a slice of Apple Delight at room temperature with a glass of cold milk or a hot cup of herbal tea. My family tradition is to have it after Sunday dinner, usually with a little extra cinnamon sprinkled on top before serving. It just makes the whole meal feel complete and comforting.
Top Tips for Perfecting Your Apple Delight
Over the years, I’ve learned a few tricks that really elevate this Apple Delight from good to absolutely sensational. For the apples, I always make sure they’re cut into roughly half-inch dice. Too small and they can turn to mush; too large and they might not cook through. And when it comes to preparing them, don’t over-handle the apple mixture after tossing it with sugar and spice. Just a gentle toss is all you need. For the batter, the biggest tip I can give you is to *not overmix*. Seriously, once you add the dry ingredients to the wet, mix just until they are combined. A few small lumps are far better than a tough cake. I learned this the hard way early on! When it comes to the streusel topping, using cold butter is non-negotiable. It’s what creates those lovely little crumbles instead of a greasy paste. I like to use my fingertips to combine the flour, sugar, cinnamon, and butter until it resembles coarse crumbs. If your kitchen is warm, you can pop the bowl in the fridge for a few minutes before crumbling it over the batter. Now, about those ingredient swaps – if you don’t have milk, you can use yogurt or sour cream thinned with a little water for the batter; it adds fantastic moisture. And for the glaze, if you want it thicker, just add more powdered sugar, a teaspoon at a time. If you want it thinner, a tiny bit more milk will do the trick. For baking, always use the middle rack of your oven. This ensures even heat circulation around the pan. If your oven tends to run hot, you might want to tent it loosely with foil during the last 10-15 minutes of baking to prevent the topping from getting too dark before the center is cooked through. Lastly, for the best flavor and texture, let it cool slightly before slicing. That slight cooling allows the cake to set properly and the flavors to meld. Trust me, the patience is worth it!
Storing and Reheating Tips
One of the things I adore about this Apple Delight is how well it stores, making it perfect for leftovers – not that there are usually many! For storing at room temperature, I usually keep it covered with plastic wrap or in an airtight container for up to two days. It stays wonderfully moist during this time. If you live in a very warm climate or plan to keep it longer than two days, the refrigerator is your best bet. Wrap the pan tightly with plastic wrap or transfer the slices to an airtight container. It will keep well in the fridge for about 4-5 days. I’ve found that the flavors actually deepen a bit after a day or two in the fridge, which is quite nice! If you want to freeze it, I highly recommend doing so *before* adding the glaze. Bake the Apple Delight, let it cool completely, then wrap it tightly in plastic wrap, followed by a layer of aluminum foil or by placing it in a freezer-safe container. It will keep in the freezer for up to 2-3 months. To thaw, simply remove it from the freezer and let it defrost on the counter for a few hours, or overnight in the refrigerator. Once it’s thawed and you’re ready to serve, you can reheat individual slices gently in the microwave for about 20-30 seconds, or pop them in a warm oven (around 300°F/150°C) for a few minutes until warmed through. If you’ve frozen it, I’d recommend adding the glaze *after* thawing and reheating for the best presentation and texture. For reheating refrigerated slices, you can warm them gently in the oven as well, which often brings back that lovely slightly crisp texture.
Frequently Asked Questions
Final Thoughts
I truly hope you give this Apple Delight a try! It’s more than just a dessert; it’s a little slice of comfort that’s perfect for so many moments. Whether you’re baking it for a special occasion, a weeknight treat, or just because you’ve got a hankering for something warm and apple-y, it’s sure to be a hit. I love that it’s approachable for home bakers of all levels, and it delivers so much flavor and texture for relatively little effort. It’s a recipe that brings people together, sparks happy memories, and makes the kitchen smell absolutely incredible. If you enjoy this Apple Delight, you might also love my Spiced Pear Crumble or my Easy Apple Cinnamon Scones – they share that same cozy, comforting vibe! I can’t wait to hear what you think of this one. Please let me know in the comments below how yours turns out, and if you have any favorite variations or tips of your own! Happy baking, and enjoy every delicious bite!
Apple Delight
Ingredients
Crust
- 2.5 cups all-purpose flour
- 0.5 cup granulated sugar
- 1 teaspoon salt
- 1 cup cold unsalted butter, cut into cubes
Filling
- 6 medium apples, peeled, cored, and sliced like Honeycrisp or Granny Smith
- 0.75 cup granulated sugar
- 1 tablespoon ground cinnamon
- 0.5 teaspoon ground nutmeg
- 2 tablespoons all-purpose flour
- 2 tablespoons lemon juice
Instructions
Preparation Steps
- For the crust: In a large bowl, whisk together flour, sugar, and salt. Cut in the cold butter using a pastry blender or your fingertips until the mixture resembles coarse crumbs with some pea-sized pieces of butter.
- Gradually add ice water, 1 tablespoon at a time, mixing until the dough just comes together. Do not overmix. Divide the dough in half, flatten each half into a disc, wrap in plastic wrap, and refrigerate for at least 30 minutes.
- For the filling: In a large bowl, toss the sliced apples with granulated sugar, cinnamon, nutmeg, flour, and lemon juice until evenly coated.
- Preheat oven to 375°F (190°C). Grease a 9-inch pie plate.
- On a lightly floured surface, roll out one disc of dough into a 12-inch circle. Carefully transfer it to the prepared pie plate and press it into the bottom and up the sides.
- Pour the apple filling into the pie crust. Dot with a few small pieces of butter if desired.
- Roll out the second disc of dough. You can either place it over the filling as a solid top crust (cutting vents) or cut it into strips to create a lattice top.
- Crimp the edges of the pie crust to seal. You can brush the top with a little milk and sprinkle with sugar for a nice finish.
- Bake for 40-50 minutes, or until the crust is golden brown and the filling is bubbly. If the crust starts to brown too quickly, loosely tent it with foil.
- Let the apple delight cool completely before slicing and serving.


