


There are some recipes that just feel like a warm hug, aren’t there? For me, that’s this Apple Cobbler. It’s the kind of dessert that instantly transports me back to my grandma’s kitchen, the air thick with the sweet scent of baked apples and cinnamon. It’s not fancy, not complicated, but oh-so-satisfying. If you’re looking for something that’s a surefire crowd-pleaser, something that feels both nostalgic and incredibly comforting, then you’ve landed in the right spot. It’s my secret weapon when I need a little sweetness in my life, and frankly, it beats a complicated cake any day of the week, especially when I’m short on time but my sweet tooth is yelling. This apple cobbler is truly special.
What is an apple Cobbler?
So, what exactly *is* apple cobbler? At its heart, it’s a fruit dessert with a cakey or biscuit-like topping, baked until bubbly and golden. Think of it as the wonderfully rustic, approachable cousin to a pie. Instead of a fussy pastry crust, you get a more forgiving, spoonable topping that bakes right into the fruit. The name itself just sounds cozy, doesn’t it? Cobbler kind of evokes this lumpy, bumpy, “cobbled together” look, which is exactly what makes it so charming. It’s essentially baked fruit with a delicious blanket of dough on top. It’s the ultimate Comfort Food dessert, perfect for sharing (or not!).
Why you’ll love this recipe?
What are some of the best reasons to make apple cobbler?flavor. It’s that perfect balance of sweet and tart apples, kissed with warm cinnamon and a hint of nutmeg, allsimplicity. I’ve tested this out on busy weeknights, and it’s a lifesaver. You don’t need to be a pastry chef to nail this. The steps are straightforward, and the ingredients are things you likely already have in your pantry. Plus, it’s incredibly cost-effective. Apples are usually pretty budget-friendly, and the rest of the ingredients are pantry staples. What I love most, though, is its versatility. It’s fantastic warm, right out of the oven, but it’s also surprisingly delicious at room temperature the next day (if there are any leftovers!). I’ve served this for everything from casual family dinners to more relaxed holiday gatherings, and it always gets rave reviews. It’s one of those recipes that just makes people happy, and that’s what cooking is all about for me.
How to Make Apple Cobbler
Quick Overview
Making this apple cobbler is really a joy because it’s so forgiving. You’ll basically mix up a simple batter, prepare your lovely apples with a touch of sweetness and spice, and then layer them together before baking. It comes together surprisingly quickly, making it perfect for those times you need a dessert in a hurry but still want something truly homemade and delicious. The result is a bubbling, golden-brown masterpiece that smells like heaven.
Ingredients
For the Main Batter:
* 2 cups all-purpose flour: I usually just grab whatever’s in my pantry, but a good quality all-purpose flour works wonders.
* 1 cup granulated sugar: This provides the sweetness for the topping. You can slightly reduce this if your apples are super sweet, but I find this balance is just right.
* 2 teaspoons baking powder: This is what gives our topping that lovely, slightly cakey lift. Don’t skimp on this!
* 1/2 teaspoon salt: Essential for balancing out the sweetness and bringing out all the flavors.
* 1 cup milk: I’ve experimented with whole milk, 2%, and even almond milk, and honestly, they all work beautifully. Whole milk gives it a richer texture, but any will do in a pinch.
* 1/2 cup unsalted butter, melted: Make sure it’s properly melted and slightly cooled so it doesn’t scramble the eggs if you’re using them in other versions, though this one is egg-free!
For the Filling:
* 6-8 medium apples, peeled, cored, and sliced (about 6-7 cups): This is where you can have some fun! I love a mix of tart Granny Smith and sweeter Honeycrisp or Fuji apples. It gives the filling a wonderful depth of flavor and texture.
* 1/2 cup granulated sugar: Adjust this based on your apples’ sweetness and your personal preference.
* 1 tablespoon lemon juice: This brightens up the apple flavor and helps prevent them from browning too quickly. A little acidity goes a long way!
* 1 teaspoon ground cinnamon: The quintessential apple pie spice!
* 1/4 teaspoon ground nutmeg: Just a pinch adds such warmth.
* 1 tablespoon all-purpose flour: This helps thicken the juices from the apples as they bake, preventing a watery cobbler.
For the Glaze:
* 2 tablespoons unsalted butter, melted: For brushing over the top before baking.
* 1 tablespoon granulated sugar: For a little sparkle and sweetness on top.
* 1/2 teaspoon ground cinnamon: To echo the flavors within the cobbler.
Step-by-Step Instructions
Step 1: Preheat & Prep Pan
First things first, let’s get that oven going. Preheat it to 375°F (190°C). While the oven is heating up, grab a 9×13 inch baking dish or a similar-sized oven-safe skillet. You don’t need to grease it beforehand; the butter in the topping and the juices from the apples will take care of that. We want things to get nice and toasty around the edges!
Step 2: Mix Dry Ingredients
In a large bowl, whisk together the 2 cups of flour, 1 cup of sugar, 2 teaspoons of baking powder, and 1/2 teaspoon of salt. Give it a good whisk to make sure everything is evenly distributed. This ensures your topping bakes up evenly and gets that lovely golden color all over.
Step 3: Mix Wet Ingredients
In a separate, smaller bowl, whisk together the 1 cup of milk and the 1/2 cup of melted butter. Just a quick whisk to combine them. Easy peasy!
Step 4: Combine
Now, pour the wet ingredients into the dry ingredients. Stir just until everything is *barely* combined. It’s really important not to overmix here! A few lumps are perfectly fine, even desirable. Overmixing can lead to a tough topping, and we want ours to be tender and delicious. Think of it like gently coaxing them together, not beating them into submission.
Step 5: Prepare Filling
In another large bowl, toss your prepared Apple Slices with the 1/2 cup of sugar, 1 tablespoon of lemon juice, 1 teaspoon of cinnamon, 1/4 teaspoon of nutmeg, and 1 tablespoon of flour. Make sure all those apple slices are coated. The flour will help thicken up the juices that bubble out while baking, giving you a lovely, saucy filling without being watery.
Step 6: Layer & Swirl
Pour the apple mixture evenly into your prepared baking dish. Then, dollop the batter you made in Step 4 over the apples. Don’t worry about spreading it perfectly; it will spread and bake into a beautiful, rustic topping. If you’re feeling fancy, you can gently swirl it a little with a spoon, but it’s totally not necessary for great flavor.
Step 7: Bake
Place the dish in your preheated oven. Bake for 35-45 minutes, or until the topping is golden brown and the apples are tender and bubbling around the edges. You can test the apples by gently poking them with a fork or a knife. If it goes in easily, they’re ready!
Step 8: Cool & Glaze
Once it’s out of the oven, let it cool for at least 10-15 minutes before you even think about serving. This allows the filling to thicken up a bit more. While it’s cooling, you can brush the top with the melted butter, sprinkle with the extra tablespoon of sugar and 1/2 teaspoon of cinnamon for a little extra sparkle and flavor. It’s optional, but I think it makes it extra special!
Step 9: Slice & Serve
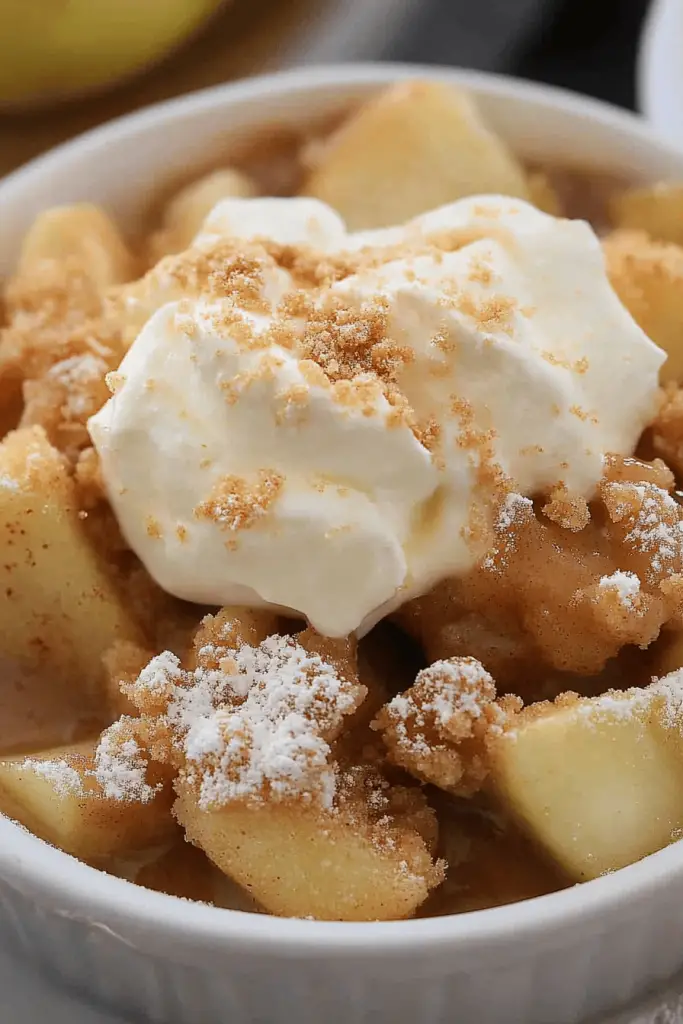
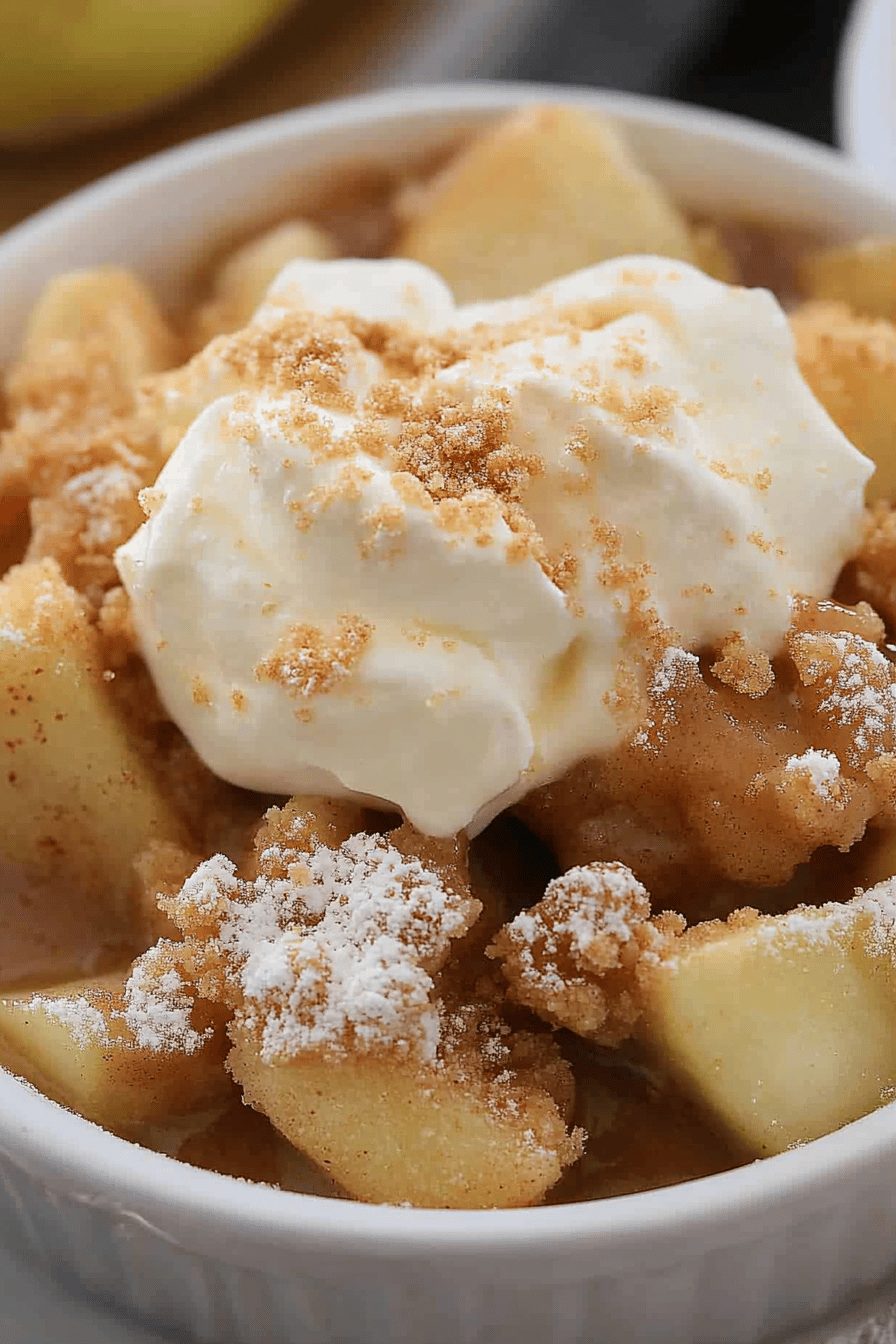
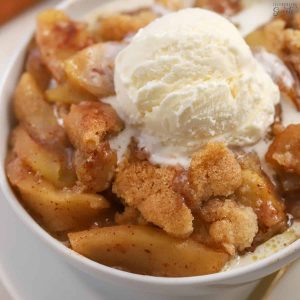
Serve warm! It’s absolutely divine on its own, but I highly recommend serving it with a scoop of vanilla Ice Cream or a dollop of whipped cream. It’s the perfect way to finish off a meal or even just enjoy a comforting afternoon treat.
What to Serve It With
This Apple Cobbler is so versatile, it can truly fit into any meal or occasion. For breakfast, I love serving a smaller portion with a strong cup of coffee. It’s a little indulgent, but why not start the day with a bit of sweetness? It feels so cozy on a lazy weekend morning. For brunch, it’s a fantastic addition to a buffet. I usually serve it in a pretty dish with a dusting of powdered sugar and maybe some extra berries on the side for color. It pairs beautifully with mimosas or a nice hot tea. As dessert, this is where it truly shines. It’s fantastic on its own, but truly magical with a scoop of Vanilla Bean ice cream that slowly melts into the warm apples, or a generous dollop of homemade whipped cream. For cozy snacks, a simple slice with a glass of cold milk is pure comfort. My family also loves it with a drizzle of caramel sauce sometimes. It’s the kind of dessert that just makes everything feel a little bit better, no matter the context.
Top Tips for Perfecting Your Apple Cobbler
Over the years of making this apple cobbler more times than I can count, I’ve picked up a few tricks that I think really make a difference. First, regarding the apple prep, using a mix of apples is key. Granny Smiths give you that tartness that cuts through the sweetness, while something like Honeycrisp or Fuji adds a lovely sweetness and softer texture. Don’t worry too much about perfectly uniform slices; they’ll soften as they bake anyway. For mixing the batter, I cannot stress enough the importance of not overmixing. A few lumps are your friend here! Overmixing develops the gluten in the flour, which can make your topping tough. Stop stirring as soon as you don’t see dry flour. When it comes to swirl customization, while it’s not strictly necessary, I sometimes like to gently swirl the batter into the apples with a spatula or the back of a spoon. It creates little pockets of topping and ensures every bite has both fruit and cake. For ingredient swaps, I’ve found that if you’re out of regular milk, any dairy-free milk like almond or soy works wonderfully. For the butter, a good quality margarine can also be used, though the flavor won’t be quite as rich. If you’re craving a different spice profile, try adding a pinch of cardamom or allspice to the apple filling. When it comes to baking tips, ovens can be quirky! If you notice your topping browning too quickly before the apples are tender, you can loosely tent the dish with aluminum foil. Conversely, if it’s not browning as much as you’d like, you can always pop it under the broiler for a minute or two at the very end, watching it *very* carefully to avoid burning. For glaze variations, instead of the butter and cinnamon sugar, a light dusting of powdered sugar after baking is also beautiful. Or, for something more decadent, you can drizzle a bit of caramel sauce over the top after it’s cooled slightly.
Storing and Reheating Tips
One of the best things about this apple cobbler is how well it keeps (if there are any leftovers, which is rare in my house!). For room temperature storage, I usually let it cool completely, then cover it loosely with plastic wrap or foil. It’s generally good for about 1-2 days, especially in a cooler environment. For refrigerator storage, this is my preferred method if I know it’ll be around for a few days. Transfer it to an airtight container or cover the baking dish tightly with plastic wrap and then foil. It will keep well in the fridge for up to 4 days. The topping might soften a little, but it’s still delicious. Freezer instructions are also a lifesaver. Let the cobbler cool completely, then wrap the entire baking dish tightly in plastic wrap, followed by a layer of aluminum foil. You can also cut it into individual portions and wrap those separately. It freezes well for up to 2-3 months. When you’re ready to enjoy it from frozen, it’s best to thaw it overnight in the refrigerator before reheating. For reheating, the microwave is the quickest option for individual slices, just heat until warmed through. If you want to revive it to its former glory, gently reheat individual portions in a low oven (around 300°F / 150°C) for about 10-15 minutes, or until warmed through. The glaze timing is important too – I always add the optional glaze *after* baking and *during* the cooling process. If you add it before baking, the sugar can sometimes burn before the cobbler is fully cooked.
Frequently Asked Questions
Final Thoughts

So there you have it – my absolute favorite apple Cobbler Recipe. It’s simple, it’s comforting, and it’s guaranteed to bring smiles to faces. It’s the kind of dessert that reminds you of home, of warmth, and of good times. I really hope you give this a try; it’s honestly one of the most rewarding recipes to make because the payoff is just immense for the effort. If you’re a fan of apple desserts, you might also want to check out my Easy Apple Crumble or my Classic Apple Pie for more cozy fall flavors! I can’t wait to hear how yours turns out, so please leave a comment below and let me know your thoughts or any variations you try. Happy baking!
Classic Apple Cobbler
Ingredients
For the Filling
- 6 pounds apples peeled, cored, and sliced
- 0.75 cup granulated sugar
- 2 tablespoons all-purpose flour
- 1 teaspoon ground cinnamon
- 0.25 teaspoon ground nutmeg
- 1 tablespoon lemon juice
For the Topping
- 1.5 cup all-purpose flour
- 0.75 cup granulated sugar
- 1.5 teaspoons baking powder
- 0.25 teaspoon salt
- 0.5 cup unsalted butter cold and cut into cubes
- 0.5 cup milk
Instructions
Preparation Steps
- Preheat your oven to 375°F (190°C).
- In a large bowl, combine the sliced apples, 0.75 cup sugar, 2 tablespoons flour, cinnamon, nutmeg, and lemon juice. Toss to coat the apples evenly. Pour the apple mixture into a 9x13 inch baking dish.
- In a separate medium bowl, whisk together 1.5 cups flour, 0.75 cup sugar, baking powder, and salt.
- Cut in the cold butter using a pastry blender or your fingertips until the mixture resembles coarse crumbs.
- Pour in the milk and stir until just combined. The dough will be thick and shaggy.
- Drop spoonfuls of the topping mixture over the apple filling, covering as much of the surface as possible.
- Bake for 35-45 minutes, or until the topping is golden brown and the apple filling is bubbly.
- Let cool slightly before serving. Serve warm, perhaps with a scoop of vanilla ice cream or a dollop of whipped cream.


