


Oh, you guys. I’m so excited to share this one with you. This recipe for Thumbprint Cookies isn’t just a recipe; it’s a feeling. It’s the smell of warm butter and sweet jam filling my kitchen on a lazy Saturday afternoon, the one that instantly brings my kids running in, asking what deliciousness is brewing. It’s like a little piece of sunshine you can hold in your hand. I remember my grandma making these when I was little, her hands dusted with flour, humming a tune as she carefully pressed her thumb into the dough. They’re not as fussy as some intricate cookies, but they have this wonderful charm that makes them feel extra special. If you’ve ever loved a classic shortbread cookie but wanted something a little more playful, a little more *you*, then these thumbprint cookies are going to be your new best friend. They’re my go-to when I need a sweet pick-me-up or when unexpected guests pop over – they always disappear in minutes, and people always ask for the recipe. Honestly, they’re just pure comfort food in cookie form.
What is a thumbprint cookie?
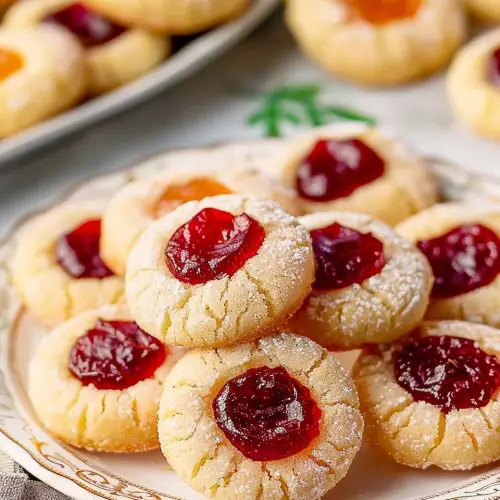
So, what exactly *are* Thumbprint Cookies? Think of them as little buttery clouds with a sweet surprise nestled right in the center. The name, as you might have guessed, comes from the way you make them! You roll the dough into little balls, place them on a baking sheet, and then, with your thumb (or a little spoon, if you prefer!), you gently press an indentation into the top of each one. This little well is then lovingly filled with jam, preserves, or sometimes even a gooey caramel or chocolate. It’s like a mini edible treasure chest! The dough itself is usually a tender, buttery shortbread-like base, which gives them a lovely crumbly texture that melts in your mouth. It’s this simple combination of a delicate cookie and a burst of sweet filling that makes them so utterly irresistible. They’re not complicated, but that’s part of their magic. They’re the kind of cookie that feels homemade and cherished, not store-bought and mass-produced. It’s that personal touch, that little thumbprint, that makes them so endearing.
Why you’ll love this recipe?
Okay, let me gush for a second because I genuinely adore these thumbprint cookies. First off, the flavor profile is just divine. The cookie itself has a rich, buttery taste that’s not overly sweet, which is exactly what I look for. It’s the perfect canvas for whatever delicious filling you choose. Speaking of filling, the way the jam or preserves caramelizes slightly in the oven and creates this gooey, sweet center is pure perfection. It’s a fantastic contrast to the tender cookie. Then there’s the simplicity, which, let’s be honest, is a lifesaver on busy days. The dough comes together so easily, and the thumbprint part is actually really fun to do – my kids love helping with this step! You don’t need any fancy equipment, just basic pantry staples. And speaking of pantry staples, these are wonderfully cost-effective. You likely have most of the ingredients on hand right now, which is a huge plus. What I love most about these thumbprint cookies, though, is their versatility. You can switch up the jam flavor with the seasons – strawberry for spring, raspberry for summer, apricot for fall, and maybe even a spiced plum for winter. You can even mix in a touch of cinnamon or nutmeg into the dough for an extra layer of flavor. They’re not just for holidays; they’re perfect for a Tuesday afternoon with a cup of tea, a thoughtful addition to a potluck, or a simple treat to brighten someone’s day. They’re so much more than just a cookie; they’re a little bit of edible joy.
How do I make thumbprint cookies?
Quick Overview
Making these thumbprint cookies is a delightful process that’s surprisingly straightforward. You’ll mix a simple buttery dough, form it into balls, create those signature indentations, fill them with your favorite jam, and bake until golden. The magic happens when the filling gets warm and bubbly, creating a perfect sweet center. It’s a hands-on recipe that’s incredibly rewarding and perfect for bakers of all levels.
Ingredients
For the Main Batter:
- 2 ½ cups all-purpose flour
- ½ teaspoon salt
- 1 cup (2 sticks) unsalted butter, softened (This is key! Make sure it’s truly softened, not melted. I usually take mine out an hour or two before I plan to bake.)
- ¾ cup granulated sugar
- 1 large egg, at room temperature
- 1 teaspoon vanilla extract (Good quality vanilla makes a difference here!)
For the Filling:
- 1 cup jam, preserves, or fruit butter (My favorites are raspberry, strawberry, or apricot, but feel free to experiment! Think about what you have in your pantry.)
- (Optional: A pinch of ground cinnamon or nutmeg for extra warmth in the cookie dough)
For the Glaze (Optional, but highly recommended!):
- 1 cup powdered sugar
- 2-3 tablespoons milk or water (Adjust for desired consistency)
- ½ teaspoon vanilla extract
Step-by-Step Instructions
Step 1: Preheat & Prep Pan
First things first, preheat your oven to 350°F (175°C). Then, line a couple of baking sheets with parchment paper. This is a non-negotiable for me – it prevents sticking and makes cleanup a breeze. Trust me, you’ll thank yourself later.
Step 2: Mix Dry Ingredients
In a medium bowl, whisk together the flour and salt. Give it a good stir to make sure everything is evenly distributed. This simple step ensures consistent texture throughout your cookies.
Step 3: Mix Wet Ingredients
In a large bowl, cream together the softened butter and granulated sugar until light and fluffy. This usually takes about 3-5 minutes with an electric mixer. Then, beat in the egg and vanilla extract until just combined. Make sure the egg is fully incorporated, but don’t overmix at this stage.
Step 4: Combine
Gradually add the dry ingredients to the wet ingredients, mixing on low speed until just combined. Be careful not to overmix the dough! Overmixing can lead to tough cookies, and we want tender, delicate thumbprint cookies. The dough should be soft but hold together.
Step 5: Prepare Filling
If your jam is super thick, you might want to give it a quick stir to loosen it up. If you’re adding spices to the dough, this is the time to gently fold them in. Just a little pinch is usually enough!
Step 6: Layer & Swirl
Roll the dough into balls, about 1-inch in diameter. Place them on your prepared baking sheets, leaving about 2 inches between each cookie. Now for the fun part! Using your thumb (or the back of a small spoon or even a small melon baller), gently press an indentation into the center of each dough ball, creating a little well. Don’t press all the way through to the bottom; you want to create a good-sized dip for the filling.
Step 7: Bake
Spoon about ½ to 1 teaspoon of your chosen jam into each indentation. Don’t overfill, or it will bubble over! Bake for 10-12 minutes, or until the edges are lightly golden and the cookie is set. The jam should be bubbly.
Step 8: Cool & Glaze
Let the cookies cool on the baking sheets for about 5 minutes before transferring them to a wire rack to cool completely. Once they’re completely cool, whisk together the powdered sugar, milk (or water), and vanilla extract for the glaze. Drizzle it over the cooled cookies, or dip the tops. Let the glaze set before serving.
Step 9: Slice & Serve
These are best served at room temperature. Arrange them on a pretty platter and admire your handiwork! They’re delicious on their own or with a cup of coffee or tea.
What to Serve It With
These thumbprint cookies are so wonderfully versatile, they fit in everywhere! For breakfast, I love to serve a couple with my morning coffee. The buttery cookie and sweet jam are the perfect way to start the day without being too heavy. They make a lovely addition to a more elaborate brunch spread, perhaps alongside some fresh fruit salad and a mimosa. For dessert, they’re fantastic as a lighter option after a rich meal, especially when paired with a scoop of vanilla bean Ice Cream or a dollop of whipped cream. The contrast between the warm cookie and cold ice cream is just divine. And for those cozy snack moments? Oh, that’s where they truly shine! They’re perfect with a mug of hot chocolate on a chilly evening, or with a steaming cup of herbal tea while you curl up with a good book. My family has a tradition of making them around the holidays, and we always have a little plate ready for Santa with these and a glass of milk. It just feels so festive and comforting. I’ve also found they pair beautifully with other baked goods – a few thumbprint cookies alongside a slice of homemade pie or a brownie can really elevate a dessert table.
Top Tips for Perfecting Your Thumbprint Cookies
I’ve made these thumbprint cookies more times than I can count, and over the years, I’ve picked up a few tricks that make them even better. For the Cookie Dough, make sure your butter is truly softened but not melted. If it’s too cold, it won’t cream properly, and if it’s melted, your cookies will spread too much. I learned that the hard way with a batch that looked more like a giant cookie than individual treats! When you’re pressing the indentations, go gently but firmly. You want to create a good well, but you don’t want to crack the dough. If it cracks a little, just gently press it back together. For the filling, using a thicker jam or preserves is usually best. If your jam is very runny, it might soak into the cookie or leak out during baking. My grandma always said a dollop about the size of a small grape is usually perfect. If you’re feeling adventurous with the swirl, try using two different colors of jam in alternating cookies, or even swirling a bit of chocolate ganache into the jam before baking. It adds a lovely visual appeal. For baking, keep an eye on them! Ovens can vary, and you want those edges to be just lightly golden, not brown. Overbaking will make them dry. And if you’re using different types of jam, some might bake a little faster than others, so it’s good to check them at the lower end of the baking time. For the glaze, consistency is key. If it’s too thin, it will just run off. If it’s too thick, it will be hard to drizzle. Start with 2 tablespoons of milk and add more, a teaspoon at a time, until it’s pourable but not watery. I’ve found that a mix of raspberry and apricot jam gives a beautiful color contrast if you’re feeling fancy. And if you want to make them dairy-free, I’ve had success using a good quality vegan butter stick and a plant-based milk for the glaze; the texture is remarkably similar!
Storing and Reheating Tips
One of the best things about these thumbprint cookies is how well they store, which means you can enjoy them for days (if they last that long!). At room temperature, they’ll keep beautifully in an airtight container for about 3-4 days. I usually just pop them into a cookie tin or a sturdy plastic container. Make sure they are completely cooled before you seal the container, otherwise, you’ll end up with condensation, and nobody wants soggy cookies. If you want them to last a bit longer, or if you live in a very humid climate, the refrigerator is your friend. They’ll stay fresh in the fridge for up to a week, still in an airtight container. Just a note: if you refrigerate them with the glaze on, the glaze might get a little sticky from the moisture. For longer storage, these cookies freeze like a dream! You can freeze the unglazed cookies for up to 2-3 months. Make sure they are completely cool, then wrap them tightly in plastic wrap, and then place them in a freezer-safe bag or container. When you’re ready to eat them, let them thaw at room temperature. If you want to add the glaze after thawing, it’s a great idea to do it then so the glaze stays nice and fresh. I usually don’t glaze the cookies I plan to freeze, I just add the glaze once they’re thawed and ready to be served. This keeps the glaze looking its best. Honestly, though, these disappear so fast in my house, I rarely have to worry about long-term storage!
Frequently Asked Questions
Final Thoughts
So there you have it, my beloved thumbprint cookies! I really hope you give these a try. They’re more than just a sweet treat; they’re a little bit of happiness, a sprinkle of nostalgia, and a whole lot of love baked into every bite. The buttery crumb, the sweet burst of jam, and that little dimple that just begs to be filled – it all comes together to create something truly special. They are the perfect reminder that sometimes, the simplest things bring the most joy. Whether you’re making them for a holiday, a special occasion, or just because, I promise they’ll be a hit. If you’re a fan of classic shortbread or love a cookie with a sweet center, these thumbprint cookies are absolutely for you. I can’t wait to hear how yours turn out! Please feel free to leave a comment below and tell me what kind of jam you used, or any fun variations you tried. Your feedback and your baking adventures always make my day! Happy baking, my friends!
Classic Thumbprint Cookies
Ingredients
Cookie Dough
- 0.5 cup unsalted butter, softened
- 0.5 cup granulated sugar
- 1 teaspoon vanilla extract
- 2 cups all-purpose flour
- 0.5 teaspoon salt
Filling
- 0.5 cup jam or preserves (any flavor)
Instructions
Preparation Steps
- Preheat oven to 350°F (175°C). Line baking sheets with parchment paper.
- In a large bowl, cream together the softened butter and granulated sugar until light and fluffy.
- Beat in the egg and vanilla extract until well combined.
- In a separate bowl, whisk together the flour and salt.
- Gradually add the dry ingredients to the wet ingredients, mixing until just combined. Do not overmix.
- Roll the dough into 1-inch balls and place them on the prepared baking sheets, about 2 inches apart.
- Using your thumb or the back of a small spoon, make an indentation in the center of each cookie.
- Fill each indentation with about 1/2 teaspoon of jam or preserves.
- Bake for 10-14 minutes, or until the edges are lightly golden brown. The centers may look slightly soft.
- Let the cookies cool on the baking sheets for a few minutes before transferring them to a wire rack to cool completely.


