


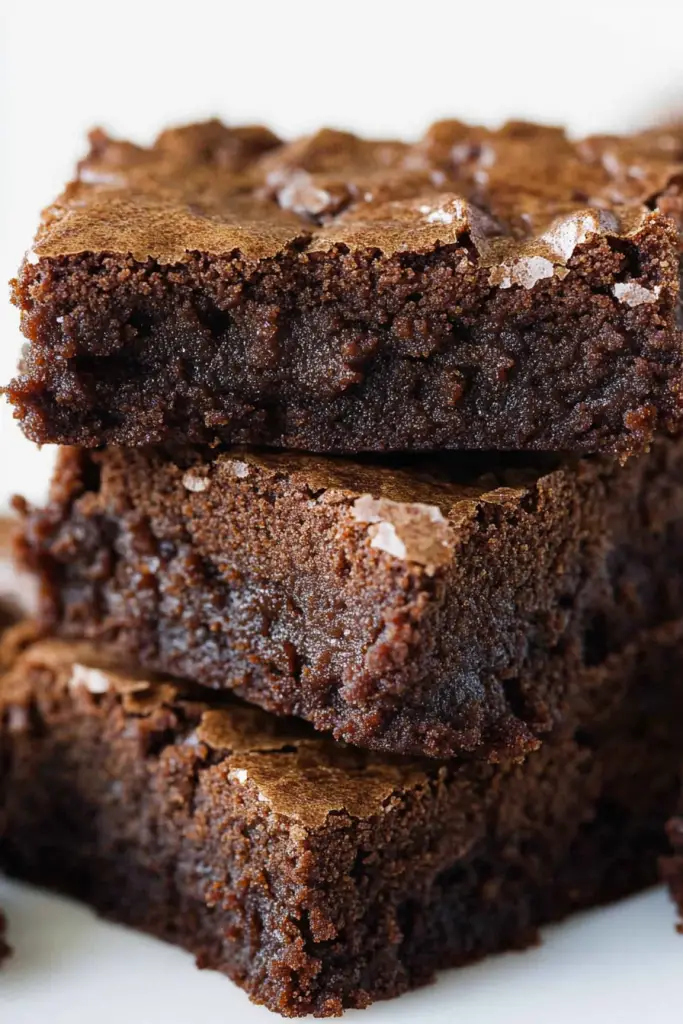
There’s something incredibly cozy about brownies fresh out of the oven—the way the chocolate aroma fills the kitchen, the first fudgy bite that melts on your tongue. Now, imagine those brownies with a twist, a subtle tang that adds depth and complexity without overpowering their sweet, rich nature. That’s what sourdough brownies bring to the table. I stumbled upon this gem when I had a little starter on hand and a craving for something special but didn’t want to fuss with a full cake. These sourdough brownies quickly became a staple in my house – my kids actually ask for seconds (and sometimes thirds!). If you’re used to classic brownies, this version might surprise you with its moist crumb and that slight, almost caramelized flavor thanks to the sourdough. Honestly, it’s such a cool way to use your starter discard, and trust me, once you try these, you’ll keep making them over and over.
What is sourdough brownies?
Think of sourdough brownies as your classic chocolate brownie’s tangy cousin. They’re essentially brownies made with a bit of sourdough starter mixed into the batter, which adds a gentle sour note that balances the sweetness and enriches the texture. The “sourdough” part refers to that wild yeast starter many of us nurture for bread baking. Instead of tossing your starter discard or saving it just for baking bread, you sneak it into your brownies and end up with this incredible, almost chewy yet tender treat. It’s a fun way to “stretch” your starter’s use while giving your baked goods a nuanced flavor boost. I love how this recipe gives a familiar dessert a delicious new spin without any fuss.
Why you’ll love this recipe?
What I love most about these sourdough brownies is how the sourdough starter elevates the whole experience without making the process complicated. First off, the flavor is nothing short of wonderful—a deep chocolate richness mingled with a light tang that you won’t get from regular brownies. It’s like your favorite brownie just got a little more sophisticated, but in the best possible way. And you don’t have to be a baking pro to pull this off; the recipe uses simple, pantry-friendly ingredients, making it surprisingly easy and budget-friendly. I always keep a jar of starter discard in the fridge, so this recipe feels like a win-win every time I make it. Plus, it’s versatile—you can enjoy these brownies as a quick snack, dress them up with a scoop of ice cream for dessert, or even take them for breakfast (don’t judge, chocolate and sourdough pairs beautifully with coffee!).
In fact, if you’re into experimenting, you can tweak the sweetness, add nuts, or swirl in some caramel or peanut butter. I once tried adding raspberries, and the tartness was surprisingly delightful alongside the earthy chocolate and sourdough flavors. You might also like my classic banana bread or zucchini bread recipes, which also make great use of sourdough discard and share the same comfort vibe.
How do I make sourdough brownies?
Quick Overview
These brownies come together super easily: start by prepping your pan, then mix your dry and wet ingredients separately before combining. The magic happens when you fold in sourdough starter, which perks up the batter in such a subtle but remarkable way. After a quick swirl of the filling across the batter, you bake until the edges are crisp and the center is just set. The whole process is straightforward enough that I’ve whipped this up after dinner on busy weeknights, and the kids never complain about the wait!
Ingredients
For the Main Batter:
- 1 cup all-purpose flour (I use unbleached for a richer flavor)
- 3/4 cup sugar (feel free to tweak this, depending on your sweet tooth)
- 1/2 cup unsweetened cocoa powder (good quality is a game-changer)
- 1/2 cup melted butter (unsalted, browned butter adds a lovely nuttiness)
- 2 large eggs (room temperature lets them blend in smoothly)
- 1/2 cup sourdough starter discard (unfed, straight from the fridge or just fed—both work!)
- 1 tsp vanilla extract (because vanilla always makes everything better)
- 1/4 tsp salt
- Optional: 1/2 tsp baking powder for a slightly cakier texture
For the Filling:
- 1/2 cup cream cheese, softened (for that luscious, tangy layer)
- 2 tbsp sugar
- 1/4 tsp vanilla extract
- Optional: a pinch of lemon zest to brighten the cream cheese filling
For the Glaze:
- 1/2 cup powdered sugar
- 1-2 tbsp milk or cream (adjust for perfect drizzle consistency)
- A splash of vanilla or espresso powder for depth
Step-by-Step Instructions
Step 1: Preheat & Prep Pan
Start by preheating your oven to 350°F (175°C). Grab an 8×8 inch square baking pan and line it with parchment paper—make sure there’s some overhang on the sides to help lift the brownies out later. I always grease the parchment with a light butter swipe, too, since nothing should stick! This little step saves so much frustration when it’s time to cut.
Step 2: Mix Dry Ingredients
In a medium bowl, whisk together your flour, cocoa powder, sugar, salt, and baking powder (if using). You want everything evenly incorporated so your batter bakes consistently. I like to sift cocoa and flour together just to be sure there are no lumps or clumps hiding around.
Step 3: Mix Wet Ingredients
In a separate large bowl, beat the eggs lightly, then add melted butter, vanilla extract, and sourdough starter. The starter will feel a little thick and bubbly—don’t worry, that’s exactly what we want. Mix until everything looks smooth and glossy. This batter smells nutty and a little sweet already, which always makes me hopeful.
Step 4: Combine
Gently fold your dry ingredients into the wet mix in batches, stirring just until everything is combined. Overmixing will make the brownies tough, so resist the urge to beat the batter. It should be thick but pourable, with a beautiful chocolate sheen that hints at the fudginess to come.
Step 5: Prepare Filling
While the batter rests, whisk the softened cream cheese with sugar and vanilla until smooth and creamy—no lumps allowed here! If you want to add a little zing, toss in some lemon zest; it makes the filling sparkle against the chocolate. Set this aside but keep it handy.
Step 6: Layer & Swirl
Pour about two-thirds of the batter into your prepared pan, smoothing it out with a spatula. Dollop the cream cheese mixture across the top in spoonfuls, then add the remaining batter in small patches on top. Grab a butter knife or skewer and gently swirl through the layers to create that classic marbled look. Don’t overdo it—you want visible streaks of cream cheese mingling with rich chocolate.
Step 7: Bake
Bake for 30–35 minutes, but start checking around 28 minutes since oven temperatures vary. When the edges look set and the center is just a tad soft (think fudge-like, not jiggly), it’s ready. I tap it lightly, and if it springs back ever so slightly, then you can pull it out. Leave it too long and you’ll lose that lovely gooey center, which would break my heart.
Step 8: Cool & Glaze
Let the brownies cool in the pan for at least 20 minutes. Trust me, this step is key—cutting into hot brownies is tempting but messy. Once mostly cooled, whisk glaze ingredients together until smooth and drizzle over the top. The glaze hardens just enough to add a sweet, shiny finish without stealing the limelight.
Step 9: Slice & Serve
Use the parchment overhang to gently lift the block out of the pan, then slice into squares with a sharp knife. I like to wipe the knife between cuts for clean edges. These brownies are good slightly warm or at room temperature—both bring out different parts of their personality. Serve with a hot cup of coffee or a scoop of vanilla ice cream if you’re feeling indulgent.
What to Serve It With
For Breakfast: These sourdough brownies pair surprisingly well with morning coffee or a creamy latte. Cut them into bite-sized pieces to scatter on a breakfast plate alongside fresh berries and Greek yogurt. It’s like a little chocolate treat to kickstart a cozy weekend.
For Brunch: I like to serve them wrapped up with fresh fruit salad and a glass of sparkling rosé or a rich hot chocolate. They add a comfy touch to any brunch spread, especially when entertaining friends who appreciate a slightly unexpected dessert.
As Dessert: Nothing beats these brownies after a homemade meal, especially topped with whipped cream or melting vanilla bean ice cream. You can dust them lightly with cocoa powder or cinnamon, or drizzle with a thick caramel sauce for extra decadence. It’s the kind of dessert that makes people linger at the table, savoring every bite.
For Cozy Snacks: I often grab a square on those lazy afternoons when the kids are playing or we’re all doing some reading. Sometimes, I warm a brownie and smear a little salted butter on top—the salty-sweet combination is a little slice of heaven. Bonus: these keep well, so they’re always ready to satisfy a sudden chocolate craving without extra fuss.
Top Tips for Perfecting Your Sourdough Brownies
Sourdough Starter Quality: Your starter discard should be active or at least a week or so fed regularly. I’ve found that a bubbly discard gives the best rise and flavor without any sourness that’s overpowering.
Mixing Advice: Under mixing is better than overmixing. Stir just until you don’t see dry pockets. Overworked batter leads to dense, rubbery brownies — and nobody wants that. When folding the filling in, aim for light swirling; it should look artistic, not muddy.
Swirl Customization: Try playing with the swirl pattern. A gentle figure-eight motion is my go-to, but some people like zigzags or concentric circles. Just be sure to keep the layers distinct enough for that pretty marble look that’s half the fun of these brownies.
Ingredient Swaps: I’ve swapped butter for coconut oil when I ran out, and while the texture shifted a touch, the brownies were still yum. For dairy-free, use almond milk in the glaze and coconut yogurt in the filling instead of cream cheese—trust me, it works surprisingly well! Just keep liquids steady to avoid a runny batter.
Baking Tips: Oven temperatures can differ wildly — I recommend checking your brownies at 28 minutes, then every two minutes until just done. Avoid using toothpicks; they tend to leave holes in this fudge-like texture. Instead, lightly press the center with your fingertip for a gentle spring.
Glaze Variations: Feel free to spice up the glaze with cinnamon, espresso, or even a splash of bourbon for an adult twist. If you want a thicker glaze, add more powdered sugar—but be careful not to make it too thick to drizzle. Glaze also doubles as a protective seal if you plan to store these brownies for a day or two.
Storing and Reheating Tips
Room Temperature: Keep your brownies in an airtight container or covered with foil for up to 3 days. I like to leave the glaze on if I plan to eat them within this window—it keeps them looking shiny and inviting.
Refrigerator Storage: These brownies store beautifully in the fridge for up to a week. Wrap them tightly with plastic wrap or place them in a sealed container. They firm up nicely and the flavor actually deepens after a day or two.
Freezer Instructions: For longer storage, wrap brownies individually in plastic wrap, then place them in a freezer bag. They’ll keep for about 2 months. Thaw overnight in the fridge or at room temperature for an hour before serving. Glaze can crack when frozen, so I usually glaze after thawing.
Glaze Timing Advice: If you want a perfectly smooth top without cracks, glaze your brownies after they are completely cooled, especially if freezing or refrigerating. Applying glaze too early can lead to streaks or melting, depending on your kitchen’s temperature.
Frequently Asked Questions
Final Thoughts
I honestly can’t say enough good things about these sourdough brownies—they’re that rare treat that feels special but is easy enough to make any day. Whether you’re dipping into the magical world of sourdough for the first time or looking for a new way to use up starter discard, this recipe hits all the right notes. Fudgy, tangy, rich, and festive all at once, these brownies have become a go-to in my kitchen and have some of the best “wow” feedback from friends and family alike. If you give them a try, I’d love to hear how yours turn out, any tweaks you make, or how you serve them up. Don’t be shy with the comments, and feel free to rate the recipe—sharing the love makes baking even sweeter. Happy baking, and may your next batch be your best batch yet!
sourdough brownies
Ingredients
Main Ingredients
- 4 oz semi-sweet chocolate
- 0.5 cup unsalted butter 1 stick
- 1 cup granulated sugar
- 1 tsp vanilla extract
- 2 large eggs room temperature
- 0.125 tsp salt a pinch
- 0.75 cup active sourdough starter fed and bubbly
Instructions
Preparation Steps
- Preheat oven to 350°F and prepare a 9x9 inch baking pan with non-stick spray or parchment paper.
- Roughly chop the semi-sweet chocolate and place into a microwave-safe bowl.
- Slice the butter into smaller pieces and add to the chocolate. Microwave for 1 minute, stir, then microwave another 30 seconds. Stir thoroughly until melted and combined.
- Add granulated sugar to the chocolate mixture and stir well to combine.
- Mix in vanilla extract, eggs, and salt until batter is smooth and well incorporated.
- Stir in the sourdough starter until the batter is smooth and even.
- Pour batter into the prepared pan and bake for 25 to 28 minutes or until a toothpick inserted comes out with a few moist crumbs. Avoid overbaking for fudgy texture.


