Oh, friends, I have a confession. There are some recipes that are just… special. They aren’t just food; they’re memories baked into a pan. My strawberry brownies fall into that category for me. You know those days when you just need something sweet, something comforting, but you don’t have hours to dedicate to a complex dessert? This is your answer. It’s a little bit of fudgy brownie heaven, swirled with the bright, tangy sweetness of fresh strawberries. It’s honestly one of my go-to’s, especially when I want to impress without the stress. People always rave about them, asking for the secret, and honestly, the secret is how ridiculously simple they are. They’re like a little taste of summer even in the dead of winter. They’re more decadent than a regular brownie, but with that burst of fruit that just cuts through the richness. It’s that perfect balance that makes them utterly irresistible. I remember the first time I made these; my kitchen smelled like a dream, and my family practically inhaled them. That’s when I knew I had found a winner. They’re definitely a step up from your average boxed brownie mix, but just as approachable.
What are strawberry brownies?
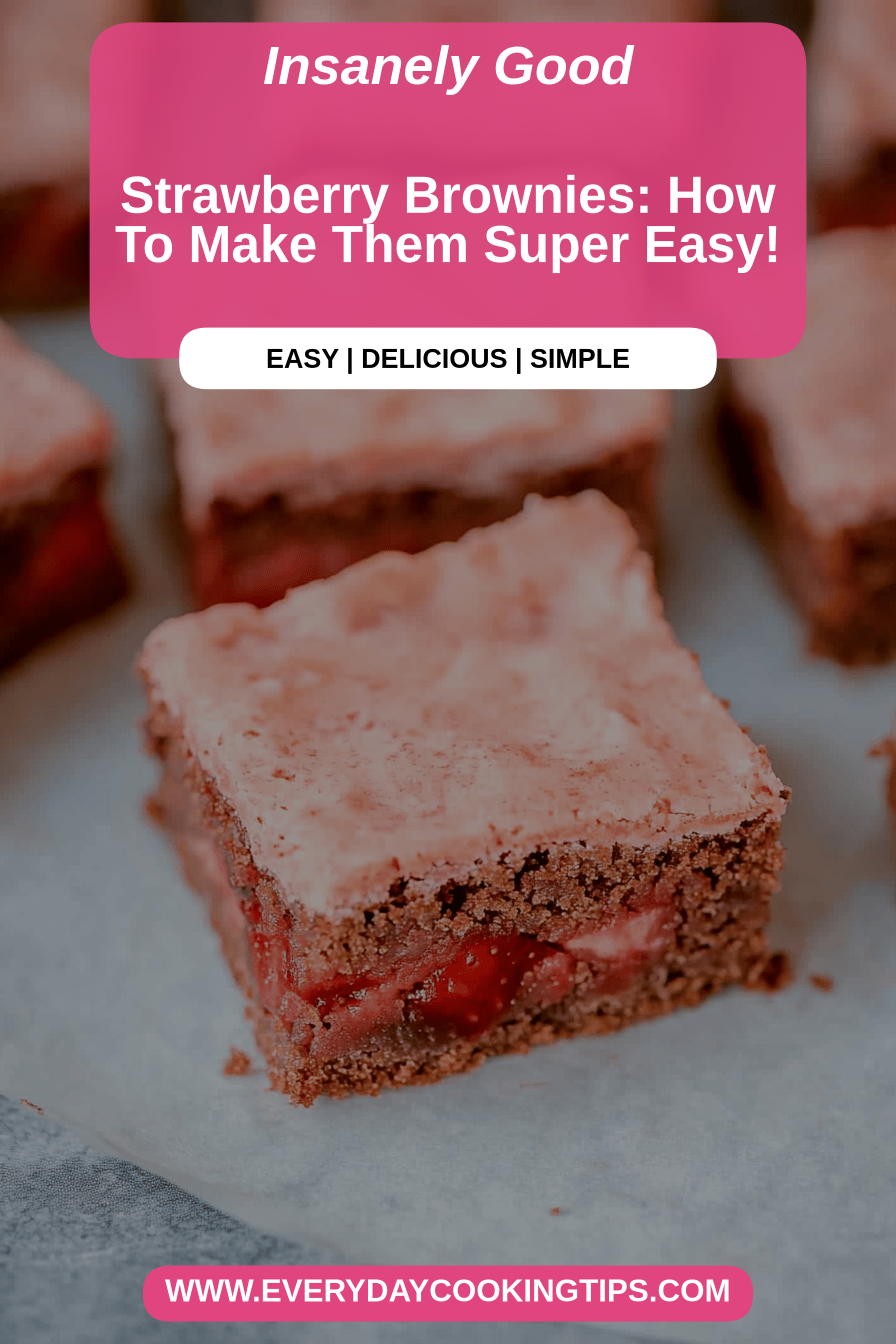
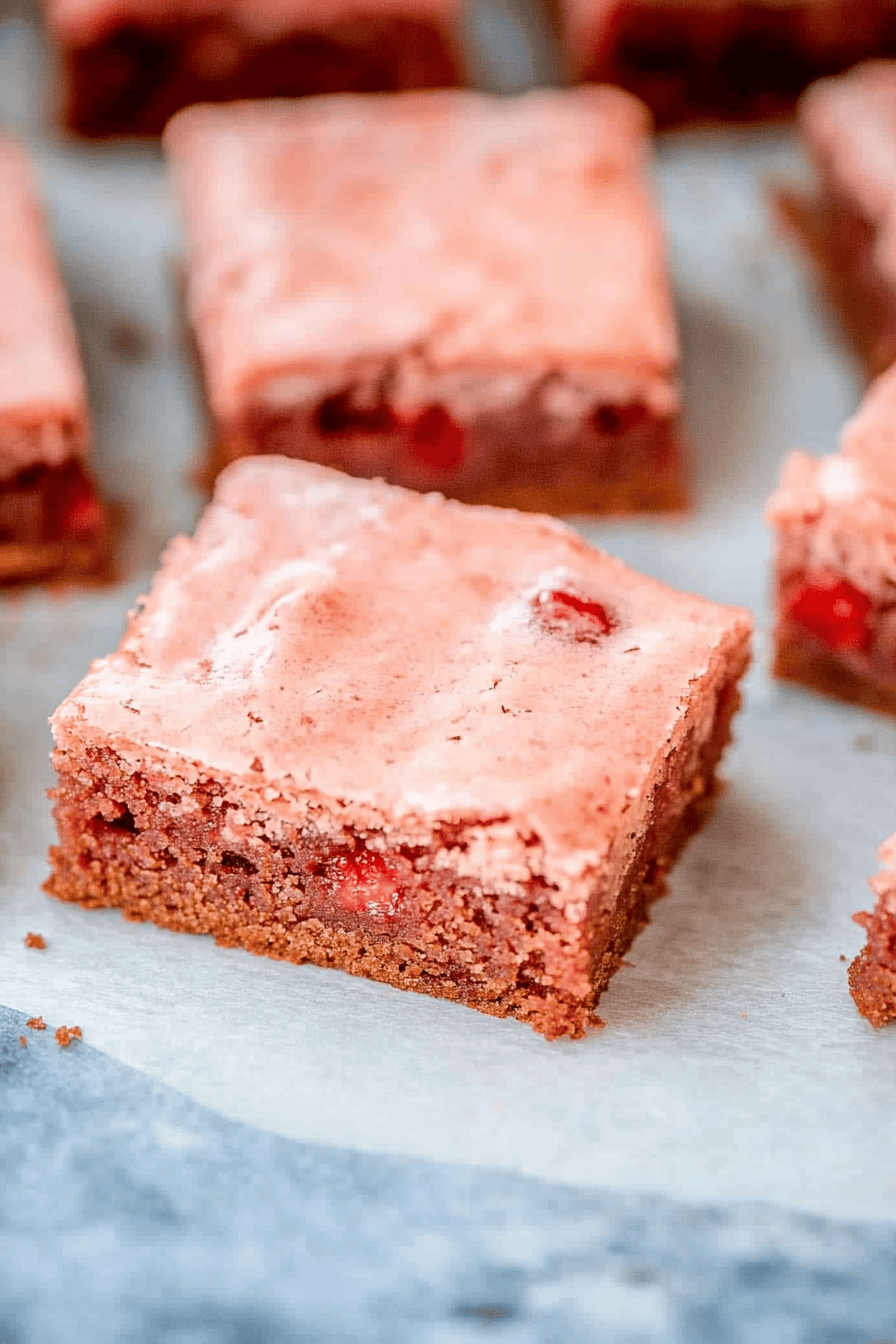
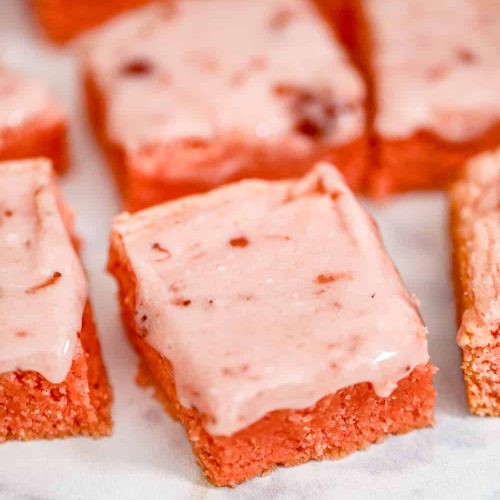
So, what exactly are these magical strawberry brownies? Think of them as your classic, rich, fudgy brownie base, but elevated. We’re talking about a decadent chocolate foundation, so moist and chewy it practically melts in your mouth. Then, we swirl in a vibrant, slightly tart strawberry ribbon that bakes right into the brownie, creating these beautiful pink streaks and pockets of fruity goodness. It’s not a cakey brownie, mind you – we’re aiming for that dense, fudgy texture that is so satisfying. The strawberries aren’t just a topping; they’re an integral part of the flavor profile, offering a lovely contrast to the deep chocolate. It’s essentially the best of both worlds: the intense chocolate satisfaction of a brownie and the fresh, bright flavor of ripe strawberries. I often describe it as a brownie that’s been kissed by summer sunshine. It’s surprisingly simple to achieve this magic, which is a huge part of its appeal. It’s not some fussy layered cake; it’s pure, unadulterated brownie joy with a fruity twist.
Why you’ll love this recipe?
Honestly, the list could go on forever, but let me try to hit the highlights! Firstly, the flavor. Oh, the flavor! It’s this incredible dance between deep, Dark Chocolate and bright, sweet-tart strawberries. Each bite is a little adventure. The chocolate is rich and intense, just the way a good brownie should be, but the strawberries cut through it beautifully, preventing it from being too heavy. It’s the perfect balance, and it’s what makes me reach for this recipe again and again.
Secondly, the simplicity. I know I keep saying this, but it’s so true! If you can melt butter and stir things together, you can make these strawberry brownies. There’s no fancy equipment needed, just a bowl, a whisk, and a baking pan. I’ve made this recipe with my niece when she was barely tall enough to see over the counter, and she had a blast. That’s how approachable it is. It’s a lifesaver on busy weeknights when that sweet craving hits hard, but you don’t have time for elaborate bakes.
And the cost-efficiency! You likely have most of the ingredients in your pantry already. Basic pantry staples like flour, sugar, cocoa powder, and eggs, plus some butter and fresh or frozen strawberries. It’s far more affordable than buying fancy pastries, and honestly, so much more satisfying because you made it yourself.
Then there’s the versatility. These are amazing straight out of the pan, but they’re also fantastic slightly warm with a scoop of vanilla Ice Cream. You can even add a dollop of whipped cream or a drizzle of extra chocolate sauce. They’re perfect for potlucks, bake sales, or just a cozy afternoon treat. What I love most is that they feel special without demanding a ton of effort. They’re a crowd-pleaser, for sure. My husband always says they’re better than any store-bought treat, and he’s usually right about these things!
How do I make strawberry brownies?
Quick Overview
Making these delightful strawberry brownies is a straightforward process that even beginner bakers can master. You’ll essentially prepare a rich chocolate Brownie Batter, then swirl in a quick strawberry filling before baking. The whole thing comes together in under 30 minutes of active prep time, making it incredibly efficient. The magic lies in the combination of a fudgy, dense base and the bursts of fresh fruitiness. Don’t be intimidated by the swirl – it’s easier than it looks and adds such a beautiful visual appeal. It’s a recipe designed for maximum flavor and minimal fuss, perfect for those times when you need a quick win in the kitchen.
Ingredients
For the Main Batter:
Butter: 1 cup (2 sticks) unsalted butter. I always use unsalted so I can control the salt content myself. Melt it gently in a saucepan or in the microwave. Don’t let it boil, just melt it to liquid.
Granulated Sugar: 2 cups. This gives us that perfect sweetness and contributes to the chewy texture.
Eggs: 4 large eggs, at room temperature. Room temperature eggs incorporate much better into the batter. I usually just let them sit out for about 30 minutes before I start.
Vanilla Extract: 2 teaspoons. The good stuff, of course! It enhances all the other flavors.
All-Purpose Flour: 1 ½ cups. Just your standard flour is perfect here.
Unsweetened Cocoa Powder: ¾ cup. Use a good quality cocoa powder – it really makes a difference in the depth of chocolate flavor. Natural or Dutch-processed both work, but Dutch-processed gives a darker, smoother chocolate taste.
Salt: ½ teaspoon. Balances the sweetness and brings out the chocolate flavor.
Baking Powder: 1 teaspoon. Just a touch to give them a little lift without making them cakey.
For the Filling:
Fresh Strawberries: 1 ½ cups, hulled and finely chopped. You want them small enough to swirl easily. If using frozen, don’t thaw them completely; you want them still a bit icy so they don’t make the batter too wet.
Granulated Sugar: ¼ cup. To sweeten the strawberries just a bit.
Cornstarch: 1 tablespoon. This helps thicken the strawberry juices so they don’t make your brownies soggy.
For the Glaze:
Powdered Sugar: 1 cup. Sifted to avoid lumps.
Milk or Cream: 2-3 tablespoons. Just enough to get the right drizzling consistency.
Vanilla Extract: ½ teaspoon. For a little extra flavor boost in the glaze.

Step-by-Step Instructions
Step 1: Preheat & Prep Pan
First things first, get your oven preheated to 350°F (175°C). Then, grab a 9×13 inch baking pan. I like to line mine with parchment paper, leaving some overhang on the sides. This makes lifting the finished brownies out so much easier and cleanup is a breeze. Just grease the pan well before you lay in the parchment paper, and then grease the parchment paper too. This ensures absolutely no sticking, which is always my biggest baking fear!
Step 2: Mix Dry Ingredients
In a medium bowl, whisk together your flour, cocoa powder, salt, and baking powder. Whisking well ensures that everything is evenly distributed, which is super important for consistent texture and flavor in your final brownies. You don’t want pockets of unsalted batter or dense clumps of cocoa!
Step 3: Mix Wet Ingredients
Now, in a large bowl, melt your butter. You can do this in the microwave or on the stovetop. Once it’s melted and slightly cooled, whisk in the granulated sugar until it’s well combined. Then, beat in your eggs one at a time, making sure each one is fully incorporated before adding the next. Finally, stir in the vanilla extract. The mixture should look glossy and smooth.
Step 4: Combine
This is where the magic starts to happen! Gradually add the dry ingredients to the wet ingredients. Mix with a spatula or a wooden spoon until *just* combined. Seriously, don’t overmix! Overmixing can lead to tough brownies, and we want fudgy perfection. A few streaks of flour are okay; they’ll disappear as you fold in the strawberries.
Step 5: Prepare Filling
While your brownie batter is resting for a moment, quickly toss the chopped strawberries with the ¼ cup of sugar and the tablespoon of cornstarch in a small bowl. The cornstarch is key here; it’ll help thicken up the strawberry juices as they bake, preventing your brownies from becoming too wet. If you’re using frozen strawberries, this step is especially important.
Step 6: Layer & Swirl
Now for the fun part! Pour about two-thirds of your brownie batter into the prepared pan and spread it out evenly. Spoon dollops of the strawberry mixture over the batter, then carefully spread the remaining one-third of the brownie batter over the strawberries. Grab a knife or a skewer and gently swirl the strawberry mixture into the brownie batter. Don’t go crazy here; just a few gentle passes will create those beautiful marbled patterns.
Step 7: Bake
Pop the pan into your preheated oven. Bake for 30-35 minutes. The edges should look set, and a toothpick inserted into the center should come out with moist crumbs attached, not wet batter. If you prefer your brownies super fudgy, err on the side of underbaking slightly. It’s better to be a little underdone than overdone!
Step 8: Cool & Glaze
This is possibly the hardest step: let them cool! Let the brownies cool completely in the pan on a wire rack. This is crucial for them to set properly. Once they’re completely cool, you can whip up the glaze. Whisk together the powdered sugar, 2 tablespoons of milk, and the vanilla extract. Add more milk, a teaspoon at a time, until you reach your desired drizzling consistency. Drizzle this over the cooled brownies.
Step 9: Slice & Serve
Once the glaze has set a bit, lift the brownies out of the pan using the parchment paper overhang. Slice them into squares using a sharp knife. For the cleanest cuts, wipe your knife between each slice. Enjoy these incredible strawberry brownies warm, at room temperature, or even chilled!
What to Serve It With
These strawberry brownies are so versatile, they’re practically their own food group! But if you’re looking for some perfect pairings, I’ve got you covered.
For Breakfast: While technically a dessert, I absolutely love a small square of these on a weekend morning with a strong cup of coffee. It feels like such a decadent start to the day, but the fruit makes it feel less heavy than a traditional breakfast pastry. They’re also great alongside a fruit salad or a yogurt parfait.
For Brunch: These are a showstopper for any brunch spread. Cut them into smaller squares or elegant rectangles and arrange them on a tiered stand. They look so pretty with the pink swirls and white glaze. Pair them with mimosas or a fresh berry smoothie. They’re a lovely sweet counterpoint to savory brunch dishes like quiche or bacon.
As Dessert: This is their most natural habitat! Serve a warm brownie with a scoop of vanilla bean ice cream – the contrast of warm and cold is divine. A dollop of freshly whipped cream is also a classic. For something a little more sophisticated, try pairing them with a raspberry coulis or a light Chocolate Mousse.
For Cozy Snacks: On a chilly afternoon, there’s nothing better than a mug of hot chocolate and a brownie. The rich chocolate flavors complement each other perfectly. They’re also great with a glass of cold milk, a throwback to childhood that never gets old. Honestly, they’re perfect just on their own, too. My family has a tradition of having these after a family movie night, and they disappear in minutes!
Top Tips for Perfecting Your Strawberry Brownies
I’ve been making these strawberry brownies for years, and let me tell you, I’ve learned a few tricks along the way that make them consistently amazing. Don’t skip these steps!
Strawberry Prep: When using fresh strawberries, make sure they’re not overly ripe and mushy. You want them firm enough to hold their shape a bit. If they’re too ripe, they’ll release too much juice. For the best flavor, I always try to use in-season strawberries. If you’re using frozen, resist the urge to thaw them completely. Give them a quick rinse if they’re clumped together, but use them straight from the freezer. The little bit of ice will help them keep their structure and not make your batter too watery.
Mixing Advice: This is probably the most critical tip for fudgy brownies. When you combine the dry ingredients into the wet, mix *only* until they are just incorporated. A few streaks of flour are perfectly fine. Overmixing develops the gluten in the flour, which will result in a tougher, cake-like brownie. We want dense and fudgy, remember? So, be gentle and stop stirring as soon as you don’t see large dry patches. It’s really about respecting the batter here.
Swirl Customization: Don’t overthink the swirl! The beauty of these brownies is their rustic, marbled look. Just a few gentle passes with a knife or skewer are all you need. Pushing the strawberry mixture too deep or swirling too vigorously can muddy the flavors and create a less appealing texture. Aim for those lovely ribbons of pink throughout the deep chocolate. It adds a visual appeal that’s just delightful.
Ingredient Swaps: I’ve experimented quite a bit! For a dairy-free version, you can use a good quality vegan butter and plant-based milk (like almond or oat milk) for the glaze. The result is surprisingly creamy and delicious. If you don’t have fresh strawberries, good quality frozen ones work great as mentioned, just be mindful of the thawing. For the cocoa powder, I find that a good Dutch-processed cocoa gives the richest, smoothest chocolate flavor, but natural unsweetened works too. Just be aware that Dutch-processed can sometimes react differently with leavening agents, though it’s usually not a significant issue here.
Baking Tips: Every oven is different, so keep an eye on your brownies. The toothpick test is your best friend. You’re looking for moist crumbs, not a clean sweep (that means they’re overbaked) or wet batter. If you prefer a crispier edge, you can bake them a minute or two longer. Also, make sure your oven rack is in the center of the oven for even baking. Baking them too high or too low can lead to uneven cooking.
Glaze Variations: If you’re not a fan of the powdered sugar glaze, no worries! You can skip it entirely, and they’re still delicious. Another option is to dust them with a bit of powdered sugar once cooled, or drizzle them with melted dark chocolate. If you want a bit more strawberry flavor in the glaze, you can whisk in a teaspoon of strawberry jam or a tiny bit of strawberry extract.
Storing and Reheating Tips
Proper storage is key to keeping these strawberry brownies tasting fresh and delicious. Because they have fruit and a glaze, there are a few things to keep in mind.
Room Temperature: If you’ve glazed them, I’d say they’re best kept at room temperature for up to 2 days. Make sure they’re in an airtight container. If they aren’t glazed, they can last for 3-4 days, provided they are stored in a way that prevents them from drying out. I usually just cover the pan tightly with plastic wrap. They tend to get even fudgier and more delicious on day two!
Refrigerator Storage: If you need them to last longer, the refrigerator is your best bet. They will keep well in an airtight container in the fridge for up to a week. The texture will firm up a bit in the fridge, but they’re still incredibly tasty. I actually prefer them chilled sometimes, especially if I’m having them with coffee. Just make sure to wrap them well to prevent them from absorbing any fridge odors.
Freezer Instructions: These freeze beautifully! If you want to keep them for longer, wrap individual squares or the whole pan tightly in plastic wrap, then in a layer of aluminum foil, or place them in a freezer-safe airtight container. They can be frozen for up to 2-3 months. To thaw, transfer them to the refrigerator overnight. If you’re reheating them slightly, you can warm them gently in a low oven or microwave.
Glaze Timing Advice: For the best results, I always recommend letting the brownies cool completely *before* applying the glaze. If you glaze them while they’re warm, the glaze will melt and become messy. Once glazed, allow the glaze to set at room temperature for at least 30 minutes before storing. If you plan to freeze them, I often recommend glazing them *after* thawing them from the freezer, as the glaze can sometimes become a little sticky or soft during freezing and thawing.
Frequently Asked Questions
Final Thoughts
I truly hope you give these strawberry brownies a try. They’re more than just a dessert to me; they’re a reminder of cozy afternoons, happy family moments, and the simple joy of baking. They represent that perfect balance of rich chocolate and bright fruit that I adore, and they always seem to bring smiles to people’s faces. The best part is that they’re so wonderfully forgiving and easy to make, proving that you don’t need to be a pastry chef to create something truly special.
If you’re a fan of chocolate and fruit combinations, you might also enjoy my Chocolate Raspberry Tart or my Lemon Blueberry Scones. They offer similar delightful flavor profiles.
I’d absolutely love to hear how yours turn out! If you make these strawberry brownies, please leave a comment below and let me know what you think. Did you swirl them a special way? Did your family gobble them up as quickly as mine does? Your feedback and your own baking adventures are what make this community so wonderful. Happy baking, my friends!
Strawberry Brownies
Ingredients
Brownie Batter
- 0.75 cup unsalted butter, melted
- 1.5 cup granulated sugar
- 2 large eggs
- 1 teaspoon vanilla extract
- 0.5 cup all-purpose flour
- 0.25 cup unsweetened cocoa powder
- 0.25 teaspoon salt
Strawberry Swirl
- 1 cup fresh strawberries, hulled
- 1 tablespoon granulated sugar
Instructions
Preparation Steps
- Preheat your oven to 350°F (175°C). Grease and flour an 8x8 inch baking pan or line it with parchment paper.
- In a medium bowl, whisk together the melted butter and granulated sugar until well combined.
- Beat in the eggs one at a time, then stir in the vanilla extract.
- In a separate small bowl, whisk together the flour, cocoa powder, and salt.
- Gradually add the dry ingredients to the wet ingredients, mixing until just combined. Be careful not to overmix.
- For the strawberry swirl, combine the fresh strawberries and sugar in a small blender or food processor. Puree until smooth.
- Pour about two-thirds of the brownie batter into the prepared baking pan and spread evenly.
- Dollop spoonfuls of the strawberry puree over the brownie batter. Then, pour the remaining brownie batter over the strawberry puree.
- Use a knife or skewer to gently swirl the strawberry puree into the brownie batter. Be careful not to over-swirl.
- Bake for 25-30 minutes, or until a toothpick inserted into the center comes out with moist crumbs attached (not wet batter).
- Let the brownies cool completely in the pan before cutting into squares.