


Oh, you know those days. The ones where you’re rushing out the door, the kids are yelling about being late, and your stomach is doing that sad, empty rumble? Yeah, me too. For the longest time, my solution was usually a sad, pre-packaged granola bar that tasted more like cardboard than food. Then, one afternoon, staring into my pantry with a desperate craving for something chewy, sweet, and satisfying, it hit me: why not make my own Peanut Butter granola bars? And let me tell you, it’s been a game-changer ever since. These aren’t just any granola bars; they’re the kind that make you want to sit down with a cup of tea (or coffee, no judgment!) and just savor every single bite. They’re so much better than anything you’d find in a box, and honestly, they’re ridiculously easy to whip up. Think of them as a hug in bar form, but with that irresistible peanut butter goodness you love.
What is peanut butter granola?
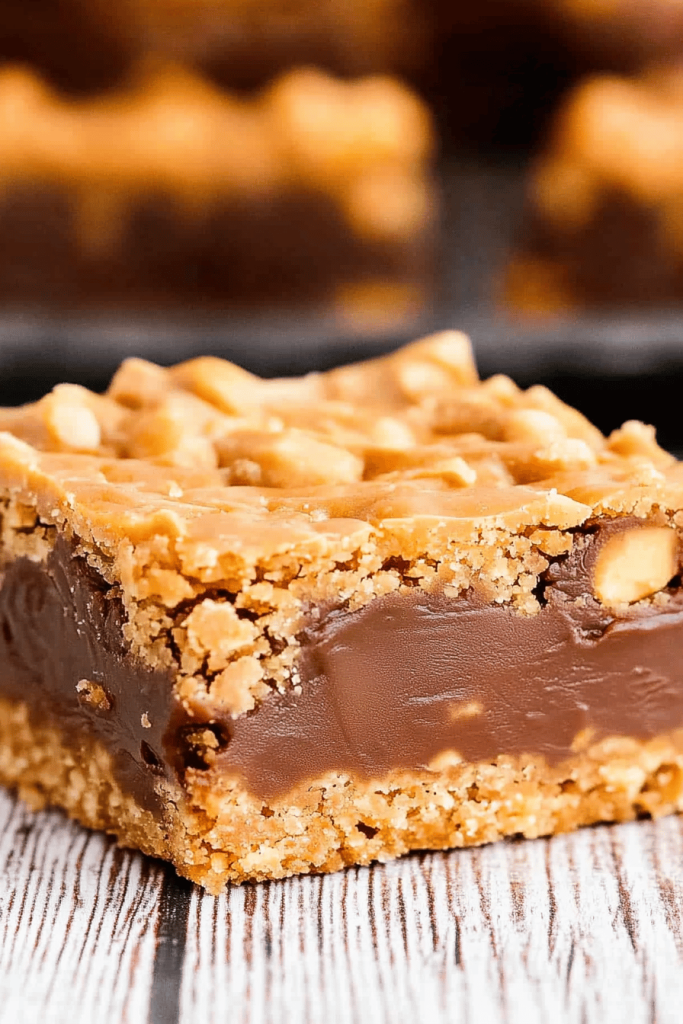
So, what exactly are we talking about when I say peanut butter granola bars? Well, it’s pretty much exactly what it sounds like! It’s a delightful fusion of wholesome oats, Creamy Peanut Butter, a touch of sweetener, and a few other goodies all bound together and baked into perfectly portioned bars. Think of it as a deconstructed peanut butter cookie that’s portable, healthy-ish, and incredibly satisfying. It’s that comforting, nostalgic flavor of peanut butter, but in a convenient, chewy bar that’s perfect for school lunches, pre-workout fuel, or even a midnight snack when you’re trying to be good but failing spectacularly. It’s essentially your favorite childhood treat, all grown up and ready to tackle your busy life.
Why you’ll love this recipe?
Honestly, there are so many reasons I keep coming back to this recipe, and I’m so excited for you to discover them too! First off, the FLAVOR. Oh my goodness, the flavor. It’s that classic, irresistible Peanut Butter taste that just sings. It’s not too sweet, not too bland – it’s perfectly balanced. And the texture? Imagine a slightly chewy, wonderfully dense bar with just the right amount of crispness from the oats. It’s pure bliss. Then there’s the SIMPLICITY. Seriously, you don’t need to be a master baker for this. I’ve made this countless times on a chaotic Sunday afternoon, and it’s always a win. It’s also incredibly COST-EFFECTIVE. Buying specialty granola bars can add up, but this recipe uses pantry staples that are easy on the wallet. Plus, it’s SO VERSATILE. Want to add chocolate chips? Go for it. Nuts? Absolutely. Dried fruit? Why not! I’ve even experimented with different nut butters, and while peanut butter is my forever favorite, almond butter is a close second. What I love most about these peanut butter granola bars is that they’re a reliable win for everyone. My kids devour them, my husband takes them to work, and I grab one when I need that little pick-me-up. They’re a lifesaver, truly.
How do I make peanut butter granola bars?
Quick Overview
The process is refreshingly simple. You’ll basically mix your dry ingredients, then stir in your wet ingredients, press the mixture into a pan, bake it until golden, and let it cool. That’s it! No fancy techniques, no complicated steps. The magic happens in the simple combination of good ingredients and a little bit of heat. It’s the kind of recipe that makes you feel like you’ve accomplished something great in under an hour (plus cooling time, of course!).
Ingredients
For the Main Batter:
Rolled Oats: About 3 cups. I always go for old-fashioned rolled oats, not instant. They give you that lovely chew and structure. Steel-cut oats won’t work here, they just don’t soften up the same way. Make sure they haven’t been sitting in your pantry since the dawn of time; fresh oats make a big difference!
All-Purpose Flour: 1 cup. This helps bind everything together. If you’re going gluten-free, you can swap this out for a good gluten-free all-purpose blend (I’ll get to that later!).
Baking Soda: 1 teaspoon. This gives them just a little lift, not too much, just enough to prevent them from being too dense.
Salt: ½ teaspoon. Don’t skip this! Salt enhances all the other flavors, especially the Peanut Butter.
Creamy Peanut Butter: 1 cup. This is the star! Use your favorite creamy peanut butter. Natural peanut butter works, but you might need to adjust the sweetener a bit since they can be less sweet and sometimes runnier. I usually use Jif or Skippy for consistent results and that classic flavor.
Melted Butter: ½ cup (1 stick). Unsalted is best so you can control the saltiness. You can also use coconut oil if you prefer, though the flavor is slightly different.
Brown Sugar: ¾ cup, packed. This adds that lovely caramel-like sweetness and helps with chewiness. You can use light or dark brown sugar, both work great.
Honey or Maple Syrup: ¼ cup. This adds another layer of sweetness and helps keep the bars moist and chewy. Maple syrup will give a slightly different, delicious flavor profile.
Vanilla Extract: 1 teaspoon. Just a little bit makes everything smell and taste more amazing.
Eggs: 2 large. These are crucial for binding everything together and giving the bars structure.
For the Filling (Optional, but highly recommended!):
Chocolate Chips: ½ cup. Semi-sweet or milk chocolate chips are classic. You can also use chopped chocolate.
Chopped Nuts: ½ cup (peanuts, almonds, walnuts, whatever you like!).
Dried Fruit: ½ cup (raisins, cranberries, chopped apricots).
For the Glaze (Optional, but makes them extra special!):
Powdered Sugar: 1 cup.
Peanut Butter: 2 tablespoons.
Milk or Cream: 1-2 tablespoons. Just enough to get the right drizzling consistency.
Step-by-Step Instructions
Step 1: Preheat & Prep Pan
First things first, get your oven preheating to 350°F (175°C). Then, grab an 8×8 inch baking pan. I like to line mine with parchment paper, leaving some overhang on the sides. This is my secret trick for easy removal – no more sticking or struggling to get the bars out! Just grease the pan lightly, lay the parchment in, and crease the corners so it stays put.
Step 2: Mix Dry Ingredients
In a large bowl, whisk together your rolled oats, all-purpose flour, baking soda, and salt. Give it a good mix until everything is evenly distributed. You want to make sure the leavening agent and salt are spread out so you don’t get any weird pockets of flavor or texture.
Step 3: Mix Wet Ingredients
In a separate medium bowl, combine the creamy peanut butter, melted butter, packed brown sugar, and honey (or maple syrup). Stir this until it’s well combined and looks nice and smooth. Don’t worry if it’s a little lumpy from the brown sugar; that’s totally fine. Then, whisk in the two large eggs and the vanilla extract until everything is smooth and emulsified. This mixture will smell amazing!
Step 4: Combine
Now, pour the wet ingredients into the bowl with the dry ingredients. Using a spatula or a wooden spoon, gently fold everything together until it’s just combined. Be careful not to overmix here! Overmixing can lead to tough bars, and nobody wants that. You should see no dry streaks of flour remaining, but it’s okay if there are still a few small pockets of oats visible.
Step 5: Prepare Filling
If you’re adding a filling, this is the time to get it ready. Just gently stir in your chocolate chips, chopped nuts, or dried fruit into the oat mixture. I like to reserve a few chocolate chips to sprinkle on top before baking for extra visual appeal.
Step 6: Layer & Swirl
Spoon the batter into your prepared baking pan. Use the spatula or your hands (lightly dampened if it’s sticky) to press the mixture evenly into the pan. Make sure it’s pressed down firmly, especially in the corners, so the bars hold together well. If you want a marbled effect or a distinct layer, you can press half the batter in, sprinkle your filling over it, and then top with the remaining batter, pressing gently. For a more uniform bar, just press it all in evenly.
Step 7: Bake
Pop the pan into your preheated oven. Bake for about 25-30 minutes. You’re looking for the edges to be golden brown and the center to be set. A toothpick inserted into the center should come out with moist crumbs attached, but not wet batter. Keep an eye on it towards the end of baking, as ovens can vary!
Step 8: Cool & Glaze
This is perhaps the hardest part: letting them cool! Once they come out of the oven, let them cool in the pan on a wire rack for at least 30 minutes. This is crucial for them to set properly. If you try to cut them too soon, they’ll crumble. Once they’re mostly cool, you can prepare the glaze. Whisk together the powdered sugar, peanut butter, and milk (start with 1 tablespoon and add more if needed) until you have a smooth, drizzly consistency. Drizzle this over the cooled bars. Let the glaze set for about 15-20 minutes before slicing.
Step 9: Slice & Serve
Once the glaze has set (or if you skipped the glaze!), use the parchment paper overhang to lift the whole slab out of the pan onto a cutting board. Use a sharp knife to cut them into bars. I usually get about 12 good-sized bars. Serve them at room temperature for the best chewy texture. They’re also delicious slightly warm, but make sure they’ve cooled enough so they don’t fall apart.
What to Serve It With
These peanut butter granola bars are superstars on their own, but they also play well with others! For BREAKFAST, I love pairing them with a hot cup of coffee or a steaming mug of herbal tea. They’re a perfect grab-and-go option for busy mornings when you just need something filling. For BRUNCH, they add a delightful homemade touch to any spread. I often cut them into smaller, bite-sized pieces and arrange them on a platter alongside fresh fruit and yogurt parfaits. They feel a bit more elegant that way. As DESSERT, they’re surprisingly satisfying. A little square after dinner with a glass of milk or even a scoop of vanilla ice cream is pure indulgence! For COZY SNACKS, they’re my absolute favorite. They’re perfect with a glass of cold milk after school for the kids, or enjoyed with a warm cup of chai while I’m curled up with a book. My family also loves them after a hike or a long bike ride; they’re just the right amount of energy-boosting fuel without being too heavy.
Top Tips for Perfecting Your Peanut Butter Granola Bars
I’ve made these peanut butter granola bars so many times, and along the way, I’ve picked up a few tricks that I think make all the difference. Here are some of my top tips:
Oat Prep: While you don’t need to toast the oats, using fresh, old-fashioned rolled oats is key. They provide the best chew and texture. If your oats have been hanging around for ages, they might be a little stale and won’t give you that satisfying bite. You can find them in any grocery store, and they’re pretty affordable.
Mixing Advice: The biggest mistake I see people make is overmixing the batter. Once you combine the wet and dry ingredients, mix *just* until everything is incorporated. Overworking the flour develops gluten, which can make your bars tough and dry instead of perfectly chewy. I always use a spatula and fold gently – it’s hard to overdo it that way!
Pressing is Key: Don’t be shy when you’re pressing the mixture into the pan! Really pack it down firmly and evenly. This is what ensures your bars hold their shape when you cut them. If you press it loosely, they’ll likely crumble apart when you try to serve them. I sometimes use the bottom of a measuring cup to get an extra-firm, even layer.
Ingredient Swaps: Peanut butter is my go-to, but feel free to experiment! Almond butter, cashew butter, or even a sunflower seed butter for a nut-free option work beautifully. Just be aware that different nut butters have different oil contents and consistencies, so you might need to slightly adjust the liquid ingredients or sweetener. For the sweetener, while brown sugar and honey give that classic flavor, you can use maple syrup for a vegan option (just ensure your oats and any additions are also vegan-friendly!).
Baking Tips: Ovens really do vary, so start checking your bars around the 23-minute mark. You’re looking for that beautiful golden-brown edge and a center that looks set. If the tops are browning too quickly but the inside isn’t done, you can loosely tent the pan with aluminum foil for the last few minutes of baking.
Glaze Variations: If you’re not a fan of the powdered sugar glaze, that’s totally okay! You can skip it altogether, and they’ll still be delicious. Alternatively, you could dust them with a little extra powdered sugar once cooled, or even drizzle them with melted dark chocolate. A little sprinkle of flaky sea salt on top of the glaze or chocolate drizzle is also divine!
Storing and Reheating Tips
The great thing about these peanut butter granola bars is that they store really well, making them perfect for meal prep. At ROOM TEMPERATURE, they’ll stay fresh for about 3-4 days if you store them in an airtight container. I usually keep mine in a lidded container on the counter. If you plan on keeping them longer, REFRIGERATOR STORAGE is your best bet. They’ll last up to a week, sometimes even 10 days, in an airtight container in the fridge. They’ll firm up a bit in the fridge, which makes them even easier to slice. For FREEZER INSTRUCTIONS, wrap each bar individually in plastic wrap, then place them all in a freezer-safe bag or container. They’ll keep for up to 3 months. Thaw them at room temperature for a couple of hours before enjoying. I usually add the GLAZE TIMING advice slightly differently depending on how I’m storing them: if I plan to eat them within a day or two, I glaze them before slicing and storing. If I’m freezing them or storing them for longer, I often skip the glaze initially and drizzle it on fresh just before serving to prevent it from getting sticky or cracking. But honestly, even without the glaze, they are absolutely delicious!
Frequently Asked Questions
Final Thoughts
So there you have it – my go-to recipe for the most delicious, satisfying, and downright cheerful peanut butter granola bars! They’re the kind of treat that makes you feel good, both from the wholesome ingredients and the joy of making them yourself. They’re perfect for those busy mornings, pre-workout boosts, or just when you need a little something sweet to brighten your day. If you love these, you might also enjoy my Chewy Chocolate Chip Cookie Bars or my No-Bake Energy Bites – they’re in a similar vein of easy, delicious goodness! I really hope you give these peanut butter granola bars a try. I can’t wait to hear how they turn out for you and what delicious additions you might experiment with. Happy baking (or no-baking, in this case)!
Peanut Butter Granola Bars
Ingredients
Main Ingredients
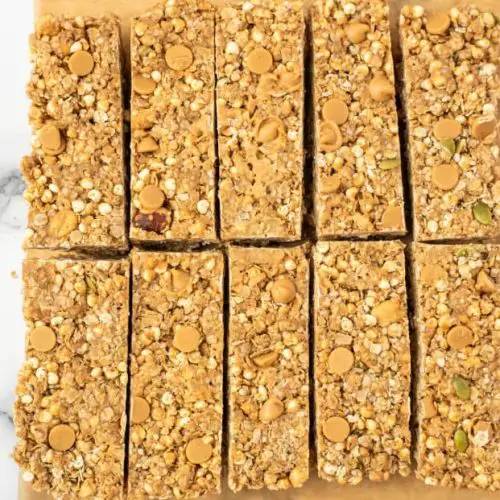
- 2 cups quick cook oats
- 1 cup puffed rice I used millet
- 0.5 cup nuts A combo of peanuts, pumpkin seeds, and hemp seeds
- 0.75 cup creamy peanut butter
- 0.5 cup honey
- 2 teaspoon cinnamon
- 0.5 cup peanut butter chips Optional
Instructions
Preparation Steps
- Spread oats on a cookie sheet and bake in a 325 degree oven for 2-3 minutes. This step is optional.
- Line a 9-inch square dish with parchment paper, set aside.
- In a large bowl, combine toasted oats, puffed rice, and nuts/seeds.
- Place peanut butter and honey in a glass bowl. Heat for 30 seconds in the microwave to soften for easier mixing.
- Add cinnamon and mix until combined.
- Pour cinnamon peanut butter over dried oats mixture. Stir just until combined. Fold in peanut butter chips if desired.
- Press into prepared pan. Refrigerate for one hour. Overnight is best.
- Remove from pan by lifting the parchment paper. Cut into bars. Store for up to 5 days in an airtight container.


