


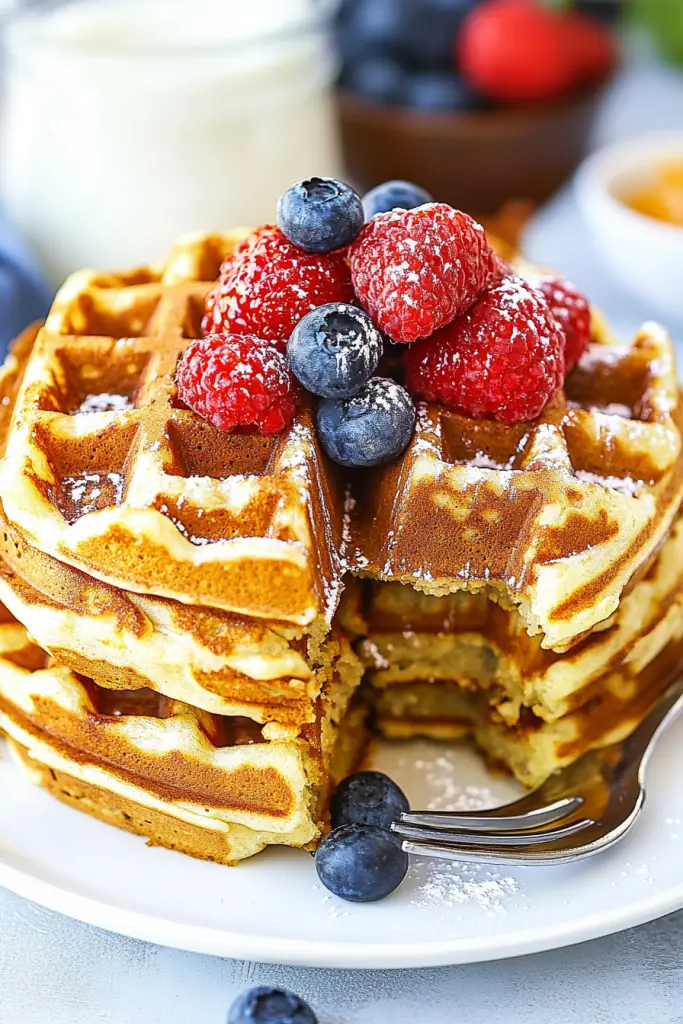
There’s just something about the smell of waffles cooking in the morning that takes me right back to childhood weekends filled with laughter and syrup-smudged smiles. I remember my mom’s waffle maker always humming in the corner of the kitchen while we hurriedly set the table, totally captivated by the golden clouds of goodness soon to hit our plates. If you’re anything like me, waffles often feel a little like a special treat, but this recipe is a game changer—easy enough for a weekday breakfast, yet impressive enough to impress company. Unlike pancakes, which can sometimes turn out soggy or flat if you’re not careful, waffles come out crisp on the outside with a cloud-like softness inside that’s just *chef’s kiss*. Plus, whether you’re a berry lover, a cinnamon fanatic, or here just for the melt-y butter and maple syrup, these waffles have you covered. Trust me, once you try these, your waffle weekends will never be the same.
What is waffles?
Think of waffles as the delightful lovechild of pancake batter and a fancy iron griddle that gives you those iconic grid indentations perfect for holding all your favorite toppings. They’re essentially batter cooked in a waffle iron until golden and crispy on the outside, tender and fluffy inside. The name “waffle” traces back to Middle Dutch “wafel,” and the dish itself has been a staple across Europe for centuries, beloved for its distinct texture and perfect bite. But what makes waffles really stand out is their versatility—you can go sweet, savory, loaded, or plain—and the fact they’re generally quick to whip up. If you can make pancakes, you can definitely make waffles, with just a little twist in technique and tools. It’s a comfort food that’s approachable, and feels fancy all at once.
Why you’ll love this recipe?
What I love most about this waffle recipe is how ridiculously easy it is to get consistently fluffy, tender waffles that still have that perfect crispy crust on the outside. The batter comes together in minutes, and there’s zero weird ingredients—just good old flour, eggs, milk, and a touch of vanilla that makes every bite smell like a cozy hug. The flavor is that classic slightly sweet, buttery goodness that makes your kitchen smell like a diner. You honestly don’t need to buy a million toppings to enjoy these; they’re great on their own, or you can pile fresh fruit and syrup on top like I often do when my kids raid the fridge. Plus, I always buy ingredients that won’t break the bank—flour, eggs, and milk, staples you probably have on hand already.
Another reason I keep coming back to this waffle recipe is the versatility. It works for breakfast, brunch, or even a sweet snack later in the day. Sometimes I’ll swap in almond milk or buttermilk when I want a richer flavor or a little tang. I’ve also added cinnamon and nutmeg on cozy fall mornings, which adds a lovely spicy twist. Compared to recipes that require weird culturing or long resting times, this one’s ready faster than you can finish your coffee. And bonus: if you’re pressed for time, the leftovers freeze beautifully and reheat perfectly in the toaster or oven, just like freshly made. I’ve made these countless times, and with each batch, they disappear in minutes—no exaggeration.
How do you make waffles?
Quick Overview
Mix your dry ingredients together, whisk the wet ones separately, then combine without overmixing—the secret to fluffy waffles. From there, simply preheat your waffle iron, cook the batter in batches, and if you want to get fancy, add a simple glaze or a swirl of filling. This method is foolproof and quick—I swear it’s one of the easiest recipes in my repertoire. Even on busy mornings, I can have delicious waffles on the table in under 30 minutes. Plus, the batter never disappoints, whether you want plain waffles or jazz them up with a little twist.
Ingredients
For the Main Batter:
- 2 cups all-purpose flour – I like to use unbleached for a subtly nutty flavor
- 2 tablespoons granulated sugar – balances the batter just right
- 1 tablespoon baking powder – helps with that airy fluffiness
- 1/2 teaspoon salt – rounds out the sweetness
- 1 3/4 cups milk – whole milk is best, but almond or oat milk work great too!
- 2 large eggs – room temperature for better mixing
- 1/3 cup melted unsalted butter – adds richness and crispiness
- 1 teaspoon vanilla extract – the magic touch that smells phenomenal when cooking
For the Filling:
- Optional: 1 cup fresh berries or chopped nuts – fold into the batter or layer inside
- Optional: Cinnamon sugar mix – for a maple-cinnamon swirl (more on this below)
For the Glaze:
- 1/2 cup powdered sugar
- 1–2 tablespoons milk or lemon juice – for desired consistency
- Optional: A splash of vanilla or almond extract for flavor variations
Step-by-Step Instructions
Step 1: Preheat & Prep Pan
Always start by preheating your waffle iron until it’s nice and hot—that way you get a crisp exterior from the moment the batter hits the grill. While it’s warming, lightly brush or spray the plates with melted butter or a neutral oil. I’ve learned that even a tiny bit of butter keeps waffles from sticking without burning. If your iron has adjustable temperature, set it to medium-high for golden brown perfection. Don’t rush this step; a properly heated iron is your best friend!
Step 2: Mix Dry Ingredients
In a large bowl, whisk together the flour, sugar, baking powder, and salt. Make sure everything is well combined—this helps distribute the baking powder evenly, giving you those lovely fluffy waffles. I like to sift the flour and baking powder just to keep lumps at bay. The texture should be powdery but smooth, like a soft cloud.
Step 3: Mix Wet Ingredients
In a separate bowl, beat the eggs lightly then whisk in the milk, melted butter, and vanilla extract. The butter should be warm but not hot, or you risk cooking the eggs early and getting a grainy texture. The wet mixture should look smooth and glossy; if you want, you can add a pinch of cinnamon here for a warm hint of spice.
Step 4: Combine
Pour the wet ingredients into the dry and gently fold together. This part is crucial—overmixing leads to tough waffles, and nobody wants that. Fold just until you no longer see dry patches of flour. The batter will be slightly lumpy but that’s completely fine. If you want to fold in berries or nuts, do so at this point, but don’t overdo it to keep your batter light.
Step 5: Prepare Filling
If you’re going for a cinnamon sugar swirl (which I highly recommend), mix together 1/4 cup brown sugar with 1 tablespoon ground cinnamon. You can spoon this into the waffle iron after pouring batter, then use a knife or skewer to gently swirl it into a marbled pattern. This creates pockets of caramelized cinnamon sugar goodness inside each waffle.
Step 6: Layer & Swirl
Start by pouring half the batter into the center of the waffle iron, add dollops of the cinnamon sugar or berries if using, then top with the remaining batter. Use a knife or skewer to swirl filling through the batter in a figure-eight or spiral motion. This step makes your waffles look extra bakery-fancy and ensures every bite has bursts of flavor.
Step 7: Bake
Close the waffle iron and let the magic happen. Depending on your appliance, it typically takes 4 to 6 minutes per waffle. Don’t peek too early or you risk breaking the waffle apart, but if your iron has an indicator light, trust it. You’re aiming for a deep golden brown crust and crispy edges. The waffle should release easily when it’s ready.
Step 8: Cool & Glaze
Transfer waffles to a wire rack to cool slightly; this keeps them from steaming and getting soggy underneath. If you want to glaze, mix powdered sugar with milk or lemon juice until it’s thick but pourable, then drizzle sweet ribbons over warm waffles. The glaze adds just a hint of sweetness and looks pretty too. If you prefer syrup or whipped cream, those work beautifully as well.
Step 9: Slice & Serve
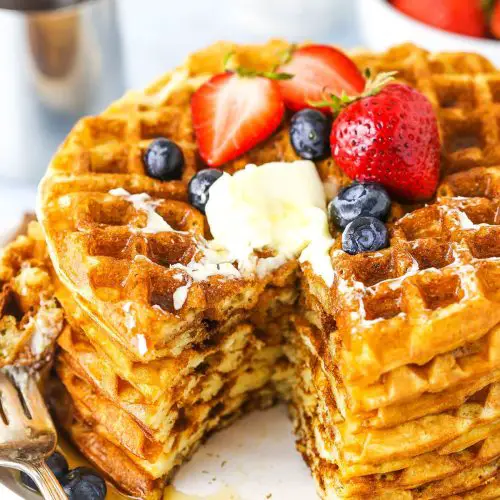
Stack waffles on a plate or slice into wedges if you’ve made a larger batch to share. Serve warm with butter, syrup, fresh fruit, or even bacon on the side for a sweet-savory combo that’s always a hit in my house. My kids actually ask for seconds when I top theirs with a sprinkle of powdered sugar and fresh strawberries. It smells like Sunday morning in every bite.
What to Serve It With
For Breakfast: Pair your waffles with a rich cup of coffee or a steaming cappuccino, plus a side of scrambled eggs or breakfast sausage. Nothing beats that cozy morning feeling of syrup drip mixed with smoky breakfast meat on your tongue.
For Brunch: Dress up your waffles with dollops of mascarpone or cream cheese, fresh berries, and a drizzle of honey or flavored syrup. Add a mimosa or a fresh-pressed juice, and your brunch guests will be raving.
As Dessert: Try serving waffles topped with a scoop of vanilla ice cream, warm apple compote, or chocolate sauce. The contrast between warm waffles and cold ice cream always feels indulgent, yet easy.
For Cozy Snacks: When the afternoon slump hits, waffles with a sprinkle of powdered sugar and a cup of chai tea or hot chocolate feel like a warm hug. I sometimes make mini waffles for snack sizes—kids love them, and honestly, so do I.
My family has a few traditions around waffles: on holidays, we often turn these into “waffle sandwiches” with Nutella and banana slices; during the school year, a batch of waffles in the freezer makes for a lifesaver on busy mornings. The best part? Waffles are forgiving enough to experiment with toppings and accompaniments, so you can keep discovery alive.
Top Tips for Perfecting Your Waffles
Mixing Advice: Always be gentle when combining wet and dry ingredients. A few lumps won’t hurt, but overmixing is the quickest way to tough waffles. I’ve learned the hard way that patience is key—fold, don’t stir!
Swirl Customization: Your swirl doesn’t have to be perfect. A lazy figure-eight or random dollops of cinnamon sugar create beautiful marbling and add flavor bursts. Don’t be afraid to experiment with chocolate spread, pureed fruit, or nut butters too.
Ingredient Swaps: I’ve swapped out up to half the milk for almond or oat milk with great success; the waffles were creamier and less dense. Using buttermilk also adds a pleasant tang and extra fluffiness. For butter, melted coconut oil works well in a pinch, though it changes the aroma slightly.
Baking Tips: Position your waffle iron away from drafty windows or vents so the batter cooks evenly. If your iron tends to brown too fast, lower the temperature slightly. When testing doneness, a golden brown color combined with no sticky batter on the surface means you’re good to go.
Glaze Variations: Adjust the glaze thickness by adding more milk or powdered sugar depending on your preference. A lemon or orange juice glaze adds a fresh zing, while maple syrup mixed into the glaze makes it decadently sweet. Drizzle right before serving for the best texture.
Prepping Ahead: Making the batter the night before helps develop flavor and gives you a head start in the morning. Just give the batter a gentle stir before cooking—sometimes it thickens overnight.
Storing and Reheating Tips
Room Temperature: Waffles can sit out covered on a wire rack for up to 2 hours. A plate with a loose foil tent works well if you’re serving soon but want to keep them crisp.
Refrigerator Storage: Store leftover waffles in an airtight container or zip-top bag in the fridge for up to 3 days. To prevent sogginess, separate layers with parchment paper.
Freezer Instructions: For longer storage, flash freeze waffles individually on a baking sheet, then transfer into a freezer-safe bag or container. They keep well for up to 2 months. To reheat, toast frozen waffles in a toaster or oven until hot and crisp. Avoid microwaving to prevent limp texture.
Glaze Timing Advice: If you’re glazing waffles to store or freeze, wait until serving to add glaze for the best texture—glaze can get sticky or too soft during refrigeration or freezing. If you want to freeze glazed waffles, use a thin drizzle or keep glaze separate.
Frequently Asked Questions
Final Thoughts
Honestly, these waffles have become a weekend ritual in our home, a little slice of warmth and sweetness that’s both nostalgic and comforting. From the first golden crisp bite to the last dribble of maple syrup, they bring everyone to the table with smiles and full bellies. If you love the smell of vanilla and butter dancing in the air, and crave that perfect balance between soft and crunchy, this recipe is your new go-to. Feel free to experiment with whatever you have on hand—I’m always mixing in different spices or toppings, keeping things fun. And hey, if you try it, drop me a comment; I’d love to hear how your kitchen smells and what toppings you choose! Happy baking!
waffles
Ingredients
Main Ingredients
- 2 cups all purpose flour
- 0.25 cups sugar
- 4 teaspoons baking powder
- 0.5 teaspoons salt
- 0.25 cups unsalted butter melted
- 2 cups milk
- 2 large eggs
- 2 teaspoons vanilla extract
Instructions
Preparation Steps
- Preheat your waffle iron according to manufacturer's instructions.
- In a medium bowl, whisk together the flour, sugar, baking powder, and salt.
- In a separate bowl, melt the butter and stir in a few tablespoons of milk to combine.
- Add the remaining milk, eggs, and vanilla extract to the butter mixture and whisk well to combine.
- Pour the wet ingredients into the dry ingredients and gently whisk until just combined. The batter should be a bit lumpy; do not overmix.
- Pour batter onto the preheated waffle iron and cook according to manufacturer’s instructions until golden and crisp.
- Serve warm with your favorite toppings.


