


Oh, hello there! Pull up a chair and let’s chat about something truly magical: Pistachio Fudge. You know, the kind that melts in your mouth, bursting with that irresistible nutty goodness and a hint of creamy sweetness. This isn’t just any fudge; this is the stuff of my childhood dreams, the recipe that always brings a smile to everyone’s face. It reminds me of those cozy evenings spent in my grandma’s kitchen, the air thick with the aroma of something wonderful baking. While Chocolate Fudge is a classic, there’s just something about the vibrant green and delicate flavor of pistachios that feels a little more sophisticated, a little more special. If you’ve ever tried those fancy truffles from a gourmet shop, this pistachio fudge comes pretty darn close, but it’s made right in your own kitchen. It’s the perfect little treat when you need a pick-me-up, or when you want to impress without spending hours in a hot kitchen. Seriously, this fudge is a lifesaver!
What is pistachio fudge?
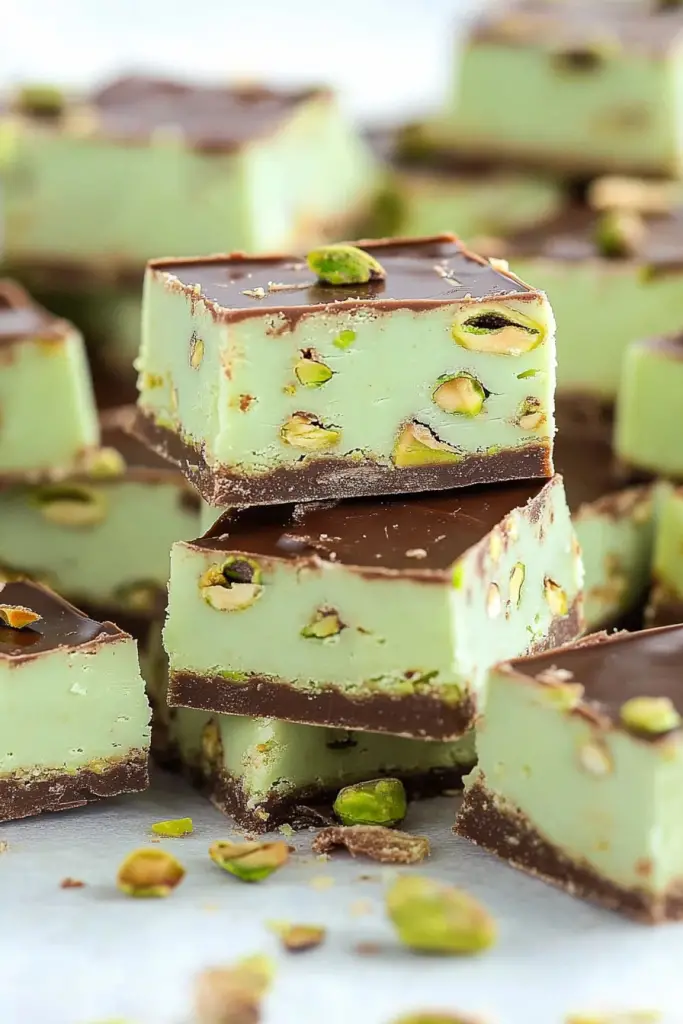
So, what exactly *is* this delightful Pistachio Fudge? Think of it as a sweet, creamy, intensely flavored confection, where the star of the show is undoubtedly the pistachio. Unlike your typical chocolate fudge that often relies on cocoa powder or melted chocolate, this version gets its rich flavor and beautiful color from finely ground pistachios. It’s essentially a glorious marriage of Sweetened Condensed Milk, butter, sugar, and those wonderful green nuts, cooked just right to achieve that perfect, yielding texture. It’s smooth, it’s rich, and it’s packed with that unique, slightly sweet, slightly earthy taste that only pistachios can deliver. It’s not overly complicated, but it requires a little bit of patience and attention to get that perfect consistency. It’s the kind of treat that feels indulgent but is surprisingly approachable for any home baker. It’s essentially a little piece of heaven in every bite, without being overly fussy.
Why you’ll love this recipe?
There are so many reasons why I absolutely adore this Pistachio Fudge and why I just *know* you will too. First off, let’s talk about the flavor. Oh, the flavor! It’s not just sweet; it’s a complex, nutty symphony. The pistachios bring this incredible depth that’s unlike any other fudge out there. It’s delicate enough to appreciate the subtle nuances, but bold enough to satisfy any sweet craving. Then there’s the simplicity of it all. Seriously, once you get the hang of it, this fudge comes together remarkably quickly. It’s one of those recipes I pull out when I’m short on time but still want to make something really special. And the cost-efficiency? Compared to buying gourmet fudge, making this at home is incredibly budget-friendly, especially if you can snag pistachios on sale. You get so much deliciousness for a fraction of the price. What I love most about this recipe, though, is its versatility. It’s beautiful on its own, but you can totally dress it up with a drizzle of white chocolate or a sprinkle of extra chopped pistachios. It’s perfect for holidays, special occasions, or just because you deserve a little treat. If you’re a fan of my White Chocolate Bark or my Candied Pecans, you’ll appreciate the focus on quality ingredients and simple techniques that yield such incredible results. This Pistachio Fudge truly hits all the right notes.
How do you make pistachio fudge?
Quick Overview
Making this Pistachio Fudge is a straightforward process that involves cooking a few key ingredients together until they reach the perfect stage. We’ll be heating butter, sugar, and sweetened condensed milk, stirring in our star ingredient – the pistachios – and then letting it all set up beautifully. The magic happens in how long you cook it; get it just right, and you’ll have smooth, melt-in-your-mouth fudge. It’s really that simple. No complicated tempering or fancy equipment needed, making it totally doable for anyone looking for a delicious homemade candy.
Ingredients
For the Main Fudge Base:
You’ll need unsalted butter, a good quality sweetened condensed milk (full fat is best for richness!), granulated sugar for that perfect sweetness, and of course, the star of the show: shelled, unsalted pistachios. For the best flavor and color, I highly recommend using raw pistachios that you’ll grind yourself. Pre-shelled ones can sometimes be a little dry. You’ll also want a touch of vanilla extract to round out the flavors and a pinch of salt to balance the sweetness.
For the Optional Drizzle/Garnish:
Sometimes, I like to elevate this fudge even further. A little bit of good quality White Chocolate for melting and drizzling over the top adds a lovely contrast in both flavor and appearance. A few extra chopped pistachios for sprinkling on top are also a great idea for texture and visual appeal. This part is totally optional, but oh-so-pretty!
For Preparing Your Pan:
A square baking pan (8×8 or 9×9 inches) is perfect. You’ll need parchment paper to line it so your fudge doesn’t stick, and a little bit of butter or non-stick spray to grease the parchment paper itself, ensuring easy removal.
Step-by-Step Instructions
Step 1: Preheat & Prep Pan
First things first, let’s get our workspace ready. Preheat your oven to 350°F (175°C). While the oven heats up, line your 8×8 or 9×9 inch baking pan with parchment paper, leaving some overhang on the sides. This overhang acts as handles to lift the fudge out later. Once the parchment is in place, lightly grease it with a little butter or non-stick cooking spray. This extra step ensures your precious fudge slides out effortlessly. Don’t skip it!
Step 2: Mix Dry Ingredients
We’re going to start by preparing our pistachios. Take your shelled, unsalted pistachios and place them in a food processor. Pulse them until they are finely ground. You want a consistency that’s almost like a coarse flour, but with some tiny pieces still visible. Be careful not to over-process them into a paste, unless you want a very different texture. Set your ground pistachios aside. In a medium bowl, I like to whisk together the ground pistachios, that pinch of salt, and the vanilla extract. This way, everything is ready to go when we need it.
Step 3: Mix Wet Ingredients
In a heavy-bottomed saucepan, combine the unsalted butter, granulated sugar, and the entire can of sweetened condensed milk. Place the saucepan over medium heat. Stir constantly with a wooden spoon or heatproof spatula. You want to make sure the butter is fully melted and the sugar is dissolved. Keep stirring to prevent anything from scorching on the bottom of the pan. It’s important to use a heavy-bottomed pot here to distribute heat evenly.
Step 4: Cook the Mixture
Now for the cooking part! Continue to cook the mixture over medium heat, stirring *constantly*. This is where the magic happens and the fudge thickens. You’ll notice it start to bubble and thicken gradually. Keep stirring, scraping the bottom and sides of the pan. You’re looking for the mixture to reach the “soft-ball stage,” which is around 235-238°F (113-114°C) on a candy thermometer. If you don’t have a thermometer, a good test is to drop a small amount of the mixture into a glass of ice water. It should form a soft, pliable ball that flattens when you press it.
Step 5: Add the Pistachios
Once your fudge mixture has reached the correct temperature and consistency, remove the saucepan from the heat immediately. Stir in your prepared ground pistachios and vanilla extract. Mix thoroughly until everything is well combined and the nuts are evenly distributed throughout the fudge mixture. This is when you’ll start to see that gorgeous pale green hue developing. Work quickly but carefully.
Step 6: Pour into Pan & Swirl (Optional)
Pour the hot fudge mixture into your prepared baking pan. Spread it out evenly using your greased spatula. If you’re adding the optional White Chocolate drizzle, now’s the time! Melt about 1/2 cup of white chocolate chips in a microwave-safe bowl in 30-second intervals, stirring in between, until smooth. Drizzle the melted white chocolate over the fudge in a decorative pattern. Then, using a toothpick or the tip of a knife, gently swirl the white chocolate into the pistachio fudge to create a marbled effect. This step isn’t essential for flavor but makes it look extra special!
Step 7: Cool & Set
Let the fudge cool at room temperature for about 2-3 hours, or until it’s firm to the touch. You can also speed this up by placing it in the refrigerator for about an hour, but I find it sets up better when allowed to cool naturally at room temperature. You want it to be completely set before you try to cut it. Resist the urge to poke it too much!
Step 8: Slice & Serve
Once the fudge is completely firm, use the parchment paper overhangs to lift the entire block out of the pan. Place it on a cutting board. For neat slices, I like to use a sharp knife that’s been dipped in hot water and dried. Cut the fudge into small squares. If you’ve drizzled it with white chocolate and sprinkled extra nuts, now’s the time to admire your beautiful creation!
Step 9: Chill (Optional, for easier cutting)
If your fudge seems a little too soft for slicing, pop it back into the fridge for about 20-30 minutes before cutting. This makes it much easier to get clean edges. Once cut, you can arrange it on a serving platter. This Pistachio Fudge is best served at room temperature, so let it sit out for a few minutes before indulging.
What to Serve It With
This Pistachio Fudge is so versatile, it fits perfectly into almost any occasion. For breakfast or brunch, it’s a delightful little sweet bite to accompany a strong cup of coffee or a creamy latte. Imagine a slice of this alongside a fluffy omelet or some fresh fruit salad – pure bliss! As a dessert, it’s wonderfully elegant. Serve small squares alongside a scoop of vanilla bean ice cream, or pair it with a rich espresso. It’s that little something sweet that rounds off a meal perfectly. And for those cozy snack moments? Oh, it’s a dream! This fudge is the ideal companion to a warm mug of tea on a chilly afternoon or a glass of milk for a late-night treat. My kids always ask for this when they want something sweet after dinner, and it’s so much easier than baking cookies! We’ve also found it to be a fantastic addition to holiday cookie platters, standing out with its unique flavor and beautiful color. It’s a guaranteed crowd-pleaser, no matter how you serve it.
Top Tips for Perfecting Your Pistachio Fudge
Making delicious Pistachio Fudge really comes down to a few key techniques and understanding how the ingredients behave. Let’s dive into some of my hard-won wisdom!
Pistachio Prep: For the best flavor and color, always use good quality, unsalted pistachios. Grinding them yourself in a food processor gives you control over the texture. You want a fine grind, but not a paste. If you find your raw pistachios aren’t bright green enough, sometimes roasting them very gently (like 5-7 minutes at 300°F) can enhance their color and flavor. Just be sure to let them cool completely before grinding.
Mixing Advice: The constant stirring is non-negotiable when cooking the fudge base. This prevents scorching and ensures an even texture. I’ve learned the hard way that using a good, heavy-bottomed saucepan makes a huge difference. It distributes heat much more evenly, reducing the risk of hot spots burning your fudge. Watch the color change as it cooks – it will get a slightly deeper hue. Don’t rush this step!
Cooking to the Right Stage: This is probably the MOST crucial part. Using a candy thermometer is highly recommended for accuracy. Aim for that soft-ball stage (235-238°F or 113-114°C). If you don’t have a thermometer, the ice water test is your best friend. Too short, and your fudge will be too soft and greasy; too long, and it will be hard and crumbly. Trust the thermometer, or the ice water test!
Ingredient Swaps: While this recipe is fantastic as is, I’ve experimented a bit. If you find your sweetened condensed milk is a bit thick, you might need to cook the fudge base a touch longer. For a dairy-free version, I haven’t personally tested it, but I’d imagine a high-fat coconut milk (the thick cream from the top) might work, though the flavor profile will change significantly. Stick with full-fat dairy condensed milk for the classic, best results.
Pan Preparation: Don’t skimp on lining your pan with parchment paper and greasing it. This makes removing the fudge so much easier, preventing frustration and ensuring you get perfect squares. If your fudge sticks, it’s usually because this step was rushed or skipped!
Cooling and Cutting: Allowing the fudge to cool completely at room temperature is key to achieving the right texture. If you cut it too soon, it can crumble. If you find it still a bit soft for clean cuts, chilling it briefly in the fridge before slicing can really help. Using a sharp, hot knife will give you the cleanest edges. A little patience here goes a long way!
Storing and Reheating Tips
One of the best things about this Pistachio Fudge is how well it keeps! You can store it at room temperature for up to a week if it’s kept in an airtight container. I usually line a tin or a container with a piece of parchment paper before adding the fudge, then pop the lid on tight. This helps maintain its perfect texture and prevents it from drying out or picking up any unwanted odors. If your kitchen is particularly warm, though, or if you plan to keep it for longer than a week, the refrigerator is your best bet. In the fridge, it can last for a good two to three weeks, and it will be firmer, which some people actually prefer! Just remember to let it come back to room temperature for about 15-20 minutes before serving if you’ve stored it in the fridge, so it regains that lovely melt-in-your-mouth quality.
For longer-term storage, freezing is absolutely an option. Wrap individual pieces tightly in plastic wrap, then place them in a freezer-safe bag or container. It can last in the freezer for up to 2-3 months. When you’re ready to enjoy it, just transfer the frozen fudge to the refrigerator to thaw overnight, and then let it sit at room temperature for a bit. The glaze timing is important here too – if you’re freezing it with a white chocolate drizzle, make sure the chocolate is completely set before wrapping and freezing. You don’t want it to crack or smudge.
Frequently Asked Questions
Final Thoughts
So there you have it – my absolute favorite Pistachio Fudge recipe! I really hope you’ll give this one a try. It’s more than just a sweet treat; it’s a little piece of comfort, a nod to happy memories, and a testament to how simple ingredients can create something truly spectacular. The texture, the nutty flavor, that beautiful pale green color – it’s just perfection. It’s one of those recipes that always feels special, no matter how many times I make it. If you love the nutty goodness of pistachios, you might also want to check out my recipe for Pistachio Biscotti – they’re divine with a cup of coffee! I’m so excited for you to experience this fudge. Don’t be shy about letting me know how yours turns out in the comments below, and please share any variations or tips you discover. Happy baking (or, should I say, candy-making)! Can’t wait to hear about your delicious creations!
Pistachio Fudge
Ingredients
Main Ingredients
- 2 cups granulated sugar
- 0.5 cup unsalted butter cut into pieces
- 0.5 cup evaporated milk
- 1 teaspoon vanilla extract
- 1 cup shelled pistachios chopped
- 0.5 teaspoon almond extract (optional)
Instructions
Preparation Steps
- Line an 8x8 inch baking pan with parchment paper, leaving an overhang on the sides.
- In a medium saucepan, combine sugar, butter, and evaporated milk. Cook over medium heat, stirring constantly, until the butter is melted and the sugar is dissolved.
- Bring the mixture to a boil and cook, stirring constantly, for 5 minutes. Do not stir after it starts boiling.
- Remove from heat. Stir in vanilla extract, chopped pistachios, and almond extract (if using).
- Pour the mixture into the prepared baking pan and spread evenly.
- Let the fudge cool completely at room temperature for about 2-3 hours, or until firm.
- Once firm, lift the fudge out of the pan using the parchment paper overhang. Cut into squares.


