


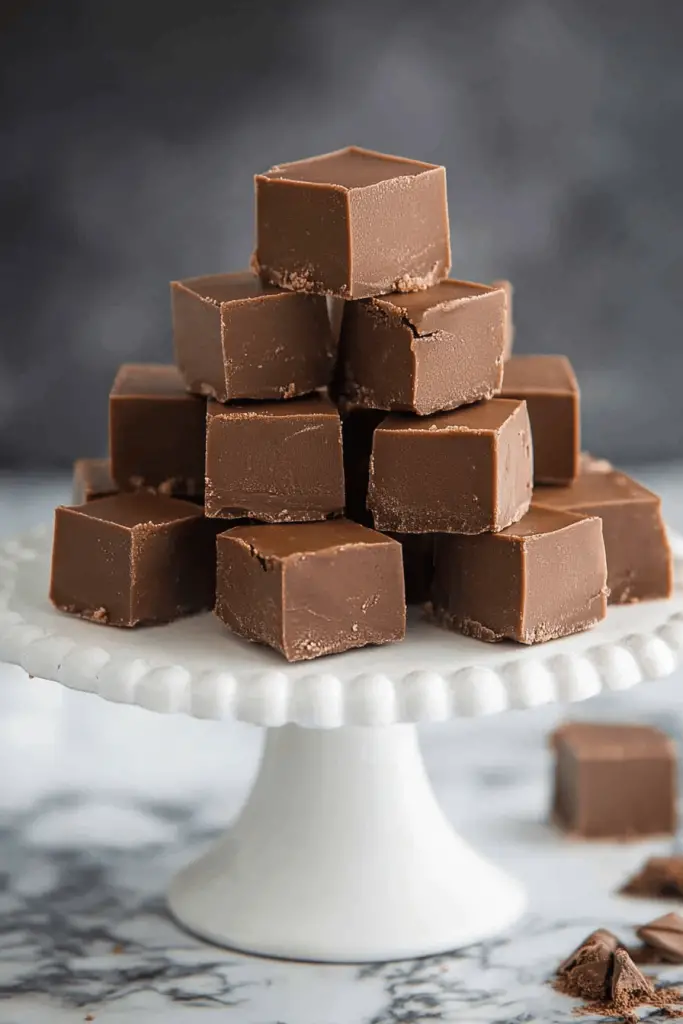
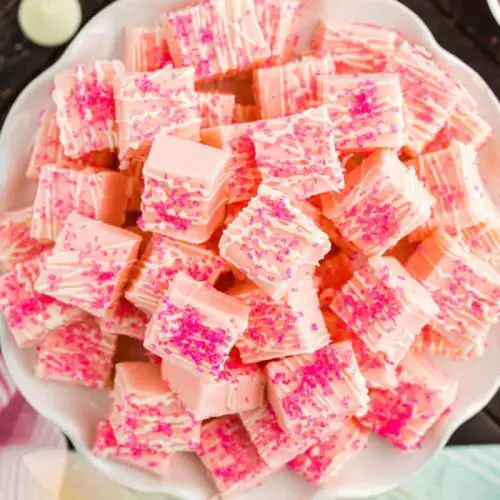
When I tell people about my pink fudge recipe, I’m really telling them about a little moment in the kitchen that never fails to spark a smile. It’s soft, creamy, and somehow a little fancy without asking for a lot of effort. I remember making a tray for a neighborhood bake sale and hearing my sister sigh, “It’s like summer in fudge form.” The pink color makes it feel special, almost like a little celebration you can slice into tidy squares. This pink fudge recipe leans into that nostalgia while staying practical enough for busy weeknights. Think of it as the grown-up version of a kid’s favorite treat—easy, accessible, and insanely comforting. If you love a bright, fruity twist in your sweets, this pink fudge recipe is your new go-to. It reminds me of strawberry ice cream swirled into a classic White Chocolate base, only it’s set up in neat, bite-sized pieces you can share with friends or tuck into lunch boxes. I often compare it to a ganache moment you can chill and cut—creamy, glossy, and utterly crave-worthy.
What is the recipe for Pink Fudge?
Pink fudge recipe is essentially a dreamy blend of white chocolate, condensed milk, and a touch of butter, tinted with pretty pink color and brightened with a hint of vanilla. Think of it as a no-bake confection that tastes almost like Strawberry Cream meets creamy vanilla fudge. The idea behind the pink hue is simple: a little pink candy melts or strawberry powder stirred in gives you that cheerful color without overwhelming the palate. It’s a forgiving recipe, too—if you don’t have a fancy garnish stock, a swirl of strawberry jam or a dab of raspberry puree can become your signature filling, turning plain fudge into something a bit more personal. It’s the kind of treat that travels well, looks pretty on a dessert board, and still feels like dessert you’d crave late at night. I’ve found this pink fudge recipe to be a lifesaver on busy nights because it comes together quickly, then rests in the fridge until you’re ready to slice. And yes, my kids actually ask for seconds of this one—which is basically the highest compliment any confection can get.
Why you’ll love this recipe?
What I love most about this pink fudge recipe is how reliable it is. It’s powerful in flavor but gentle in technique, which means you don’t have to be a master chocolatier to nail it. The base is creamy and luscious—the way white chocolate and condensed milk mingle creates a velvet texture that feels indulgent but not too heavy. The pink color keeps things cheerful on a cookie tray or holiday platter, and it photographs beautifully, which is always a bonus for food bloggers and weekend bakers alike. The simplicity is a major win: you basically melt, mix, swirl, and chill. There’s no baking to worry about, which makes this a lifesaver when you want something delightful after dinner but don’t want to turn the kitchen Upside Down. Budget-wise, the ingredients are friendly, and you can switch the color or flavor profile in seconds for a party-ready variation. If you like a bit of contrast, you can swirl in a teaspoon of raspberry puree or a dollop of strawberry jam—the result is a pretty marbled ribbon that feels like a personal touch. This pink fudge recipe also stands up well to substitutions for dietary needs—dairy-free options via coconut milk and vegan white chocolate exist, and the texture still stays luxuriously smooth when you test those swaps.
How do I make pink fudge?
Quick Overview
Here’s the quick version: melt white chocolate with a little butter and Sweetened Condensed Milk, stir in pink coloring, and fold in a bit of salt and vanilla. Pour half the glossy batter into a lined pan, dollop your filling and swirl it in to create a pretty marbled effect, then top with the remaining batter. Chill until firm, glaze if you like, and slice into squares. The beauty of this method is that there are few moving parts, and you can customize the swirl and glaze to your heart’s content. In about 20 minutes of hands-on time plus chilling, you’ve got a tray of pink fudge that tastes like a nostalgic treat and looks like a party centerpiece.
Ingredients
For the Main Batter:
- 2 cups (about 12 oz) White Chocolate chips or chopped white chocolate
- 1 can (14 oz) sweetened condensed milk
- 2 tablespoons unsalted butter
- 1 teaspoon vanilla extract
- 1/4 teaspoon salt
- 2 tablespoons pink candy melts or 1 tablespoon strawberry powder + a few drops pink gel food coloring, as desired
For the Filling:
- 2 tablespoons strawberry jam or raspberry puree (swirl-in option)
- Optional: 1 teaspoon lemon zest for a bright contrast
For the Glaze:
- 1/3 cup white chocolate chips
- 1 teaspoon heavy cream (or milk for a thinner glaze)
- 1–2 drops pink gel food coloring
- Optional: extra strawberry powder or finely chopped freeze-dried berries for texture
Step-by-Step Instructions
Step 1: Preheat & Prep Pan
Line a 8×8 inch square pan with parchment paper, leaving a bit of overhang for easy removal. I always butter the parchment lightly so the edges release cleanly. A quick spray of nonstick spray can help, too. If you’re outdoors or dealing with a warm kitchen, chill the pan for a minute before you start so the chocolate doesn’t seize when you melt it. Pro tip: have your filling ready and swirl-ready before you pour the batter. This is where a tidy setup makes all the difference in the final look of your fudge.
Step 2: Mix Dry Ingredients
In a small bowl, whisk together the salt and any dry pink color you’re using—candy melts or powder. This ensures the color distributes evenly rather than settling in one spot. If you’re using pink candy melts, you’ll melt them separately in Step 3, but giving the color a little boost now helps it blend smoothly once everything is melted together.
Step 3: Mix Wet Ingredients
In a heavy saucepan over low heat, melt the butter with the white chocolate chips, stirring frequently until smooth. Once melted, whisk in the sweetened condensed milk, vanilla, and salt. Keep the heat gentle; you want a glossy, pourable texture, not a grainy one. If your chocolate looks thick or clumpy, a quick whisk off the heat will usually fix it. Now, fold in the pink coloring—start with a small amount and add a touch more until you’ve reached your preferred rosy shade. I usually go for a soft, candy-floss pink that’s visible but not overpowering.
Step 4: Combine
Pour the warm wet mixture over your prepared dry mix and stir until the color is uniform and the batter is smooth and thick enough to coat the back of a spoon. You want it glossy and luscious, not runny. If you’re swirling in jam or puree, this is the moment to fold in a tablespoon or two in a couple of quick folds so you get pretty ribbons rather than a muddy swirl.
Step 5: Prepare Filling
If you’re going for a filling swirl, warm the strawberry jam or raspberry puree just until it loosens enough to drop ribbons into the batter. Don’t overheat—you want a loose sauce, not a syrup. For a more intense flavor, whisk in a tiny bit of lemon zest. Spoon dollops of the filling across the surface of the batter in the prepared pan. A teaspoon or two is plenty—you’re aiming for marbling, not flooding.
Step 6: Layer & Swirl
Take a butter knife or skewer and swirl the filling through the batter in a figure-eight motion to create pretty ribbons. Don’t overwork it; you want distinct pink streaks that catch the light when you slice the fudge later. If you want more pronounced swirls, add a second layer of filling and swirl again lightly. The look matters almost as much as the taste here—this fudge should feel festive and inviting just from the surface.
Step 7: Bake
Truth be told, there’s no oven involved in this pink fudge recipe. Instead, you’ll let it set in the fridge. Transfer the pan to the refrigerator and chill for at least 2–3 hours, or until the fudge is firm to the touch. If you’re in a hurry, you can pop it in the freezer for 45 minutes to speed things up, but check it often so it doesn’t become too hard to slice. The texture should be creamy and sliceable with clean edges, not crumbly. If you notice a glossy top that’s a little slick, don’t worry—that’s just the chocolate doing its job. A good chill will set it perfectly for clean cuts.
Step 8: Cool & Glaze
Once set, remove the fudge from the pan using the parchment overhang as handles. Place it on a cutting board and, if you’re feeling extra fancy, prepare the glaze. For the glaze, melt the white chocolate chips with the cream until smooth, then tint with pink coloring. Drizzle or spread a thin layer over the surface for a polished finish. If you prefer a no-glaze version, a light dusting of powdered sugar or a scatter of crushed freeze-dried berries on top gives that pretty pink hue without extra sweetness. Allow the glaze to set, which should only take about 15 minutes at room temperature or 5–10 minutes in the fridge.
Step 9: Slice & Serve
With a sharp knife, cut the fudge into neat squares. Wipe the blade between slices for clean edges. The first bite should be creamy and lush, with a gentle snap as you bite through the finished edge. If you notice the squares are a little sticky, a quick chill in the fridge will firm them up again. Serve on a pretty platter, perhaps with a few fresh berries on the side to echo the pink color and the strawberry notes. My family loves pairing these with a mug of coffee or a glass of cold milk—the way the pink fudge recipe cuts through the richness is nothing short of nostalgic.
What to Serve It With
This pink fudge recipe shines as a centerpiece on a dessert board, but it also plays nicely in smaller moments. Here are a few ideas that help you tailor the experience to the moment:
For Breakfast: Slice small squares and pair with a robust cup of coffee, or serve alongside a lemon glaze muffin for a bright, fruity contrast. The fudge’s creaminess is a nice foil to a tangy citrus muffin or a plain boiled egg for a “sweet start” moment that still feels special.
For Brunch: A small bite of pink fudge on a dessert board becomes a conversation starter. Pair with a glass of sparkling water with a splash of cranberry juice, or a light rosé. The soft pink hue looks festive on a lightly colored plate—a little dessert that doubles as décor.
As Dessert: This fudge pairs beautifully with vanilla or strawberry ice cream, or a dollop of whipped cream. A few fresh berries on the side and a mint leaf for color make the plate feel fresh and celebratory. It’s the kind of dessert you can knock out after a cozy weeknight dinner or save for a weekend treat when you want something that feels special without turning on the oven.
For Cozy Snacks: Wrap a few squares in parchment and stash in the fridge for a quick bite when you crave something sweet but don’t want to commit to a larger dessert. It’s a family favorite for movie nights and a popular companion to a mug of hot chocolate during chilly evenings.
Top Tips for Perfecting Your Pink fudge recipe
Here are a few tricks I’ve learned after making this pink fudge recipe countless times. These tiny details can mean the difference between a glossy, creamy fudge and a dull, stodgy bite.
Color & Chocolate Handling: Use good-quality white chocolate; it makes a huge difference in flavor and texture. If your pink color looks a little dull, add a touch more coloring gradually, stopping when you reach a soft, candy-floss pink that still feels natural. Melt slowly over low heat to avoid scorching.
Texture & Moisture Management: The key to a smooth fudge is avoiding too much air incorporation. Stir steadily and avoid beating. If your mixture looks grainy, take the pan off the heat and whisk vigorously for a minute—the heat stored in the mixture often helps smooth it out as it cools.
Swirl Customization: To create more defined swirls, chill the filling slightly before adding it to the main batter, then use a skewer to drag lines through the batter after you pour. If you want a more marbled look, drop in a second round of filling in a few places before swirling again.
Ingredient Swaps: Dairy-free option: use coconut milk in place of condensed milk and vegan white chocolate. The texture will be slightly firmer but still luscious. For a dairy-free glaze, use coconut cream with white chocolate and a few drops of pink coloring. If you want a lighter version, try using half the condensed milk and supplement with a splash of heavy cream or plant-based cream to hit your desired sweetness and consistency.
Baking Tips: Even though this is a no-bake treat, keep your kitchen cool. A warm room can soften the fudge too quickly, making cutting tricky. If you’re cutting on a hot day, chilling for longer in the fridge helps maintain clean edges. When you’re ready to slice, wipe the knife between cuts for crisper lines.
Glaze Variations: For a tinted glaze with more shimmer, add a pinch of pearl dust or edible glitter. If you prefer a lighter touch, drizzle a thin white glaze and skip the color altogether, letting the pink batter shine on its own.
From my kitchen to yours, the beauty of this pink fudge recipe is that it’s forgiving and personal. I’ve learned that a little patience during the cooling stage pays off in stunning slices and glossy tops. This isn’t a race—it’s a celebration of flavor, color, and the simple joy of sharing something sweet with people you love.
Storing and Reheating Tips
Storing fudge is basically about protecting texture and flavor while preserving that melt-in-your-mouth moment. Here’s how I keep this pink fudge recipe tasting its best.
Room Temperature: If you’re planning to nibble on it within a day or two, keep the fudge in an airtight container at room temperature. It will stay soft and creamy for about 2–3 days in a warm kitchen, but in a cooler space, it’s good for up to 5 days.
Refrigerator Storage: For longer life, store in an airtight container in the fridge. It’ll stay fresh for up to 2 weeks. The cold will firm the texture a bit, but it softens nicely at room temp when you slice it and serve.
Freezer Instructions: This fudge freezes beautifully. Wrap individual squares tightly in parchment, then transfer to a freezer-safe container or bag. It’ll keep for up to 3 months. Thaw in the fridge overnight or at room temperature for about an hour before serving. The texture holds up well, and the color remains pretty vibrant after thawing.
Glaze Timing Advice: If you’re freezing the fudge with a glaze, glaze after thawing, not before freezing. The glaze holds up well, but it’s a little more forgiving when applied after the fudge has firmed and been fully thawed.
These tips keep the pink fudge recipe tasting fresh and wonderful, whether you’re sharing a tray with friends or sneaking a quiet treat for yourself after a long day.
Frequently Asked Questions
Final Thoughts
There’s something quietly comforting about this pink fudge recipe. It’s the kind of treat that tastes like childhood summers but feels fully welcome in a grown-up kitchen. The flavor carries a gentle strawberry note that doesn’t overwhelm the vanilla, and the texture—soft, glossy, and almost cloudlike—just melts on your tongue. I love how adaptable it is: the marbled filling looks gorgeous, the glaze adds a little elegance, and you can tailor the color and filling to suit a party or a quiet night in. If you’re new to fudge, this is a friendly place to start because it teaches you to balance sweetness, color, and texture without any complicated technique. My family asks for this pink fudge recipe for birthdays, movie nights, and the little celebrations that pop up when you least expect them. It’s become a staple that I’m happy to share with you today. So, grab a sheet pan, a good knife, and a cozy corner of your kitchen. Happy baking! And please, tell me in the comments how yours turns out—the swirls, the glaze, and all the little tweaks you tried. I love hearing your stories and seeing your photos.
Pink Lemonade Fudge
Ingredients
Main Ingredients
- 7 ounce marshmallow creme (Fluff)
- 2.5 cup white chocolate morsels
- 0.75 cup unsalted butter
- 1 cup granulated sugar
- 0.75 cup heavy whipping cream
- 1 pinch kosher salt
- 1 package Kool-Aid dry pink lemonade mix
Optional Topping
- 8 ounce Ghirardelli white chocolate wafers melted
- 2 Tablespoons pink sparkling sugar
Instructions
Preparation Steps
- Line an 8x8 inch baking dish with parchment paper, leaving an overhang on the sides. Set aside.
- In a large mixing bowl, add the marshmallow creme and white chocolate morsels (do not melt the morsels yet). Set aside.
- In a large saucepan, combine the butter, granulated sugar, heavy cream, and salt. Bring to a boil over medium-high heat, stirring constantly. Continue boiling for exactly 5 minutes.
- Remove the saucepan from the heat. Whisk in the pink lemonade packet until fully combined. Immediately pour the hot mixture into the mixing bowl with the marshmallow creme and white chocolate morsels. Using an electric mixer (or stand mixer with whisk attachment), beat the ingredients together until creamy and the chocolate is melted, about 1 minute.
- Pour the fudge mixture into the prepared baking dish and spread evenly. Allow the fudge to set at room temperature for at least 3 hours, or until firm.
- Once the fudge is set, use the parchment paper overhang to lift it out of the pan. Trim the edges if desired and cut the fudge into 1-inch squares.
- Melt the Ghirardelli white chocolate wafers according to package directions. Drizzle the melted white chocolate over the fudge squares. Immediately sprinkle with pink sparkling sugar before the chocolate sets.
- Once the topping has set, store the fudge in an airtight container at room temperature until ready to enjoy.


