


There’s something magical about taking two beloved classics and marrying them into one cozy, swoon-worthy dish. I still remember the first time I whispered this idea to my sister: “What if we made Philly Cheesesteak flavor inside tortellini?” The kitchen smelled like melted cheese, sautéed peppers, and a little sunshine from caramelized onions. This Philly Cheesesteak Tortellini isn’t fussy; it’s the kind of recipe that feels like a warm hug after a long day. Think of it as Philly cheesesteak meets stuffed pasta—comforting, hearty, and surprisingly simple to pull off on a weeknight. I’ve served it beside a crisp green salad or with a crusty loaf for mopping up every last drop, and I’ve watched kids who swore they didn’t like peppers suddenly begging for seconds. This dish is a crowd-pleaser, and yes, it’s as good as it sounds: tender tortellini hugging a beefy, peppery filling, all swirled with a creamy cheese glow. If you’ve got a ravenous crew waiting at the table, this one disappears in minutes, I’m telling you. Philly Cheesesteak Tortellini is my weeknight lifesaver, and I think you’ll see why I keep coming back to it over and over again.
What is Philly Cheesesteak Tortellini?
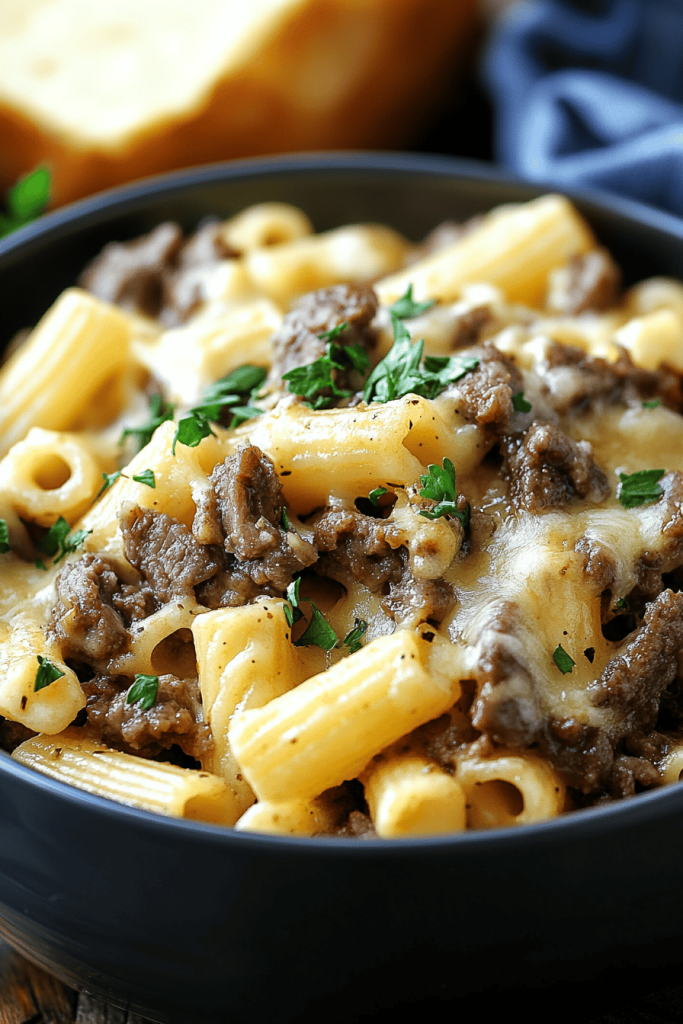
Philly Cheesesteak Tortellini is basically an elevated weeknight remix: the classic flavors of a Philly cheesesteak—thin-sliced beef, onions, peppers, and melted cheese—packed inside tender tortellini and finished with a cozy, glossy sauce. Think of it as building a sandwich flavor inside a pasta pocket. It’s essentially comfort food masquerading as elegant dinner-party fare. The name is a playful nod to the original street-food hero, but the execution is homey and approachable: you sauté the steak with aromatics, fold in peppers and onions, and toss the whole thing with creamy cheese—then bake until everything is bubbling and golden. If you love the way a Philly cheesesteak smells when it hits the hot griddle, you’ll adore how the same perfume translates into a pasta dish. My family calls this “the best of both worlds,” and I love that it feels like a treat without being fussy. For those who crave that familiar, beefy-sweet flavor with a velvety cheese finish, this is the dish you’ll return to again and again.
Why you’ll love this recipe?
What I love most about this Philly Cheesesteak Tortellini is how forgiving it can be while still delivering big, punchy flavors. First, the flavor profile: it’s got that meaty, umami kiss from the steak, the gentle sweetness of caramelized onions, and the bright bite from bell peppers, all wrapped in a creamy, cheesy sauce that clings to every pocket of tortellini. The aroma alone makes people drift into the kitchen, wondering what I’m cooking. Second, the simplicity: you can prep the components ahead of time, then mix and bake in one pan for a nearly hands-off, one-dish meal. Third, the budget-friendliness: you can use cheaper cuts or even leftover roast beef, and you’ll still achieve that luxe, restaurant-ish vibe. I also love how versatile it is—swap in mushrooms for a different bite, or use Italian sausage for a spicier kick. And yes, there’s a gentle nostalgia here; it’s the kind of dish that makes Sunday dinners feel like a warm family movie night. What I love most about this recipe is how it rewards simple ingredients with big personality. It’s a guaranteed crowd-pleaser that still feels special enough to serve to guests. If you’ve got a busy week ahead, this is the kind of dish that can turn a chaotic evening into something comforting and memorable.
How do I make Philly Cheesesteak Tortellini?
Quick Overview
Here’s the quick version: you’ll make a beef-onion-pepper filling, prepare or roll out a tortellini dough, assemble pockets, and then bake everything with a creamy cheese sauce until everything is bubbling and glossy. The beauty lies in how the flavors layer, almost like a swirl of Philly Cheesesteak in every bite. It’s not fussy, it’s not delicate, and it doesn’t require you to be a technique wizard. You’ll taste the caramelized sweetness, the savory beef, the punch of cheese, and the gentle herb notes in one nourishing dish. Trust me, this comes together faster than you think—especially if you use store-bought tortellini to speed things along.
Ingredients
For the Tortellini Dough:
2 cups all-purpose flour, plus extra for dusting; 3 large eggs; 1 tablespoon olive oil; pinch of salt. If you’ve got a corner of the pantry with 00 flour, you can swap in 1 cup 00 flour and 1 cup all-purpose for a silkier bite. Pro tip: rest the dough for 20–30 minutes to relax the gluten and make rolling easier.
For the Filling:
8 ounces thin-sliced ribeye or flank steak, shaved as thinly as possible; 1 small onion, thinly sliced; 1 bell pepper (any color you love), thinly sliced; 2 cloves garlic, minced; 1 tablespoon Worcestershire sauce; 1 teaspoon smoked paprika (optional but delightful); salt and black pepper to taste; 1 cup shredded provolone or mozzarella; 1 tablespoon olive oil for cooking. If you’re short on time, use leftover steak or a quick sautéed ground beef option and still get that iconic flavor.
For the Sauce / Glaze:
1/2 cup heavy cream or milk (for a lighter version, use half-and-half); 1 cup shredded cheese (a mix of provolone and mozzarella works beautifully); 1–2 tablespoons grated Parmesan; pinch of nutmeg (optional); salt and pepper to taste; a splash of dry white wine or chicken stock if you want extra depth.
Step-by-Step Instructions
Step 1: Preheat & Prep Pan
Preheat your oven to 375°F (190°C). Lightly oil a 9×13-inch baking dish or a similar-sized casserole pan. If you’re rolling dough from scratch, have a clean, lightly floured surface ready, plus a rolling pin and a small bowl of flour for dusting. If you’re using store-bought tortellini, keep it handy and skip the dough step for speed. This is a dish that loves efficiency as much as it loves flavor.
Step 2: Make Dough (or Prep Tortellini)
If you’re feeling ambitious, mix your dough: whisk flour with salt, create a well, and pour in eggs and olive oil. Bring together with a fork, then knead by hand until smooth and elastic—about 8–10 minutes. Wrap and rest for 20–30 minutes. If you’re shortcutting, simply boil a pound of tortellini (fresh or frozen) according to package directions; drain and set aside. Either path yields a tender pocket ready to cradle the filling.
Step 3: Cook Filling
In a skillet, heat a tablespoon of olive oil over medium-high heat. Add the onions and peppers, cooking until caramelized and a little sweet around the edges, about 6–8 minutes. Stir in the garlic for the last 30 seconds. Transfer to a plate. In the same pan, sear the steak slices quickly; you want a nice sear, not a stew. Season with salt, pepper, Worcestershire, and paprika. Let everything mingle while you finish the rest—the sizzling aroma is the sign you’re doing it right.
Step 4: Assemble Tortellini
If you’re making dough from scratch, roll out the dough until it’s thin but not tearable, then cut into circles or use a tortellini mold if you have one. Place a teaspoon of the filling (beef, onions, peppers) in the center, fold over, and seal the edges tightly. If you’re using store-bought tortellini, skip to the next step and just ensure they’re well drained and ready to mingle with the filling and sauce.
Step 5: Prepare Filling (Second Pass)
Return the skillet with the onions and peppers to a gentle heat. If there’s any beefy fond left in the pan, scrape it up and return it to the mix. Stir in the shredded cheese until it becomes a creamy, melty pocket. You want the cheese to clump slightly around the meat and veggies—this will help flavor each tortellini bite from the inside out.
Step 6: Layer & Swirl
Spread a light layer of the sauce in the bottom of your baking dish. Arrange the tortellini in a single layer or in two rows, depending on your dish size. Spoon the beef mixture over and between the tortellini. Drizzle the remaining sauce and a few extra handfuls of cheese over the top. If you love a marble-looking finish, swirl the sauce with a spatula to create pretty ribbons of white and gold as it bakes. This is the moment where you can really make it your own—add a pinch of red pepper flakes for a quiet heat, or a handful of fresh herbs for brightness.
Step 7: Bake
Cover the dish with foil to trap steam, then bake for 20 minutes. Remove the foil, sprinkle an extra handful of cheese over the top if you like, and bake uncovered for another 10–15 minutes until the edges are bubbling and the top is melty and golden. The whiff of cheese and caramelized onions rising from the pan is a sign you’re almost there. If your oven runs hot, check at the 25-minute mark to prevent any over-browning.
Step 8: Cool & Glaze
Let the Philly Cheesesteak Tortellini rest for 5–10 minutes before slicing or serving. This rest time helps the filling set so you don’t get a runny scoop. If you want a glaze, whisk a tablespoon of melted butter with a splash of garlic-infused olive oil and a pinch of parsley. Drizzle lightly over the top for extra gloss and aroma. A light dusting of Parmesan right before serving adds a final touch of savoriness and a little sparkle on the plate.
Step 9: Slice & Serve
Cut a generous square or spoon portions onto plates. The edges should show a little crust, the center should be creamy and cheesy, and the beefy, peppery filling should taste like that classic Philly bite you crave. Garnish with chopped parsley or chives for color, and serve with a bright salad or crusty bread to mop up the sauce. My kids actually ask for seconds, which is the best compliment I can get. If you want to keep it extra comforting, pair it with a simple arugula salad tossed with lemon juice and olive oil—peppery greens offset the richness beautifully.
What to Serve It With
This dish already feels like a main event, but I always like to offer a few little accompaniments that make the meal feel complete without turning it into a multi-dish marathon.
For Breakfast: If you’re up early and craving something savory, serve a small plate with a soft-boiled egg and a wedge of crusty bread. A mild, creamy yogurt with a drizzle of olive oil can be a surprising but delightful side—it’s all about balance. A hot cup of coffee or a strong espresso makes the whole experience feel like a weekend brunch at a cozy cafe.
For Brunch: A bright citrus salad with fennel, mint, and a light vinaigrette keeps things fresh. A mimosa or sparkling water with a splash of cranberry adds a celebratory note without stealing the spotlight from the main dish.
As Dessert: If you’re pairing in a big family meal, keep dessert light: a lemon yogurt cake or a simple baked quest for something a touch sweet and tangy works well. The last bite of the tortellini should feel savory and satisfying, not heavy—save room for something zippy and refreshing after.
For Cozy Snacks: A small plate of marinated olives, roasted peppers, and slices of crusty bread makes a perfect prelude or late-night bite. This is one of those dishes that tastes even better when enjoyed with good friends and real conversation—pour another cup of coffee and linger a while.
Top Tips for Perfecting Your Philly Cheesesteak Tortellini
Here are the tricks I’ve learned from countless tests and a few kitchen mishaps that finally paid off.
Beef prep: If you can, shave the steak very thin or buy pre-sliced “steak for fajitas.” The thinner the beef, the quicker it browns and the more it soaks up flavor from the onions and peppers. If you’re using leftovers, chop them into small, bite-sized pieces so every mouthful tastes beefy.
Drying zucchini-yields (not needed here, but a great lesson): When you ever grate zucchini into something, you want to squeeze out the moisture first. It keeps batters from thinning and helps with texture. For this recipe, we’re not adding zucchini, but that trick lives in my brain for lighter, brighter fillings.
Mixing for texture: When you’re sautéing onions and peppers, you want them tender with a bit of caramelization, not mushy. A higher heat to start helps crisp edges, then lower the heat to finish cooking. This contrast gives every bite a little pop of sweetness, a little savoriness, and a lot of depth.
Swirl patterns: Don’t worry about perfect marbling. A few intentional swirls on top before baking creates an inviting look and helps cheese distribute evenly as it melts. If you want pizzazz, add a dollop of pesto into a portion of the sauce for a green pulse that’s surprisingly delicious with beef and cheese.
Ingredient swaps: Want a quicker version? Use store-bought tortellini and pre-shredded cheese. If you’re avoiding dairy, swap in a cashew cream or a lactose-free cheese alternative. If you crave a stronger kick, add a pinch of crushed red pepper or a splash of hot sauce to the filling.
Baking tips: If your oven runs hot, check early. A minute or two less can keep the top from getting overly browned while the inside remains perfectly melted. If you’re cooking for a crowd, you can assemble everything in advance and bake just before serving to keep the sauce glossy and the noodles al dente.
Glaze variations: The butter-garlic glaze is nice, but you can go creative: a balsamic reduction drizzle adds brightness, or a quick parsley-lemon drizzle gives a zippy finish that lightens the heaviness a touch. The glaze is optional but a fun finishing flourish that makes the dish feel special.
Storing and Reheating Tips
This dish handles make-ahead meals beautifully, which is one of the things that make it so practical for busy weeks.
Room Temperature: If you’re cooking and want to enjoy it the same day, you can let it rest briefly at room temperature for about 20 minutes before serving. Avoid leaving it out for more than two hours to keep flavors fresh and safe.
Refrigerator Storage: Store leftovers in an airtight container for up to 3 days. Reheat gently in a skillet with a splash of broth or milk to loosen the sauce and prevent the cheese from seizing up. A quick bake in the oven at 350°F for 8–10 minutes can re-melt the cheese and crisp the top a touch.
Freezer Instructions: This dish freezes well, but the tortellini texture can soften a bit after freezing. Freeze in a single layer first, then transfer to a freezer-safe container for up to 2 months. Thaw overnight in the fridge, then reheat gently on the stove or in a low oven until bubbling and warmed through.
Glaze Timing Advice: If you’re freezing leftovers, skip applying the glaze before freezing. Add the glaze after reheating to keep it glossy and bright. Glaze timing matters for texture—don’t glaze too early if you’re planning to reheat, or you’ll lose that pristine, silky finish.
Final Thoughts
Philly Cheesesteak Tortellini has become our family’s go-to cozy dinner because it feels special without demanding hours in the kitchen. It’s the kind of recipe that’s perfect for a weeknight when you want something comforting, a touch indulgent, and undeniably satisfying. The filling is a well-balanced chorus of beefy savoriness, onions’ sweetness, and peppers’ brightness, all hugged by tender pasta and a velvet-y sauce. I’ve served it to friends who asked for the recipe before the plates were cleared, and I’ve watched kids savor every bite with gleeful little noises. If you’re craving that classic Philly vibe but in pasta form, this dish delivers with warmth and ease. The best part is how forgiving it is—use what you have, tweak what you love, and you’ll end up with something that tastes like a cherished family tradition even if you’re cooking alone on a Tuesday night. Happy cooking, friends, and if you try this, I’d love to hear how you customized it.
Frequently Asked Questions

Philly Cheesesteak Tortellini
Ingredients
Main Ingredients
- 1 pound cheese tortellini
- 1 pound ribeye steak thinly sliced or top sirloin, trimmed
- 1 medium onion sliced
- 1 large green bell pepper sliced
- 1 large red bell pepper sliced
- 2 tablespoons olive oil
- 2 tablespoons butter
- 3 tablespoons all-purpose flour
- 2 cups milk whole preferred
- 1 teaspoon Worcestershire sauce
- 0.5 teaspoon garlic powder
- 0.25 teaspoon smoked paprika
- 4 ounces provolone cheese slices halved
- 0.5 cup shredded mozzarella cheese
- 0.25 cup grated Parmesan cheese
- 0.5 teaspoon salt
- 0.25 teaspoon black pepper
Instructions
Preparation Steps
- Cook tortellini according to package directions in a large pot of salted boiling water. Drain and set aside.
- While pasta cooks, heat 1 tablespoon olive oil in a large skillet over medium-high heat. Add sliced steak, season with salt and pepper, and cook in batches to avoid overcrowding. Sear until browned, about 3-4 minutes per batch. Transfer to a plate.
- Add remaining olive oil and butter to the skillet. Add onions and both bell peppers. Sauté until softened, about 6-7 minutes. Transfer to the plate with the steak.
- Melt 2 tablespoons butter in the same skillet. Whisk in flour and cook for 1 minute to form a roux. Gradually whisk in milk, Worcestershire sauce, garlic powder, paprika, salt, and black pepper.
- Cook, stirring constantly, until sauce thickens and bubbles, about 5 minutes. Reduce heat to low.
- Stir in Parmesan and mozzarella until melted. Return beef and vegetable mixture to the skillet and stir to combine. Add cooked tortellini and toss gently to coat. Heat through for 2-3 minutes.
- Top each serving with a half-slice of provolone and broil in oven-safe bowls or dish for 1-2 minutes until cheese is melted and bubbly.


