


There’s something magical about a dish that tastes like a hug in a skillet. I still remember the first time I swapped a forkful of classic Philly cheesesteak for a plate of pasta and realized I’d found a new family favorite. The aroma—the onions caramelizing, the beef sizzling, the cheese melting into a glossy river—fills the kitchen and somehow calls everyone to the table. Philly Cheesesteak Pasta is that cozy, crowd-pleasing bridge between two classics: a Philly sandwich and a comforting weeknight pasta. It’s the kind of recipe I reach for when I’m scrambling to feed a crowd or when I want something delicious and a little daring without spending hours in the kitchen. This version leans into creamy, glossy sauce and savory steak, but keeps things approachable with pantry-friendly ingredients. If you’ve ever compared a cheesesteak sub to a simple pasta night, you’ll know exactly why this dish feels so right—familiar, satisfying, and totally crave-worthy in minutes. I’ll admit, this one’s a lifesaver on busy nights, and the kids actually ask for seconds, which is basically a mom’s love language in itself.
What is Philly cheesesteak pasta?
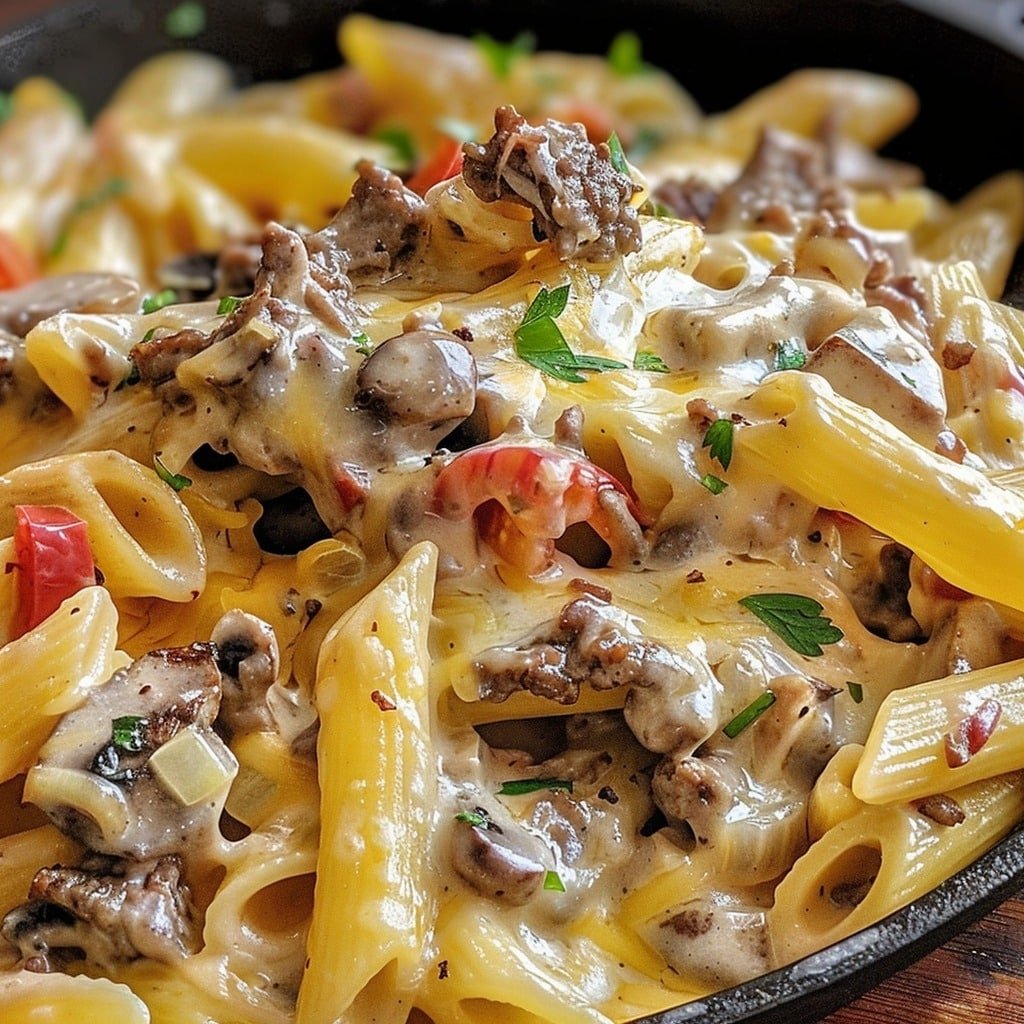
Think of Philly Cheesesteak Pasta as a celebration of two kitchens in one pot. It’s essentially a skillet dinner that marries tender sliced beef, sautéed onions, and peppers with al dente pasta and a blanket of melted cheese. The name hints at the flavor profile—savory, peppery, and a little tangy from a splash of provolone or American cheese—while the pasta base keeps everything hearty and kid-friendly. My take on it keeps the essence of the Philly sandwich but removes the step of piling hot fillings into a long roll. It’s easy to portion, easy to customize, and incredibly forgiving if you’ve got a busy weeknight schedule. Think of it as comfort food you can tuck into a weeknight and still proudly serve to guests. It’s Philly at heart, pasta by design, and totally my kind of dish for rotating into family meals or potlucks.
Why you’ll love this recipe?
What I love most about this Philly Cheesesteak pasta is how it delivers big, bold flavors with minimal fuss. It’s a one-pan sensation that practically cleans up after itself, which is a dream on evenings when I’m juggling a dozen little tasks at once. Here’s what I’m constantly singing about in the kitchen:
- Flavor: The beef is seared to develop that caramelized crust, the onions melt into sweetness, and the cheese threads through every bite. The result is a glossy, rich sauce that clings to every noodle and makes you swoon with a single twirl of your fork.
- Simplicity:I always make the toppings first so the hot pan can do all the work. It’s a toolkit recipe. No fuss, just reliable
- Cost-efficiency: What is the best way to measure cost-efficiency? The ingredients are straightforward and pantry-friendly. I grab a cheap cut of beef or use thinly sliced leftovers, and the cheese options are flexible—whatever you have on hand will work deliciously here.
- Versatility: You can riff on toppings, cheeses, and even swap in a lighter creaminess with a splash of milk or stock. It’s also fantastic as a make-ahead meal that still tastes vibrant when reheated.
- Family-friendly: This is a dish my kids actually request, and it’s perfect for feeding a hungry crew after practice or a long day. The sauce thickens nicely as it sits, so you can portion and save for the next day.
How to Make Philly cheesesteak pasta
Quick Overview
In a sizzling skillet, I brown the beef with onions and peppers, then toss in the cooked pasta with a punchy, cheesy sauce. The trick is to let the pan stay hot enough to caramélize everything a touch, not so hot that the cheese separates. You’ll lean on a quick simmer to bring everything together, then finish with a melty, irresistible layer of cheese that folds through the sheets of pasta like a silky ribbon. It’s all done in about 20 minutes, which makes this recipe a lifesaver when you want something comforting but don’t have hours to cook. If you’ve got extra peppers or a stubborn piece of steak from the night before, this is the perfect place to put them to delicious use.
Ingredients
For the Main Batter:
- 1 pound (450 g) flank steak or ribeye, thinly sliced against the grain
- 1 tablespoon olive oil
- 1 medium yellow onion, thinly sliced
- 1 bell pepper, sliced (any color)
- 2 cloves garlic, minced
- Salt and pepper to taste
- 1 teaspoon paprika (optional, for a hint of smokiness)
- 1/2 cup beef broth or stock
For the Filling:
- 12 ounces (340 g) pasta shapes of your choice (fettuccine, penne, or rigatoni work well)
- 1 cup shredded provolone, mozzarella, or a mix of both
- 1/2 cup grated Parmesan or Pecorino
- Optional add-ins: mushrooms, spinach, or zucchini for extra veggie goodness
For the Glaze:
- 1/2 cup half-and-half or whole milk (for creaminess) or a splash of cream if you’ve got it
- 1/2 cup shredded cheese (use more if you love a gooier finish)
- Salt to taste
Step-by-Step Instructions
Step 1: Preheat & Prep Pan
Grab a large skillet that can handle a quick sear. I start on medium-high heat and let the pan get nice and hot. That first sizzle is a signal that you’re about to build flavor. While it heats, slice the onions and peppers, mince the garlic, and lay out the beef. A little mise en place goes a long way here, because this dish moves fast once you start cooking.
Step 2: Mix Dry Ingredients
In a small bowl, whisk together salt, pepper, paprika, and a pinch of red pepper flakes if you like a gentle kick. This is the flavor foundation—it seasons the meat and the vegetables evenly, so you don’t have to chase salt at every turn.
Step 3: Mix Wet Ingredients
In a separate cup, blend the milk or cream with a portion of the beef broth. This creates a silky backdrop for the cheese to melt into and helps keep the sauce from getting too heavy. I love a touch of richness, but I’m careful not to overdo it—balance is everything.
Step 4: Combine
Add the olive oil to the hot pan, then slide in the beef in a single layer. Don’t overcrowd the pan; you want to get a nice brown crust. Once it’s seared, remove it to rest briefly and use the same pan to caramelize the onions and peppers. A pinch of salt helps draw out their sweetness. Then add the garlic and cook for another minute until fragrant.
Step 5: Prepare Filling
While the vegetables soften, cook the pasta in salted boiling water until al dente. Reserve a cup of the cooking water in case you need to loosen the sauce later. Drain the pasta and set aside. If you’re using mushrooms or zucchini, saute them here until they release their juices and start to brown.
Step 6: Layer & Swirl
Return the beef to the pan and pour in the milk-beef broth mixture. Let it simmer for a couple of minutes so the flavors meld. Add the cooked pasta, then sprinkle in the grated cheese. Stir gently to coat the noodles without breaking them apart. You’re aiming for a glossy sauce that clings to every strand. If it looks a bit tight, splash in some of the reserved pasta water a tablespoon at a time until it reaches your desired consistency.
Step 7: Bake
Here’s the fun twist: transfer the pan to a hot oven (or broil with the pan on the middle rack) for 3–5 minutes, just long enough for the cheese to bubble and lightly brown. If you’re not into baking, you can skip this step and finish with a big handful of cheese stirred in off the heat until it’s perfectly creamy. Either way, you want that cheese to melt through the pasta, creating ribbons of gooey goodness.
Step 8: Cool & Glaze
Let the dish rest for a few minutes off the heat so the sauce can thicken a touch. Then drizzle with a quick glaze—if you like making it extra special, whisk a tablespoon of cream with a teaspoon of Dijon mustard and a little more cheese, and spoon it over the top. The glaze adds a sheen and a bright kick that cuts through the richness. It’s optional, but I find it makes the dish feel chef-worthy even on weeknights.
Step 9: Slice & Serve
I like to finish with a final sprinkle of Parmesan and a crack of Black Pepper. Serve it family-style right from the skillet for a cozy, no-fuss presentation. If you’ve got fresh herbs on hand, a little chopped parsley or chives tossed over the top brings a pop of color and freshness. This is one where a quick squeeze of lemon over the top can surprise you—in a good way—brightening the richness just enough to keep things balanced.
What to Serve It With
This Philly cheesesteak pasta hits a satisfying stride on its own, but there are plenty of ways to stretch it into a full meal or a showpiece for guests.
For Breakfast: Think day-after leftovers warmed with a fried egg on top and a light peppery kick from extra green peppers. A simple coffee or orange juice pairing keeps things bright and casual.
For Brunch: Serve with a side salad of butter lettuce, cherry tomatoes, and a tangy lemon vinaigrette. A light sparkling cider or a cold snap of white wine makes brunch feel festive without being heavy.
As Dessert: Not exactly dessert, but a small scoop of vanilla gelato or a dollop of whipped cream can be a playful contrast after a full plate—trust me on this one, it’s surprisingly refreshing with the cheesy savoriness.
For Cozy Snacks: Use the leftover pasta to make a quick skillet bake the next day: top with extra cheese and bake until bubbly. It’s a hug you can reheat and serve with a crusty piece of bread and a glass of iced tea or a cold beer.
In our house, this dish often shows up when friends come by with their kids after practice. The aroma alone pulls everyone into the kitchen, and before you know it, we’re dishing out big bowls and laughing about the day. It’s a crowd-pleaser that travels well to potlucks and barbecues, which is why it’s become a standard on my weekly rotation—easy to scale, forgiving with substitutions, and always comforting.
Top Tips for Perfecting Your Philly cheesesteak pasta
Here are the little tricks that make the difference between a good dinner and a truly memorable one. They’re the notes I’ve learned after making this dish dozens of times in different kitchens, from cramped apartment setups to generous, sunlit counters at the weekend house.
Zucchini Prep: If you’re adding grated zucchini, squeeze out as much moisture as you can after grating. Moisture ruins the sauce’s gloss and can thin the cheese’s melt. I wrap the grated zucchini in a clean towel, twist, and press firmly until dry. It adds nice moisture without watering down the flavor.
Mixing Advice: Don’t overmix after you add the cheese. You want the cheese to ribbon through the pasta rather than turn it into a gluey mass. A gentle fold is all you need—think of it as stitching rather than kneading. If you overwork it, the sauce can break or become gummy.
Swirl Customization: The swirl is less about perfect patterns and more about even distribution. If you’re using multiple cheeses, fold them in in stages, a little at a time, so you get a marbled effect rather than one solid melt.
Ingredient Swaps: Ground pork works nicely in place of beef, and turkey works for a lighter version. If you’re dairy-free, try a sharp dairy-free cheese alternative or a splash of olive oil with nutritional yeast for a savory, cheesy bite. Adjust salt carefully when swapping cheeses, since some varieties are saltier than others.
Baking Tips: If you’re broiling, watch closely—cheese can go from bubbly to burnt in a minute. Keep the pan on the middle rack and remove as soon as you see a golden top. If you skip baking altogether, you’ll still get a creamy, glossy finish; you’ll just miss the lightly crisp top.
Glaze Variations: A mustard-kissed glaze adds a bright contrast. If you love a touch of sweetness, whisk in a teaspoon of honey or maple with the glaze. You can also swap in a splash of hot sauce for a little heat. The glaze should feel like a whisper on top, not a heavy shout.
My trick with this recipe is to taste as you go and trust your instincts. I’ve swapped in extra peppers when I want a crunchier bite, or used a sharper cheese when I’m craving a stronger bite. This is the kind of dish that rewards your personal touch, so don’t be afraid to make it yours.
Storing and Reheating Tips
This is one of those dishes that actually reheats beautifully, which makes weekend meal-prep a breeze. Here’s how I keep it at its best.
Room Temperature: If you’re only keeping it out for a quick service, it’s best to enjoy it fresh. Overnight it stales the cheese a bit and the sauce can thicken as the pasta absorbs more liquid.
Refrigerator Storage: Store in an airtight container for up to 3 days. Reheat gently on the stove with a splash of broth or milk to loosen the sauce, then finish with a quick melt of cheese on top under a broiler or in a hot oven.
Freezer Instructions: Not ideal for the exact texture because the pasta can become mushy after freezing, but you can freeze the cooked beef and peppers separately. Reheat and then combine with freshly cooked pasta and cheese for a quick redo later on. If you do freeze combined, thaw overnight and reheating gently is key to preserving texture.
Glaze Timing Advice: If you like to glaze, add the glaze after reheating to preserve its sheen and brightness; microwaving can dull the gloss, so a quick finish in a hot pan or under the broiler is best.
In practice, I find this dish shines best when served fresh, with a bright finish from the cheese and a little bite from the peppers. But it’s surprisingly forgiving—with a little patience, it can be a weeknight hero that still feels special.
Frequently Asked Questions
Final Thoughts
This Philly cheesesteak pasta has become a staple in my kitchen because it feels both comforting and exciting at the same time. The beef’s savory depth, the onions’ sweetness, and the way the cheese coats every noodle—it’s basically a hug you can eat with a fork. I’ve learned to trust the simple rules: keep the pan hot, don’t overwork the cheese, and taste as you go. When I describe this dish to friends, I tell them it’s like taking the heart of a classic cheesesteak and giving it a loving chef’s makeover with pasta. It’s flexible, forgiving, and generous with portions—perfect for feeding a busy week or a casual weekend gathering. If you try it, I’d love to hear which cheese you reached for first or what veggie you sneaked in without telling anyone. Happy baking, cooking, and savoring. Can’t wait to hear how yours turns out!
Philly cheesesteak pasta
Ingredients
Main Ingredients
- 1 tablespoon olive oil
- 9 ounces quick steak strips (frozen) can substitute with shaved ribeye
- 1 cup sweet yellow onion diced, about 0.5 inch pieces
- 1 cup green bell pepper diced, seeds and stem removed
- 0.75 teaspoon salt
- 0.25 teaspoon black pepper
- 2 ounces cream cheese room temperature
- 0.5 cup beef broth low sodium recommended
- 1.5 cups half & half
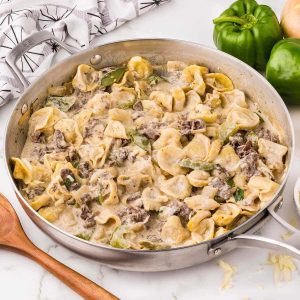
- 19 ounces frozen cheese tortellini
- 1 cup shredded mozzarella cheese
- 1 cup shredded provolone cheese
Instructions
Preparation Steps
- To a large 12-inch skillet over medium-high heat, add the olive oil. When hot, add the frozen quick steak strips.
- Cook the steak undisturbed for 2 minutes to brown on the first side. Flip and cook for another 2 minutes, or until no pink remains. Avoid over-breaking the pieces for a hearty texture.
- Using a slotted spatula, remove the cooked steak to a plate, leaving excess fat in the pan for sautéing vegetables. Set aside.
- Add diced yellow onion and green bell pepper to the skillet. Cook for 5–6 minutes until tender, lightly browned, and onions are translucent.
- Stir in cream cheese until melted and fully combined with the vegetables.
- Return the cooked steak to the skillet. Add salt, black pepper, beef broth, and half & half. Stir gently to avoid breaking the steak pieces.
- Bring the mixture to a boil. Add frozen cheese tortellini, stirring to fully coat in the liquid. Reduce heat to low, cover, and simmer for 10 minutes, stirring occasionally to prevent sticking.
- Uncover and sprinkle shredded mozzarella and provolone cheese over the top. Replace the lid and let sit 1–2 minutes to allow cheeses to melt.
- Remove from heat and stir the melted cheese into the pasta and sauce until creamy and well incorporated.
- Serve hot in bowls. Optionally garnish with extra cheese, red pepper flakes, or fresh parsley.


