


On Saturdays the kitchen fills with the warm hum of the oven and the sweet, familiar aroma of bananas turning to caramel. I still remember my grandma’s loaf cooling on the rack, a smear of butter melting into the crackly crust, the whole house smelling like sunshine. This is the Perfect banana bread recipe—the one I reach for when I need something comforting, simple, and almost effortless. It’s forgiving enough for a weeknight bake, yet special enough to share with friends who drop by with a mug of coffee. I’ll be honest: the first bite always makes me smile. It’s not fussy, it’s not fussy, and it always delivers. I’ve tweaked it a hundred times in little ways—using almond milk to keep it extra tender, swapping in dark brown sugar for a richer touch, or adding a swirl of cream cheese so it feels indulgent without being heavy. It’s the kind of loaf that makes conversations flow and the kitchen feel like home. This, my friend, is exactly the kind of recipe you’ll reach for again and again.
What is the best banana bread recipe?
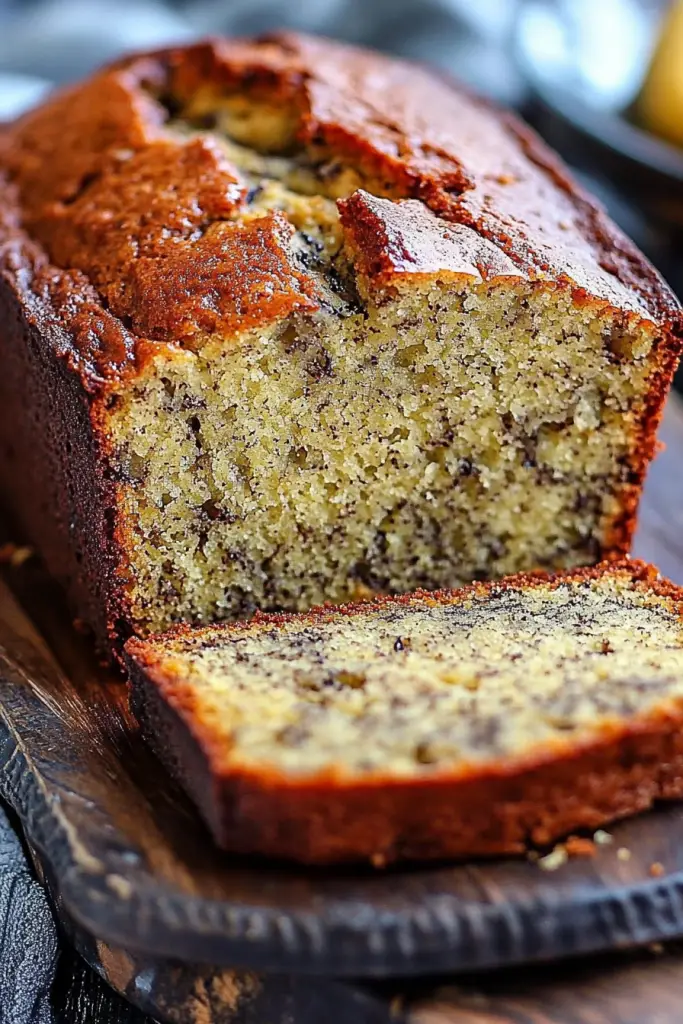
Think of this as a softly sweet, moist loaf that stars ripe bananas, a whisper of vanilla, and a gently salty crumb. The name comes from its balance: not too dense, not too crumbly, with enough banana flavor to feel like a treat but not so much that you’d pass on a slice with your afternoon tea. It’s essentially a quick bread that relies on the ripeness of the fruit, not on yeast, so it comes together in a matter of minutes and bakes into a sturdy, sliceable beauty. I love this version because it wears its personality lightly: a hint of brown sugar warmth, a splash of cinnamon if you’re feeling cozy, and optional fillings or toppings that transform each loaf into a tiny celebration. It’s the kind of recipe you can personalize—walnuts for crunch, chocolate chips for a wink of decadence, or a Cream Cheese Swirl for a cafe-worthy crack of indulgence.
Why you’ll love this recipe?
What I love most about this Perfect banana bread recipe is how it feels like a warm hug you can bake. It’s friendly to beginners and wonderfully forgiving to seasoned bakers alike. The flavor is familiar and comforting—the banana notes are bright, with a hint of vanilla and caramel from the brown sugar. The texture is the best part: a moist, tender crumb that stays soft for days and slices cleanly, even after a night in the fridge. It’s incredibly simple, too: you whisk dry ingredients, whisk wet ingredients, combine, and bake. No fancy equipment or scary techniques required. And the cost is a win: ripe bananas are cheap, flour and pantry staples are widely available, and a few mix-ins stretch it into a dozen different moods. I’ve made this as a quick weekday breakfast, a weekend treat, and even a desk-side snack during late work sessions. It’s a go-to when the pantry feels a little bare but the appetite is hungry. This is the banana bread I reach for when I want something that tastes like home, without any fuss or fussiness. What I love most about this recipe is its versatility—you can swap in almond milk for extra tenderness, or fold in a handful of chopped walnuts for a toasty bite. It’s also a lifesaver on busy nights when you want a dessert that’s ready in under an hour. My kids ask for seconds, and I never mind sharing.
How do I make banana bread?
Quick Overview
This loaf comes together in a few easy steps: mash the bananas, mix wet ingredients, whisk dry ingredients, then fold (gently) everything together. A quick swirl of Cream Cheese or a sprinkle of chocolate chips turns the classic into something a bit more special. The beauty is in the bake—the batter stays incredibly moist and the crust develops a delicate edge that’s almost caramelized. It’s friendly for improvisation: you can fold in nuts, swap in a dairy-free milk, or skip the glaze if you’re watching sugar. The result is a fragrant, golden loaf with a slightly domed top that slices into neat, butter-ready rounds. Perfect banana bread recipe, indeed—easy, cozy, and absolutely crave-worthy.
Ingredients
For the Main Batter:
– 2 cups (260 g) all-purpose flour
– 1 teaspoon baking soda
– 1/2 teaspoon baking powder
– 1/2 teaspoon salt
– 1/2 cup (100 g) packed light Brown Sugar
– 1/3 cup (75 g) unsalted butter, melted and cooled
– 2 large eggs, at room temperature
– 3–4 very ripe bananas, mashed (about 1 1/2 cups)
– 1 teaspoon vanilla extract
For the Filling:
– 8 oz (225 g) cream cheese, softened
– 2 tablespoons granulated sugar
– 1 teaspoon vanilla extract
– Optional: 1/4 cup mini chocolate chips or chopped dark chocolate
For the Glaze:
– 1/2 cup powdered sugar
– 2–3 tablespoons milk or cream
– 1/2 teaspoon vanilla extract
– Optional: lemon zest or a pinch of cinnamon
Step-by-Step Instructions
Step 1: Preheat & Prep Pan
Heat your oven to 350°F (175°C). Lightly grease a 9×5-inch loaf pan and line the bottom with parchment if you like a clean release. A quick spray of nonstick spray plus a dusting of flour works wonders too. I always let a little extra crumb come away from the edges—that’s the sign of a good, moist loaf.
Step 2: Mix Dry Ingredients
In a medium bowl, whisk together the flour, baking soda, baking powder, and salt. This step is where you build the structure so the loaf doesn’t collapse or feel gluey. I like to whisk until there are no visible streaks of flour. It’s a small thing, but trust me, it makes a difference in the crumb.
Step 3: Mix Wet Ingredients
In a separate bowl, beat the melted butter with the brown sugar until glossy. Add the eggs, one at a time, then the mashed bananas and vanilla. The mixture should look smooth and a little glossy—the bananas give it that creamy, honeyed texture once you fold in the dry ingredients.
Step 4: Combine
Pour the dry ingredients into the wet mix, folding just until you see no dry patches. It’s tempting to overmix, but stop as soon as the flour disappears. A few small lumps are perfectly fine and will bake out during the bake, leaving you with a tender crumb.
Step 5: Prepare Filling
If you’re going for a cream cheese swirl, whip the cream cheese with the sugar and vanilla until smooth. I like to leave it a touch soft so it swirls easily in the batter without clumping. If you’re adding chocolate, fold in the chips so they distribute evenly but don’t sink to the bottom.
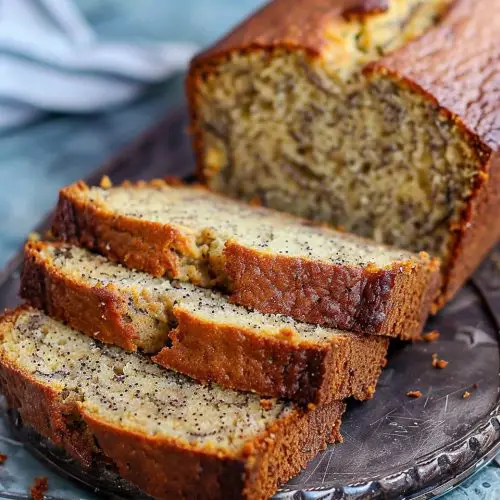
Step 6: Layer & Swirl
Spread half the batter in the pan. Dollop spoonfuls of the cream cheese mixture on top, then scatter a few chips if using. Cover with the remaining batter. Use a knife or skewer to swirl gently through the batter to create a marbled look without fully mixing the fillings in—this gives you pretty ribbons of flavor in every slice.
Step 7: Bake
Bake for 50–60 minutes, or until a toothpick inserted into the center comes out clean or with a few moist crumbs. If the top seems to brown too quickly, tent loosely with foil for the last 10–15 minutes. Oven temperatures vary, so start checking at 50 minutes and go by the toothpick test rather than the clock.
Step 8: Cool & Glaze
Let the loaf rest in the pan for 10 minutes, then transfer to a wire rack to cool completely. Whisk together the glaze ingredients until smooth. Once the loaf is cool, drizzle the glaze in thin lines or a gentle drizzle over the top. If you’re not glazing, a light dusting of confectioners’ sugar also looks pretty and tastes great.
Step 9: Slice & Serve
Use a sharp serrated knife for clean slices. If the loaf is still a touch warm, you’ll get a softer, more crumbly slice; if it’s truly cooled, you’ll get a more defined cut. I like it in thick, generous slices with a pat of butter and a hot cup of coffee. It’s the little moments that make this banana bread feel like a hug you can hold in your hands.
What to Serve It With
When you’re serving this loaf, think about the mood you’re in. Here are a few ideas that pair beautifully, depending on the moment:
For Breakfast: A mug of strong coffee or a classic latte, a smear of butter or a light cream cheese spread, and a few banana slices for a photo-worthy plate.
For Brunch: Fresh berries, a dollop of whipped cream, and a side of scrambled eggs or a soft cheese toast. A sprig of mint makes it look extra special.
As Dessert: Serve warm with vanilla ice cream or a drizzle of caramel sauce. A pinch of sea salt on the glaze adds a bakery-fresh feel.
For Cozy Snacks: A simple tea loaf moment with a handful of nuts and a hot beverage. It becomes a tiny ceremony—the kind of moment you use to slow down and savor.
Personally, we tuck a slice into a lunchbox on busy mornings, and the house smells incredible when the thermos fills with tea at 7 a.m. It’s become our little family tradition—a loaf that travels well, tastes comforting, and leaves everyone grinning.
Top Tips for Perfecting Your Perfect banana bread recipe
Here are practical tricks that have saved my loaf more than once, organized by technique:
Zucchini Prep: Not relevant here, but the idea of moisture management matters. Bananas do the moisture job, but if you’re adding grated zucchini as an experiment, salt it lightly and pat dry to keep the crumb balanced.
Mixing Advice: Don’t overmix. The batter should be just combined with a few small lumps left. That keeps the crumb tender and light and prevents a rubbery texture. If you fold in add-ins, do so gently and evenly.
Swirl Customization: For a fancier swirl, chill the cream cheese filling for 15 minutes before adding it to the batter. It holds its shape longer and creates sharper stripes when you swirl with a knife.
Ingredient Swaps: Swap milk for almond milk or oat milk to keep it dairy-free; you’ll notice a slightly crisper crumb with dairy, but the non-dairy versions still stay wonderfully moist. If you want a deeper banana flavor, let the bananas ripen even more—black-spotted fruit yields maximum sweetness and aroma.
Baking Tips: If your oven runs hot, lower the temperature to 325°F (165°C) and extend the bake time by 10–15 minutes. Use a light-colored pan if you can; it browns more evenly and avoids overly dark edges that can taste burnt.
Glaze Variations: For a citrusy finish, add a teaspoon of lemon zest to the glaze. For a richer finish, swap vanilla for almond extract or add a tablespoon of maple syrup to the glaze for extra depth.
Over the years I learned a few key lessons: ripe bananas are nonnegotiable, a little extra melted butter helps moisture, and letting the loaf cool completely before glazing keeps the glaze from sliding off. Trust me on this one: patience at the end makes the slice so much more satisfying. I’ve tweaked and tested this recipe many times, and every tweak taught me something new about balance, texture, and flavor. It’s a forgiving, soulful bake that still manages to feel special—like you spent hours in the kitchen when really you didn’t. And yes, the house smells amazing while it bakes—that alone is a huge win.
Storing and Reheating Tips
Banana bread loves air, not humidity, so store it properly to keep that tender crumb intact. Here’s how I keep it tasting fresh:
Room Temperature: Wrap the cooled loaf tightly in parchment or place it in a reusable beeswax wrap, then in a breathable container for up to 3 days. The crust softens over time, but the inside stays moist and flavorful, which is exactly what we want.
Refrigerator Storage: It’s not strictly necessary, but if you’re in a warm climate, you can refrigerate for up to 5 days in an airtight container. Bring slices to room temperature before serving for best texture and flavor.
Freezer Instructions: Slice first, then wrap each slice in plastic or place in a freezer bag. Freeze for up to 2–3 months. Thaw at room temperature or toast gently for a quick warm-up with a little butter.
Glaze Timing Advice: If you’re storing the bread, you can glaze later. Apply the glaze right before serving to keep the top shiny and fancy. If you’re freezing, you can add glaze after thawing for a fresh finish.
These tips help the loaf stay delicious across days, so you can savor it without worry. It’s one of those recipes that tastes better a day or two later as the flavors meld, so I always bake a little extra when we’re entertaining and watch it disappear in minutes.
Frequently Asked Questions
Final Thoughts
There’s something about this Perfect Banana Bread Recipe that makes it feel like a warm welcome home—whether you’re baking for yourself, family, or friends. It’s a loaf that travels well, stays moist, and tastes like a gentle celebration of ripe fruit and simple pantry goods. The cream cheese swirl is a little wink of indulgence, the glaze a final kiss of sweetness, and the texture? It’s exactly what you want when you crave something comforting but not overly fussy. I’ve made this countless times, and it never fails to bring a smile to the kitchen table. If you’ve got a slice you’re proud of, drop a comment below and tell me how you customized it—the nuts you added, the glaze you chose, or the swap you tried. Happy baking! And if you love this bread as much as we do, please share it with a friend who could use a little coziness today.
Perfect Banana Bread Recipe
Ingredients
Main Ingredients
- 0.5 cup unsalted butter melted
- 0.75 cup granulated sugar
- 2 large eggs
- 1 teaspoon vanilla extract
- 3 medium ripe bananas mashed
- 1.5 cup all-purpose flour
- 1 teaspoon baking soda
- 0.5 teaspoon salt
- 0.5 cup chopped walnuts or pecans optional
Instructions
Preparation Steps
- Preheat your oven to 350°F (175°C). Grease and flour a 9x5 inch loaf pan.
- In a large bowl, cream together the melted butter and granulated sugar until well combined.
- Beat in the eggs one at a time, then stir in the vanilla extract.
- Stir in the mashed ripe bananas.
- In a separate bowl, whisk together the flour, baking soda, and salt.
- Gradually add the dry ingredients to the wet ingredients, mixing until just combined. Do not overmix.
- If using, gently fold in the chopped nuts.
- Pour the batter into the prepared loaf pan and spread evenly.
- Bake for 50-60 minutes, or until a wooden skewer inserted into the center comes out clean.
- Let the banana bread cool in the pan for 10 minutes before inverting it onto a wire rack to cool completely.


