


Oh, this orange creamsicle cheesecake! Just thinking about it makes me feel like a kid again, standing at the Ice Cream truck with sticky fingers, sunshine on my face. It’s that exact feeling, that pure, unadulterated joy, that I tried to capture in this recipe. If you’ve ever craved that nostalgic blend of creamy vanilla and bright, zesty orange, but wanted something a little more sophisticated than a frozen pop, then you’ve landed in the right spot. This isn’t just another cheesecake; it’s a vibrant, sunshine-y dessert that tastes like happiness. It’s like the grown-up, fancier cousin of the ice pops we all loved, but trust me, it’s just as delightful and surprisingly easy to whip up. I was looking for something that would be a showstopper without requiring a culinary degree, and this orange creamsicle cheesecake hit every single mark.

What is an orange creamsicle cheesecake?
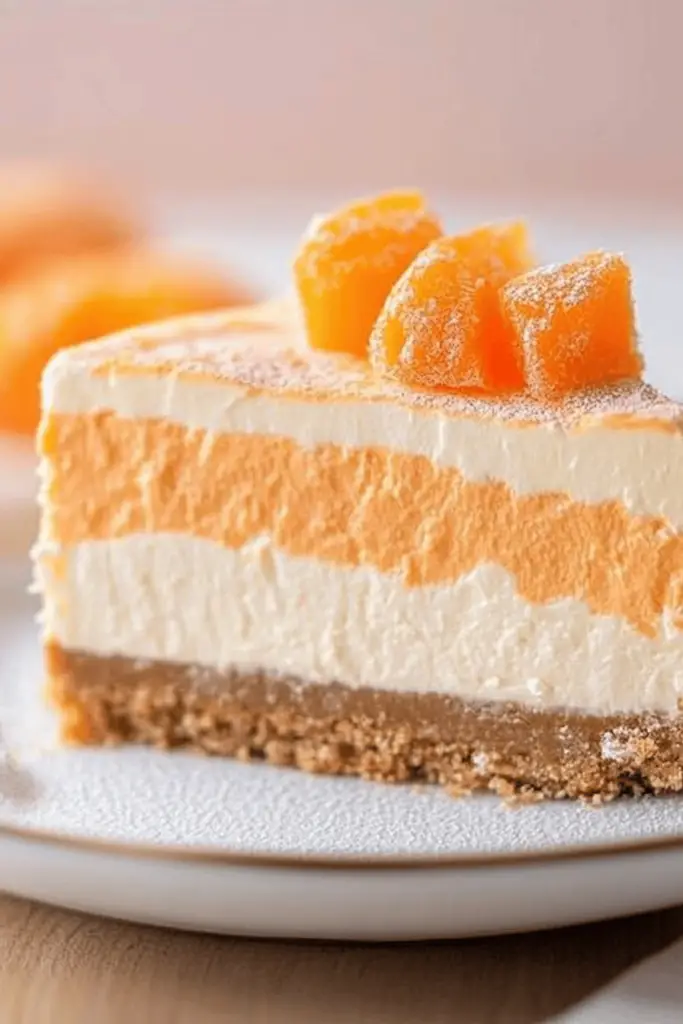
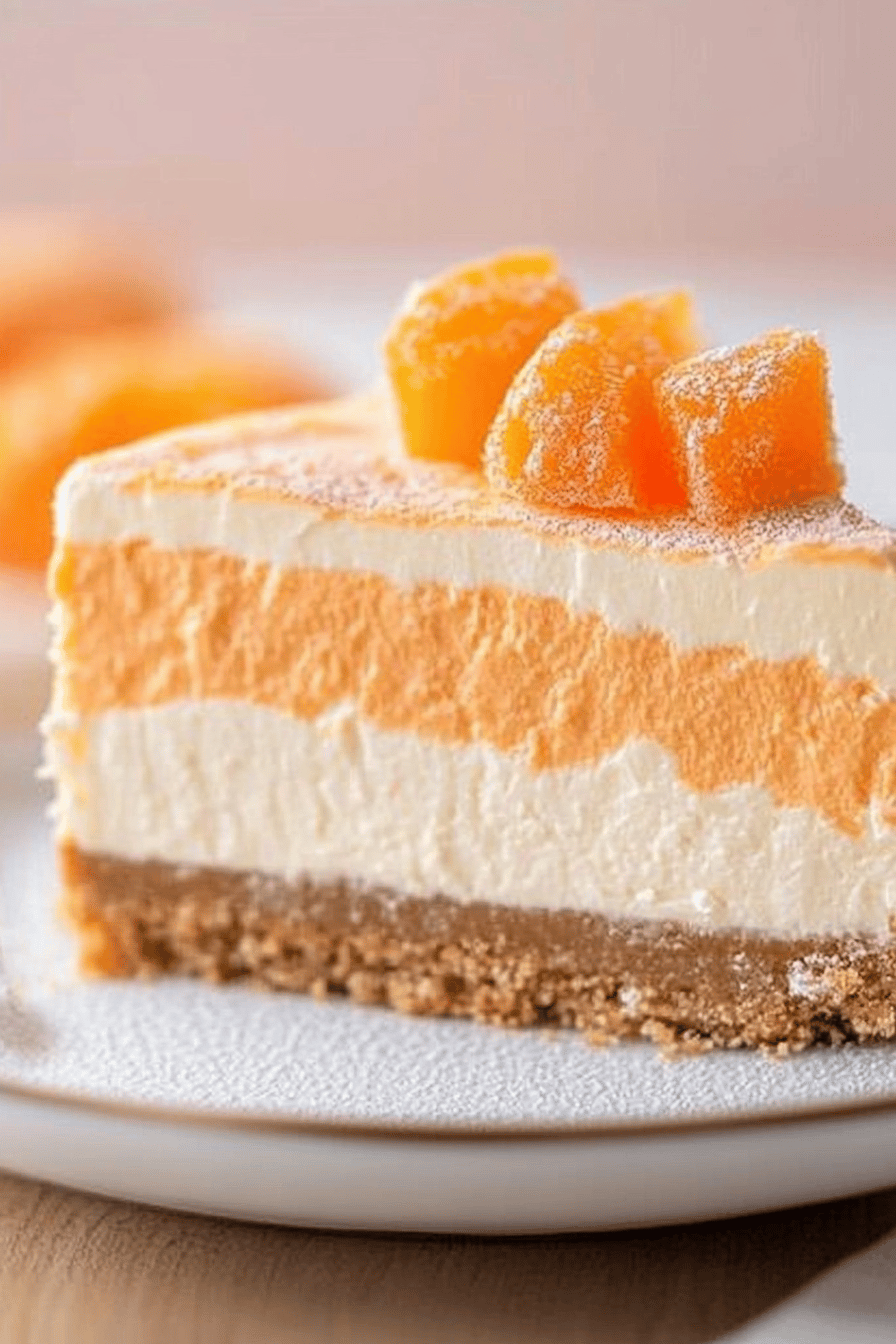
So, what exactly is this magical thing I’m raving about? Think of it as a classic, dreamy cheesecake that’s been given a delightful makeover with the iconic flavors of an orange creamsicle. You know that classic combination – that smooth, sweet vanilla ice cream mingling with the tangy, refreshing burst of orange? That’s what we’ve bottled up and baked into this incredible dessert. It’s essentially a rich, creamy, No-Bake Cheesecake base, infused with vibrant orange zest and juice, and swirled with ribbons of pure vanilla goodness. The texture is just divine – impossibly smooth and melt-in-your-mouth, with that perfect balance of sweet and tart that keeps you coming back for another bite. It’s a flavor profile that’s instantly recognizable and always a crowd-pleaser. It’s not overly complicated; it’s just a really, really good cheesecake that happens to taste like your favorite childhood treat!
Why you’ll love this recipe?
Honestly, I could go on and on about why this orange creamsicle cheesecake is a winner, but let me try to narrow it down. First, the flavor is just out of this world. It’s that perfect harmony of creamy, tangy orange and sweet vanilla that’s both refreshing and incredibly satisfying. It’s not overly sweet, which I appreciate, so you get all the bright citrus notes without it feeling cloying. Then there’s the simplicity factor. I know cheesecake can sometimes sound intimidating, but this one is surprisingly straightforward. You don’t even need a water bath, which is a lifesaver in my book! Plus, the ingredients are super accessible. You probably have most of them in your pantry right now. What I love most, though, is its versatility. It’s perfect for a summer picnic, a birthday celebration, or honestly, just because you deserve a treat after a long day. It feels special, but it’s genuinely easy enough to make on a weeknight if you’ve got a craving. Compared to other cheesecakes I’ve made, this one stands out because it brings that fun, nostalgic element. It always brings smiles to faces, and that’s really what it’s all about, isn’t it?
How do you make Orange Creamsicle Cheesecake?
Quick Overview
Making this orange creamsicle cheesecake is a breeze, and I promise you’ll feel like a baking superstar. We start by creating a simple graham cracker crust, then whip up a luscious, no-bake Cream Cheese filling infused with real orange zest and juice. The magic really happens when we swirl in ribbons of vanilla. It bakes up into a beautiful, creamy dream that sets perfectly. The final touch is a vibrant orange glaze that just screams summer. It’s mostly hands-off chilling and mixing, making it ideal for when you want a showstopper without all the fuss. Seriously, it’s one of those recipes that delivers big on flavor and presentation with minimal stress.
Ingredients
For the Crust:
2 cups Graham Cracker crumbs (about 14 full sheets) – I like to pulse mine in the food processor until they’re fine
1/4 cup granulated sugar – just a touch to sweeten it up.
1/2 cup unsalted butter, melted – make sure it’s fully melted and a little warm, but not boiling.
For the Filling:
3 (8-ounce) packages Cream Cheese, softened to room temperature – this is crucial for a smooth, lump-free filling. Don’t rush this part!
1 1/4 cups granulated sugar – for that classic sweetness.
1/4 cup fresh orange juice – I always use freshly squeezed for the best flavor. No bottled stuff here!
2 tablespoons orange zest – get as much of that fragrant oil as you can. A microplane is your best friend for this.
1 teaspoon vanilla extract – good quality vanilla makes a difference.
1/2 cup sour cream, at room temperature – this adds an extra layer of creaminess and a slight tang.
For the Swirl:
1/2 cup heavy cream, cold – make sure it’s nice and cold!
2 tablespoons powdered sugar – just to sweeten it lightly.
1/4 teaspoon vanilla extract
For the Orange Glaze:
1 cup powdered sugar, sifted – sifting prevents lumps.
2-3 tablespoons fresh orange juice – start with 2 and add more if needed for drizzling consistency.
1/4 teaspoon orange zest (optional, for extra zing)

Step-by-Step Instructions
Step 1: Preheat & Prep Pan
First things first, preheat your oven to 350°F (175°C). Grab a 9-inch springform pan. You’ll want to lightly grease the bottom and sides. This helps ensure your beautiful cheesecake releases cleanly later. I like to press a piece of parchment paper on the bottom too, just for extra insurance. It’s a little trick I learned after one too many stuck cheesecakes!
Step 2: Mix Dry Ingredients
In a medium bowl, combine your graham cracker crumbs and granulated sugar. Give it a good whisk to make sure everything is nicely distributed. This is the base for our delicious crust.
Step 3: Mix Wet Ingredients
Pour the melted butter over the graham cracker and sugar mixture. Stir everything together until the crumbs are evenly moistened, like wet sand. It should hold together when you squeeze it. If it seems a little dry, add another tablespoon of melted butter.
Step 4: Combine
Press the graham cracker mixture firmly and evenly into the bottom of your prepared springform pan. Use the flat bottom of a glass or a measuring cup to get a nice, compact layer. You can even press it a little up the sides if you like a thicker crust. Bake for 8-10 minutes, just until it’s lightly golden. Let it cool completely while you prepare the filling.
Step 5: Prepare Filling
In a large bowl, beat the softened cream cheese with an electric mixer on medium speed until it’s completely smooth and creamy. This is key to avoiding lumps! Gradually add the granulated sugar and beat until well combined. Then, add the fresh orange juice, orange zest, and vanilla extract. Beat again until everything is smooth. Finally, gently stir in the sour cream until just combined. Don’t overmix at this stage, or you might incorporate too much air.
Step 6: Layer & Swirl
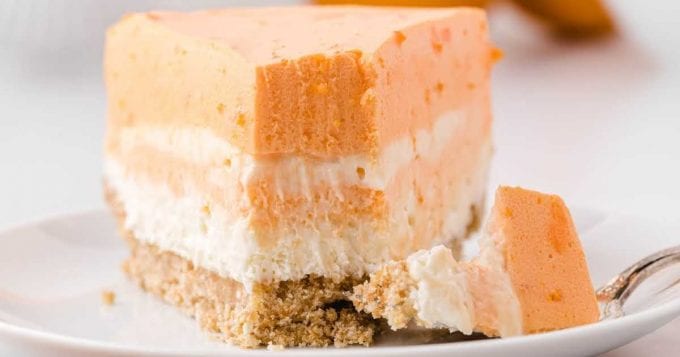
Pour about half of the cream cheese filling over the cooled crust. Then, dollop half of the whipped vanilla cream mixture (which you’ll make in the next step!) over the first layer. Repeat with the remaining cream cheese filling and then the remaining vanilla cream. Use a knife or skewer to gently swirl the vanilla into the orange cream cheese filling, creating beautiful marbled patterns. Don’t over-swirl; you want distinct ribbons.
Step 7: Bake
Bake the cheesecake in the preheated oven for 50-60 minutes, or until the edges are set and the center is just slightly jiggly. It shouldn’t look liquidy, but there should be a gentle wobble. Turn off the oven, crack the door open slightly, and let the cheesecake cool in the oven for another hour. This gradual cooling helps prevent cracks.
Step 8: Cool & Glaze
Once cooled in the oven, remove it from the oven and let it cool completely on a wire rack. Then, cover it loosely with plastic wrap and refrigerate for at least 6 hours, or preferably overnight, to allow it to set fully. For the glaze, whisk together the sifted powdered sugar and orange juice until smooth. If it’s too thick, add a tiny bit more juice; if too thin, add a little more powdered sugar. You want a drizzling consistency. Once the cheesecake is chilled and set, drizzle the glaze over the top. Add the extra zest if you’re using it for more color and flavor.
Step 9: Slice & Serve
To get the cleanest slices, run a thin, sharp knife under hot water, wipe it dry, and then slice. Repeat for each cut. Serve chilled and enjoy the pure bliss!
What to Serve It With
This orange creamsicle cheesecake is so versatile, it fits right in at any gathering. For breakfast, I love a small slice with a good cup of strong coffee. It’s not too sweet to start the day, and the citrus brightens everything up. At brunch, I’ll serve it with fresh berries – raspberries or strawberries are perfect companions. A little dollop of whipped cream on top makes it feel extra special. As a dessert, it’s obviously the star. I often serve it with a side of extra orange segments or even a light raspberry coulis for a pop of contrasting color and flavor. For those cozy, late-night snacks, it’s wonderful all on its own, maybe with a glass of milk. My kids always want it with a little extra drizzle of that orange glaze – they’re obsessed!
Top Tips for Perfecting Your Orange Creamsicle Cheesecake
I’ve made this orange creamsicle cheesecake more times than I can count, and I’ve learned a few tricks along the way that I just have to share. First, about the zest: don’t just use the peel from the outside. Get down to the bright orange part – that’s where all the flavorful oils are. A microplane is really the best tool for this; it zests finely without getting any of the bitter white pith. When it comes to the cream cheese, please, please make sure it’s truly softened. If it’s still cold, you’ll end up with lumps, and nobody wants lumpy cheesecake! I usually leave mine out on the counter for a couple of hours. For the swirling, remember that less is often more. You want distinct streaks of vanilla, not a muddy mess. Gentle, few strokes are all you need. I once tried to make it super swirly and it just looked… brown! It still tasted good, but the visual wasn’t quite there. If you’re worried about cracking, the gradual cooling in the oven after turning it off is your best friend. It’s a simple step, but it makes a huge difference. For ingredient swaps, if you can’t find fresh oranges, a good quality orange extract can work in a pinch for the filling, but you’ll need to adjust the amount carefully. And for the crust, if graham crackers aren’t your thing, digestive biscuits or even shortbread cookies would make a lovely alternative. Experiment with your glaze consistency too; a thicker glaze is great for piping if you’re feeling fancy, while a thinner one is perfect for drizzling.
Storing and Reheating Tips
Storing this beautiful orange creamsicle cheesecake is pretty straightforward, thankfully! At room temperature, it really shouldn’t sit out for more than about 2 hours, especially if it’s warm out. The cream cheese needs to stay cool. Once it’s fully set, I like to cover it tightly with plastic wrap, making sure it’s sealed well to prevent it from drying out or picking up any odors from the fridge. It will keep beautifully in the refrigerator for up to 4-5 days. I’ve found the flavor actually deepens slightly on the second day! If you need to freeze it, which is a great make-ahead strategy, I recommend freezing it *before* you add the glaze. Wrap the cheesecake very well in a couple of layers of plastic wrap, then in a layer of aluminum foil. It can stay frozen for up to 2-3 months. To thaw, place it in the refrigerator overnight. Then, add your glaze just before serving. I always add the glaze right before serving to keep it fresh and shiny. If you do have leftover cheesecake with glaze, it’s still best kept refrigerated.
Frequently Asked Questions
Final Thoughts
So there you have it – my ultimate orange creamsicle cheesecake recipe. It’s more than just a dessert; it’s a little slice of sunshine, a reminder of simpler times, and a guaranteed way to bring smiles to the table. I truly hope you give this a try. It’s one of those recipes that feels special enough for a party but is wonderfully achievable for any home cook. If you love this, you might also enjoy my Lemon Blueberry Swirl Cake for another fruity, delightful treat. And of course, if you make this orange creamsicle cheesecake, please leave a comment below and let me know how it turned out! I’d love to hear your thoughts, any tweaks you made, or how your family enjoyed it. Happy baking, and may your kitchen always be filled with delicious aromas!
Orange Creamsicle Cheesecake
Ingredients
Crust
- 1.5 cups graham cracker crumbs
- 0.25 cups granulated sugar
- 6 tablespoons unsalted butter, melted
Cheesecake Filling
- 24 ounces cream cheese, softened
- 1 cup powdered sugar
- 0.5 cup orange juice concentrate, thawed
- 1 teaspoon orange zest
- 1 cup heavy whipping cream
- 0.5 teaspoon vanilla extract
Optional Topping
- 0.5 cup whipped cream for garnish
- orange slices for garnish
Instructions
Prepare the Crust
- In a medium bowl, combine graham cracker crumbs and granulated sugar. Pour in melted butter and stir until well combined.
- Press the crumb mixture evenly into the bottom of a 9-inch springform pan.
- Place the crust in the freezer while you prepare the filling.
Make the Cheesecake Filling
- In a large bowl, beat the softened cream cheese with an electric mixer until smooth.
- Gradually add the powdered sugar and beat until well combined and no lumps remain.
- Stir in the thawed orange juice concentrate and orange zest until evenly distributed.
- In a separate bowl, whip the heavy cream with vanilla extract until stiff peaks form.
- Gently fold the whipped cream into the cream cheese mixture until just combined. Be careful not to overmix.
Assemble and Chill
- Pour the cheesecake filling over the prepared crust in the springform pan and spread evenly.
- Cover the cheesecake with plastic wrap and refrigerate for at least 4-6 hours, or until firm.
- Before serving, carefully remove the sides of the springform pan.
- Garnish with whipped cream and orange slices, if desired.


