


You know those days when you just crave something sweet, something bright and zesty, but the thought of pulling out every single mixing bowl and appliance feels like way too much effort? Yeah, I’ve been there more times than I can count, usually around 10 PM when the craving hits hardest. That’s exactly how this incredible One bowl lemon dessert. came to be a staple in my kitchen. It’s this wonderfully moist, tender cake-like creation that just bursts with fresh lemon flavor. It reminds me so much of my grandma’s lemon loaf, but honestly, it’s even easier. There’s no complicated creaming of butter and sugar, no separate bowls for wet and dry ingredients that then have to be meticulously combined. Nope, this is pure, unadulterated, simple joy in a single bowl. It’s the kind of dessert that makes you feel like a baking superhero, even when you’re wearing your comfiest pajamas.
What is a one bowl lemon dessert?
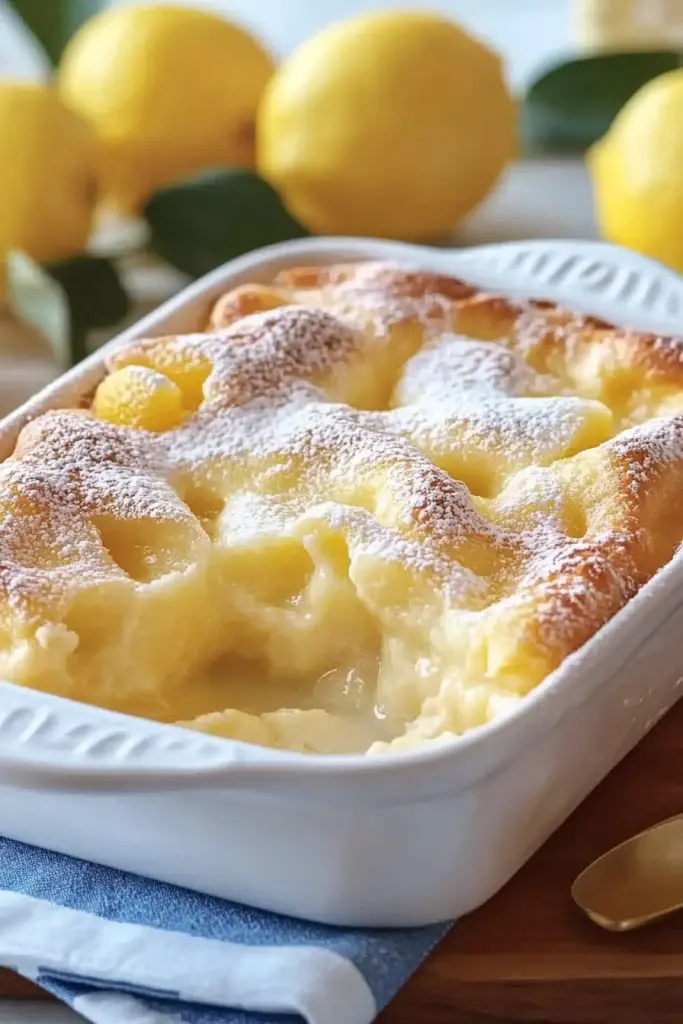
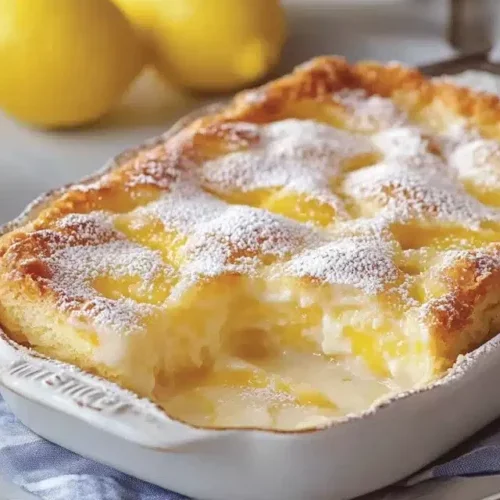
So, what exactly is this magical one bowl wonder? Think of it as a super moist, incredibly flavorful lemon cake or a dense, rich lemon blondie – honestly, it sits somewhere perfectly in between, and that’s part of its charm! The “one bowl” part isn’t just a cute name; it’s the absolute truth. You literally mix everything right there in one vessel, which dramatically cuts down on cleanup, a huge win in my book. The name itself, “Sunshine Cake,” is what my kids started calling it because of its bright yellow hue and the way it just brightens up any dull afternoon. It’s essentially a dense, slightly chewy, incredibly citrusy bar that’s both comforting and refreshing. It’s the perfect way to capture that pure, unadulterated lemon taste without any fuss.
Why you’ll love this recipe?
Why is there so many reasons for this.one bowl lemon dessert has become my go-to. First and foremost, the flavor. Oh, the flavor! It’s intensely lemony, not just from the zest, but from the juice too, giving it a beautiful tang that balances the sweetness perfectly. It’s that kind of flavor that makes you close your eyes and savor each bite. Then there’s the simplicity. I mean, truly, just one bowl! This is a lifesaver on busy weeknights when you want a homemade treat but don’t have hours to spare. You can whip it up in about 15 minutes and then let the oven do the rest of the work. And let’s talk about cost – the ingredients are super budget-friendly; you probably have most of them in your pantry right now. It’s also incredibly versatile. Serve it warm with a scoop of vanilla ice cream, dust it with powdered sugar, or drizzle it with a simple LEMON GLAZE. It’s just so forgiving! What I love most about this recipe is that it feels special enough for guests but is also perfectly cozy for a quiet afternoon tea. It’s the kind of dessert that brings a smile to everyone’s face, and honestly, that’s what baking should be all about.
How to Make This One Bowl Lemon Dessert
Quick Overview
This recipe is all about minimal effort for maximum reward. You’ll whisk together your dry ingredients in a single bowl, then add your wet ingredients and mix until just combined. A simple swirl of lemon goodness is added before baking to perfection. The entire process from start to finish, including mixing, takes less than 20 minutes. It’s designed to be incredibly straightforward, meaning even novice bakers can achieve fantastic results. The beauty of using just one bowl means less mess and more time enjoying the delicious outcome!
Ingredients
For the Main Batter:
2 cups all-purpose flour
1 ½ teaspoons baking powder – make sure it’s fresh! Old baking powder can make your dessert flat, and we want it nice and fluffy.
½ teaspoon salt – this really wakes up all the other flavors.
1 cup granulated sugar – I find this gives the perfect balance of sweetness and tang.
½ cup (1 stick) unsalted butter, melted – I prefer unsalted so I can control the saltiness better, but salted works in a pinch!
2 large eggs – room temperature is best; they incorporate more easily.
½ cup milk – I’ve tested this with almond milk and it actually made it even creamier! Whole milk gives it a lovely richness, though.
1 teaspoon vanilla extract – a good quality vanilla makes a difference.
Zest of 2 large lemons – this is where all that bright, sunny flavor comes from! Don’t skip this part; it’s crucial.
¼ cup fresh lemon juice – again, fresh is key here for that zesty punch.
For the Lemon Swirl (optional but highly recommended!):
¼ cup granulated sugar
1 tablespoon all-purpose flour
1 tablespoon lemon zest
For the Lemon Glaze (optional):
1 cup powdered sugar
2-3 tablespoons fresh lemon juice – start with 2 and add more until you reach your desired consistency.
Step-by-Step Instructions
Step 1: Preheat & Prep Pan
First things first, let’s get that oven preheated to 350°F (175°C). I always do this first thing to make sure it’s ready to go when my batter is. Then, grease and flour an 8×8 inch baking pan. You can also line it with parchment paper, leaving some overhang, which makes lifting the finished dessert out a breeze. I like to use a little butter for greasing and then just a light dusting of flour. Make sure to get into all the corners!
Step 2: Mix Dry Ingredients
Grab your single, glorious mixing bowl! Add the 2 cups of all-purpose flour, the 1 ½ teaspoons of baking powder, and the ½ teaspoon of salt. Give it a good whisk until everything is nicely combined. This step ensures your baking powder and salt are evenly distributed, which is super important for an even rise and flavor. You’ll see it all come together into a pale, fluffy mixture.
Step 3: Mix Wet Ingredients
Now, in a separate small bowl or large liquid measuring cup (if you want to keep your primary bowl for the batter), whisk together the 1 cup of granulated sugar, ½ cup of melted butter, 2 large eggs, ½ cup of milk, and 1 teaspoon of vanilla extract. Make sure the butter isn’t super hot when you add it to the eggs, or you might end up with scrambled eggs – oops! Whisk until it’s all smooth and well combined. Then, stir in the zest of 2 large lemons and ¼ cup fresh lemon juice.
Step 4: Combine
Pour the wet ingredients into the bowl with your dry ingredients. Now, here’s the crucial part: mix until *just* combined. Overmixing can develop the gluten too much, leading to a tough dessert. A few streaks of flour are okay; they’ll disappear as it bakes. Use a spatula or wooden spoon and gently fold everything together. You’re looking for a thick, smooth batter. It should smell amazing already!
Step 5: Prepare Filling
If you’re making the lemon swirl, which I highly recommend, it’s super simple. In a tiny bowl, combine ¼ cup granulated sugar, 1 tablespoon all-purpose flour, and 1 tablespoon lemon zest. Give it a quick mix with a fork. This will create little pockets of intense lemon flavor throughout the dessert.
Step 6: Layer & Swirl
Spread about half of the batter into your prepared baking pan, smoothing the top with your spatula. Sprinkle the lemon swirl mixture evenly over the batter. Then, carefully spoon the remaining batter over the swirl mixture, trying to cover it as much as possible. If you want a more defined swirl, you can gently drag a knife or skewer through the batter in a zigzag pattern, but honestly, just getting it in there is enough for a beautiful effect.
Step 7: Bake
Pop the pan into your preheated oven. Bake for about 25-35 minutes. The exact time will depend on your oven, of course. You’ll know it’s done when a toothpick inserted into the center comes out clean, or with just a few moist crumbs attached. The top should be golden brown, and the edges should be pulling away slightly from the sides of the pan.
Step 8: Cool & Glaze
Let the dessert cool in the pan on a wire rack for at least 15-20 minutes before attempting to glaze or slice. If you’re adding the glaze, whisk together 1 cup of powdered sugar and 2-3 tablespoons of fresh lemon juice in a small bowl until you have a smooth, pourable consistency. Drizzle this over the slightly cooled dessert. It sets up beautifully and adds another layer of that bright lemon flavor.
Step 9: Slice & Serve
Once it’s cooled enough to handle (and resist that amazing smell!), cut it into squares or bars. It’s delicious served warm or at room temperature. If you glazed it, give the glaze a little time to set before slicing. This is perfect on its own, but if you’re feeling extra decadent, a dollop of whipped cream or a scoop of vanilla bean Ice Cream is divine.
What to Serve It With
This one bowl lemon dessert is so wonderfully versatile, it fits into pretty much any meal or occasion. For breakfast, I love cutting a small square and serving it warm with my morning coffee. It’s like a sunshine-filled start to the day, much better than a plain muffin! For brunch, it’s elegant enough to be part of a spread. I’ll often cut it into slightly smaller, neater portions and arrange them on a pretty platter. A light dusting of powdered sugar makes it look extra special. As a dessert, it truly shines. It’s light enough after a rich meal but satisfyingly sweet. I often pair it with a simple cup of tea or even a Moscato if I’m feeling fancy. And for those cozy, quiet afternoons when you just need a little pick-me-up, this is my absolute go-to. A glass of cold milk is all it needs. My family has a tradition of making this after a long soccer game on a Saturday – it’s our little reward!
Top Tips for Perfecting Your One Bowl Lemon Dessert
Over the years, I’ve learned a few tricks that really elevate this one bowl lemon dessert from good to absolutely stellar. For the lemon zest, I always use a microplane grater. It gets the most flavor from the peel without digging into the bitter white pith. Make sure to zest the lemons *before* you juice them – it’s so much easier! When it comes to mixing, remember that “just combined” is your mantra. Overmixing is the enemy of tender baked goods. If you see a few small streaks of flour, don’t sweat it; they’ll disappear in the oven. For the lemon swirl, I sometimes like to add a tiny pinch of cinnamon to the sugar mixture for a subtle warmth, though it’s absolutely delicious without it. If you want a really prominent swirl, you can try making a thicker paste with a little less sugar and a bit more zest and juice, then dolloping it and swirling more intentionally. When baking, ovens can be quirky. If yours tends to run hot, keep an eye on it and maybe check a few minutes earlier than the recipe states. A wooden skewer or toothpick test is your best friend here. For ingredient swaps, if you’re out of milk, a plain yogurt or Sour Cream thinned with a little water can work in a pinch and adds a lovely tang. And if you’re not a fan of lemon glaze, a simple dusting of powdered sugar through a sieve is beautiful and classic. I once accidentally used Meyer lemons, and the result was even sweeter and more fragrant – a delightful surprise!
Storing and Reheating Tips
One of the best things about this one bowl lemon dessert is how well it stores. If you have any leftovers (which is rare in my house!), you can keep it at room temperature for up to 2 days. Just make sure to cover it tightly with plastic wrap or pop it into an airtight container. I’ve found that covering it helps keep it from drying out too much. If you think you might have more than a couple of days’ worth, or if your kitchen is particularly warm, popping it in the refrigerator is a better option. It will stay fresh in the fridge for up to 5 days. When storing in the fridge, I like to wrap it well in plastic wrap, then foil, and place it in an airtight container. This extra layer of protection ensures it doesn’t pick up any unwanted odors. If it’s been refrigerated, you might want to warm it up slightly before serving. A few seconds in the microwave (just 10-15 seconds per piece) or a few minutes in a low oven will bring back that wonderful fresh-baked warmth. If you plan to freeze it, it’s best to do so before glazing. Wrap individual bars or the entire un-glazed dessert tightly in plastic wrap, then in aluminum foil, and place it in a freezer-safe bag or container. It should last for up to 3 months. To thaw, transfer it to the refrigerator overnight, then bring it to room temperature or warm it up as desired. If you’ve already glazed it, it still freezes well, but the glaze might be a little softer upon thawing.
Frequently Asked Questions
Final Thoughts
Honestly, this one bowl lemon dessert is a little piece of sunshine that’s always there when you need it. It’s so wonderfully simple to whip up, and the flavor is just unparalleled – bright, zesty, and perfectly sweet. It’s the kind of recipe that makes you feel capable and accomplished in the kitchen, even on your busiest days. It’s proof that you don’t need a million ingredients or complicated techniques to create something truly delicious and heartwarming. If you love lemon, or if you just appreciate a dessert that’s easy on the cleanup, you *have* to give this one a try. It’s become a favorite for so many people I’ve shared it with, and I have a feeling it will become one of your favorites too. I’d love to hear how yours turns out in the comments below, and if you have any of your own family twists on it, please share! Happy baking!
One Bowl Lemon Dessert
Ingredients
Main Ingredients
- 1.5 cups all-purpose flour
- 1 cup granulated sugar
- 2 teaspoons baking powder
- 0.5 teaspoons salt
- 0.5 cup unsalted butter, melted
- 0.5 cup milk
- 2 large eggs
- 2 tablespoons lemon zest from about 2 lemons
- 0.25 cup fresh lemon juice
Instructions
Preparation Steps
- Preheat your oven to 350°F (175°C). Grease and flour an 8x8 inch baking pan.
- In a large bowl, whisk together the flour, sugar, baking powder, and salt.
- Add the melted butter, milk, eggs, lemon zest, and lemon juice to the bowl with the dry ingredients.
- Whisk until just combined and smooth. Do not overmix.
- Pour the batter into the prepared baking pan and spread evenly.
- Bake for 30-35 minutes, or until a toothpick inserted into the center comes out clean.
- Let the dessert cool in the pan for at least 15 minutes before slicing and serving.


