


There’s this vivid memory I always get when the smell of peppermint floats through the air—my grandma’s cozy kitchen during Christmas, her humming softly as she slid a tray of peppermint swirl brownies out of the oven. The warm chocolate mingling with the chilly, refreshing hit of peppermint used to make these the star of the holiday table. If you’ve ever loved the combination of mint and chocolate in a peppermint patty or those candy canes you sneak before the holiday even arrives, then you’re going to fall head over heels for this recipe. It’s that beautiful, nostalgic flavor combo brought to life as fudgy brownies with little ribbons of peppermint sweetness. I love this version because it’s so uncomplicated but truly magical. It’s perfect not only for holiday treats but whenever you need a comforting, minty pick-me-up. I often compare this treat to classic double chocolate brownies, but the peppermint just elevates it to a whole new level—a little unexpected twist for brownie lovers looking for something fresh.
What is a Peppermint Swirl Brownie?
Think of peppermint swirl brownies as exactly what they sound like: rich, moist chocolate brownies infused with peppermint flavor and playful swirls of peppermint frosting or candy cane bits. It’s essentially a brownie base with a minty surprise running through or atop it, creating that cool contrast with the deep chocolatey richness. The “swirl” part comes from spooning a peppermint glaze or cream throughout the batter before baking, so when it comes out of the oven, you have these gorgeous, marble-like patterns. The peppermint flavor usually comes from peppermint extract or crushed candy canes—sometimes both for a more intense hit. If brownies are your kitchen comfort food, this treat adds a refreshing twist that’ll keep you coming back.
Why you’ll love this recipe?
Let me spill why this peppermint brownie recipe has become a staple in my kitchen. First, the flavor combo is unbeatable—the rich, fudgy chocolate paired with that bright, cooling peppermint makes every bite feel like a mini celebration. It’s not just your typical brownie; this one has personality and punch.
Another thing I adore is how simple it is. Seriously, if you’ve ever felt intimidated by fancy dessert recipes, this one’s your buddy. You only need a handful of ingredients, many of which you probably have in your pantry already, and it comes together in under 30 minutes. Plus, the peppermint swirl part? That’s an easy, fun step that makes the brownies look like you spent hours fussing over them, but it’s really just a few swirls with a toothpick or knife.
And here’s something that always makes me smile: it’s budget-friendly. No obscure or expensive ingredients — just basic staples with peppermint extract or candy canes adding that festive flair. Plus, you can customize the intensity of the mint flavor based on your preference without needing any special additions.
Versatility is the last reason I keep making this recipe. It’s not just a dessert! Like, I’ve served these brownies as a surprising treat at brunch, with coffee to warm up the room, and sometimes even cut small squares for after-dinner snacks. If you’re a fan of peppermint hot chocolate or minty cookies, this brownie is like getting all those flavors in one fudgy bite. What I love most about this is that it feels fancy but hides its humble, easy-going roots—there’s nothing intimidating about whipping these up even for your kids’ school bake sale or a last-minute gathering.
How do I make homemade peppermint swirl brownies?
Quick Overview
From mixing the batter to swirling in that peppermint glaze, this recipe is a straightforward joy. You start by preheating your oven and getting your pan ready—this step gives so much confidence because it means you’re already halfway there! The magic is in combining a simple chocolate batter with a cool peppermint layer that’s spooned over and swirled just right. Baking only takes about 25 minutes, and the whole house fills with smell that will have you checking the oven every two minutes (don’t worry, I did too!). Then it’s just letting them cool to enjoy or glaze for that shiny, sweet peppermint finish. This method shines because it’s mess-free, approachable, and incredibly satisfying each time.
Ingredients
For the Main Batter:
- 1 cup (2 sticks) unsalted butter, melted – Using unsalted lets you control the salt, and I always recommend high-quality butter here for the richest flavor.
- 2 cups granulated sugar – I stick to regular sugar, but you can tone it down or swap part for coconut sugar if you want a warmer note.
- 4 large eggs – At room temp for easier mixing and better rise.
- 1 tbsp pure vanilla extract – Adds warmth and rounds out the chocolate.
- 1 cup all-purpose flour – Sifted for lightness.
- ¾ cup unsweetened cocoa powder, good quality – This is where things get intense, so don’t skimp.
- ½ tsp salt – Balances the sweetness perfectly.
- ½ tsp baking powder – For a subtle lift without making it cakey.
For the Filling:
- ¾ cup powdered sugar – To keep the swirl creamy but not too runny.
- 2 tbsp unsalted butter, softened – Helps make a spreadable frosting base.
- 1–2 tsp peppermint extract – Adjust to taste; start small, you can always add more!
- 2–3 tbsp milk or cream – Adds smoothness; you can swap for almond milk for a dairy-free twist.
- Optional: ½ cup crushed candy canes or peppermint candies – For texture and an extra burst of mint.
For the Glaze (Optional):
- 1 cup powdered sugar – For that sweet glaze crust.
- 1-2 tbsp milk – Adjust until glaze is pourable but not runny.
- ½ tsp peppermint extract – To keep that flavor consistent.
- Optional: Tiny pinch of salt – Just to add a little depth.
Step-by-Step Instructions
Step 1: Preheat & Prep Pan
Start by preheating your oven to 350°F (175°C). I always line a 9×13-inch baking pan with parchment paper, leaving a little overhang on the sides so you can easily lift the brownies out later. Then, give the parchment a quick spray with non-stick spray or rub with some butter to keep everything smooth and make cleanup a breeze.
Step 2: Mix Dry Ingredients
In a medium bowl, whisk together the flour, cocoa powder, salt, and baking powder until they’re just blended and free of lumps. I like to sift the cocoa and flour here—it helps keep the texture airy and ensures no bitter cocoa chunks sneak into the brownies.
Step 3: Mix Wet Ingredients
In a large bowl, beat the melted butter and granulated sugar together until glossy. Then add the eggs one at a time, beating well after each addition. Stir in the vanilla extract. The mixture should look silky and well combined — don’t rush this part, it really helps with that fudgy texture later.
Step 4: Combine
Now, gently fold the dry ingredients into the wet with a spatula. The key here is to mix just until you don’t see dry flour anymore—overmixing is the enemy of tender brownies. The batter should be thick, luscious, and smooth.
Step 5: Prepare Filling
Mix the softened butter with powdered sugar until creamy, then stir in the peppermint extract and milk, adjusting milk so it’s spreadable but not runny. If you want crunch, fold in crushed candy canes now. This filling is your fresh burst of peppermint, so taste and tweak to your liking.
Step 6: Layer & Swirl
Pour half of the brownie batter into your prepared pan and smooth it out. Dollop the peppermint filling in little spoonfuls over the batter, then spread the remaining batter on top. Grab a butter knife or skewer and gently swirl through the layers—it creates those beautiful peppermint ribbons that make these brownies so special. Don’t over-swirl or the flavors mix too much and you lose that distinct peppermint hit.
Step 7: Bake
Bake for 22–27 minutes, depending on your oven. To check doneness, gently insert a toothpick in the center: it should come out with a few moist crumbs but not wet batter. If it’s dry completely, your brownies might be overdone and less chewy. Keep a close eye starting at 22 minutes because ovens vary and fudgy brownies hate to be dried out.
Step 8: Cool & Glaze
Allow the brownies to cool in the pan on a wire rack for about 15-20 minutes before you try to glaze. If you add the glaze too soon, it will melt and run off. Stir the glaze ingredients until smooth and pour over the cooled brownies, then spread evenly. Let the glaze set for at least 30 minutes so it firms up to that shiny, sweet peppermint finish.
Step 9: Slice & Serve
Using the parchment overhang, lift out the whole slab and transfer it to a cutting board. Use a sharp knife for clean cuts. I like to wipe the knife clean between slices to keep edges neat, especially with the glaze. These brownies are fantastic just as they are, but you can dust with extra crushed peppermint or a sprinkle of powdered sugar for a pretty presentation. Serve slightly warm or at room temperature to savor the best texture.
What to Serve It With
For Breakfast: I know it sounds indulgent, but bite-sized pieces of peppermint swirl brownies with a hot latte or peppermint tea make a fun weekend breakfast treat. The chocolate kick wakes you up nicely alongside a creamy cup of coffee.
For Brunch: These brownies, served on a pretty platter next to fruit salad or yogurt parfaits, play really well with brunch spreads. Pair with a mint mojito mocktail or a sparkling rosé for an elegant touch.
As Dessert: After dinner, a brownie with a scoop of vanilla or peppermint ice cream is everything. You get hot and cold contrast alongside chocolate and mint. Drizzle some warm chocolate sauce if you want to go all out.
For Cozy Snacks: On lazy evenings, I love breaking these into smaller chunks and enjoying them by the fire with a mug of hot chocolate or spiced cider. These are the kind of treats that turn ordinary days into something a little more special. At family movie nights, these disappear in seconds — trust me!
Top Tips for Perfecting Your Homemade Peppermint Swirl Brownies
Chocolate Quality Matters: Don’t skimp on your cocoa powder—rich, natural cocoa gives these brownies their deep color and flavor. I’ve switched brands before and noticed the difference right away!
Use Fresh Peppermint Extract: Peppermint can taste artificial if your extract has been sitting in the pantry forever. Get a quality, fresh bottle for the best flavor punches.
Swirling Technique: When swirling the peppermint filling in, use gentle, curving motions—not too fast or over-mixed or you’ll lose those pretty streaks. Always check your swirls from above before baking; the pattern means a lot visually.
Don’t Overmix Batter: It’s tempting to get everything perfectly smooth but overworking the batter creates dense brownies that aren’t as fudgy. Folding until just combined keeps the texture chewy and light.
Customize Peppermint Intensity: If you want a softer peppermint note, use less extract or cut back on candy canes. If you love mint like I do, don’t hesitate to add a little extra, especially in the glaze.
Freeze Your Candy Canes: Crushing peppermint candies or candy canes can be tricky. I freeze mine first, then put them in a zip bag and bash gently with a rolling pin—this keeps the pieces uniform and prevents powdery messes.
Don’t Skip Cooling Before Glazing: I learned the hard way! If the brownies are too warm, the glaze slides right off. Let them cool fully for best results.
Oven Variability: My oven runs hot, so I usually bake at 345°F and check early. Know your oven and keep a close eye—peppermint swirl brownies hate drying out.
Storing and Reheating Tips
Room Temperature: Store brownies in an airtight container or wrapped tightly with plastic wrap for up to 3 days. If you glaze them, the coating stays neat and delicious without cracking or drying out.
Refrigerator Storage: These brownies also hold up great in the fridge for up to a week. Just place them in an airtight container to keep moisture in—perfect if you want to prep ahead for holiday parties.
Freezer Instructions: For longer storage, wrap brownies tightly in plastic wrap, then foil, and freeze up to 3 months. Thaw overnight in the fridge and finish warming for a few seconds in the microwave before serving.
Glaze Timing Advice: If you plan to freeze, I recommend glazing after thawing rather than before. The glaze texture sometimes dulls in the freezer, and fresh glaze looks and tastes better.
Frequently Asked Questions
Final Thoughts
Honestly, these peppermint swirl brownies have brought so much joy in my kitchen, from quiet afternoon treats to festive family celebrations. The marriage of mint and chocolate feels timeless, but the ease of this recipe makes it accessible anytime you want to bake without fuss. It’s a comfort food with a sparkle of holiday magic—even on an ordinary Tuesday. If you’re as obsessed with peppermint as I am, you might also enjoy my peppermint hot cocoa mix or mint chocolate chip cookies for a full flavor experience. Please, let me know how yours turns out, and don’t be shy to share your little twists or memories connected to peppermint sweets—I live for those stories. Happy baking and may your kitchen always smell like chocolate and mint!
peppermint
Ingredients
Main Ingredients
- 12 oz semi-sweet chocolate chips
- 0.75 cup heavy whipping cream
- 0.25 cup peppermint mocha flavored coffee creamer (see note)
- 2.5 candy canes crushed candy canes for garnish (see note)
- 1 9-inch Oreo pie crust (homemade or store bought)
Instructions
Preparation Steps
- Heat the heavy whipping cream and peppermint mocha creamer in a microwave-safe bowl until very hot but not boiling, about 90 seconds on high.
- Place the semi-sweet chocolate chips in a medium bowl and pour the hot cream mixture over them. Let sit for 30 seconds, then whisk gently until smooth and thick. If necessary, warm in 15-second intervals, whisking until fully melted.
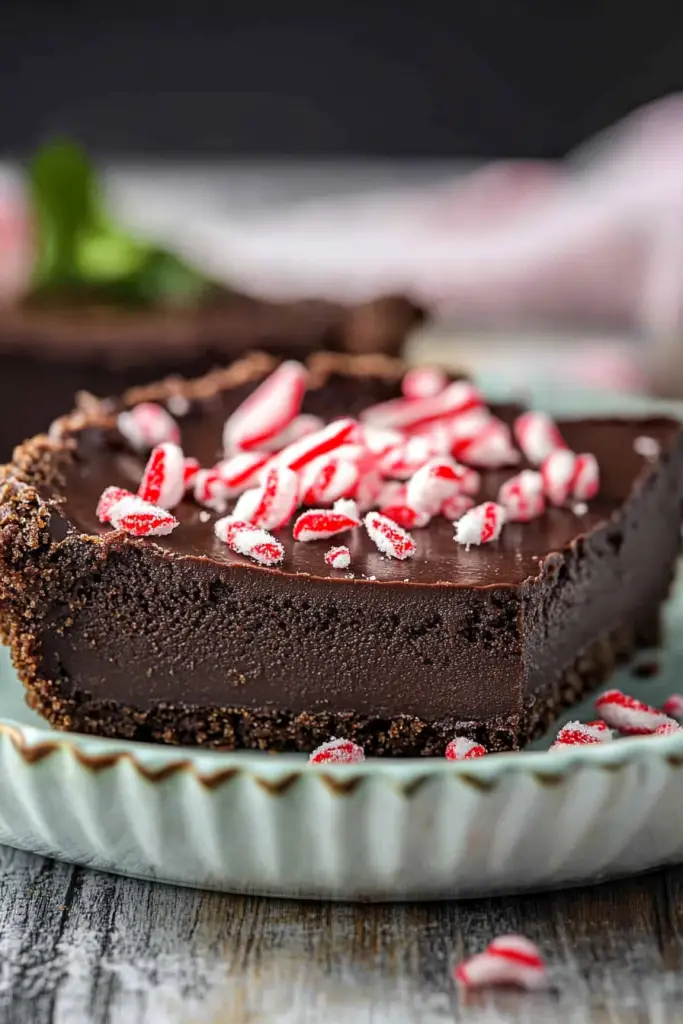
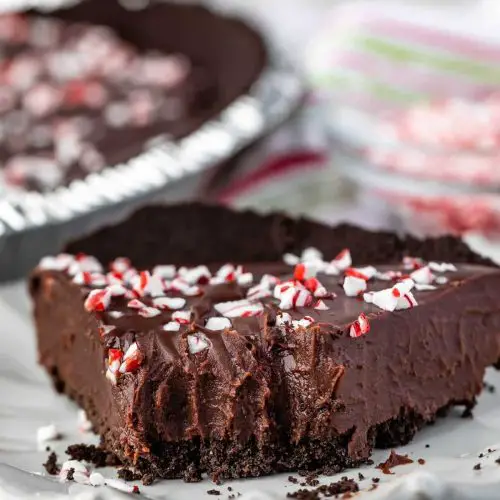
- Pour the peppermint ganache into the Oreo pie crust. Sprinkle crushed candy canes evenly over the top.
- Chill the pie in the refrigerator for at least 4 hours until set. For easier slicing, let it sit at room temperature for about 10 minutes before serving.


