


What is a gluten-free Japanese milk Bread Recipe? I remember the first time I had Japanese milk bread. I swear I almost cried at this tiny little bakery in Tokyo. The texture was like a cloud, the taste was subtly sweet, and I knew I had to recreate it. Imagine a bread that is gluten-free? This recipe is like a fluffy hug in bread form, similar to brioche but with more delicate texture. If you’re a gluten-free baker, you can totally nail this.
What is gluten free Japanese milk bread?
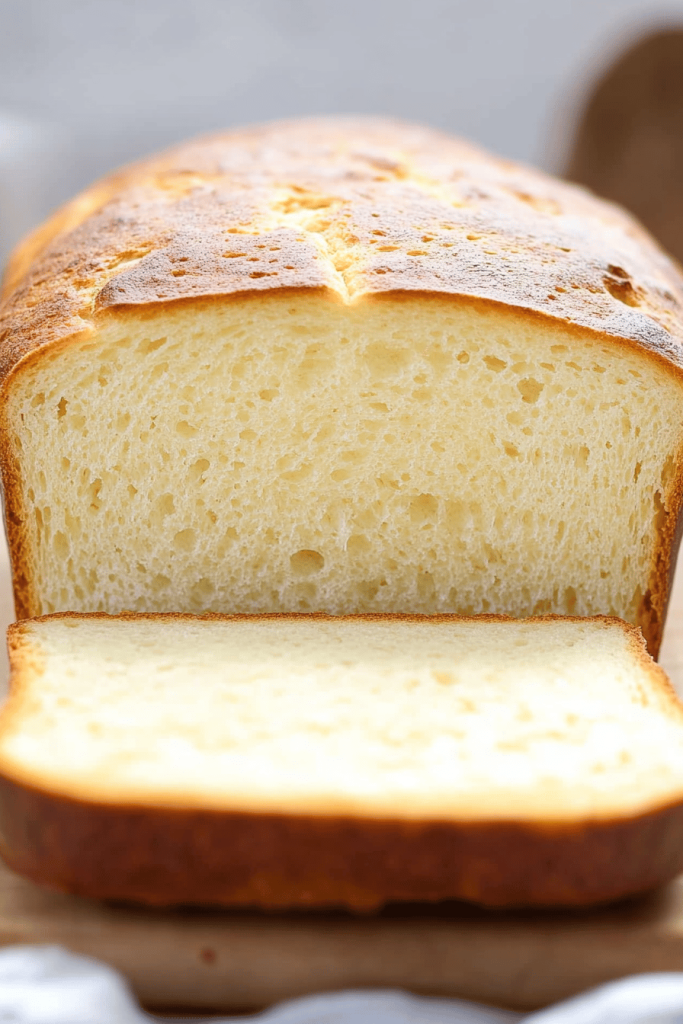
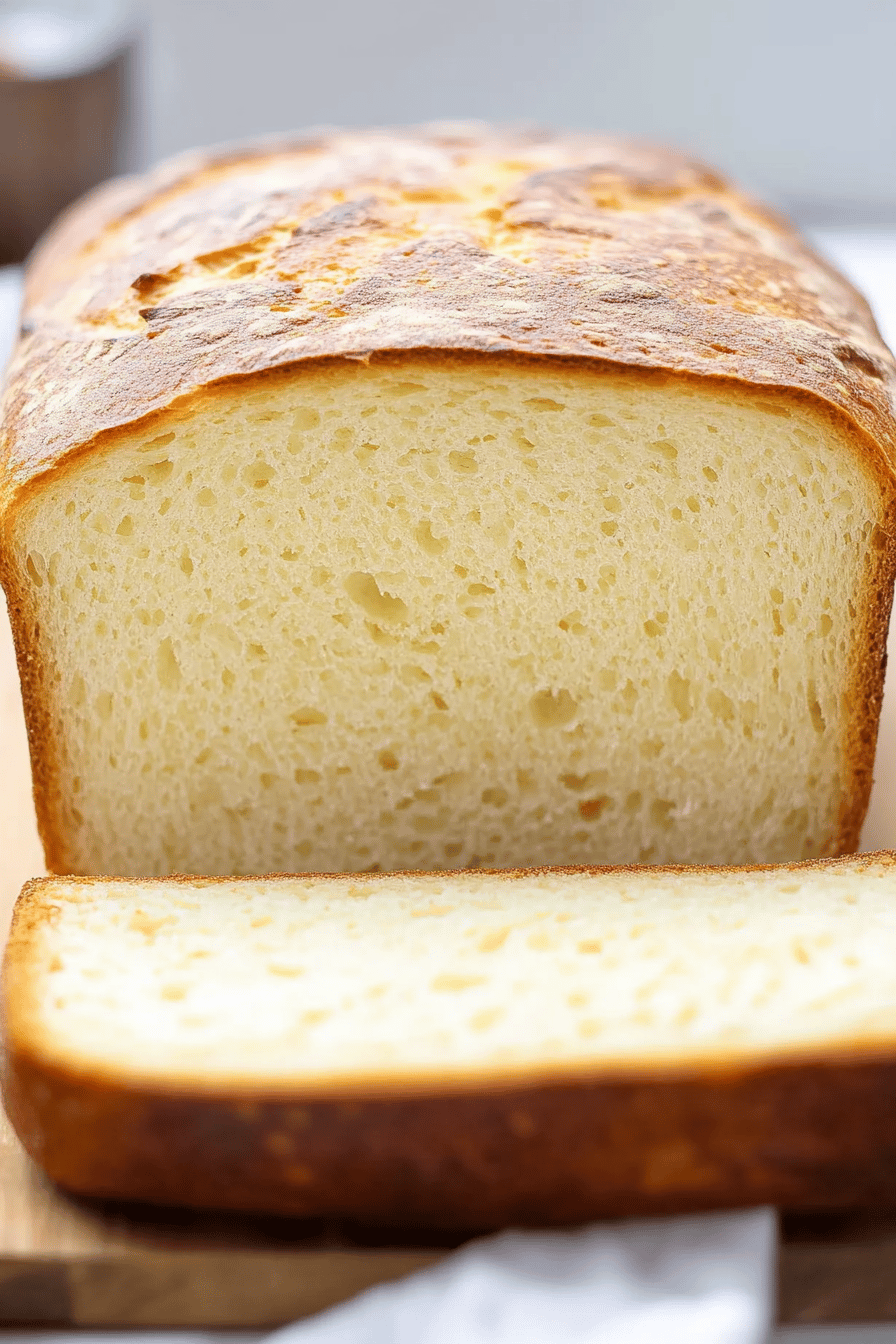
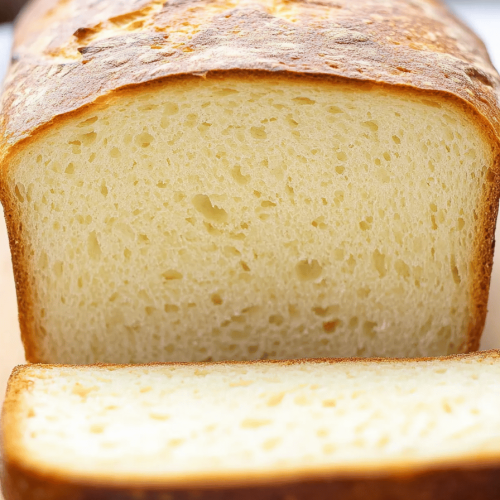
What is Japanese milk bread? Think of it as the most unbelievably soft and pillowy bread you’ve ever encountered. It’s essentially an enriched dough, meaning it has butter, milk, and eggs, which gives it its unique taste. What an amazing tenderness. The secret weapon, though, is the tangzhong method – it’s basically a roux made with flour and sugar. If you cook the liquid before adding it to the rest of the dough, add more liquid. This pre-gelatinizes the starches, allowing the dough to absorb more liquid. What is the softest, most delightful texture? For this version, we’re swapping out the wheat flour for a gluten-free blend that ACTUALLY WORKS! I’ve tested a million, and this one delivers.
Why you’ll love this recipe?
Oh, where do I even begin? First and foremost, the *flavor*. It’s subtly sweet, with a hint of milky richness that’s just… divine. But beyond the taste, it’s the *texture* that truly sets this Gluten-Free Japanese Milk Bread apart. We’re talking cloud-like, melt-in-your-mouth perfection. What I love most about this is how surprisingly *simple* it is to make. Yes, it takes a little time, but the steps are straightforward, and honestly, the active time is minimal. It’s so rewarding to pull this gorgeous loaf out of the oven and know you made it yourself. And let’s not forget the *cost-efficiency*. Using simple, everyday ingredients means you don’t have to break the bank to enjoy a little bit of luxury. This is also incredibly *versatile*. Think sandwiches, toast, Bread Pudding… or just tearing off a piece and enjoying it warm with a little butter. If you’re a fan of challah or even a good Hawaiian roll, this gluten-free version will become your new obsession. I even tried making it with oat milk once, and honestly, it was just as good – maybe even a touch nuttier in flavor! It’s really that adaptable.
How do I make gluten-free Japanese milk bread?
Quick Overview
What is the game plan? What is the magic roux that gives this bread its signature? Then, we’ll combine all the ingredients, let the dough rise, shape it, and bake it until golden brown. Don’t be intimidated by the rise time – it’s mostly hands-off! What is the best way to make gluten-free flour? Is it easier to make a loaf of bread?
Ingredients
For Tangzhong:
* 1/4 cup (30g) gluten-free all-purpose flour blend (I like Bob’s Red Mill 1-to-1 Baking Flour, but can’t eat it). Is xanthan gum safe? ) * 1/2 cup (120ml) whole milk (or almond milk for a dairy-free option – I’ve found it works great! (* 1/2 cup (120ml) water) * 1 tsp
For the Dough:
* 2 1/4 cups (300g) gluten-free all-purpose flour blend (again, Bob’s Red Mill 1-to-1 is my go-to)
* 1/4 cup (50g) granulated sugar
* 1 teaspoon salt
* 2 1/4 teaspoons (1 packet) active dry yeast
* 1/2 cup (120ml) whole milk, warmed to 110°F (43°C)
* 2 large eggs, lightly beaten
* 4 tablespoons (57g) unsalted butter, softened
For the Egg Wash: What is the recipe?
* 1 large egg, beaten with 1 tablespoon milk
What are the steps of
Step 1: Make the Tangzhong
In a small saucepan, whisk together gluten-free flour, milk, and water until smooth. Set aside. Cook over medium heat, stirring constantly, until the mixture thickens into a paste. What is the best way to do this? How do you know if the pan is ready? How do I remove from heat and let cool slightly? Do you want to add hot tangzhong to your dough?
Step 2: Activate the Yeast
In a small bowl, combine the warm milk and yeast. Let it sit for 5-10 minutes, or until foamy. If your yeast is not foaming, it might be too old.
Step 3: Combine Ingredients
In the bowl of a stand mixer fitted with the dough hook attachment (or in tupperware if you’re using it for baking) add the flour. If using a hand blender, combine the gluten-free flour, sugar, and salt. Add the tangzhong, activated yeast mixture, and beaten eggs. Mix on low speed until a shaggy dough forms.
Step 4: Add the Butter
With the mixer still running on low, add the softened butter, one tablespoon at a time, until fully incorporated. Increase the speed to medium and knead for 8-10 minutes, or until the dough is smooth and elastic. What is Gluten Free dough? If the ball is pulled away from the sides of the bowl, it will not form a perfectly smooth ball.
Step 5: First Rise
Place dough in a lightly greased bowl, turning to coat. Cover with plastic wrap and let rise in a warm place for 1-1.5 hours, or until doubled in size. I usually put mine in the oven with the light on – works like a charm!
Step 6: Shape the Dough
Gently deflate the dough and turn it out onto a lightly floured surface. Divide the dough into 3 equal pieces. Roll each piece into a long rope, about 12 inches long. Place the ropes side by side and pinch them together at one end. Braid the ropes together and pinch the other end to seal. Carefully transfer the braid to a greased 9×5 inch loaf pan.
Step 7: Second Rise
Cover the loaf pan with plastic wrap and let rise in a warm place for 30 minutes, or until the top is golden brown. When the dough has almost reached the top of the pan, remove the excess dough from the bottom.
Step 8: Bake
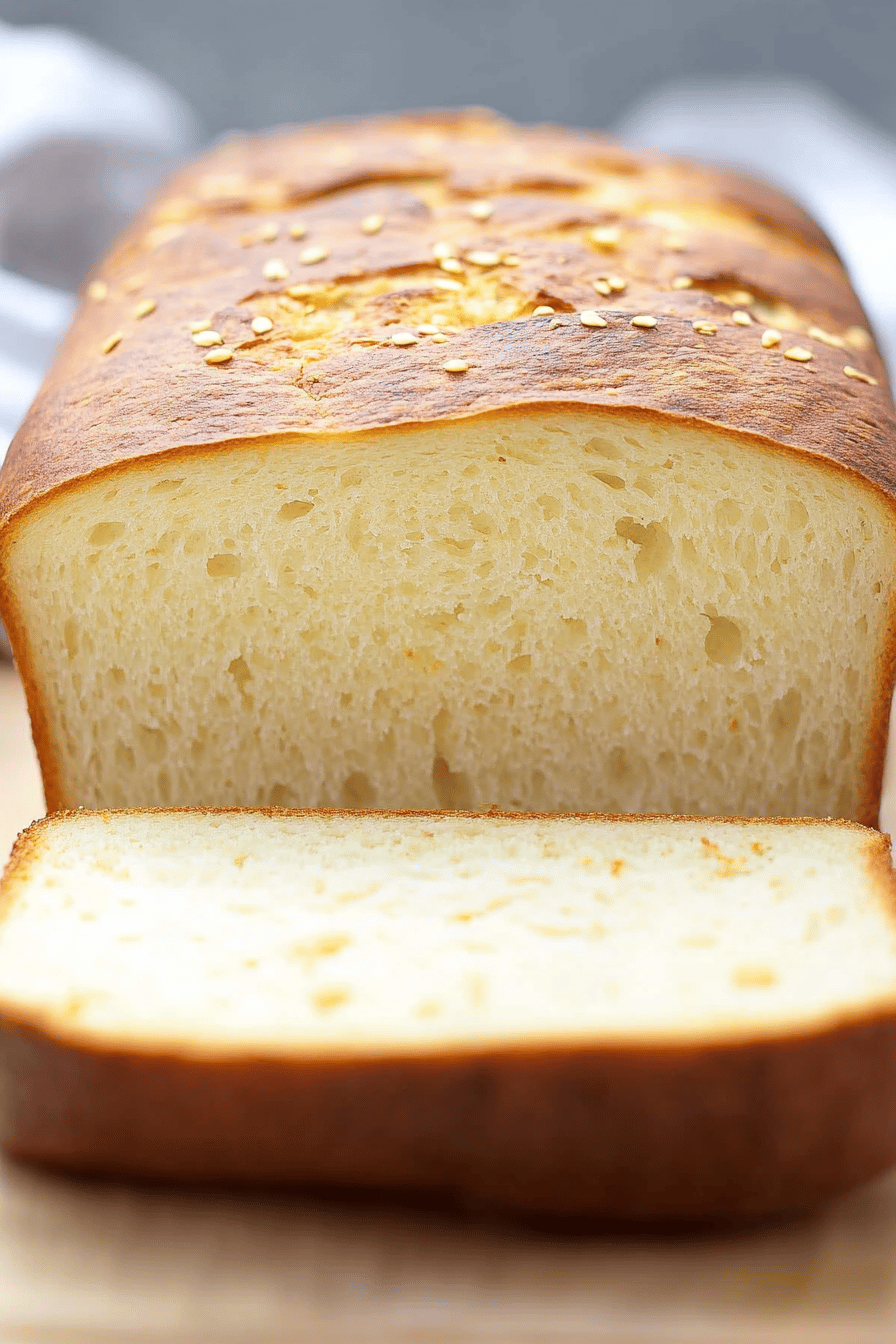
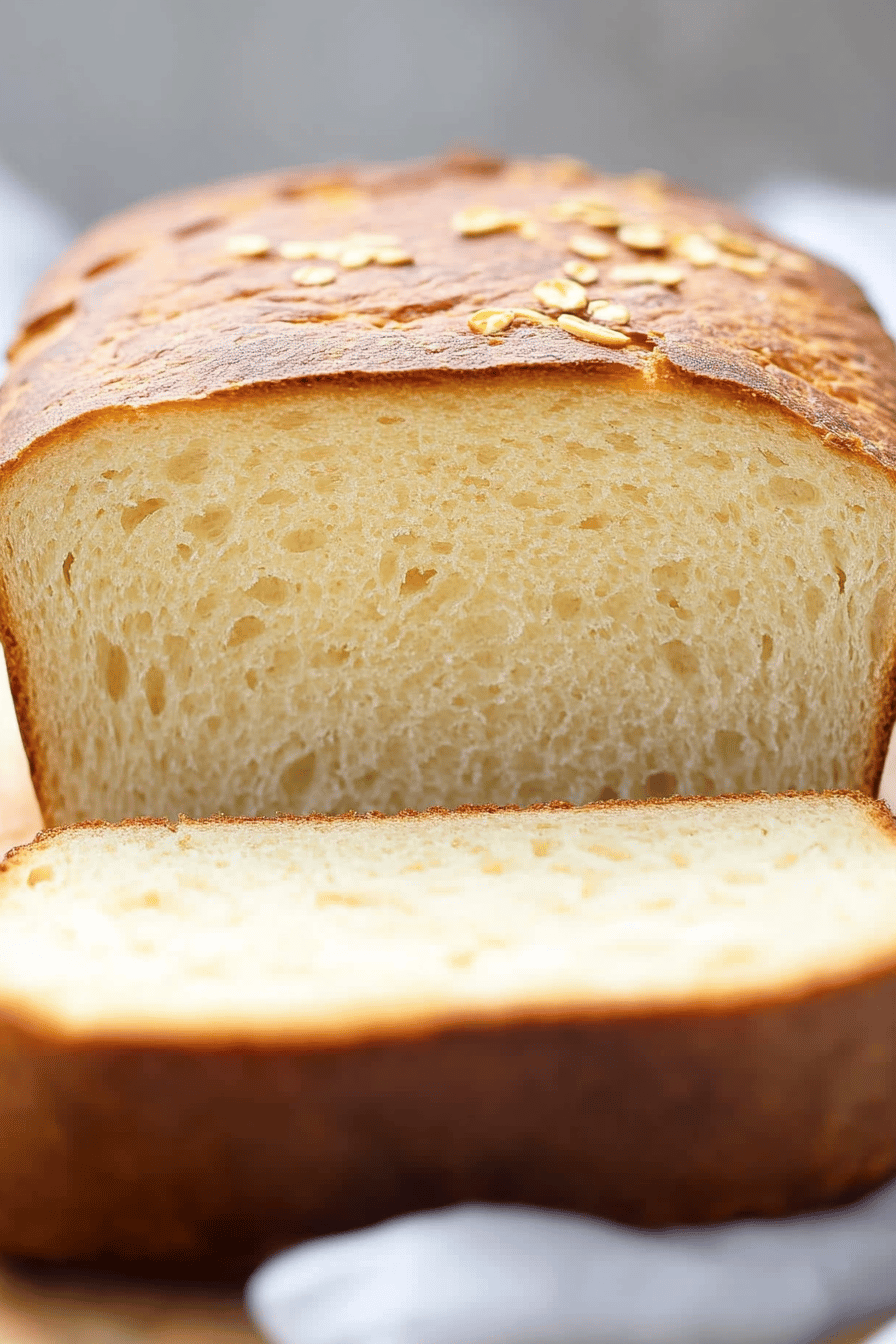
Preheat oven to 350°F (175°C). Brush the top of the loaf with the egg wash. Bake for 30-35 minutes, or until golden brown and the internal temperature reaches 200°F (93°C). If the top starts to brown too quickly, tent it with foil.
Step 9: Cool and Enjoy
Let the bread cool in the pan for 10 minutes before transferring it to a wire rack to cool completely. I always have to sneak a piece while it’s still warm – it’s just too irresistible!
What should I serve it with?
This gluten-free Japanese milk bread is seriously versatile! For breakfast, it’s amazing toasted with a smear of butter and if you like, drizzled with honey. I love pairing it with a strong cup of coffee or latte. What are some good bread baskets for brunch? Serve it with a mimosa for an extra special touch! As *dessert*, this bread is fantastic on its own, or you can get fancy and make it into bread. What is a trifle? Top it with whipped cream and fresh berries for an elegant presentation. What are some of the best snack moments? What is the best way to enjoy tea or hot chocolate? What is the best way to dip a kid in Nutella? Is this bread a crowd pleaser?
How do I make gluten-free Japanese milk bread?
Alright, listen up, because I’ve learned a few things over the years making this Gluten-Free Japanese Milk Bread. First, when it comes to *gluten-free flour*, not all blends are created equal! I swear by Bob’s Red Mill 1-to-1 Baking Flour (the one with xanthan gum), but if you use a different blend, you might need to adjust the liquid slightly. Pay attention to the texture of the dough – it should be smooth and elastic, but not too sticky. For *mixing advice*, don’t overmix the dough! Gluten-free dough doesn’t develop gluten like regular dough, so overmixing can actually make it tough. Just mix until everything is combined and the dough is smooth. When it comes to the *rise*, gluten-free dough can be a little finicky. It might not rise as much as regular dough, but that’s okay! Just make sure it’s doubled in size before baking. As for *ingredient swaps*, you can definitely use almond milk or oat milk in place of the whole milk – it won’t affect the texture too much. And for *baking tips*, keep an eye on the bread while it’s baking. If the top starts to brown too quickly, tent it with foil to prevent it from burning. And lastly, with *glaze variations*, If you want to skip the egg wash, you can brush the top of the loaf with melted butter instead. It will give it a beautiful golden color and a delicious buttery flavor. I’ve even sprinkled a little coarse sugar on top before baking for a little extra sparkle and sweetness!
What are the Storing and Reheating Tips?
To keep your Gluten-Free Japanese Milk Bread fresh, store it in an airtight container at *room temperature* for up to 2 days. If you want to store it for longer, you can keep it in the *refrigerator* for up to a week. Just make sure to wrap it tightly to prevent it from drying out. For *freezer storage*, wrap the loaf tightly in plastic wrap and then place it in a freezer bag. It will keep in the freezer for up to 2 months. When you’re ready to eat it, thaw it overnight in the refrigerator or at room temperature. For *reheating*, you can warm individual slices in the microwave for a few seconds, or toast them in a toaster. To reheat the whole loaf, wrap it in foil and bake it at 350°F (175°C) for 10-15 minutes, or until heated through. *Glaze timing advice*: If you’re planning on storing the bread, it’s best to add the glaze right before serving. This will prevent the glaze from getting sticky or melting during storage.
What are the most frequently asked questions on
Final Thoughts
Is this gluten-free Japanese milk bread good for you? Is this recipe worth the effort? The texture is just out of this world, and the taste is subtly sweet and oh-so-delicious. What are some of the best gluten free recipes? What are some gluten free recipes? What is your favorite recipe for baking cookies? What are your variations and creations?
Gluten-Free Japanese Milk Bread: 5 Secrets to Perfect Texture!
Ingredients
Main Ingredients
- 1.5 cups Gluten-Free All-Purpose Flour Blend with xanthan gum
- 0.5 cup Tapioca Starch
- 2 tablespoons Sugar
- 1 teaspoon Salt
- 1 package Active Dry Yeast
- 0.75 cup Milk Warm
- 4 tablespoons Butter Melted
- 1 Egg Large
Instructions
Preparation Steps
- In a large bowl, combine flour, tapioca starch, sugar, salt, and yeast.
- Add warm milk, melted butter, and egg. Mix until a shaggy dough forms.
- Knead the dough for 5-7 minutes until smooth and elastic.
- Place dough in a greased bowl, cover, and let rise for 1-1.5 hours or until doubled in size.
- Punch down the dough and divide into equal portions. Shape each portion into a ball and place in a greased loaf pan.
- Cover and let rise for another 30-45 minutes.
- Bake in a preheated oven at 350°F (175°C) for 30-35 minutes, or until golden brown.
- Let cool in the pan for 10 minutes before transferring to a wire rack to cool completely.


