


There’s something about the smell of warm cookies baking that instantly takes me back to my childhood kitchen—where my mom would whip up her infamous monster cookie cake that vanished in minutes. If you’ve ever loved classic monster cookies packed with oats, peanut butter, chocolate chips, and colorful candies, then you’re going to flip for this cake version. It’s like all those beloved cookie flavors got together and decided to throw a party in the form of a cake. My kids beg for this monster cookie cake every single time I pull it out of the oven, and honestly, I don’t blame them. It’s richer and softer than a cookie yet still has that satisfying chew and crunch that only a good cookie can deliver. Honestly, it’s the perfect blend of fun and comfort—way better than a plain ol’ chocolate chip cookie cake, and seriously easier to throw together on a busy afternoon.
What is a monster cookie cake?
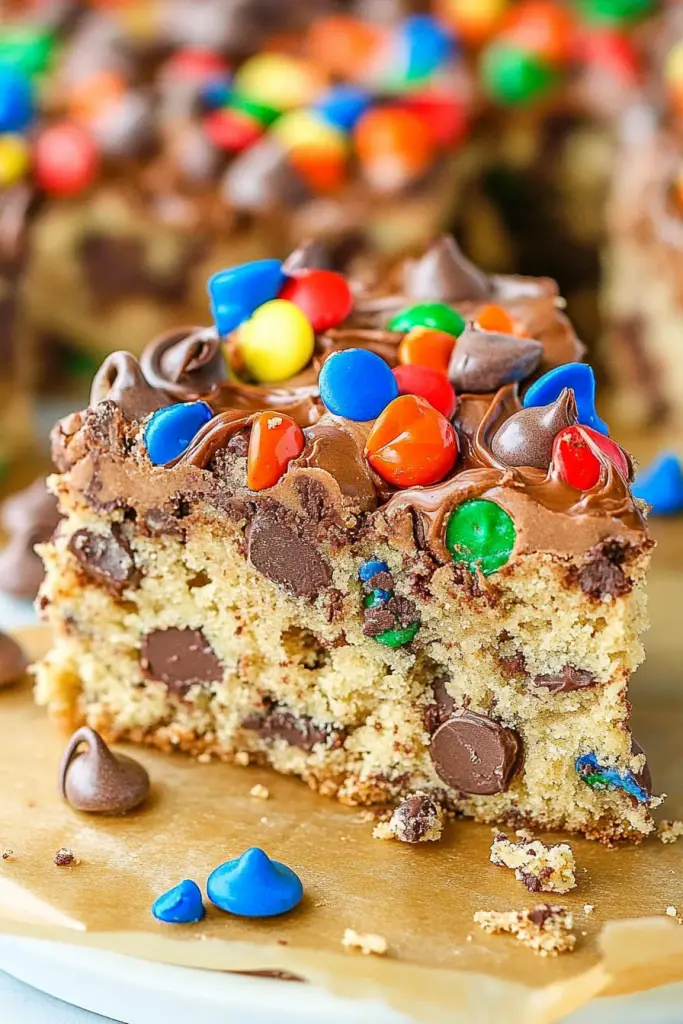
Think of monster cookie cake as the cousin of your favorite monster cookies, but transformed into a luscious, thick, soft cake. It’s essentially a cake that’s loaded with the usual monster cookie cast of characters—oats, peanut butter, chocolate chips, M&Ms, and sometimes even a handful of nuts for crunch. The “monster” part refers to how many goodies get thrown in, making it feel like a wild, overloaded cookie party. The beauty is that it’s not just cookies in cake form—it has this moist, tender crumb that’s slightly chewy thanks to the oats. So if you love monster cookies but want a cake experience with the same nostalgic flavors, this recipe hits every mark. And bonus: it’s great for sharing, gifting, or impressing your family without any complicated fuss.
Why you’ll love this recipe?
What I love most about this monster cookie cake is how it brings childhood memories out of the oven and onto a plate with zero hassle. First off, the flavor is seriously next level—you get the deep nuttiness of peanut butter blending seamlessly with the warm brown sugar and bursts of sweet chocolate and candy crunch. Every bite feels like a cozy hug. And the oatmeal? It adds just the right chewy texture to keep things interesting. But here’s the real kicker: this cake is surprisingly easy to toss together and doesn’t require any weird ingredients or special gadgets. I always do this on busy weekends or whenever the kids want an afterschool treat because it’s quick, forgiving, and always a crowd-pleaser.
Plus, it’s wallet-friendly—just pantry staples you likely have on hand, which makes me feel good when those “I want something sweet, now” moments hit. And because it’s so versatile, you can tweak it up depending on what you have—swap M&Ms for chocolate chips, toss in some walnuts or skip the glaze for a simpler finish. It’s like a recipe that bends with you, not one that locks you in. Compared to a classic chocolate chip cookie cake, this one feels heartier, more substantial, and just flat-out more comforting in that “I’ll be coming back for seconds” kind of way. Honestly, if you love monster cookies, you’ll get why I keep making this over and over again—it’s pure joy in cake form.
How do I make a monster cookie cake?
Quick Overview
This monster cookie cake is a breeze to make—no fancy gadgets, no complex steps, just mixing, layering, swirling, and baking. What makes this method special is the way we incorporate those classic monster cookie mix-ins into a cake batter, then swirl in a luscious peanut butter filling before melting it all together in the oven. It’s a little like magic, turning what could be a classic cake bake into a layered, gooey, show-stopper cake that never feels heavy or dry. Plus, the glaze finish adds that perfect shiny, sweet touch that brings all the flavors together beautifully. I promise, even if you’ve never made anything like this before, you’ll breeze through it.
Ingredients
For the Main Batter:
- 1 cup all-purpose flour (make sure it’s fresh—old flour can affect the texture)
- 1 cup old-fashioned rolled oats (for that chewy monster cookie texture)
- 1/2 teaspoon baking soda
- 1/4 teaspoon salt
- 1/2 cup unsalted butter, softened (room temp is key for smooth mixing)
- 1/2 cup creamy peanut butter (freshly stirred is best, as it blends easier)
- 1 cup light brown sugar, packed (brings that caramel warmth)
- 1/2 cup granulated sugar
- 2 large eggs (room temperature helps with better incorporation)
- 1 teaspoon vanilla extract (always use the good stuff—it makes a difference)
- 1/2 cup whole milk (can swap for almond milk; I tested it, and it actually made the cake even creamier!)
- 3/4 cup semisweet chocolate chips
- 3/4 cup M&Ms (mini size works perfectly for even distribution)
For the Filling:
- 1/2 cup creamy peanut butter
- 1/4 cup powdered sugar (to sweeten and thicken)
- 1-2 tablespoons milk to loosen if needed
This filling is simple but packs that punch of peanut butter flavor. If you want it richer, add a pinch of salt or a bit of honey for a sweeter note.
For the Glaze:
- 1 cup powdered sugar
- 2-3 tablespoons milk
- 1/2 teaspoon vanilla extract
- Optional: A pinch of salt to balance sweetness
The glaze should be pourable but not runny—adjust the milk gradually. You want it just thick enough to drape over the cake gently.
Step-by-Step Instructions
Step 1: Preheat & Prep Pan
Start by preheating your oven to 350°F (175°C). Line a 9-inch springform pan or cake pan with parchment paper and grease the sides well. This cake is a little chunky with all the mix-ins, so greasing prevents any sticking. I like using a springform pan because it’s easier to release the cake without crumbling—the last thing you want is to lose that perfect surface!
Step 2: Mix Dry Ingredients
In a medium bowl, whisk together the flour, rolled oats, baking soda, and salt. Mixing these first is important so your batter stays light and bakes evenly. I always sift my flour with the baking soda to avoid any lumps. You should have a nice, uniform dry mix with no clumps when you’re done.
Step 3: Mix Wet Ingredients
In a large bowl, beat the softened butter, peanut butter, brown sugar, and granulated sugar until creamy and smooth—about 3-4 minutes. This is where your batter gets its rich base, so don’t rush it. Then add the eggs, one at a time, beating well after each addition. Stir in the vanilla extract. Finally, mix in the milk until everything’s fully combined.
Step 4: Combine
Pour the dry ingredients into the wet mixture and gently fold until just combined. You want to stop as soon as there are no visible dry streaks—overmixing can make the cake dense. Then, fold in the chocolate chips and M&Ms, saving a handful to sprinkle on top. This is the moment it all starts to look like a true monster cookie cake.
Step 5: Prepare Filling
In a small bowl, mix the peanut butter and powdered sugar until smooth. Add milk 1 teaspoon at a time if it feels too thick—it should be creamy but not runny. This filling provides a rich, nutty swirl inside that makes the cake feel extra special.
Step 6: Layer & Swirl
Pour half the batter into your prepared pan, then dollop the peanut butter filling over it in spoonfuls. Top with the remaining batter, smoothing it gently. Take a butter knife and swirl the filling into the batter, creating marbled patterns. Don’t overdo it—just enough to see ribbons of peanut butter wrapped in chocolate and oats. Sprinkle the reserved chocolate chips and M&Ms on top for that show-stopping look.
Step 7: Bake
Bake for 40-45 minutes or until a toothpick inserted in the center comes out with just a few moist crumbs. Ovens can vary, so start checking at 38 minutes. You want that perfect balance of set cake with a touch of gooeyness inside. The smell alone will have everyone crowding the kitchen.
Step 8: Cool & Glaze
Let the cake cool completely in the pan on a wire rack (trust me, patience here is key). Once cooled, mix the glaze ingredients until smooth, then drizzle over the top. The glaze adds a lovely shine and just the right hint of sweetness to finish it off.
Step 9: Slice & Serve
When you’re ready, carefully run a knife around the pan edges before releasing the springform. Use a sharp knife to slice (warm water dipped and wiped dry between cuts works like magic), and serve slightly warm or at room temp. It’s wonderful with a glass of cold milk or your morning coffee—the texture and flavor remind me of those cozy kitchen moments with my family.
What to Serve It With
For Breakfast: Monster cookie cake with a steaming mug of your favorite roast coffee or cinnamon-spiced latte. I swear, those first bites in the morning paired with coffee feel like a little indulgence that sets the tone for the day.
For Brunch: Slice it thin, plate with fresh berries and a dollop of Greek yogurt or whipped cream for a quasi-decadent brunch. Add a mimosa and you’re officially hosting a five-star spread with minimal fuss.
As Dessert: Warm it slightly and serve alongside vanilla ice cream or a drizzle of caramel sauce. I’ve done this many times when friends come over—everyone’s amazed at how comforting and unexpected it tastes. A sprinkle of sea salt on top elevates it even more.
For Cozy Snacks: Just rip off a big chunk and dunk it in hot cocoa. The chewy oats and sweet candy bursts make it the ultimate comfort snack for rainy afternoons or chilly evenings.
I love how this cake is basically the all-in-one answer to any time you want a treat. My family has this down as our “go-to” when company shows up last minute, and somehow it never lasts long enough to be reheated!
Top Tips for Perfecting Your Monster Cookie Cake
Peanut Butter Quality: Use a creamy and fresh peanut butter. Natural peanut butter can separate and mess with the texture, so if you go that route, stir it very well.
Rolled Oats vs. Quick Oats: Old-fashioned rolled oats give you that perfect chewy bite. Quick oats can make it more cake-like but lose the “monster cookie” texture.
Mixing Method: Don’t overmix once you combine wet and dry ingredients. A few flour streaks are better than a dense cake. I’ve learned this the hard way when my first attempt turned out heavy.
Swirl Technique: Use a butter knife or a narrow spatula to swirl the peanut butter filling just a few times. Less is more—more swirls can overblend the filling and make the layers messy.
Chocolate & Candy Swap: If you dislike M&Ms, experiment with chopped pecans, white chocolate chips, or even butterscotch chips. Each adds a unique twist.
Baking Temperature: If your oven runs hot, lower it to 325°F and bake longer to avoid a burned top with an undercooked center.
Glaze Adjustments: For thicker glaze, reduce milk; for drippy glaze, add a little more. Adding a touch of espresso powder to the glaze brings out a deeper chocolate flavor if you want to jazz it up.
One lesson I learned was to always let the cake cool fully before glazing, or the glaze melts right off, leaving a mess. Patience yields the best shine!
Storing and Reheating Tips
Room Temperature: Keep your monster cookie cake in an airtight container or well-covered with foil for up to 2 days. This keeps it moist and soft, and honestly, the flavors deepen a bit overnight.
Refrigerator Storage: Store it in an airtight container or wrap tightly in plastic wrap for up to 5 days. If you refrigerate, just bring it to room temp or gently warm before serving so it’s soft and gooey again.
Freezer Instructions: Wrap slices individually in plastic wrap and then place them in a freezer-safe zip bag. Freeze for up to 3 months. To thaw, leave at room temp for an hour or warm gently in the microwave for 15-20 seconds.
Glaze Timing Advice: If freezing, it’s better to freeze unglazed and add the glaze after thawing. Glazing before freezing can cause the sugar to get sticky.
I’ve done all these methods multiple times and honestly, reheating lightly brings back all the luscious textures and flavors better than I expected—even after a few days!
Frequently Asked Questions
Final Thoughts
This monster cookie cake is hands down one of those recipes that makes you look forward to baking instead of dreading it. Every time I pull it out, it sparks joy—partly because it smells like a warm hug and partly because it brings my family running to the kitchen. What I treasure most is how adaptable and forgiving it is. Whether you’re baking for a crowd or just to satisfy your own sweet tooth, it never fails to lift spirits. If you’re curious, I’ll bet you’ll want to explore other recipes with peanut butter and oatmeal—they bring such comforting warmth. Can’t wait to hear how your monster cookie cake turns out—drop a comment below or share your twist on this classic. Happy baking, friend!

monster cookie cake
Ingredients
Main Ingredients
- 0.25 cup unsalted butter
- 6 tbsp peanut butter
- 0.5 cup brown sugar
- 3 tbsp sugar
- 1 unit egg
- 1 tsp vanilla extract
- 1 cup all-purpose flour
- 0.75 tsp baking soda
- 0.25 tsp baking powder
- 0.25 tsp salt
- 1.25 cups quick cook oats
- 0.75 cup M&Ms
- 0.5 cup chocolate chips
- 0.5 cup unsalted butter (for frosting)
- 1.75 cups powdered sugar
- 0.25 cup unsweetened cocoa powder natural
- 0.5 tsp vanilla extract (for frosting)
- 1 tbsp water or milk for frosting, add more if needed
Instructions
Preparation Steps
- Preheat the oven to 350°F. Line a 9-inch cake pan with parchment paper and grease the sides.
- Cream together 0.25 cup butter, peanut butter, brown sugar, and sugar until light and fluffy, about 3-4 minutes.
- Beat in the egg and vanilla extract until combined.
- In a separate bowl, whisk together flour, baking soda, baking powder, and salt.
- Add the dry ingredients to the wet mixture and mix until fully combined.
- Stir in the oats until well distributed throughout the dough.
- Fold in the M&Ms and chocolate chips; they may not fully stick to the dough but will stay once pressed into the pan.
- Press the cookie dough evenly into the prepared cake pan, pressing some mix-ins into the edges to secure them.
- Bake for 16-18 minutes until edges are golden. Remove from oven and allow to cool completely in the pan.
- To make the frosting, beat 0.5 cup butter until smooth. Gradually add half the powdered sugar and mix until combined.
- Add cocoa powder, vanilla extract, 1 tablespoon water, and the remaining powdered sugar; mix until smooth. Add more water if needed to reach desired consistency.
- Pipe the frosting around the edges of the cookie cake. Store in an airtight container until ready to serve.


