


Okay, picture this: the air is thick with anticipation, loved ones are gathered, and all eyes are glued to a cake. Not just any cake, but a gender reveal cake, a symbol of pure joy and a little bit of mystery. It reminds me of the first time I made a surprise birthday cake for my little sister, filled with her favorite candy. The look on her face was priceless, and that’s the kind of magic a gender reveal cake can bring. If you love the thrill of a surprise and the satisfaction of baking something truly special, then diving into the world of gender reveal Cake Ideas is going to be so much fun! It’s a little like a piñata, but edible – and, in my opinion, way more delicious than most piñata candy.

What is a gender reveal cake?
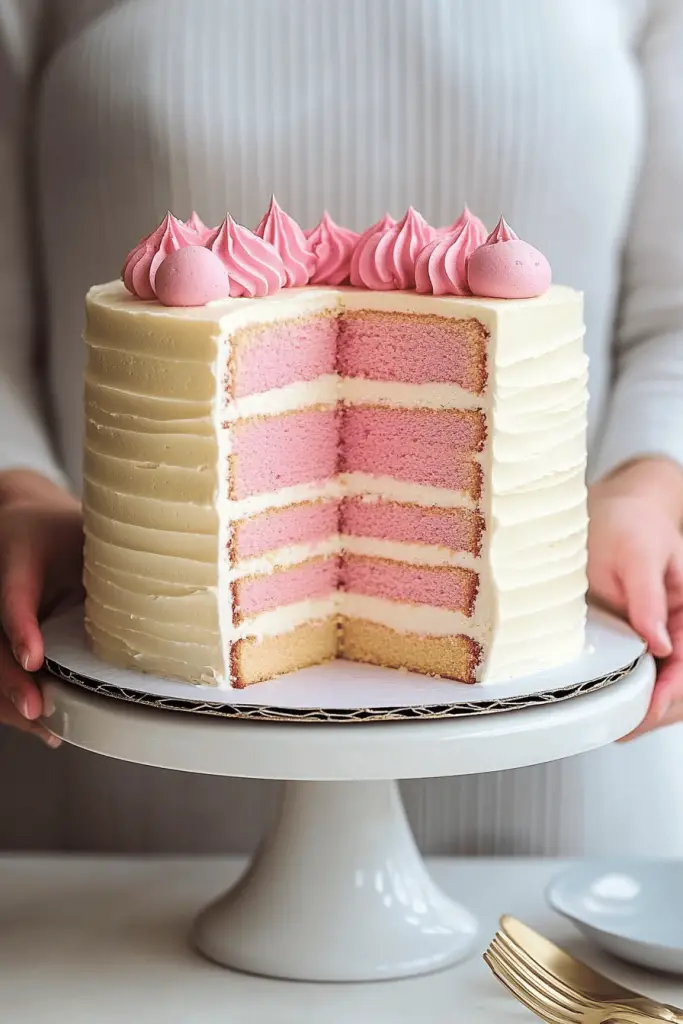
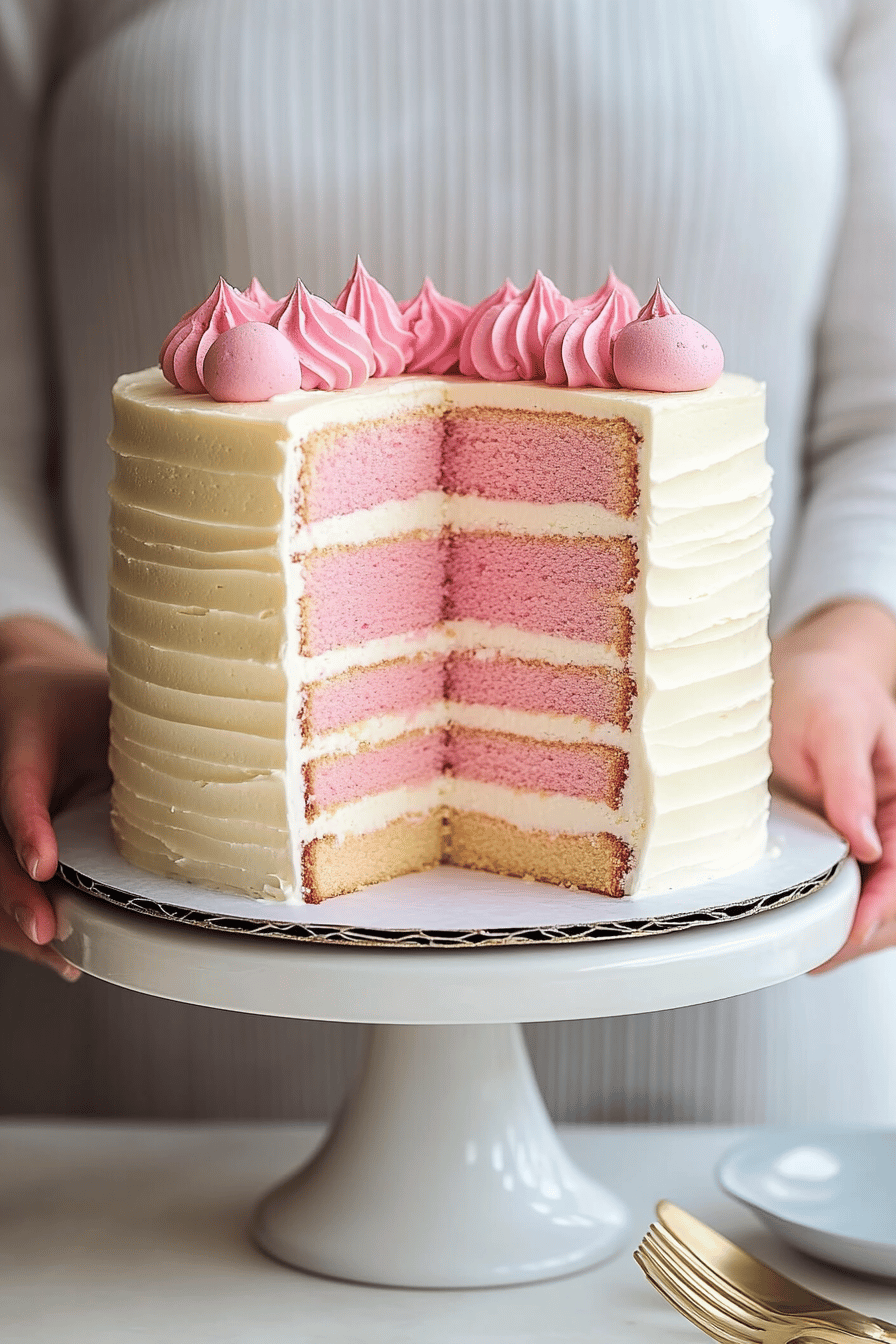
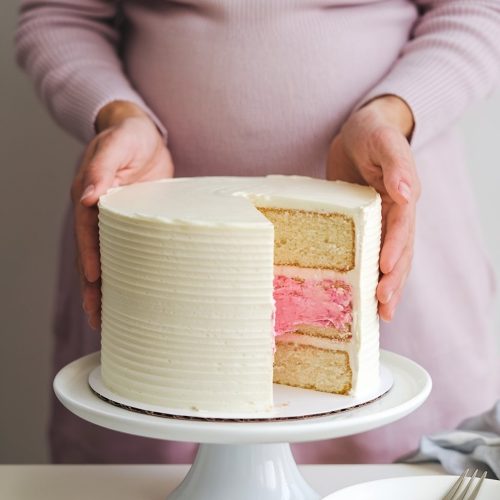
Think of it as a delicious way to share a big secret! A gender reveal cake is essentially a cake designed to unveil the sex of a baby. It’s typically frosted on the outside so that it looks like any other cake, but when you cut into it, the inside reveals either pink (for a girl) or blue (for a boy). It’s essentially a delicious, edible envelope containing a life-changing announcement! Sometimes, people get creative with fillings, sprinkles, or even colored candies to amplify the surprise element. It’s a relatively new tradition, but it’s quickly become a heartwarming and fun way to celebrate impending parenthood.
Why you’ll love this recipe?
Oh, where do I even begin? First off, the flavor is just phenomenal. Imagine a moist, vanilla-infused cake with a hint of almond extract, creating a delicate sweetness that’s simply irresistible. But the real magic lies in the surprise! What I love most about this is the sheer joy it brings to everyone in the room when that first slice is cut. The “oohs” and “aahs” are truly heartwarming.
It’s also surprisingly easy to make. Don’t let the fancy reveal intimidate you; the basic Cake Recipe is straightforward, and the color reveal is achieved with simple food coloring. Plus, it’s incredibly cost-effective. You can create a stunning and memorable cake without breaking the bank.
And talk about versatility! You can customize the cake flavor, the filling, and even the type of frosting to suit your preferences. I’ve seen everything from chocolate ganache to raspberry buttercream. If you’re a fan of fun, festive, and flavorful desserts, this gender reveal cake is a winner. It’s similar to a pinata cake, but with even more emotional impact. Trust me, it’s a showstopper! It is sure to make a lasting impression on your family and friends.
How do I make a gender reveal cake?
Quick Overview
Making a gender reveal cake is a lot easier than you might think! The core process involves baking a vanilla cake, dividing the batter, coloring one portion pink or blue, and then carefully layering the colored batter into the pan. Once baked and cooled, you can frost it however you like – the inside is where the magic happens. The beauty of this method is its simplicity; the reveal is built into the baking process itself, ensuring a delightful surprise with every slice.
Ingredients
For the Main Batter: What is the difference between
* 2 1/2 cups all-purpose flour: I prefer unbleached for the best flavor.
* 1 1/2 cups granulated sugar: Adjust slightly based on your sweetness preference.
* 3 1/2 teaspoons baking powder: Make sure it’s fresh for the best rise.
* 1 teaspoon salt: Balances the sweetness and enhances other flavors.
* 1 cup (2 sticks) unsalted butter, softened: Crucial for a tender crumb.
* 1 cup milk: Whole milk works best, but you can use 2% if needed.
* 2 large eggs: Add structure and richness to the cake.
* 1 teaspoon vanilla extract: Adds a classic vanilla flavor.
* 1/2 teaspoon almond extract: This is optional, but it elevates the flavor beautifully.
* Pink and blue gel food coloring: Gel is more concentrated than liquid, giving you vibrant colors without thinning the batter.
For the Frosting:
* 1 cup (2 sticks) unsalted butter, softened: Again, softened is key!
* 3-4 cups powdered sugar: Adjust for desired sweetness and consistency.
* 1/2 cup milk or heavy cream: For a smooth and creamy frosting.
* 1 teaspoon vanilla extract: Enhances the flavor of the frosting.

What is the step-
Step 1: Preheat & Prep Pan
Preheat your oven to 350°F (175°C). Grease and flour two 9-inch round cake pans. I always use parchment paper circles on the bottom to ensure the cakes release perfectly. Trust me, this step is a lifesaver!
Step 2: Mix Dry Ingredients
In a large bowl, whisk together the flour, sugar, baking powder, and salt. Set aside. Make sure everything is well combined to avoid any pockets of baking powder that can cause uneven results.
Step 3: Mix Wet Ingredients
In a separate bowl, cream together the softened butter and sugar until light and fluffy. Beat in the eggs one at a time, then stir in the vanilla extract and almond extract. Make sure your butter is truly softened; otherwise, you’ll end up with lumps.
Step 4: Combine
Gradually add the dry ingredients to the wet ingredients, alternating with the milk, beginning and ending with the dry ingredients. Mix until just combined. Be careful not to overmix; overmixing develops the gluten in the flour, resulting in a tough cake.
Step 5: Divide and Color the Batter
Divide batter evenly into two bowls. Add food coloring to one bowl and blue gel to the other. How do you mix pink and blue? I usually start with a small amount of food coloring and add more until I get the right color. Remember, the color will deepen slightly during baking.
Step 6: Layer & Bake
Pour the pink batter into one prepared cake pan and the blue batter into the other. Spread the batter evenly. Bake for 30-35 minutes, or until a toothpick inserted into the center comes out clean. Keep a close eye on them; every oven is different, and you don’t want to overbake them.
Step 7: Cool the Cakes
Let the cakes cool in the pans for 10 minutes before inverting them onto a wire rack to cool completely. Make sure the cakes are completely cool before frosting, or the frosting will melt.
Step 8: Make the Frosting
In a large bowl, cream together the softened butter until smooth. Set aside. Gradually add the powdered sugar, beating until light and fluffy. Add the heavy cream and vanilla extract and beat until smooth. If the frosting is too thick, add a little more milk or cream. If it’s too thin, add a little more powdered sugar.
Step 9: Frost the Cake
Place one cake layer on a serving plate or cake stand. Frost the top of the cake with a generous layer of frosting. Place the second cake layer on top and frost the entire cake with the remaining frosting. You can get creative with your frosting design; I sometimes use a piping bag to create a decorative border.
Step 10: Slice & Serve
What is the surprise of a pink cake? I like to use a long, serrated knife for clean slices.
What should I serve it with?
This gender reveal cake is truly a standalone star, but pairing it with complementary treats can be tricky. How can I elevate the celebration?For Breakfast:Imagine serving slices of cake alongside a platter of fresh berries and steaming pot of water. The richness of the cake pairs beautifully with the tartness and the warmth of berries. What’s a good way to start the day?For Brunch:How do you decorate a cake stand? What are the best mini quiches or croissants? Serve with mimosas or sparkling cider for an elegant touch.As Dessert:After dinner, this cake shines as a delightful conclusion. Pair it with vanilla Ice Cream or a drizzle of chocolate sauce for added indulgence. A glass of wine or herbal tea would complement the cake perfectly.For Cozy Snacks:What is the best way to serve a cake with hot cocoa? What is the best way to create a cozy and comforting atmosphere? I have fond memories of my grandmother serving a cake with warm milk, and it always felt like it was the best thing ever.
How can I make a Gender Reveal Cake?
Cake Batter Consistency: I Don’t overmix! Overmixing develops gluten, which leads to a tough cake. Mix until just combined for a tender crumb.
Food Coloring:Gel food coloring is your best friend. It provides vibrant colors without adding excess liquid to the batter. Start with a small amount and gradually add more until you achieve the desired shade.Layering:If you’re worried about the colors bleeding together, chill the cake layers slightly before serving. If you want to keep colors in the same color, you need to change the shape of the colors.Frosting:Make sure your butter is softened but not melted for a smooth frosting. If the frosting is too thick, add a little milk or cream. If it’s too thin, add more powdered sugar.Surprise Element: WhatWhat are some ideas for a hidden layer of candy inside your cake? What is the surprise when you slice into it? I once added a layer of blue raspberry candies to my cake and it was great!Doneness Testing:If the toothpick comes out clean, the cake is done. If it comes out with wet batter, bake for a few more minutes and test again.Flavor Variations: Get creative with flavor variations! Add lemon zest to the batter for a bright, citrusy flavor. Or, incorporate chocolate chips for a touch of decadence. I love experimenting with different extracts, like coconut or peppermint.
Troubleshooting: If your cake layers are uneven, use a serrated knife to trim the tops before frosting. This will create a level surface for frosting and ensure a beautiful final product.
Storing and Reheating Tips
Room Temperature: You can store the frosted cake at room temperature for up to 2 days, but make sure to cover it tightly to prevent it from drying out. I usually use a cake dome or an airtight container.
Refrigerator Storage: For longer storage, keep the cake in the refrigerator for up to 5 days. Again, make sure it’s tightly covered to prevent it from absorbing odors.
Freezer Instructions: If you want to freeze the cake, wrap each layer tightly in plastic wrap and then in aluminum foil. You can freeze it for up to 3 months. When ready to serve, thaw the cake in the refrigerator overnight.
Glaze Timing Advice: If you plan to freeze the cake, it’s best to wait until after thawing to add the frosting. This will prevent the frosting from cracking or becoming soggy during the freezing process.
I always find that a cake tastes best when it’s fresh, but these storage tips will help you keep it delicious for as long as possible!
Frequently Asked Questions
Final Thoughts
Making a gender reveal cake is so much more than just baking; it’s about creating a memory, a moment of pure joy and anticipation. The simple act of cutting into that cake and revealing the surprise inside is a moment that everyone will remember. Whether you’re a seasoned baker or just starting out, I encourage you to give this recipe a try. It’s easier than you might think, and the results are truly magical.
If you enjoyed this recipe, you might also like my recipe for confetti cake – it has a similar surprise element and is perfect for birthdays and other celebrations. Happy baking! I can’t wait to hear how yours turns out. Share your photos and stories in the comments below – I love seeing your creations! And don’t forget to rate this recipe if you loved it.
Gender Reveal Cake Ideas
Ingredients
Main Ingredients
- 2 cups all-purpose flour
- 2 cups sugar
- 1 cup unsalted butter softened
- 4 large eggs
- 1 cup milk
- 2 teaspoons baking powder
Instructions
Preparation Steps
- Preheat oven to 350°F (175°C). Grease and flour two 9-inch round baking pans.
- In a large bowl, cream together the butter and sugar until light and fluffy. Beat in eggs one at a time, then stir in the milk.
- In a separate bowl, whisk together the flour and baking powder. Gradually add to the creamed mixture and mix until just combined.
- Divide batter evenly between the prepared pans. Bake for 30-35 minutes, or until a wooden skewer inserted into the center comes out clean.
- Let cakes cool in pans for 10 minutes before inverting onto a wire rack to cool completely.


