


Okay, let me tell you about this White Chicken Chili. If there’s one dish that’s become my absolute culinary MVP, this is it. It’s the kind of meal that feels like a warm hug on a chilly evening, but honestly, I make it year-round because it’s just that good. I remember the first time I made it, I was a little nervous because I usually associate chili with a deep, dark, smoky flavor. But this white chicken chili? It’s bright, it’s creamy, it’s got this subtle warmth that just melts into you. My kids, who are notoriously picky eaters, devour this. They’ll actually ask for it! It’s so much lighter than a traditional beef chili, and the flavors are just so perfectly balanced. It’s the ultimate comfort food without feeling heavy. I swear, the aroma alone makes everyone in the house come running to the kitchen asking, “What smells so amazing?”
What is white chicken chili?
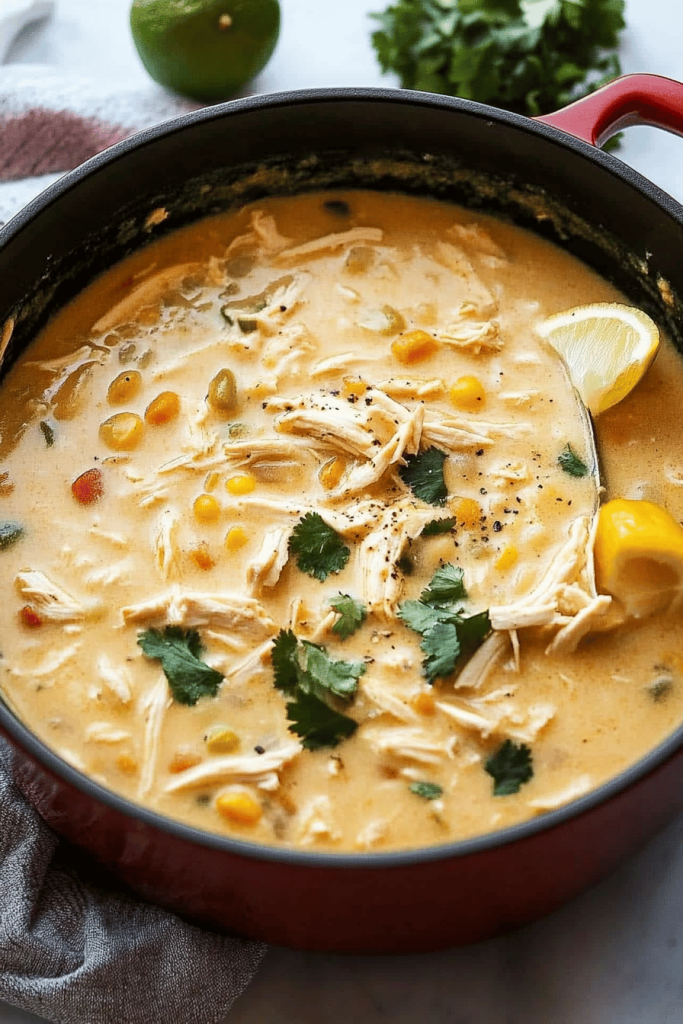
So, what exactly is White Chicken Chili? Think of it as the lighter, brighter cousin to your classic red chili. Instead of tomatoes and dark beans, this version is built on a creamy, savory base, usually with white beans like cannellini or Great Northern, and tender shredded chicken. The magic comes from a blend of warming spices like cumin and coriander, a little kick from jalapeños or green chiles, and often, a touch of richness from cream or even a splash of milk. It’s less about a fiery heat and more about a comforting, layered flavor profile. It’s the kind of dish that feels both elegant enough for guests and casual enough for a Tuesday night. It’s essentially a bowl of pure comfort, packed with wholesome ingredients and incredibly satisfying. It’s not complicated; it’s just delicious.
Why you’ll love this recipe?
Why is this White Chicken Chili so special?flavor. It’s incredible. It’s creamy without being heavy, savory with just a hint of spice, and the combination of tender chicken and creamy white beans is just pure bliss. It’s a flavor profile that’s so comforting and satisfying, yet it feels fresh and bright. Then there’s the simplicity. I’m not kidding when I say this is a lifesaver on busy weeknights. You can have this simmering on the stove in under 30 minutes, and most of that is just hands-off simmering time. It’s one of those recipes where you toss a few things in a pot, and magic happens. Plus, it’s super cost-efficient. The ingredients are all pantry staples or easily found at any grocery store, making it a budget-friendly option that doesn’t skimpversatility! This is what really seals the deal for me. You can serve it as is, topped with your favorite garnishes, or you can use leftovers to make fantastic chicken chili quesadillas or even stuff it into baked potatoes. What I love most about this white chicken chili is that it’s a crowd-pleaser. My kids ask for it, my husband raves about it, and even my more discerning friends always ask for the recipe. It’s just one of those universally loved dishes that feels special every single time you make it. It’s like my answer to craving something warm and satisfying when I don’t want to spend hours in the kitchen or reach for something heavy and greasy.
How to Make White Chicken Chili
Quick Overview
Making this White Chicken Chili is surprisingly straightforward. You’ll start by sautéing some aromatics, then add your chicken, beans, and broth, letting it all simmer together. The secret to its creaminess comes in at the end, with a touch of dairy or a dairy-free alternative. It’s a one-pot wonder that minimizes cleanup, and the whole process is designed to be forgiving. You really can’t mess this one up!
Ingredients
For the Main Batter:
2 tablespoons olive oil
1 large yellow onion, finely chopped
2 bell peppers (any color, but I love using one green and one red for visual appeal), chopped
3 cloves garlic, minced
1 teaspoon ground cumin
1 teaspoon dried oregano
1/2 teaspoon chili powder (adjust to your spice preference!)
1/4 teaspoon cayenne pepper (optional, for a little extra warmth)
4 cups chicken broth (low-sodium is best so you can control the salt)
2 (15-ounce) cans cannellini beans, rinsed and drained (or Great Northern beans)
1 (4-ounce) can diced green chiles, undrained (mild is great here!)
Salt and freshly ground Black Pepper to taste
For the Filling:
2 cups cooked, shredded chicken (rotisserie chicken is my secret weapon for speed!)
For the Glaze:
1/2 cup heavy cream (or half-and-half, or even full-fat coconut milk for dairy-free!)
Juice of 1/2 lime
Step-by-Step Instructions
Step 1: Preheat & Prep Pan
Grab a large Dutch oven or a heavy-bottomed pot. Drizzle in the olive oil and set it over medium heat. Let it get nice and warm; you want it hot enough to sizzle the onions but not so hot that it burns them. While that’s heating, make sure your onion and bell peppers are chopped up small and your garlic is minced. Having everything prepped and ready to go makes this whole process so much smoother.
Step 2: Mix Dry Ingredients
This step is actually done during the sautéing, as we toast the spices. Once your onions and peppers have softened a bit, around 5-7 minutes, add the minced garlic, cumin, oregano, chili powder, and cayenne (if you’re using it). Stir everything together and let it cook for about a minute until it’s super fragrant. This toasting step really wakes up the spices and adds so much depth to the chili. You’ll know it’s ready when you can smell that delicious spice aroma filling your kitchen.
Step 3: Mix Wet Ingredients
In this recipe, the “wet ingredients” are primarily the liquids that go into the pot after the initial sautéing. Pour in the chicken broth, scraping up any tasty bits from the bottom of the pot. Then, add your rinsed and drained cannellini beans and the undrained can of diced green chiles. Give everything a good stir to combine. We’re building the flavorful base here, so making sure everything is well incorporated is key.
Step 4: Combine
We’ve already done the combining in Step 3 by adding the broth, beans, and chiles to the sautéed aromatics. Now, stir in the shredded chicken. Make sure the chicken is evenly distributed throughout the pot. Bring the mixture to a gentle simmer. Once it’s simmering, reduce the heat to low, cover the pot, and let it cook for at least 20 minutes. This allows all those wonderful flavors to meld together beautifully. Don’t be afraid to let it go a little longer if you have the time; the flavors will only get richer.
Step 5: Prepare Filling
The “filling” here is essentially the shredded chicken, which we added in Step 4 to cook in and meld with the broth. So, in this case, it’s already done! The key is to use well-cooked chicken. Rotisserie chicken is fantastic because it’s already tender and seasoned. If you’re cooking chicken specifically for this, poaching or boiling chicken breasts until cooked through and then shredding them works perfectly. Make sure the chicken is pulled apart into bite-sized pieces so it’s easy to eat in every spoonful.
Step 6: Layer & Swirl
This step is actually about finishing the chili with the creamy element. Once the chili has simmered and the flavors have melded, it’s time to add the richness. Stir in the heavy cream (or your chosen alternative) and the fresh lime juice. The lime juice really brightens everything up and cuts through the richness. Stir gently until everything is combined and the chili takes on a beautiful, creamy color. Don’t boil it vigorously after adding the cream, just let it heat through gently.
Step 7: Bake
This recipe is designed to be made on the stovetop, so no baking is required! It’s one of the reasons it’s such a weeknight hero. All the cooking happens in one pot on the stove.
Step 8: Cool & Glaze
You don’t really need to “cool” this chili in the traditional sense before serving, as it’s best served hot. The “glaze” here is actually incorporated at the end with the cream and lime juice. So, once you’ve stirred those in and let them heat through gently, the chili is ready to go! You can let it sit off the heat for a few minutes before serving if you want the flavors to settle a tiny bit more.
Step 9: Slice & Serve
Ladle the hot white chicken chili into bowls. The texture should be thick and creamy, with plenty of chicken and beans. Now comes the fun part: toppings! I love to serve it with a dollop of sour cream or Greek yogurt, a sprinkle of shredded cheddar or Monterey Jack cheese, some chopped fresh cilantro, and maybe a few crushed tortilla chips for crunch. Serve immediately and watch it disappear!
What to Serve It With
This white chicken chili is so versatile, it’s almost silly! For breakfast, I know it sounds a little unusual, but a small bowl with a fried egg on top and a sprinkle of cotija cheese is absolutely divine. It’s hearty and savory, a perfect alternative to typical breakfast fare. For brunch, I love serving it in smaller bowls with a more refined topping selection – think avocado slices, a drizzle of crema, and some pickled red onions. It’s elegant and unexpected. As a lighter dessert option, or rather, a post-dinner comfort, a tiny cup of this with a touch of sweetness (maybe a minuscule swirl of honey in the chili itself, which I’ve tested and it’s weirdly good!) can be surprisingly satisfying, though it leans more savory. But my favorite is definitely for cozy snacks or a relaxed meal. I’ll serve it with warm cornbread – obviously! – or just a big pile of tortilla chips for scooping. My family also loves it stuffed into baked sweet potatoes, which makes for a complete and incredibly satisfying meal. We’ve even made chicken chili quesadillas with the leftovers, and they are out-of-this-world good!
Top Tips for Perfecting Your White Chicken Chili
Over the years, I’ve picked up a few tricks that really elevate this white chicken chili from good to absolutely spectacular. First, for the zucchini prep, I always make sure to grate it on the large holes of a box grater. You don’t need to peel it; the skin adds nutrients and a lovely texture. Squeeze out as much excess moisture as you can after grating by wrapping it in a clean kitchen towel or cheesecloth and wringing it out. This prevents the chili from becoming watery. When it comes to mixing advice, the key is not to overcook the spices. Toasting them for just about a minute until fragrant is perfect. And when you add the cream at the end, just let it heat through gently; boiling can sometimes make it curdle. For swirl customization, while this recipe doesn’t typically involve a decorative swirl, you can absolutely play with the toppings! Arranging cilantro, cheese, and avocado in a pretty pattern can make it look extra special. When thinking about ingredient swaps, if you can’t find cannellini beans, Great Northern beans are an excellent substitute. For the chicken, if you don’t have rotisserie chicken, about 1.5 lbs of boneless, skinless chicken breasts or thighs, poached in broth until tender and then shredded, works perfectly. For the creaminess, I’ve experimented with different options! Full-fat coconut milk makes for a fantastic dairy-free version, and it adds a subtle, lovely richness. Heavy cream will give you the most decadent texture, while half-and-half is a slightly lighter option. My go-to baking tip is to actually embrace the stovetop method! It’s so much easier. But if you *were* to bake it, I’d recommend a moderate oven, around 350°F (175°C), and just bake it until it’s heated through and bubbly, maybe 20-25 minutes, uncovered. For glaze variations, the lime juice is crucial for brightness, but you could also add a tiny pinch of sugar if you want to balance out any bitterness from the chiles, though I rarely find it necessary. A dash of hot sauce stirred in at the end can also add another layer of flavor!
Storing and Reheating Tips
This white chicken chili is fantastic for make-ahead meals because, honestly, it often tastes even better the next day as the flavors have more time to meld. If you have any leftovers, you can store them at room temperature for no more than two hours. After that, it’s best to refrigerate it. For refrigerator storage, let the chili cool down to room temperature before transferring it to an airtight container. It should stay fresh and delicious in the fridge for about 3-4 days. I’ve found that glass containers are best for keeping the flavors pure. When it comes to freezer instructions, this chili freezes beautifully! Let it cool completely, then portion it into freezer-safe containers or bags. It can be stored in the freezer for up to 3 months. To thaw, transfer it to the refrigerator overnight. When you’re ready to reheat, you can do it on the stovetop over low heat, stirring occasionally, until heated through. If it seems a little thick after thawing, you can add a splash of chicken broth or water to loosen it up. For glaze timing advice, I always add the cream and lime juice right before serving the chili on the stove. If you are freezing, I recommend freezing the chili *without* the cream and lime juice. Then, when you reheat it on the stovetop, add the cream and lime juice to the freshly reheated chili just before serving. This keeps the cream from potentially separating during the freezing and reheating process and ensures that bright lime flavor is at its freshest.
Frequently Asked Questions
Final Thoughts
So there you have it – my absolute favorite white chicken chili recipe! It’s the dish I turn to when I need something comforting, easy, and undeniably delicious. It’s a recipe that feels like a warm hug, perfect for cozy nights in or even for impressing guests with its surprisingly sophisticated flavor for how simple it is to make. The combination of tender chicken, creamy beans, and those perfectly balanced spices is just magic. I really hope you give this white chicken chili a try; I promise it won’t disappoint. If you love this recipe, you might also enjoy my Creamy Tomato Soup or my Easy Weeknight Chicken Pot Pie. Both are comfort food classics with my signature easy twist! I can’t wait to hear what you think! Let me know in the comments below how yours turned out, or if you have any delicious variations you love to add. Happy cooking, my friends!

White Chicken Chili
Ingredients
For the Chicken Marinade
- 0.5 teaspoon salt
- 1 tablespoon olive oil
- 1 teaspoon cumin
- 0.5 teaspoon chili powder
For the Chili
- 1 tablespoon olive oil
- 3 ears corn dekerneled
- 0.5 teaspoon kosher salt
- 4 cloves garlic minced
- 2 pieces boneless skinless chicken breasts marinated, grilled and shredded
- 1 teaspoon salt to taste
- 2 tablespoons ground cumin
- 1 tablespoon fennel seeds
- 1 tablespoon dried oregano
- 2 teaspoons chili powder
- 3 tablespoons flour
- 4 cups low-sodium chicken broth
- 2 cans cannellini beans 15-oz each, drained and rinsed
- black pepper to taste
Instructions
Preparation Steps
- In a large zipper-top bag, combine all marinade ingredients. Add chicken breasts, seal, and marinate for at least 30 minutes, or grill immediately.
- Grill chicken until completely cooked through. Let cool, then shred.
- Heat 1 tablespoon of olive oil in a large pot over medium heat. Add the dekerneled corn and toss to coat. Sprinkle with kosher salt and roast for 8-10 minutes, or until caramelized and brown, stirring every few minutes. Remove from pot and set aside.
- Add 2 tablespoons of olive oil to the same pot and heat to medium heat. Add the shredded chicken and cook for 1-2 minutes just to reheat.
- Sprinkle the cumin, fennel seeds, oregano, and chili powder over the chicken. Cook for another minute.
- Add the flour to the chicken, stirring to coat, and cook for another minute.
- Pour in 1 cup of chicken broth to deglaze the pot, scraping up any brown bits from the bottom.
- Add the remaining 3 cups of chicken broth, the cannellini beans, and the caramelized corn. Bring to a boil.
- Reduce the heat and simmer for 30-45 minutes, or until the chili has reduced by half and thickened. Season with salt and black pepper to taste. Be careful not to oversalt if you plan to add salty toppings.
- Serve hot and garnish with your favorite toppings such as cheese, cilantro, or a squeeze of lime.


