


Oh, Swedish meatballs. Just saying the name brings back so many memories for me. I can almost smell them wafting from my grandma’s kitchen on a chilly Sunday afternoon. For years, I tried to replicate that magic, bouncing from recipe to recipe, some too dry, others too bland, and don’t even get me started on the ones where the sauce tasted like wallpaper paste. It was a culinary quest, really! Then, one day, after countless attempts and a few kitchen disasters (remember that batch that fell apart in the pan? Ugh.), I finally landed on *this* recipe. It’s the one that made my family’s eyes light up and my kids ask for seconds (and thirds!). This isn’t just a recipe; it’s a warm hug in a bowl, a taste of home that never, ever disappoints. If you’ve ever felt intimidated by making homemade Swedish meatballs, or if you’ve had less-than-stellar results before, trust me, this one is a game-changer. It’s even better than those cozy, nostalgic restaurant versions you might be thinking of!
What are Swedish meatballs?
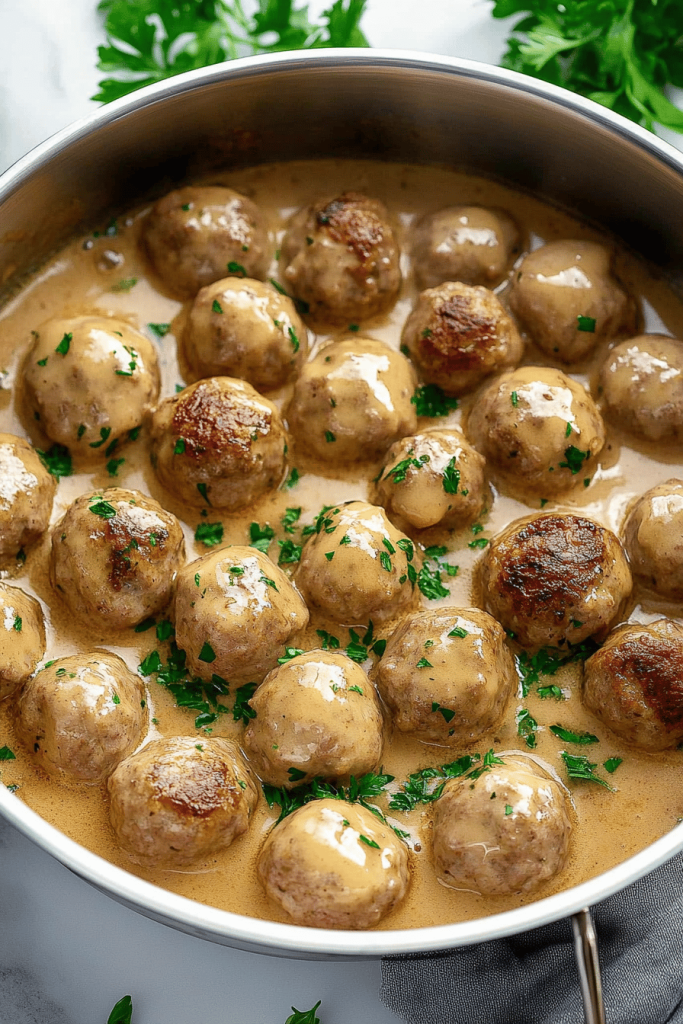
So, what exactly makes these “Swedish” meatballs so special? At their heart, they’re tender, juicy little spheres of seasoned ground meat, usually beef or a mix of beef and pork, pan-fried to golden perfection. But the real magic, the thing that sets them apart and makes them utterly irresistible, is the sauce. It’s this incredibly creamy, rich, and subtly tangy gravy that coats every single meatball. Think of it as a more sophisticated, comforting cousin to a classic Brown Gravy. They’re not supposed to be spicy or overly complicated; it’s all about balanced, savory flavors that just sing together. This dish embodies that wonderful Scandinavian approach to food: simple, high-quality ingredients treated with respect, resulting in something deeply satisfying and utterly delicious. It’s the kind of meal that makes you want to slow down, savor each bite, and maybe even have a second helping. It’s basically comfort food royalty.
Why you’ll love this recipe?
Honestly, I could write a novel about why this recipe is my absolute go-to, but I’ll try to keep it concise! First off, the FLAVOR. Oh, the flavor! The meatballs themselves are perfectly seasoned, tender without being mushy, and have a lovely golden crust from pan-frying. But that sauce? It’s a revelation. It’s luxuriously creamy, with just the right balance of savory, a hint of sweetness, and that signature tang from the Sour Cream or heavy cream that just makes everything sing. It’s not overly heavy, but it’s rich enough to make you feel like you’re indulging.
And SIMPLICITY! I know, I know, “homemade meatballs and sauce” can sound daunting, but I promise you, this recipe is surprisingly straightforward. I’ve streamlined the process over the years so it’s manageable even on a weeknight if you’re feeling ambitious. Once you get the hang of it, you can whip this up without breaking a sweat. What I also adore about this recipe is how COST-EFFECTIVE it is. Ground meat is generally budget-friendly, and the other ingredients for both the meatballs and the sauce are pantry staples for most home cooks. You get this incredibly impressive, restaurant-quality meal without emptying your wallet.
Finally, the VERSATILITY is fantastic. While they are undeniably amazing served over egg noodles or Mashed Potatoes, I’ve also used the leftover meatballs and sauce for amazing meatball subs, piled them on top of rice, or even just eaten them straight from the pan with a fork (don’t judge!). They’re a hit with literally everyone, from my pickiest eaters to my most discerning foodie friends. This is the recipe I turn to when I want something reliably delicious that I know will please a crowd. It truly stands out because it delivers on taste, ease, and value, making it a winner in my book, every single time.
How do I make Swedish meatballs?
Quick Overview
The process is really quite simple: we’ll mix up a flavorful meatball mixture, form them into balls, pan-fry them until golden brown, and then whip up a luscious, creamy sauce in the same pan. Everything comes together beautifully, creating a symphony of textures and tastes. It’s designed to be as fuss-free as possible, ensuring you get those incredible Swedish meatballs without spending hours in the kitchen. You’ll get perfectly formed, tender meatballs and a sauce that’s smooth, rich, and utterly irresistible.
Ingredients
For the Main Batter:
1 pound GROUND BEEF (80/20 is ideal for juiciness)
1/2 pound ground pork (adds great flavor and tenderness)
1/2 cup breadcrumbs (plain or Italian style work well)
1/4 cup milk (whole milk for richness)
1 large egg, lightly beaten
1/4 cup finely minced onion (or onion powder for a smoother texture)
1 teaspoon salt
1/2 teaspoon black pepper
1/4 teaspoon ground nutmeg (this is my secret touch for warmth!)
For the Filling:
2 tablespoons butter or vegetable oil (for frying)
For the Glaze:
1/4 cup all-purpose flour
2 cups beef broth (good quality makes a difference!)
1/2 cup heavy cream or Sour Cream (sour cream gives a lovely tang)
1 tablespoon Worcestershire sauce (adds depth)
Salt and pepper to taste
Fresh parsley, chopped (for garnish, totally optional but pretty!)
Step-by-Step Instructions
Step 1: Preheat & Prep Pan
Grab a large skillet or frying pan. We’ll be using this for both frying the meatballs and making the sauce, so a good, sturdy pan is key. Make sure it’s clean and ready to go. You don’t need to preheat it just yet, but having it handy is the first step. I always make sure I have all my ingredients prepped and measured before I start mixing the meatballs, so everything flows smoothly.
Step 2: Mix Dry Ingredients
In a medium bowl, combine the breadcrumbs, minced onion (if using fresh), salt, pepper, and that pinch of nutmeg. The nutmeg might seem unusual, but trust me, it adds a subtle warmth that elevates the meatballs beyond just basic savory. Give it all a good whisk together with a fork. This ensures the seasonings are evenly distributed throughout the mixture, so you don’t get pockets of flavor.
Step 3: Mix Wet Ingredients
In a separate smaller bowl, whisk together the milk and the lightly beaten egg. The milk helps to moisten the breadcrumbs and keep the meatballs tender, while the egg acts as a binder. Make sure the egg is fully incorporated into the milk; you don’t want any stringy bits of egg white in your meatballs.
Step 4: Combine
Now, let’s bring it all together. Add the ground beef and ground pork to a large mixing bowl. Pour the milk and egg mixture over the meat. Then, add the dry ingredients you mixed in Step 2. This is where you need to be gentle! Use your hands (clean hands, of course!) to gently combine everything until just mixed. Overmixing is the enemy of tender meatballs; it can make them tough and dense. You want to see streaks of the different meats and ingredients, but no long, tough strands of meat. Stop as soon as it all comes together.
Step 5: Prepare Filling
Grab your large skillet. Place it over medium-high heat and add the butter or oil. Let it melt and get nice and shimmery. This is what’s going to give our meatballs that gorgeous golden-brown exterior. While the pan is heating, start rolling your meat mixture into meatballs. Aim for about 1 to 1.5-inch balls. I usually get around 20-25 meatballs from this recipe. Don’t pack them too tightly when rolling; keep them fairly light.
Step 6: Layer & Swirl
Once the butter is hot and shimmering (but not smoking!), carefully place the meatballs into the skillet. Don’t overcrowd the pan! You might need to do this in batches. Cook them for about 3-4 minutes per side, turning them gently with tongs, until they are browned on all sides. They don’t need to be cooked through at this stage, as they’ll finish cooking in the sauce. Once they’re beautifully browned, remove them from the skillet and set them aside on a plate. Don’t wipe out the pan; all those browned bits are pure flavor gold for our sauce!
Step 7: Bake
This step is usually done after the sauce is made, but I’m including it here for clarity on the meatball cooking process. Once the sauce is done and the meatballs have been added back to it (see next steps), we’ll let them simmer and finish cooking through. You can also bake them if you prefer a more hands-off approach after searing. If baking, place the seared meatballs in a single layer on a baking sheet and bake in a preheated oven at 375°F (190°C) for about 15-20 minutes, or until cooked through.
Step 8: Cool & Glaze
This is where the magic sauce happens! Reduce the heat under the skillet to medium. Sprinkle the flour over the drippings in the pan. Whisk it in and cook for about 1 minute, scraping up any browned bits from the bottom of the pan. This is called making a roux, and it’s the base of our delicious sauce. Gradually whisk in the beef broth, a little at a time, until smooth. Bring the sauce to a simmer, stirring constantly, until it thickens. Stir in the heavy cream or sour cream and the Worcestershire sauce. Season with salt and pepper to your taste. If you cooked your meatballs separately, add them back to the sauce now and let them simmer gently for about 10-15 minutes until they are cooked through and heated through. If you seared them in the pan, you’ll be adding them to the sauce after it thickens.
Step 9: Slice & Serve
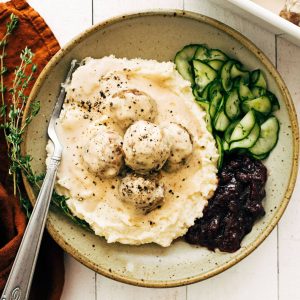
Once the meatballs are tender and the sauce is thick and creamy, it’s time to serve! I love to spoon these over a bed of fluffy mashed potatoes or some perfectly cooked egg noodles. Garnish with a sprinkle of fresh chopped parsley for a pop of color and freshness. The aroma alone will have everyone gathering around the table. It’s a dish that truly looks as good as it tastes!
What to Serve It With
Oh, the possibilities are endless, and my family has their favorites! For a classic, comforting Breakfast, I love serving a smaller portion of these Swedish meatballs with some fluffy scrambled eggs and maybe a slice of toasted rye bread. It’s surprisingly satisfying and feels like a real treat to start the day.
When it comes to Brunch, these meatballs are a showstopper. I usually serve them alongside a beautiful spread of other brunch favorites – perhaps some fruit salad, mini quiches, and a lovely mimosa or a strong cup of coffee. The rich, savory meatballs add a decadent element that’s perfect for a leisurely weekend gathering. Plating them in a nice serving bowl with a garnish of parsley makes them look extra elegant.
As a Dessert? Well, not in the traditional sense! But if you’re craving something sweet and comforting after dinner, and you don’t want to bake a whole cake, a small, warm bowl of these Swedish meatballs with a drizzle of extra sauce is surprisingly delightful. It hits that spot for a savory, comforting finish. It’s unconventional, but it works for a cozy night in!
For Cozy Snacks, this is where they truly shine. Forget chips and dip! A small plate of these warm Swedish meatballs is the ultimate comfort food snack. I love making a big batch and just having them on hand for when that craving for something hearty and delicious strikes. They’re perfect for a movie night or just a little pick-me-up in the afternoon. Honestly, they disappear in minutes at my house when served this way. My personal favorite way to serve them is with creamy mashed potatoes – it’s a match made in heaven, and the sauce just melds perfectly.
Top Tips for Perfecting Your Swedish Meatballs
After making these Swedish meatballs countless times, I’ve picked up a few tricks that I think really make a difference. First, when it comes to the Zucchini Prep, I know some recipes call for it, but I’ve found that for *these* Swedish meatballs, it’s not necessary and can sometimes make the meatballs a bit too wet if not squeezed out properly. My recipe focuses on a good meat-to-binder ratio without it. However, if you *do* decide to add finely grated zucchini for extra moisture, be absolutely sure to squeeze out as much liquid as humanly possible. You can do this by wrapping it in a clean kitchen towel or cheesecloth and wringing it out. This is crucial to avoid soggy meatballs.
For Mixing Advice, remember what I said about not overmixing. It’s really that important! You want a light hand. The texture you’re aiming for is just combined, not a homogenous paste. If you overwork the meat, it’ll develop tough proteins and result in dense, rubbery meatballs. I always tell people to stop mixing as soon as they don’t see any dry bits of breadcrumb or meat separately anymore. Use your hands – they’re the best tools for feeling the consistency.
Regarding Swirl Customization, the sauce is where you can really play. While the classic creamy sauce is divine, I’ve experimented! For a richer sauce, use all heavy cream. For a tangier, lighter sauce, use all sour cream (just make sure it’s at room temperature so it doesn’t curdle when added to the hot sauce). Some people like to add a pinch of smoked paprika to the sauce for a subtle smoky note, or even a tiny splash of brandy when deglazing the pan before adding the flour – it adds a lovely depth of flavor if you’re feeling fancy!
When it comes to Ingredient Swaps, I’ve found that while the beef and pork combo is ideal, you can use all beef if that’s what you have. The pork just adds that extra bit of tenderness and flavor. For the breadcrumbs, panko breadcrumbs will give you a slightly lighter texture, but regular breadcrumbs work perfectly fine. If you’re out of milk, a bit of water or even broth can work in a pinch for the meatball mixture, though milk adds a bit more richness.
For Baking Tips, if you choose to bake instead of simmer in the sauce, ensure your oven is properly preheated. Baking on a wire rack set inside a baking sheet helps air circulate for even browning. Keep an eye on them; ovens can vary wildly! For doneness testing, the internal temperature should reach 160°F (71°C). If you’re simmering them in the sauce, they’re done when they float to the surface and are heated through. Lastly, Glaze Variations are fun too. If you don’t have beef broth, a good quality chicken broth can work, though it will change the flavor profile slightly. Some folks even use mushroom broth for an earthier taste. The key is a good quality liquid base for that sauce!
Storing and Reheating Tips
One of the best things about this Swedish meatballs recipe is how well it stores and reheats. I’m often asked about this because I tend to make a double batch just to have leftovers!
At Room Temperature: Honestly, I don’t recommend leaving these out for too long, especially with the creamy sauce. For food safety, it’s best to refrigerate them within two hours of cooking. If you’re serving them buffet-style and they’ve been sitting out for a bit, it’s safer to put them away once they’ve cooled down a little.
Refrigerator Storage: Once completely cooled, store your Swedish meatballs and sauce in an airtight container in the refrigerator. They’ll keep beautifully for about 3-4 days. The flavors actually meld even more overnight, so they can be even tastier on day two! Make sure the container is well-sealed to prevent them from drying out or absorbing other odors from your fridge.
Freezer Instructions: These freeze wonderfully! Let them cool completely, then portion them into freezer-safe containers or heavy-duty freezer bags. They can be stored in the freezer for up to 2-3 months. When you’re ready to use them, thaw them overnight in the refrigerator. For the best quality, try to avoid refreezing once thawed.
Glaze Timing Advice: When storing, I usually keep the meatballs and sauce together. If you’ve frozen them, you’ll reheat them with the sauce. If you’re refrigerating, you can reheat everything together in a saucepan over low heat, stirring gently, until heated through. You might need to add a splash more broth or cream if the sauce has thickened too much in the fridge. I find they reheat best on the stovetop rather than in the microwave, as it helps maintain the sauce’s texture.
Frequently Asked Questions
Final Thoughts
So there you have it – my beloved Swedish meatballs recipe! It’s a dish that brings so much joy to my table, and I truly hope it does the same for yours. It’s more than just a meal; it’s that feeling of home, of comfort, of sharing something delicious with the people you love. The balance of tender meatballs and that impossibly creamy, savory sauce is just something special, and the fact that it’s achievable for any home cook makes it a winner in my book.
If you adore the simple, comforting flavors of this recipe, you might also want to explore my Creamy Chicken Noodle Soup or my Homestyle Pot Roast – they have that same cozy, comforting vibe. There’s just something so rewarding about making a classic dish from scratch and having it turn out perfectly.
I can’t wait to hear how your Swedish meatballs turn out! Please leave a comment below and let me know your experience, or if you have any of your own favorite tips or variations. And if you snap a picture, tag me on social media – I love seeing your culinary creations! Happy cooking!
Swedish Meatballs
Ingredients
Main Ingredients
- 4 slices white bread, crusts removed soaked in cream
- 0.5 cup heavy cream for soaking bread
- 1 teaspoon onion powder
- 0.75 teaspoon garlic powder
- 1 pound ground beef (85/15)
- 1 pound ground pork can use extra beef if preferred
- 1 large egg
- 2 tablespoons brown sugar
- 2 teaspoons kosher salt
- 1 pinch black pepper
For the Gravy
- 2 tablespoons butter or use rendered meat fat
- 2 tablespoons all-purpose flour
- 1.5 cup beef broth
- 1 cup heavy cream
- 1 teaspoon Worcestershire sauce adjust to taste
- 1 teaspoon brown sugar optional, for balance
- 1 teaspoon kosher salt adjust to taste
- 0.25 teaspoon ground nutmeg optional, just a dash
Instructions
Preparation Steps
- In a small bowl, soak the white bread in heavy cream for 5–10 minutes. Mash with a spoon or your hands to form a paste.
- In a large bowl, combine the bread paste with onion powder, garlic powder, ground beef, ground pork, egg, brown sugar, kosher salt, and black pepper. Mix until well blended.
- Roll the mixture into 20–24 small meatballs (about 1 inch in diameter). The mixture will be wet—this is normal. Lightly wet your hands to help with shaping.
- Preheat oven to 400°F (200°C). Place meatballs on a baking sheet lined with parchment, leaving space between each. Bake for 20–25 minutes, until golden and cooked through.
- In a large skillet or sauté pan, melt butter over medium heat. Whisk in flour and cook for 2–3 minutes, until golden and bubbly.
- Slowly add beef broth, whisking constantly to form a smooth, thickened base. Add heavy cream and continue whisking.
- Stir in Worcestershire sauce, brown sugar (if using), salt, pepper, and nutmeg. Simmer gently for 5 minutes, adjusting seasoning to taste. Gravy should be creamy and rich.
- Transfer baked meatballs into the gravy. Gently stir to coat. Cover and keep warm for 10–15 minutes before serving to allow flavors to meld. Serve over mashed potatoes, with pickled cucumbers and lingonberry sauce.


