


There’s something about the smell of crushed Oreos mixed with melted butter wafting from the kitchen that just takes me right back to cozy Sunday afternoons at my grandma’s house. She made this incredible cheesecake with an Oreo crust that my whole family would devour in no time at all—it always disappeared faster than I could snap a photo! If you’ve ever made a graham cracker crust, this Oreo crust recipe will blow your mind. It’s richer, crunchier, and adds that nostalgic chocolatey crunch that makes every bite a little celebration. I swear, once you try this crust, you’ll never go back to plain old crumbs again. Plus, it’s ridiculously simple to whip up, which means it’s an instant win for those busy days when you want a dessert that feels fancy but doesn’t come with a million steps.
What is an Oreo crust?
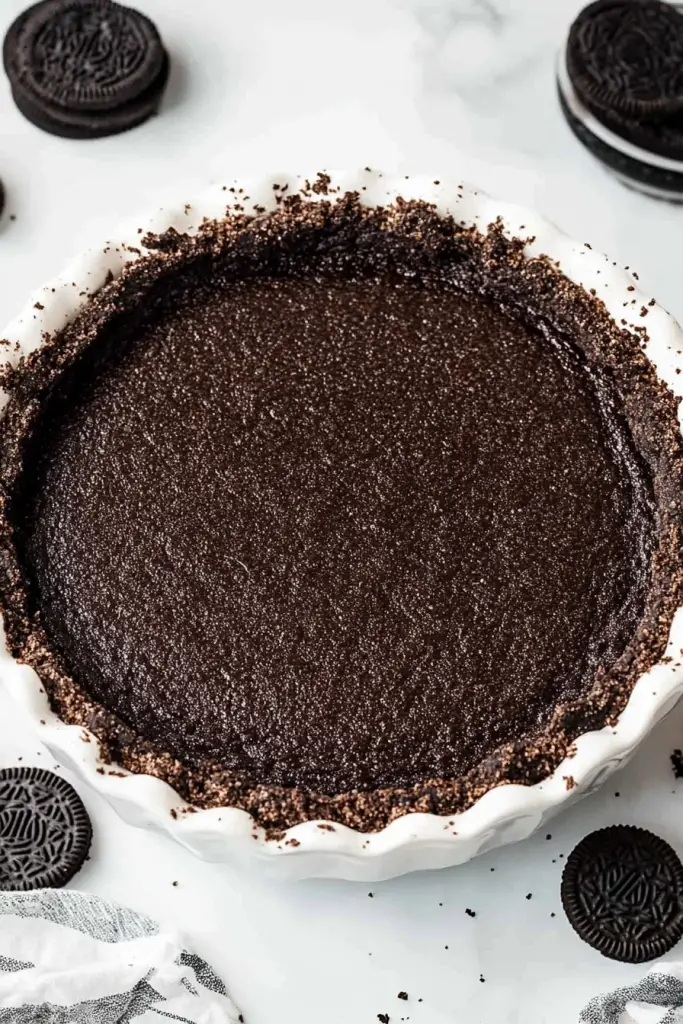
Think of Oreo crust as the delicious foundation that turns any cheesecake or pie from “okay” to “wow.” It’s essentially a crust made by crushing Oreo cookies into fine crumbs, tossing them with melted butter, and then pressing the mixture firmly into a pan. The crunchy texture and intense chocolate flavor create the perfect contrast to creamy fillings. The best part? It’s a total shortcut—no need for baking a traditional crust from scratch or dealing with flour and sugar separately. The recipe’s name just tells you what it is: Oreo cookies getting a makeover as the base for all your sweet treats. It’s approachable, kid-friendly, and if you’re like me, you’ll find that Oreo crust becomes your secret ingredient to wow everyone without breaking a sweat.
Why you’ll love this recipe?
What I love most about this Oreo crust recipe is how incredibly easy and versatile it is. You only need two ingredients (Oreos and butter), and the results taste like you spent hours baking. The chocolate boldness of the crust pairs perfectly with everything from creamy cheesecakes to tangy key lime pies and even ice cream bars. It adds a crunchy, chocolaty depth that a graham cracker crust can’t quite match. Plus, since Oreos are so affordable and widely available, it’s a budget-friendly surprise for your dessert line-up.
And here’s a little story: one holiday season, I whipped this Oreo crust for a pumpkin pie because I ran out of traditional pie crust dough, and honestly, everyone preferred it! That’s when I realized how versatile it is beyond cheesecake. This crust also holds up beautifully, so your dessert won’t turn soggy or fall apart. It’s easy enough for a beginner but impressive enough to make you feel like a baking pro. I swear by it for last-minute treats or when I want to add a fun, nostalgic twist to family favorites. If you adore classic cheesecake recipes, toss in this crust next time—trust me, it’s a game-changer.
How do you make Oreo crackers?
Quick Overview
Making an Oreo crust is one of those things that sounds fancy but is actually foolproof. You crush your Oreos (filling and all), melt some butter, mix the two together, and then firmly press into your pan. Chill it to set, and you’re ready to fill it with whatever creamy deliciousness you’re dreaming up. No baking necessary unless you want it extra crunchy. The whole process takes less than 10 minutes, which is perfect for busy days when you need a quick win that feels special. I’ve made this so many times that I barely think about it anymore—it’s just muscle memory at this point!
Ingredients
For the Oreo Crust: For the Oreo Crust: For the Oreo Crust: For the Oreo Crust
- 24 Oreo cookies (about one standard package)
- 5 tablespoons unsalted butter, melted (use real butter for best flavor)
For the Filling:
- 16 ounces cream cheese, softened
- ¾ cup granulated sugar
- 2 large eggs
- 1 teaspoon vanilla extract
- ½ cup sour cream (optional, for extra tang and creaminess)
For the Glaze (Optional):
- ½ cup heavy cream
- 4 ounces semi-sweet chocolate, chopped
- Pinch of salt
- 1 teaspoon vanilla extract
Step-by-Step Instructions
Step 1: Preheat & Prep Pan
Start by preheating your oven to 325°F (160°C). I like to use a 9-inch springform pan for cheesecakes because it makes removing the cake so much easier. Lightly grease the bottom and sides—or better yet, line the base with parchment paper to ensure a clean release. This little step saves you from disaster, especially on days when I forget and end up with cheesecake stuck to the pan. You’ll thank me later.
Step 2: Mix Dry Ingredients
Take your Oreos and pulse them in a food processor until they resemble fine crumbs. If you don’t have a food processor, pop them in a large zip-lock bag and bash away with a rolling pin. The crumbs should be almost powdery but still have a few smaller chunks here and there for texture—a little crunch in the crust goes a long way.
Step 3: Mix Wet Ingredients
Melt the butter gently—either in the microwave or on the stove—and let it cool slightly so it’s warm but not hot. Warm butter blends better with the crumb mixture, making it easier to press into a crust without turning soggy. Don’t skip this part—it’s a little trick I learned over time that makes all the difference.
Step 4: Combine
Dump the Oreo crumbs into a bowl and drizzle the melted butter over them. Stir everything together until the crumbs are evenly coated and look slightly moist. If your mixture feels too dry, add an extra tablespoon of melted butter. You want it sticky enough to hold together when pressed but not dripping.
Step 5: Prepare Filling
In a mixing bowl, beat your softened cream cheese until smooth and fluffy, then add sugar and beat together. Add eggs one at a time, mixing just until incorporated (overbeating can mean cracks later!). Stir in vanilla and sour cream for that creamy texture. Easy, right? I sometimes add a splash of coffee to enhance the chocolate notes if I’m feeling adventurous.
Step 6: Layer & Swirl
Press your Oreo crust mixture firmly into the bottom—and slightly up the sides—of your springform pan. Don’t be shy here; pack it tight with the back of a spoon or bottom of a glass. Pour your cheesecake batter on top. If you want to get fancy, reserve a handful of Oreo crumbs and sprinkle them on top before baking for an added crunch.
Step 7: Bake
Place your pan on the middle rack and bake for about 50-60 minutes, or until the edges are set but the center still jiggles just a bit when you gently shake the pan. This jiggle means the cheesecake will set perfectly as it cools. I always check it with a toothpick—if it comes out clean with some moist crumbs, you’re golden.
Step 8: Cool & Glaze
Let the cheesecake cool gradually: first on the counter for about an hour, then pop it in the fridge for at least 4 hours or overnight. If you’re doing the chocolate glaze, warm the cream gently and pour over chopped chocolate, stirring until silky smooth. Spread the glaze evenly over the chilled cheesecake and refrigerate again for 15-20 minutes to set.
Step 9: Slice & Serve
To cut clean slices, run a sharp knife under hot water, wipe dry, and slice slowly—heat and clean the knife between each cut for that perfect presentation. Serve chilled and watch it disappear in minutes! I like to add a dollop of whipped cream or a few fresh raspberries on top for a pop of color and freshness.
What to Serve It With
For Breakfast: A slice of this cheesecake (I know, unconventional!) paired with a bold black coffee or a frothy cappuccino makes an indulgent weekend treat. The chocolatey crust adds just enough decadence to feel like a special morning without being too heavy.
For Brunch: Plate wedges alongside fresh berries, toast, and maybe a mimosa. The rich, creamy cheesecake contrasts beautifully with the tart fruit and is always the star of the table—your friends will be asking for the recipe before the meal is over.
As Dessert: After dinner, serve with vanilla bean ice cream or a drizzle of caramel sauce to amp up the indulgence. The Oreo crust gives that satisfying crunch that complements any cold topping like a dream.
For Cozy Snacks: When it’s just you and the kids on a lazy afternoon, a cheesecake slice with a glass of cold milk or a hot cup of tea feels like a hug in food form. My kids actually fight over the crust edges—go figure!
Top Tips for Perfecting Your Oreo Crust Cheesecake
Oreo Crust Prep: Use fresh Oreos—stale ones won’t create that crisp crust we all crave. Don’t remove the filling; it actually adds sweetness and helps bind the crust. When pressing the crust, pack it firmly to avoid it crumbling when sliced.
Mixing Advice: Beat cream cheese until no lumps remain, but avoid overmixing once eggs are added. This keeps your cheesecake smooth without cracks. If you see bubbles, gently tap the pan on the counter before baking to release them.
Swirl Customization: If you want to jazz it up, swirl melted chocolate or caramel into your cheesecake batter with a knife right before baking. It makes it look bakery-worthy and adds extra flavor contrast.
Ingredient Swaps: I’ve swapped butter for coconut oil in the crust, which gives a slight tropical hint and works wonderfully for dairy-free versions—just use unrefined for the best flavor. For cream cheese, full-fat provides the richest texture, but lighter options work in a pinch.
Baking Tips: Oven temperatures can vary dramatically—invest in an oven thermometer if you can. Bake your cheesecake on a middle rack, and if you find the top browning too quickly, loosely cover it with foil halfway through baking.
Glaze Variations: Experiment with white chocolate or peanut butter glazes for a fun twist. You can pour glaze before chilling or on freshly baked cheesecake once it’s cooled to room temperature, but chilling post-glaze always sets the flavor better.
Storing and Reheating Tips
Room Temperature: If you’re serving within a few hours, keep the cheesecake covered loosely with foil or a cake dome to maintain moisture without sogginess. I usually don’t leave it out longer than 2 hours, especially in warm kitchens.
Refrigerator Storage: Store leftovers in an airtight container or wrapped tightly with plastic wrap for up to 5 days. The Oreo crust keeps its crunch surprisingly well if you don’t let it sit in the fridge uncovered.
Freezer Instructions: Cheesecake freezes beautifully wrapped in two layers of plastic wrap and then a layer of foil. Freeze for up to 3 months. Thaw overnight in the fridge before slicing. I always freeze extra slices for those “I need chocolate now” moments.
Glaze Timing Advice: I recommend glazing your cheesecake just before serving if you’re storing it for a long time, especially if using a softer glaze, to keep everything fresh and vibrant.
Frequently Asked Questions
Final Thoughts
Honestly, this Oreo crust cheesecake feels like a little treasure every time I make it. It’s my go-to when I want to impress family and friends without fuss or fancy ingredients. The crunchy, chocolatey crust paired with that creamy, silky filling always brings smiles around our table, and somehow, each slice seems to carry a bit of joy from all the past gatherings I’ve made it for. I hope you give it a try and find yourself reaching for Oreos in a new way! Don’t forget to share how yours turns out—I love hearing your little twists and stories in the kitchen. Happy baking and may your dessert moments be as sweet and comforting as this one!
Oreo crust
Ingredients
Main Ingredients
- 25 cookies Oreo cookies
- 5 tablespoons unsalted butter melted
Instructions
Preparation Steps
- Add Oreo cookies to a food processor and pulse until they are fine crumbs.
- Slowly drizzle in melted butter and pulse until combined.
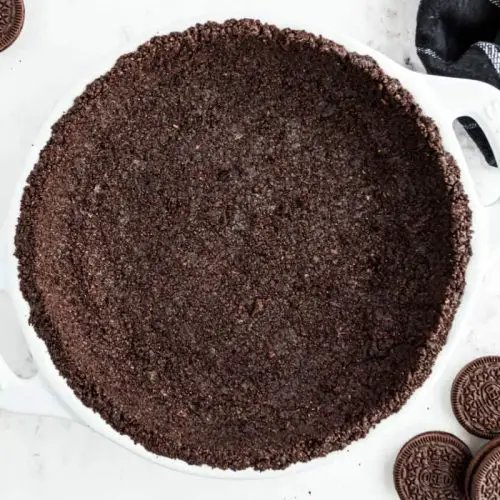
- Pour the mixture into your desired pie dish.
- Using the bottom of a measuring cup or glass, press the crumbs evenly up the sides and over the bottom of the dish until a smooth crust forms.
- Refrigerate the crust until ready to add filling.


