


The very scent of fudge melting on the stove takes me right back to my grandma’s kitchen on chilly autumn afternoons. That thick, creamy sweetness swirling with a hint of vanilla and butter—it’s comfort in candy form. This fudge recipe is one I rely on whenever I want something rich but worry about complicated steps or finicky ingredients. Honestly, fudge can sometimes seem intimidating, like it belongs to fancy chocolatiers, but this version is about as down-to-earth and homey as it gets. It’s hands-down easier than making any fancy cake or layered dessert, yet delivers that smooth, luscious flavor that sticks with you long after you’ve had a bite. My kids actually ask for seconds before the fudge even has a chance to cool properly! If you love the idea of something sweet, nostalgic, and super satisfying, you’ll find this fudge recipe impossible to resist.
What Is Fudge?
Think of fudge as a soft, creamy candy that’s essentially a sweet, buttery dream. It’s made by slowly cooking sugar, butter, and milk or cream, then beating the mixture as it cools to give it that smooth, melt-in-your-mouth texture we all love. The name “fudge” is believed to have come from the word “fadge,” meaning to fit or turn out well—which perfectly sums up how this candy behaves in your mouth! At its core, fudge is candy that dances between rich chocolate and silky softness, but the best part is you can tweak the flavors to suit your cravings—from classic chocolate to peanut butter or even swirl in some nuts for crunch. It’s essentially a sweet treat that feels fancy but is straightforward enough for anyone who loves to cook at home and see quick, delicious results. I’d say fudge is the cousin to caramel or toffee, but with this uniquely tender texture that makes each bite a little slice of dessert heaven.
Why you’ll love this recipe?
What I adore about this fudge recipe is how reliably luscious and unbelievably smooth it turns out, even on the first try. The flavor is indulgently rich but balanced enough so it doesn’t overwhelm the palate—just pure comfort with a hint of vanilla and buttery goodness that leaves you wanting more. If you’ve ever been intimidated by fudge, this one’s a lifesaver on busy nights when you want a special dessert without turning your kitchen into a chaos zone. The ingredients are simple and inexpensive—no need for exotic chocolates or fancy equipment—which makes it budget-friendly without ever feeling like you’re cutting corners. Plus, once you get the hang of the basic method, it’s crazy versatile. You can easily add nuts, swirl in peppermint, or even toss in dried fruit to switch up the texture and flavor. I’ve tried it with almond milk for a dairy-lite twist and it actually became even creamier! Honestly, the simplicity combined with that rich, nostalgic taste is what makes this fudge a total keeper in my recipe box.
How do I make fudge?
Quick Overview
This fudge is basically a one-pot wonder where you melt and cook a few key ingredients to a specific temperature, then cool it while beating to get that classic creamy texture. The magic happens in the timing—and trust me, it’s easier than it sounds. You don’t have to stand and stir like you’re wrangling molasses; just watch for the perfect soft-ball stage, let it cool, then beat to silky perfection. That’s really the secret to foolproof fudge every time. It’s quick enough to make after dinner but feels like a really special treat that tastes like you spent all afternoon on it.
Ingredients
For the Main Batter:
- 2 cups granulated sugar – Use pure cane sugar for best caramelization and flavor.
- 3/4 cup unsalted butter – Room temperature, for that rich, creamy consistency
- 2/3 cup evaporated milk – Helps keep it smooth and sets the texture just right
- 1 tsp vanilla extract – Use good quality; it’s a subtle but crucial flavor booster
- Pinch of salt – Balances all the sweetness without making it salty
For the Filling (Optional):
- 1 cup chopped toasted pecans or walnuts – Adds a lovely crunch and depth
- 1/2 cup mini marshmallows – Melts in for extra gooeyness
- 2 tbsp cocoa powder – For a chocolate swirl version, sift it well
For the Glaze:
- 1/2 cup powdered sugar – For a light dusting or a thin icing
- 1 tbsp milk or cream – To thin glaze without it running too much
- Optional: 1 tsp vanilla or almond extract – To customize sweetness and aroma
Step-by-Step Instructions
Step 1: Preheat & Prep Pan
First things first, set your oven to 350°F if baking the fudge variation or prepare your pan by lining an 8-inch square baking dish with parchment paper and lightly buttering it. If you’re just making stovetop fudge, line a similar dish but no need to heat the oven. This prep ensures your fudge comes out smoothly and unmolds easily without sticking. I always do this step while I’m gathering ingredients, so I’m not scrambling last-minute.
Step 2: Mix Dry Ingredients
In a medium saucepan, combine the granulated sugar and a pinch of salt. Stir them briefly so they’re well blended, which helps with even melting. This little mix reminds me how exactness matters—skip it, and you might get sugary clumps later. I’ve learned this the hard way!
Step 3: Mix Wet Ingredients
Add the butter and evaporated milk to your sugar mixture in the saucepan. Over medium heat, stir gently until butter is melted and the mixture is smooth. The color will deepen slightly but don’t let it brown; you want a light caramel stage here. This step smells heavenly and always makes me feel like I’m almost done before I’ve even started beating.
Step 4: Combine
Bring the mixture to a boil, stirring constantly to avoid burning. Let it cook until it reaches the soft-ball stage (about 234°F to 240°F on a candy thermometer). If you don’t have one, test by dropping a little syrup in cold water—if it forms a soft ball you can shape with your fingers, you’re on track. Once here, remove from heat immediately and stir in vanilla extract. This moment is key: don’t rush the next step or you’ll lose that smooth fudge texture.
Step 5: Prepare Filling
If using nuts or marshmallows, fold them gently into the mixture once it cools slightly but before it firms up. For chocolate swirls, mix your cocoa into a small portion of the batter before layering. I like to toast nuts lightly first; it boosts their aroma and adds a toasty snap that cuts through fudge’s richness.
Step 6: Layer & Swirl
Pour half your fudge batter into the prepared pan. Dollop spoonfuls of the chocolate (or flavored) mixture over. Then pour the rest on top and swirl with a butter knife or skewer for a beautiful marbled effect. This swirling makes the fudge feel extra special and visually stunning if you’re sharing or gifting it.
Step 7: Bake
Optional—but if you want your fudge a little firmer or prefer a baked texture, pop the pan in the oven for 15-20 minutes until set but soft in the center. Otherwise, letting it chill in the fridge for at least 4 hours or overnight works wonders too. My family usually waits impatiently when it’s chilling, but it’s worth the wait for the perfect cut.
Step 8: Cool & Glaze
Cool your fudge completely before trying to glaze or slice it. If glazing, whisk powdered sugar with milk to a runny but spreadable consistency and drizzle over cooled fudge. I find this glaze adds a lovely sweet touch without weighing down the texture. Be patient here—the glaze hardens beautifully as it sets.
Step 9: Slice & Serve
Use a sharp knife warmed under hot water and wiped dry for clean, smooth cuts. Slice into quarter- or half-inch squares, depending on how indulgent you’re feeling. Serve fudge at room temperature for the best melt-in-your-mouth experience. My kids always say it tastes better if you sneak a piece just as it’s cooling—can’t argue with that!
What to Serve It With
For Breakfast: Pair a tiny fudge square alongside your morning coffee or cappuccino for a sweet wake-up call. It’s like a little morning hug without the fuss of a big dessert.
For Brunch: Add some fresh berries and whipped cream next to fudge bites to elevate an easy brunch spread. A chilled rosé or sparkling lemonade makes a perfect refreshing contrast.
As Dessert: Serve fudge cubes on a small platter with vanilla ice cream or a dollop of crème fraîche. The combo of cold and rich fudge is ridiculously satisfying after a hearty meal.
For Cozy Snacks: Grab a few pieces with a warm mug of tea or hot chocolate on a rainy day. This combo always turns my couch into a mini sanctuary when things get hectic.
This fudge has become a cherished ritual in my household—whether it’s a quick midday pick-me-up or star of holiday celebrations. I love how it fits every mood and moment effortlessly.
Top Tips for Perfecting Your Fudge
Candy Stage Matters: Make sure to hit the soft-ball stage exactly. Too low, and your fudge will be grainy; too high, and it gets hard and crumbly. Using a candy thermometer is a game changer here, but the cold water test works in a pinch.
Butter and Milk Quality: Don’t skimp on these! Real butter and evaporated milk bring that creamy texture and keep fudge from feeling waxy or dull. I tried it with margarine once, and trust me—it’s just not the same.
Don’t Overbeat: Beat the fudge just until it thickens and loses shine. Overbeating can make it dry or crumbly, which is the last thing you want. I learned to stop right when it pulls away from the sides of the bowl slightly.
Swirl It Your Way: For marbling, swirl gently. Too much stirring blends the colors and flavors completely, which is great if you want uniform fudge, but the contrast in swirls looks more special.
Substitutions: I’ve swapped half the sugar for brown sugar before, and it brought a lovely toffee tone. You can try coconut milk instead of evaporated milk for a subtle tropical twist, but expect slight changes in texture.
Baking Tips: If baking, place the pan in the center rack to get even heat all around. Check a few minutes before time is up—each oven is different, and fudge sets quickly once cooled.
Glaze Customization: For a richer look, add a teaspoon of melted chocolate or a pinch of cinnamon to your glaze. Or skip it altogether and just dust with cocoa powder or powdered sugar for a simple finish.
The biggest lesson I learned making fudge? Patience! It’s tempting to rush the cooling or beating stages, but that’s when the magic really happens. And of course, don’t be shy about sharing—this fudge disappears fast and it’s impossible not to love getting rave feedback from friends and family!
Storing and Reheating Tips
Room Temperature: Keep fudge in an airtight container at room temp for up to 5 days. I usually wrap individual squares in wax paper to keep them from sticking. This method keeps the texture perfect and flavor fresh.
Refrigerator Storage: For longer storage (up to 2 weeks), place fudge in a sealed container or tightly wrapped in plastic wrap. When chilled, fudge firms up—just let it sit at room temp for 15 minutes before serving to regain that melt-in-your-mouth softness.
Freezer Instructions: Yes, fudge freezes wonderfully! Wrap squares tightly in foil and freeze in a sealed bag or container. Let thaw overnight in the fridge, then bring up to room temp before enjoying. I always freeze extra batches when I make too much—it’s perfect for unexpected guests.
Glaze Timing Advice: Apply glaze just before serving if stored room temp or refrigerated, because it can soften too much during freezing. Also, glazing too early sometimes leads to a sticky surface if fudge isn’t fully set, so patience really pays off.
Frequently Asked Questions
Final Thoughts
If you’re on the hunt for a sweet treat that feels like a warm, comforting hug, this fudge is your new best friend. It’s the kind of recipe that’s stood the test of time in my family—not flashy or complicated, but endlessly satisfying. Whether you’re making it to gift, share, or sneak a bite with your afternoon coffee, it’ll never disappoint. I’d love to hear what twists you try—do you swirl in peanut butter, add a pinch of sea salt, or maybe toss in your favorite nuts? Don’t be shy, drop a comment and share your fudge stories! And if you’re game, check out my other chocolatey recipes that pair beautifully with this—because one fudge never has to be the last. Happy baking and even happier eating!
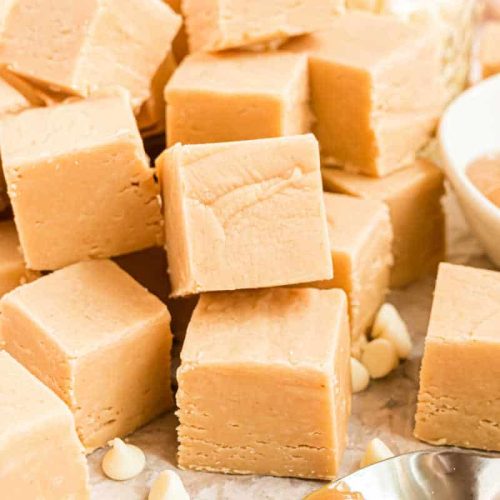
peanut butter fudge
Ingredients
Main Ingredients
- 3 cups granulated sugar
- 0.75 cup unsalted butter
- pinch kosher salt
- 1 cup heavy cream
- 2 cups white chocolate morsels
- 0.75 cup creamy peanut butter
- 7 ounce marshmallow cream
Instructions
Preparation Steps
- Line an 8 or 9-inch square baking dish with parchment paper. Set it aside.
- In a large saucepan, heat granulated sugar, butter, salt, and heavy cream until combined. Bring to a rolling boil and stir continuously for 4 minutes.
- Remove from heat. Quickly whisk in white chocolate morsels, marshmallow cream, and peanut butter until smooth (about 1-2 minutes). Pour fudge into prepared pan and allow to set for 3 hours until hardened.
- Remove fudge from pan by lifting parchment paper, cut into bite-sized pieces, and enjoy.


