


Oh, friend, let me tell you about a cake that’s more than just a cake. This isn’t just some recipe I pulled from a cookbook; this is *the* fudge cake. It’s the one that instantly transports me back to my grandmother’s kitchen, the air thick with the scent of warm chocolate and pure love. You know how some smells just hit you right in the heart? This cake, when it’s baking, does exactly that. It’s the kind of moist, intensely chocolaty dessert that makes you close your eyes and just savor every single bite. Honestly, it’s so rich and decadent, sometimes I think of it as a super-fancy brownie in cake form, but trust me, it’s got its own unique magic. My kids actually ask for this one by name, which, if you have kids, you know is the highest form of praise! This isn’t just a recipe; it’s a hug in cake form, and I can’t wait to share my go-to version of this incredible fudge cake with you.
What is a fudge cake?
So, what exactly are we talking about when we say “fudge cake”? Well, it’s definitely not your average light and airy chocolate sponge. Think of it as the glorious love child of a rich, dense brownie and a perfectly moist chocolate cake. It’s essentially a cake that’s designed to deliver an intense, almost gooey chocolate experience, reminiscent of a spoonful of homemade fudge. It gets its name from that incredible, melt-in-your-mouth, almost fudgy texture. It’s generally denser and more deeply flavored with chocolate than a typical chocolate layer cake. My version aims for that perfect balance: incredibly moist and tender crumb, but with a chewiness that gives it real character. It’s essentially pure chocolate satisfaction, designed to make your eyes roll back in your head with every forkful. This particular fudge cake is a standout because it’s so robustly chocolatey without being overly sweet, letting that deep cocoa flavor really shine.
Why you’ll love this recipe?
Seriously, there are so many reasons why this fudge cake recipe has become a permanent fixture in my kitchen. What I love most about this is just how absolutely indulgent it feels, even though it’s surprisingly straightforward to whip up. You’ll honestly wonder where this recipe has been all your life!
- What is Flavor that Hits Different? Oh my goodness, the flavor! This isn’t just “chocolatey”; it’s a deep, rich, complex cocoa symphony. We’re talking dark chocolate notes that sing, balanced perfectly with just enough sweetness. It’s truly a fudge cake that makes you want to savor every single crumb. I’ve had friends tell me it’s the best chocolate cake they’ve ever tasted, which, as a baker, is music to my ears!
- Simplicity, Seriously: What is the best way to describe a simple thing? Don’t let the decadent result fool you; this fudge cake is a breeze to make. No fancy techniques, no endless bowls, just straightforward mixing and baking. This one’s a lifesaver on busy nights when you need a dessert that tastes like you slaved all day but actually took minutes to prepare. Trust me, I’ve made this countless times after a long day, and it never fails to impress.
- Budget-Friendly Bliss: You know how expensive specialty cakes can be? Forget about it! This fudge cake uses common pantry staples that are easy on your wallet. You get bakery-quality taste without the bakery-quality price tag, and who doesn’t love that? It’s perfect for those times you want to spoil your family or friends without breaking the bank.
- Versatility is Key: This isn’t just a one-trick pony. This fudge cake is incredible on its own, but it also plays well with others. Serve it warm with a scoop of vanilla bean ice cream (my personal favorite!), a dollop of whipped cream, or a sprinkle of flaky sea salt. It’s equally fantastic for a birthday celebration as it is for a cozy Tuesday night treat. It reminds me a bit of my favorite chocolate sheet cake recipe in its adaptability, but with that extra fudgy punch.
This recipe really stands out because it delivers on that deep chocolate craving every single time. It’s comforting, it’s familiar, and it’s just plain delicious. It’s one of those recipes you’ll pass down, I promise.
How to Make This Fudge Cake
Quick Overview
Making this incredible fudge cake is surprisingly simple, really. We’re going to start by getting our wet and dry ingredients sorted in separate bowls – a classic baking move that helps prevent overmixing later. Then, we’ll gently bring them together, pop it into the oven, and let that magical aroma fill your kitchen. The secret to its incredible moistness and fudgy texture lies in a couple of key ingredients and careful mixing. It’s a method I’ve perfected over dozens of batches, and it truly yields a superior fudge cake every single time. You’ll be amazed at how quickly this comes together for such a show-stopping dessert.
Ingredients
Okay, let’s talk about what we’re going to need. Don’t skimp on quality here; it really does make a difference in the final fudge cake.
For the Main Batter:
- All-Purpose Flour: About 2 cups. I always use unbleached; it just feels better.
- Granulated Sugar: 1 ¾ cups. It provides sweetness and helps with moisture.
- Unsweetened Cocoa Powder: ¾ cup, good quality Dutch-processed if you can find it. This is where your fudge cake gets its incredible color and depth of flavor!
- Baking Soda: 1 teaspoon. For that perfect lift.
- Salt: ½ teaspoon. Don’t skip it! It balances all that sweetness.
- Large Eggs: 2, at room temperature. Always room temp for better emulsification.
- Whole Milk: 1 cup. Adds richness and moisture. I’ve tested this with almond milk too, and it actually made it even creamier!
- Vegetable Oil: ½ cup. Contributes to that super moist crumb.
- Vanilla Extract: 2 teaspoons. The real stuff, please!
- Hot Water or Coffee: 1 cup. This is my secret weapon for activating the cocoa and making it super rich. Coffee enhances the chocolate flavor without making the cake taste like coffee.
For the Filling (Optional but Highly Recommended!):
- Cream Cheese: 8 ounces, softened. Full-fat for the best texture.
- Unsalted Butter: ½ cup (1 stick), softened.
- Powdered Sugar: 3 cups, sifted.
- Vanilla Extract: 1 teaspoon.
- A Pinch of Salt: Just to cut the sweetness a bit.
For the Glaze:
- Powdered Sugar: 2 cups, sifted.
- Unsweetened Cocoa Powder: ¼ cup.
- Milk: 3-4 tablespoons. Start with less and add until you get your desired consistency.
- Vanilla Extract: ½ teaspoon.
- Melted Butter: 2 tablespoons (optional, but adds richness).
Step-by-Step Instructions
Step 1: Preheat & Prep Pan
First things first, let’s get that oven ready. You’ll want to preheat it to 350°F (175°C). While that’s heating up, grab a 9×13 inch baking pan. I always grease and flour mine, or line it with parchment paper for easy removal. This is a crucial step for any cake, but especially for a gorgeous fudge cake like this one; nothing worse than a cake stuck to the bottom! It just ensures a beautiful, clean release.
Step 2: Mix Dry Ingredients
In a large bowl, whisk together your all-purpose flour, granulated sugar, unsweetened cocoa powder, baking soda, and salt. Make sure there are no lumps of cocoa powder floating around; a good whisking here ensures everything is evenly distributed. This dry mixture sets the stage for the deep flavor of your fudge cake, so take your time and do it right.
Step 3: Mix Wet Ingredients
In a separate medium bowl, whisk together your room-temperature eggs, whole milk, vegetable oil, and vanilla extract. Whisk them until they’re well combined and look nice and uniform. Room temperature ingredients really do make a difference, helping everything emulsify better and resulting in a smoother batter for your fudge cake.
Step 4: Combine
Now for the magic! Pour your wet ingredients into your dry ingredients. Using a spatula or a hand mixer on low speed, mix until *just* combined. This is where I learned my biggest lesson: do NOT overmix! Overmixing develops the gluten too much, and we want a tender, fudgy cake, not a tough one. The batter will be thick, but don’t worry. Then, carefully stir in the hot water or coffee. The batter will thin out and become beautifully smooth. The smell alone brings everyone to the kitchen at this point.
Step 5: Prepare Filling (If Using)
If you’re going for that irresistible cream cheese filling, now’s the time! In a bowl, beat together the softened cream cheese and butter until light and fluffy. Gradually add the sifted powdered sugar, vanilla extract, and a pinch of salt, beating until smooth and creamy. You want it nice and thick but spreadable. This filling is pure bliss with this fudge cake, adding a lovely tangy counterpoint to all that chocolate.
Step 6: Layer & Swirl (If Using Filling)
If you’re doing the filling, pour half of the fudge cake batter into your prepared pan. Dollop spoonfuls of the cream cheese filling over the batter. Then, gently pour the remaining cake batter over the filling. Take a knife or a skewer and gently swirl through the layers to create a lovely marbled effect. Don’t overdo the swirling, though; we want distinct layers and ribbons, not a muddy mess. This gives your fudge cake an extra layer of surprise and beauty!
Step 7: Bake
Slide that pan into your preheated oven. Bake for 30-35 minutes, or until a wooden skewer or toothpick inserted into the center of the cake comes out with moist crumbs attached (not completely clean, because we want it fudgy!). Every oven is a little different, so keep an eye on it. My oven tends to run hot, so I often check a few minutes early. You want that perfect balance of baked through but still incredibly moist for your fudge cake.
Step 8: Cool & Glaze
Once baked, let your fudge cake cool in the pan on a wire rack for about 15-20 minutes. This helps it firm up and prevents it from sticking. While it’s cooling, whisk together your glaze ingredients until smooth. Once the cake has cooled sufficiently but is still a bit warm, pour the glaze over the top, letting it drip enticingly down the sides. The warmth of the cake will help the glaze set beautifully. Trust me, that glistening glaze is just begging for a bite!
Step 9: Slice & Serve
Allow the glaze to set completely, or if you’re impatient like me, dive in while it’s still a little soft! Using a sharp knife, slice your beautiful fudge cake into squares. This cake is incredible served slightly warm, but it’s also fantastic at room temperature. Present it simply, perhaps on a pretty platter. It’s perfect when you’re craving something sweet at 10 pm but don’t want to bake a whole cake, and leftovers are just as good, if not better, the next day.
What to Serve It With
Okay, so you’ve got this magnificent fudge cake. Now, how do you make it even *more* amazing? Here are some of my favorite ways to enjoy it, depending on the occasion:
For Breakfast: Who says you can’t have cake for breakfast? A small slice of this fudge cake, perhaps without the glaze or with a lighter dusting of powdered sugar, is heavenly with a strong cup of black coffee or a creamy latte. It’s a decadent start to the day, and let’s be honest, we all deserve a little treat sometimes. My kids actually ask for seconds if I serve it warm with a tiny drizzle of milk!
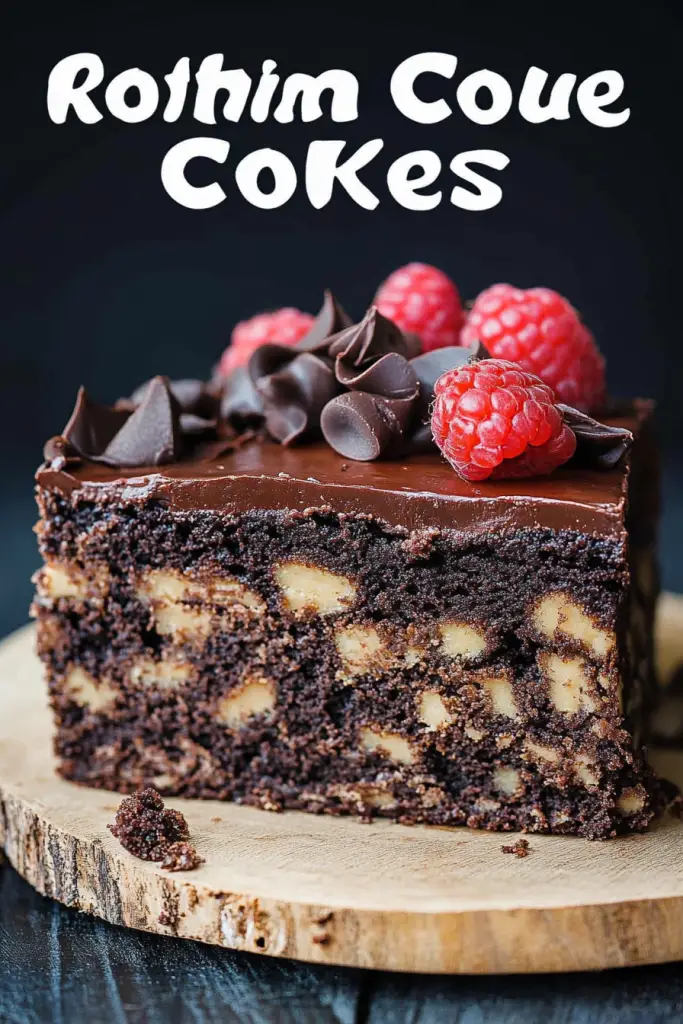
For Brunch: Elevate your brunch spread! Slice the fudge cake into elegant squares and pair it with fresh berries—raspberries or strawberries really pop against the dark chocolate. A side of perfectly brewed iced coffee or even a light mimosa makes for a sophisticated treat. It adds a touch of indulgence without being overly heavy, especially if you’ve got a savory brunch spread.
As Dessert: This is where the fudge cake really shines! For an after-dinner masterpiece, serve it warm with a scoop of premium vanilla bean ice cream. The warmth of the cake melting into the cold ice cream? Absolute bliss. A dollop of freshly whipped cream with a sprinkle of sea salt is also divine, enhancing the chocolate’s depth. Or, for a truly decadent experience, a drizzle of raspberry coulis takes it to another level. This disappeared in minutes at my house last time I served it this way!
For Cozy Snacks: Sometimes you just need a little something sweet and comforting. A generous slice of fudge cake with a tall glass of cold milk is pure nostalgia. Or, during cooler months, it’s perfect with a mug of steaming hot chocolate or a spiced chai tea. It’s that perfect comfort food that just warms you from the inside out, making any afternoon feel a little more special. It’s the ideal treat to curl up with after a long day.
No matter how you serve it, this fudge cake is a winner. My family traditions often involve a big slice, still warm from the oven, shared around the kitchen table after dinner. Simple perfection.
Top Tips for Perfecting Your Fudge Cake
I’ve made this fudge cake so many times that I’ve picked up a few little tricks and learned from a few mistakes along the way. These tips will help you get that perfect, irresistible fudge cake every single time.
Ingredient Quality & Prep:
- Good Cocoa Matters: Don’t skimp on the cocoa powder. A good quality Dutch-processed cocoa powder will give your fudge cake that deep, rich color and intense chocolate flavor that’s just unparalleled. It makes all the difference, trust me.
- Room Temp Everything: Ensure your eggs and milk are at room temperature. This helps them combine more smoothly with the other ingredients, leading to a more uniform batter and a finer crumb in your finished fudge cake. I always take them out at least 30 minutes before I start.
- Hot Liquid is Key: Don’t skip the hot water or coffee. This step isn’t just about thinning the batter; it “blooms” the cocoa powder, intensifying its flavor and resulting in a darker, richer fudge cake. I learned this trick after years of making chocolate cakes!
Mixing Advice:
- Whisk Dry Well: Really take your time whisking the dry ingredients. You want to make sure the baking soda and salt are evenly distributed so your fudge cake rises properly and has a balanced flavor.
- DO NOT Overmix: This is my number one rule for cakes! Once you combine the wet and dry ingredients, mix only until no streaks of flour remain. Overmixing develops gluten, which leads to a tough, dry cake. You want that tender, moist, fudgy texture. Your arm might get tired, but your cake will thank you.
Baking Tips:
- Know Your Oven: Ovens can be quirky! If you know yours runs hot or cold, adjust the temperature accordingly. For a dense fudge cake like this, an oven thermometer is your best friend.
- Doneness Test: For a truly fudgy cake, you want your toothpick to come out with moist crumbs, not completely clean. If it comes out clean, it’s likely overbaked and will be drier. A little fudginess is good!
- Don’t Peek Too Early: Resist the urge to open the oven door too often, especially in the first 20 minutes. Temperature fluctuations can cause your cake to sink.
Glaze Variations:
- Consistency is Queen: Adjust the milk in the glaze gradually until you get the consistency you like. For a thicker, more opaque glaze, use less milk. For a thinner, drizzly glaze, add a tiny bit more. I prefer it a little thicker so it coats the fudge cake beautifully.
- Flavor Boosters: Feel free to add a pinch of espresso powder to the glaze for an even deeper chocolate flavor, or a tiny bit of orange zest for a lovely citrusy hint. A dash of peppermint extract around the holidays is also divine!
These little insights are what elevate a good fudge cake to an absolutely phenomenal one. I’ve made this countless times and it never fails when I follow these guidelines.
Storing and Reheating Tips
Alright, so you’ve got some leftover fudge cake (if you’re lucky!). Knowing how to store it properly is key to keeping it just as delicious as when it first came out of the oven.
Room Temperature: If your fudge cake is glazed and doesn’t have a cream cheese filling, it can comfortably sit at room temperature for up to 2-3 days. Make sure it’s covered tightly with plastic wrap or stored in an airtight container to prevent it from drying out. The natural moisture in this fudge cake helps it stay fresh, but air is its enemy for freshness!
Refrigerator Storage: If you’ve used the cream cheese filling, or if you simply prefer a chilled fudge cake (it’s surprisingly good cold!), pop it into the fridge. Again, an airtight container is crucial. It will keep beautifully for up to 5-7 days. Just know that cold can sometimes make a cake feel a little denser, but this fudge cake holds up really well.
Freezer Instructions: Yes, you can absolutely freeze this fudge cake! This is a lifesaver if you want to make it ahead or save some for a rainy day.
- Whole Cake: Let the cake cool completely. If it’s glazed, let the glaze set completely. Then, wrap the entire cake tightly in plastic wrap, then again in aluminum foil. This double layer protects it from freezer burn.
- Individual Slices: My favorite way to freeze for portion control! Cut the cake into individual slices. Wrap each slice tightly in plastic wrap, then place them in a freezer-safe bag or container. This is perfect when you’re craving something sweet at 10 pm but don’t want to bake a whole cake.
It will last for up to 2-3 months in the freezer. To thaw, simply unwrap and let it come to room temperature on the counter for a few hours, or pop a slice in the microwave for a quick warm-up.
Glaze Timing Advice: If you plan on freezing the entire cake, I often glaze it after thawing. This keeps the glaze looking fresh and prevents it from getting tacky or watery during the freezing/thawing process. However, if you’re freezing individual slices, glazing beforehand works just fine as long as it’s set first.
I’ve often made a double batch and frozen half; it’s a lifesaver for last-minute guests or just those spontaneous chocolate cravings! This fudge cake maintains its incredible flavor and texture really well even after freezing.
Frequently Asked Questions
Final Thoughts
Well, there you have it, friend – my absolute favorite recipe for a truly unforgettable fudge cake. This isn’t just another dessert; it’s a little piece of comfort, a slice of joy, and a guaranteed crowd-pleaser. The deep, rich chocolate flavor combined with that unbelievably moist, fudgy texture is what makes this cake a true standout in my recipe collection. Every time I make it, it brings back such warm memories, and I just know it’ll create new ones for you and your loved ones too. It’s simple enough for a weeknight treat but elegant enough for any special occasion. If you loved this, you might also enjoy exploring some of my other classic chocolate recipes, like my Ultimate Chewy Chocolate Chip Cookies or my Decadent Fudgy Brownies. They’re all about that pure chocolate happiness!
Give this fudge cake a try, and prepare to fall in love. I can’t wait to hear how yours turns out! Did you try it with the cream cheese swirl? What did you serve it with? Share your thoughts and any variations in the comments below. Happy baking!

fudge cake
Ingredients
Main Ingredients
- 1.25 cup salted butter
- 1.25 cup sugar
- 3 large eggs beaten
- 3 tbsp cocoa powder
- 1.5 cup Social Tea cookies
- 1.5 cup nuts of choice
- 1.5 cup raisins
- 1 package semi-sweet chocolate chips
Instructions
Preparation Steps
- Put butter, sugar, eggs, and cocoa powder in a saucepan. Stir until the butter melts.
- Add Social Tea cookies, nuts, and raisins; mix well, excluding the chocolate chips.
- Pour mixture into a lightly greased 8-inch square pan. Frost with melted chocolate chips.
- Cool completely and cut into squares. Freezes well.


