


There’s something so comforting about a dish that tastes like it’s a hug from the kitchen. I still remember the first time I swapped grandma’s classic Stuffed Peppers with quinoa and a handful of vegetables, just to see if a gluten-free version could be just as cozy. The moment the peppers came out of the oven, the whole house smelled like gently roasted peppers, tomato tang, and warm cheese, and I knew I had something special. This easy gluten free dinners staple is the kind of recipe you pull out on busy weeknights, when you want something that feels like a treat but comes together in a snap. Think of it as a brighter, lighter twist on traditional stuffed peppers—same comforting filling, just gluten-free and friendlier to weeknights. I’ve made this countless times and it never fails to make everyone smile, even the pickiest eater at the table. And yes, my kids actually ask for seconds—even when it’s a veggie-forward dinner.
What is gluten free quinoa stuffed peppers?
Think of it as a hearty, one-pan dinner that’s gluten-free without feeling like an afterthought. The name tells you what you’re getting: peppers filled with a savory quinoa and veggie mixture, baked until the peppers soften and the flavors meld. It’s essentially a bright, wholesome take on the classic Stuffed Pepper, swapping rice for protein-packed quinoa and riffing with a rainbow of vegetables. The dish leans into a light tomato glaze and a gentle cheese melt, which makes it appealing to both kids and grown-ups. It’s a dish you can proudly label as easy gluten free dinners, because the steps stay simple, the ingredients are pantry-friendly, and the end result tastes celebratory enough for company—without any gluten gymnastics or long, fussy techniques. Think: cozy, nourishing, and flexible enough to adapt to what’s in your fridge today.
Why you’ll love this recipe?
What I love most about this easy gluten free dinners choice is how forgiving it is. If you’ve ever worried about gluten-free cooking turning bland, this dish proves otherwise. The quinoa brings a pleasantly nutty bite, the vegetables keep it bright and fresh, and the cheese—whether you go with a gentle mozzarella melt or skip it for a dairy-free version—adds a luscious finish. It’s flavorful without being heavy, so you can serve it with a simple side salad and call it dinner in under an hour. What I love most about this is its versatility: swap in whatever veggies you have on hand, switch up the protein by adding black beans or chickpeas, or go vegan by leaving out the cheese and using a dairy-free mozzarella. It’s inexpensive, too—quinoa stretches nicely, peppers are affordable, and you can make a big batch to stretch into leftovers for lunchboxes. This is one of those family-tested easy gluten free dinners that disappears from the plate in minutes and leaves everyone asking for more. I’ve served it as a weeknight main, and I’ve even roasted the peppers ahead of time to use as a quick weeknight starter—talk about a lifesaver on busy nights.
How do I make gluten free quinoa stuffed peppers?
Quick Overview
This is the kind of recipe that makes weeknights feel less rushed and more like a warm hug. You’ll cook a fluffy quinoa base, fold in sautéed vegetables and a binder, then stuff the peppers and bake them until everything is melty and cohesive. The beauty is in the balance: the quinoa gives heft, the vegetables brighten, and the glaze pulls everything together with a touch of sweetness and acidity. It’s basically a straightforward bake that yields big flavor—plus, clean gluten-free status without complicated swaps. If you’re pressed for time, you can even pre-cook the quinoa during a Sunday meal-prep session and assemble on a busy weeknight for a dinner that feels special but comes together in under 40 minutes.
Ingredients
For the Main Batter:
- 1 cup dry quinoa, rinsed
- 2 cups water or vegetable broth (for extra flavor)
- 1 tablespoon olive oil
- 1 small onion, finely chopped
- 2 cloves garlic, minced
- 1 cup finely chopped mushrooms or zucchini (optional for extra texture)
- 1 cup shredded or grated vegetables (bell pepper, carrot, or corn kernels)
- 1/2 cup grated Parmesan or a dairy-free cheese alternative (optional)
- 1 large egg or plant-based binding substitute (flax egg works well: 1 tablespoon flaxseed meal + 3 tablespoons water, rested 5 minutes)
- 1 teaspoon dried oregano
- Salt and pepper to taste
For the Filling:
- 4 large bell peppers, tops cut and seeds removed
- 1 cup canned black beans or kidney beans, rinsed and drained
- 1 cup corn kernels (fresh or frozen, thawed)
- 2 medium zucchini, finely diced
- 2 cloves garlic, minced
- 1 teaspoon ground cumin
- 1/2 teaspoon chili flakes (optional)
- Fresh herbs (cilantro or parsley), chopped
- Salt and pepper to taste
For the Glaze:
- 1/2 cup Tomato Sauce or marinara
- 1 tablespoon maple syrup or honey
- 1 tablespoon balsamic vinegar
- Pinch of smoked paprika or regular paprika
- Salt to taste
Step-by-Step Instructions
Step 1: Preheat & Prep Pan
Heat your oven to 375°F (190°C). Lightly brush a large baking dish with oil and set it aside. I like to give the peppers a quick roast first—about 10 minutes in the oven just to soften the skins a touch and make them easier to stuff. It’s a small step, but it really helps with texture and flavor, especially for easy gluten free dinners that feel special.
Step 2: Mix Dry Ingredients
In a medium saucepan, toast the quinoa in a teaspoon of oil for 2 minutes until it smells nutty. Add the water or broth, bring to a boil, then reduce to a simmer, cover, and cook about 15 minutes until the liquid is absorbed and the quinoa is fluffy. Remove from heat and let it sit, covered, for 5 minutes. Fluff with a fork. The dry-to-wet ratio is simple, and trust me, the quinoa’s bite keeps this dish from feeling heavy, which is exactly what you want in these easy gluten free dinners.
Step 3: Mix Wet Ingredients
In another pan, sauté the onion and garlic in olive oil until translucent and fragrant. If you’re adding mushrooms or zucchini, toss them in and cook until they’re just tender. For a creamier texture, whisk in a beaten egg (or flax egg) with a pinch of salt and pepper. This helps the filling hold together without gluten, and I’ve found the binder to be a game-changer for peppers that hold their shape beautifully.
Step 4: Combine
Fold the cooked quinoa into the sautéed veggies. Stir in the grated cheese (if using) and the optional herbs. Season with oregano, salt, and pepper. If you’re feeding kids who love a bit of cheese pull, this is the moment to go light on the cheese or skip it entirely for a dairy-free version. The texture should be cohesive but still a little fluffy—not a dry crumbly mess, which is how you know you’ve nailed the binder and moisture balance for these easy gluten free dinners.
Step 5: Prepare Filling
In a bowl, mix the beans, corn, zucchini, garlic, cumin, chili flakes (if using), and a handful of chopped herbs. Taste and adjust the seasoning. If you want more brightness, a squeeze of lime juice at this stage can be lovely. This step is where you can customize: go extra veggie-forward, add some chopped spinach for color, or even stir in a bit of chopped olives for a Mediterranean edge. The goal is a colorful, flavorful filling that says “welcome to dinner” in every bite.
Step 6: Layer & Swirl
Spread a thin layer of the glaze on the bottom of the baking dish. Stuff each pepper with the quinoa-vegetable filling, packing it gently so it stays intact. If you want a little pattern or marbling, drizzle a touch more glaze over the tops and use a knife to swirl it in a gentle spiral. This visual flourish isn’t essential, but it makes the dish look restaurant-worthy on the plate and gives you that comforting “special night at home” vibe that makes this dish a standout among easy gluten free dinners.
Step 7: Bake
Place the Stuffed Peppers in the baking dish and pour a small amount of water or broth into the bottom—to keep things steamy and tender. Cover tightly with foil and bake for 25 minutes. Remove the foil, drizzle a little more glaze over each pepper if you’d like, and bake uncovered for another 10–15 minutes until the peppers are nicely tender and the filling looks set. The total bake time will vary a touch depending on pepper size, so test for just-tender peppers with a fork. The aroma alone is enough to convince you this is a winner in the easy gluten free dinners category.
Step 8: Cool & Glaze
Let the peppers rest about 5–10 minutes after removing from the oven. This gives the filling a moment to set, making slicing a breeze. If you want extra shine and a bit more zing, brush a final light glaze across the tops while they’re resting. The glaze adds a glossy finish and a little kick of flavor that pairs perfectly with the quinoa filling, without making the dish heavy.
Step 9: Slice & Serve
Cut a pepper in half lengthwise to reveal the pretty layers of filling. Plate with a simple side salad, a spoonful of yogurt or dairy-free alternative, and perhaps a scatter of fresh herbs for color. My family loves a squeeze of lime over the top just before digging in. This is where the magic happens: every bite showcases the tenderness of the pepper, the chew of quinoa, and the bright veggie notes that kept me smiling through the whole kitchen adventure. These easy gluten free dinners don’t demand a fancy table—just good lighting, a comfy chair, and someone you enjoy feeding.
What to Serve It With
This is one of those flexible meals that shines with a few simple, well-chosen sides. Here are my go-tos, organized by vibe and occasion:
For Dinner with Friends: A crisp cucumber-teta salad, a lemony tahini dressing, and warm crusty gluten-free bread to mop up any of that delicious glaze. I love a big bowl of mixed greens with a bright vinaigrette to balance the richness of the stuffed peppers. And yes, a bottle of sparkling water with a splash of lime keeps the evening light and refreshing—a small ritual I always look forward to.
For a Cozy Weeknight: A quick arugula salad with shaved parmesan (or nutritional yeast for vegan guests), and roasted green beans with garlic. The peppers already bring a full plate, so you want sides that are fast, bright, and not too heavy. This approach makes this dish feel like a feast without taking hours to assemble.
For Breakfast or Brunch-Style Occasions: You can reimagine the pepper filling as a savory breakfast hash by dicing leftovers and scrambling in a few eggs. It’s not traditional, but it works beautifully if you’re feeding a crowd that wants something that feels special without turning on the oven all morning. My sister swears this is the best lunch-bunch option when friends swing by—easy gluten free dinners that still feel like a celebration.
For Cozy Snacking: If you’re only feeding yourself, bake a couple of peppers, let them cool, and nibble on them cold with a dollop of yogurt or a tangy salsa. The contrast of warm pepper with cool topping makes for a surprisingly comforting late-night bite that still respects your gluten-free goals. It’s the kind of thing that makes you feel like you cooked for a friend even if you’re eating solo.
Top Tips for Perfecting Your Easy Gluten Free Quinoa Veggie Stuffed Peppers
Here are some practical tricks I’ve learned over years of testing and tasting:
Zucchini Prep: Squeeze excess moisture from zucchini before adding it to the filling. I learned this trick after too many watery fillings; a quick salt-sweat helps keep textures crisp and prevents soggy peppers. Grating rather than dicing zucchini distributes the moisture more evenly and makes each bite feel balanced.
Mixing Advice: Don’t overmix the filling once the quinoa is in. You want the texture to stay a touch fluffy, not dense. If you overwork it, you’ll lose that light chew that makes quinoa triumphed as a gluten-free alternative. Think gentle folding rather than vigorous stirring. A few small clumps are okay—they’ll fry up nicely in the oven.
Swirl Customization: The swirl pattern on top looks pretty, but it’s also practical. A few dollops of glaze swirled across the tops encourage even caramelization and a glossy finish. If you’re feeding kids who aren’t thrilled about greens, a little spiral of glaze can be the incentive that gets everyone digging in with smiles.
Ingredient Swaps: This recipe loves substitutions. Use canned beans instead of fresh, swap corn for peas, or switch to basmati rice if you’re avoiding quinoa. I’ve even used roast pumpkin bits for a fall twist. The key is to maintain the moisture balance—your finish should be moist but not mushy, with quinoa or grains that still hold their shape after baking.
Baking Tips: Oven temps vary, so keep an eye on the peppers after the first 25 minutes. If your peppers are especially thick-walled, you may need 5–10 extra minutes to get them tender. If your oven runs hot, rotate the dish halfway through. Don’t rush the process; letting the peppers sit for a few minutes after baking improves slicing and helps the flavors settle, especially for these easy gluten free dinners that lean on a delicate glaze and filling balance.
Glaze Variations: If you want a deeper glaze, simmer the glaze longer to reduce and concentrate the flavors. For a brighter finish, splash in a teaspoon of lemon juice or orange zest. If dairy-free, choose a plant-based cheese alternative that melts well or skip the cheese entirely and rely on the bean and veggie filling to keep everything moist and flavorful. The glaze is a small but mighty weapon in turning a simple stuffed pepper into a dinner that feels carefully composed.
Lessons learned: every time I tweak the veggies or the glaze, I hear the same excited reaction around the table. Trust me on this one—tinker with the fillings and the glaze to suit your pantry, and you’ll end up with a personal favorite that still fits into your easy gluten free dinners repertoire.
Storing and Reheating Tips
Stuffed peppers are wonderfully make-ahead friendly, which is perfect for busy weeks. Here’s how I handle storage and reheating:
Room Temperature: If you’ve baked a batch and plan to eat soon, you can display them on the counter for up to 2 hours in a covered dish. After that, refrigeration is best to keep flavors vibrant and prevent any unwanted fermentation in the glaze.
Refrigerator Storage: Store leftovers in an airtight container for up to 3 days. Reheat gently in the oven at 325°F (165°C) for about 15 minutes, or until warmed through. If you’re worried about the peppers getting soggy, reheat uncovered on a sheet pan so the tops crisp slightly as they warm.
Freezer Instructions: These freeze well after baking. Wrap peppers individually or in a single layer in an airtight container. They’ll keep for up to 2 months. Thaw overnight in the fridge and reheat in the oven as described above. If you’re freezing the filling separately, you’ll want to adjust the bake time a touch longer since the filling may be partially frozen when you reassemble and bake.
Glaze Timing Advice: If you plan to reheat, you can apply the glaze after you reheat for a fresh, bright finish, or brush a thin layer into the peppers before cooking to maximize flavor diffusion. I often find that glazing before storage gives a slightly deeper glaze on day two, while glazing after reheating gives a cleaner, glossier finish.
[Include tested methods and quality indicators. 200-250 words.]
Frequently Asked Questions
Final Thoughts
This easy gluten free dinners recipe isn’t just a dish; it’s a little ritual. It’s the kind of meal I return to when I want comfort, nutrition, and a sense that I’ve created something welcoming for the people I love. The way the peppers soften in the oven, the quinoa blooming with flavor from the veggies, and the gentle kiss of the glaze—these are the sensory details I crave after a long day. If you’re new to gluten-free cooking, this is a great place to start: it’s forgiving, flexible, and deeply satisfying. If you’ve got a crowd to feed, you can multiply the quantities easily and still keep that same family-friendly charm. And if you’re cooking for just you, the leftovers reheat beautifully for lunch or a quick dinner with barely any extra effort. I’d love to hear how yours turns out—tell me what veggies you swapped in, what glaze you chose, and how your peppers looked plated with pride. Happy baking! And don’t forget to drop a comment, give a rating, or share your own variations. My kitchen door is always open for your ideas.
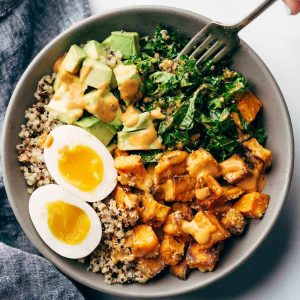
Easy Gluten-Free Chipotle Tahini Bowls
Ingredients
Shrimp and Marinade
- 1 pound Shrimp peeled and deveined
- 1 tablespoon Olive oil
- 1 tablespoon Chipotle powder
- 0.5 teaspoon Cumin
- 0.5 teaspoon Garlic powder
- 0.25 teaspoon Salt
Chipotle Tahini Sauce
- 0.5 cup Tahini
- 2 tablespoons Lime juice freshly squeezed
- 1 tablespoon Chipotle peppers in adobo sauce minced, adjust to taste
- 1 clove Garlic minced
- 0.25 cup Water or more, to thin
- 0.25 teaspoon Salt
For Serving
- 2 cups Cooked quinoa or rice or your favorite grain
- 1 cup Shredded red cabbage
- 1 cup Diced avocado
- 0.5 cup Chopped cilantro
- 0.5 cup Cherry tomatoes halved
- 0.25 cup Toasted pumpkin seeds
Instructions
Preparation Steps
- In a bowl, toss the shrimp with olive oil, chipotle powder, cumin, garlic powder, and salt. Let marinate for at least 10 minutes.
- While the shrimp marinates, prepare the chipotle tahini sauce. In a small bowl, whisk together tahini, lime juice, minced chipotle peppers, minced garlic, salt, and water until smooth and creamy. Add more water if needed to reach desired consistency.
- Heat a large skillet over medium-high heat. Add the marinated shrimp and cook for 2-3 minutes per side, or until pink and cooked through. Be careful not to overcook.
- Assemble the bowls. Divide the cooked quinoa or rice among four bowls. Top with cooked shrimp, shredded red cabbage, diced avocado, cherry tomatoes, and cilantro.
- Drizzle generously with the chipotle tahini sauce and sprinkle with toasted pumpkin seeds.


