


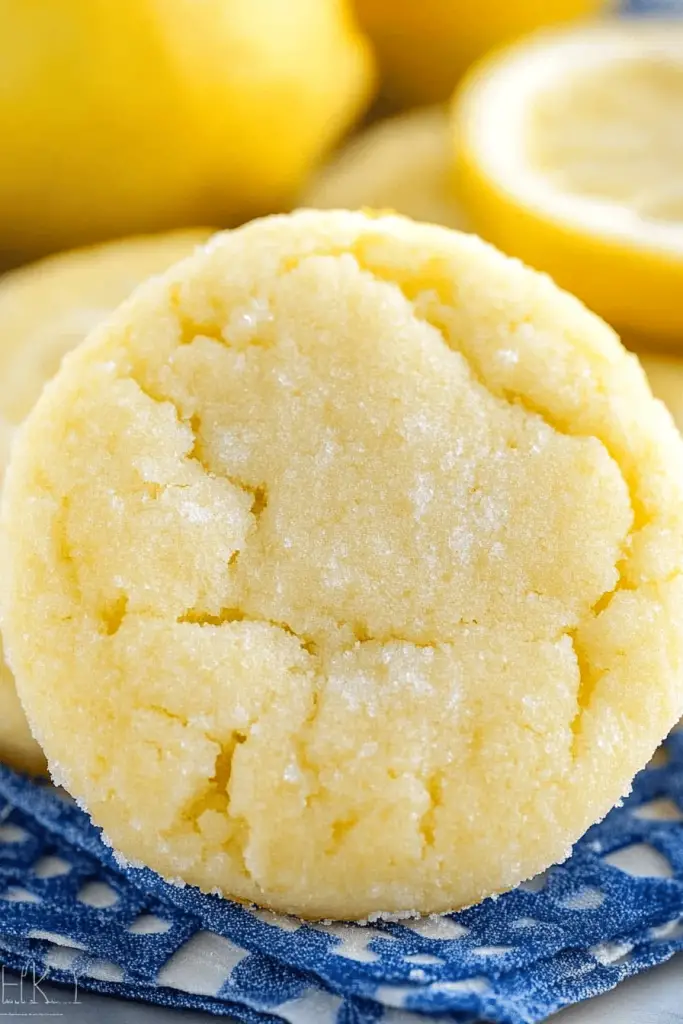
There’s something about the smell of freshly baked Sugar Cookies that instantly takes me back to my childhood kitchen, standing on a little stool next to my mom, stealing handfuls of dough when she wasn’t looking. These drop sugar cookies are that warm, buttery hug you crave when you want a little homemade love without fussing over rolling out dough or fancy cutters. I always keep the recipe close because it’s fast, forgiving, and results in cookies that are soft in the middle with those irresistibly crisp edges. Honestly, if you love classic sugar cookies but dread the time it takes, this drop version will become your new best friend. Plus, the way they melt in your mouth with a hint of vanilla and that subtle crunch from the sugar sprinkle? I can’t get enough — and my kids ask for these at every chance!
What is drop sugar cookies?
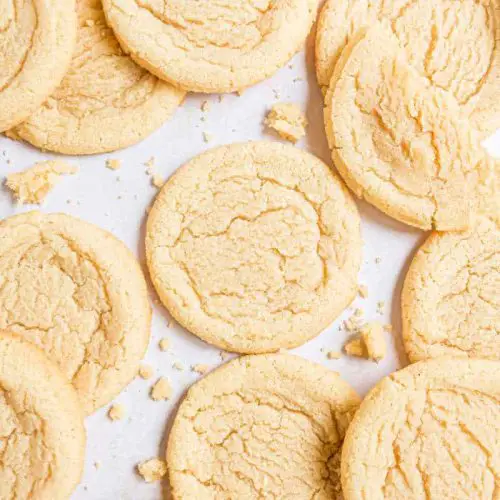
Drop sugar cookies are basically Sugar Cookie batter you drop by spoonfuls directly onto your baking sheet, no rolling or cutting necessary. The term “drop” simply means you’re dropping the cookie dough onto the pan instead of shaping it beforehand. It’s essentially a quicker, less fussy take on the classic rolled sugar cookie but doesn’t skimp on the taste or that sweet, crumbly texture we all love. Think of it as the cozy cousin of cut-out sugar cookies — all the delightful vanilla-scented goodness, but way more approachable when your schedule or patience feels tight. It’s my go-to when I want something that feels homemade but I’m not in the mood for complicated techniques. Plus, they look delightfully rustic, which adds a charm all their own.
Why you’ll love this recipe?
What I love most about these drop Sugar Cookies is how they nail the perfect balance of fluffy softness with just the right crispy edges. The scent when they’re baking is absolute magic — like a little vanilla daydream wafting through the house. And the best part? They’re incredibly simple to make. No chilling in the fridge for hours or rolling out tricky dough that cracks on you. This recipe is a lifesaver on busy nights when I get a sudden sweet tooth but can’t commit hours to baking.
They’re budget-friendly too — using pantry staples you probably already have, like flour, sugar, butter, and eggs. And they’re versatile! You can sprinkle a little colored sugar on top for the holidays, fold in some zest or spices to change the vibe, or even sandwich them with jam. I’ve brought these cookies to potlucks, after-school snacks, and even breakfast once (don’t judge—cookies and coffee, yes!). And if you’re a fan of classic Chocolate Chip Cookies, these are a wonderful twist — lighter, sweeter, and way more melt-in-your-mouth. Honestly, once you make these drop sugar cookies, you might never go back to the rolled ones.
How do I make drop sugar cookies?
Quick Overview
Making these drop Sugar Cookies couldn’t be easier — you simply mix together the dry ingredients, cream the butter and sugars, mix everything up, drop spoonfuls onto a lined pan, and bake. No shaping required, which saves so much time and stress. Plus, they bake quickly, so you can have warm cookies ready in less than 20 minutes. I love how the dough is soft enough to scoop right away, no chilling needed, and the gentle golden bottoms tell you exactly when they’re done. It’s the kind of recipe you’ll want to jot down in your “everyday treats” notebook.
Ingredients
For the Main Batter:
- 1 cup unsalted butter, softened — For that rich, buttery base that makes these cookies dreamy.
- 1 cup granulated sugar — Adds sweetness and helps create those crispy edges.
- 1 large egg — Acts as a binder and brings moisture.
- 1 teaspoon pure vanilla extract — Trust me, don’t skimp on this; it’s the heart of the flavor.
- 2 ½ cups all-purpose flour — The main structure, sifted to keep things light.
- ½ teaspoon baking soda — Just enough to help them puff slightly without being cakey.
- ½ teaspoon salt — A little accent that balances the sweetness.
For the Topping/Finishing Sugar:
- Extra granulated sugar or colored sanding sugar — For sprinkling on top before baking to get a satisfying crunch and sparkle.
Step-by-Step Instructions
Step 1: Preheat & Prep Pan
Start by preheating your oven to 350°F (175°C). Line your baking sheets with parchment paper or a silicone baking mat — this not only prevents sticking but also helps the cookies bake evenly and come off cleanly without crumbling. If you’re like me and always forget, set a timer or note so you don’t rush later on.
Step 2: Mix Dry Ingredients
In a medium bowl, whisk together the sifted flour, baking soda, and salt. This helps distribute everything evenly so there aren’t pesky clumps or uneven leavening. I like to do this separately to avoid overmixing when combined with the wet ingredients, which keeps the cookies light and tender.
Step 3: Mix Wet Ingredients
In a large bowl, beat the softened butter and granulated sugar together until the mixture is pale and fluffy — about 3-4 minutes. I always use a hand mixer on medium speed here to get that perfect texture. Next, beat in the egg followed by the vanilla extract. The batter should be smooth and creamy, promising a buttery bite.
Step 4: Combine
Gradually add the dry ingredients to the wet, mixing just until everything comes together. This is super important — overmixing will toughen the dough, and no one wants that. My rule of thumb: stop the moment there are no visible streaks of dry flour, even if the batter feels a bit thick. It leads to cookies that have a beautiful crumb without being dense.
Step 5: Shape and Top
Using a spoon or cookie scoop, drop generous tablespoons of dough onto the prepared pan about 2 inches apart. Don’t fuss about perfect shapes; the rustic charm is part of the appeal! Just before baking, sprinkle a little granulated or colored sugar on each mound, giving them a lovely sparkle and just the right hint of crunch.
Step 6: Bake
Bake in the preheated oven for 10-12 minutes. I always set my timer for 10 and then peek in — the edges should be lightly golden while the centers remain soft. That’s your cue they’re done. Don’t worry if they seem a little underbaked; they finish cooking on the hot pan once out of the oven. This step really makes all the difference between chewy delight and dry disappointment.
Step 7: Cool & Serve
Let the cookies cool on the baking sheet for about 5 minutes — this gives them time to set without breaking. Then, carefully transfer them to a wire rack to cool completely. If you’re glazing or decorating, wait until they’re fully cool, or the glaze will melt and slide off. Otherwise, just dig in — warm, buttery cookies fresh out of the oven are pure heaven.
What to Serve It With
For Breakfast: These drop sugar cookies make a surprising but delightful breakfast treat. Pair them with your morning coffee or a creamy latte — the vanilla notes in the cookie complement a good cup of brew beautifully. On weekends, I love slicing a cookie in half, adding a little smear of cream cheese, and enjoying it as a sweet morning pick-me-up.
For Brunch: Bring these cookies along with a spread of fresh fruit, yogurt parfaits, and mimosas for an extra touch of sweetness. They also pair wonderfully with herbal teas or iced chai, balancing the spices and sweetness with their soft crumb and light vanilla flavor.
As Dessert: Serve them alongside a scoop of vanilla or cinnamon ice cream with a drizzle of chocolate or caramel sauce for a cozy treat. Or, sandwich two cookies with lemon curd or raspberry jam inside for a grown-up twist that always gets compliments.
For Cozy Snacks: Nothing beats these drop sugar cookies warmed up with a glass of cold milk or a hot cup of cocoa when you want to curl up with a good book. My kids ask for this snack after school all the time, especially on chilly days when the simple smells and flavors feel like a warm blanket.
Top Tips for Perfecting Your Drop Sugar Cookies
Butter Temperature: Make sure your butter is softened but not melting. Too soft, and the dough will be greasy and spread too much. I usually set it out for about 30 minutes before mixing — you want it supple and smooth.
Mixing Method: Cream butter and sugar until light and fluffy — it’s worth the few extra minutes here for that ultimate tender cookie. When adding flour, mix slowly and stop as soon as combined to avoid tough cookies.
Sugar Topping: Adding extra sugar on top before baking isn’t just for looks — it creates that lovely crackly texture. If you want to get fancy, try sanding sugar in fun colors for holidays or celebrations.
Variations: I’ve swapped half the vanilla extract for almond or lemon extract with great results, and sometimes I’ll toss in a pinch of cinnamon or nutmeg for warmth. For a little extra texture, folded in finely chopped nuts or white chocolate chips work like a charm.
Baking Time: Oven temperatures vary, so start checking your cookies at 10 minutes. Pull them when edges are golden and centers look just set but still shiny. They’ll firm up as they cool, so resist the temptation to bake until they’re fully firm.
Storage: Always cool cookies completely before storing to prevent sogginess. And if you want to keep them soft, adding a slice of bread to the storage container is a neat old-school trick that really works!
Storing and Reheating Tips
Room Temperature: Store your cookies in an airtight container at room temp for up to 4 days. They stay soft and fresh, especially if you layer them between sheets of parchment paper to avoid sticking. This makes them perfect for making ahead of a party or weekend snack.
Refrigerator Storage: While I rarely refrigerate cookies because it can dry them out, if you live in a very warm climate, storing in the fridge up to a week inside an airtight container is fine. Just let them come back to room temperature before serving to recover their softness.
Freezer Instructions: These cookies freeze wonderfully! Wrap them individually or layer with parchment paper in a freezer-safe container. They last about 2 months frozen. When you want to enjoy, thaw at room temp or warm them briefly in a low oven for that fresh-baked feeling.
Glaze Timing Advice: If you plan to glaze your cookies, wait until they’re fully cooled to avoid melting the glaze. For storing glazed cookies, place parchment between layers and keep them in a single layer to preserve their shiny, beautiful finish.
Frequently Asked Questions
Final Thoughts
I can’t tell you how many times these drop sugar cookies have saved me from the “I want cookies now” crisis. They’re quick, forgiving, and come out tasting like you spent hours on them. Plus, the recipe is so flexible — whether you’re fancying a simple sugar cookie or want to jazz it up with mix-ins or toppings, it’s a solid base that welcomes creativity. Baking these always fills the house with the richest vanilla and butter aroma, and honestly, it’s one of those soul-soothing rituals I keep coming back to.
If you love this one, check out some of my other simple favorites like my chocolate chip skillet cookies or classic snickerdoodles — they share that same cozy vibe. And please, don’t hesitate to leave a comment below telling me how yours turned out, or any tweaks you’ve tried. I live for hearing your kitchen stories! Happy baking, friend — I can’t wait to hear all about your batch of drop sugar cookies.
drop sugar cookies
Ingredients
Main Ingredients
- 1 cup unsalted butter softened to room temperature
- 1.5 cups granulated sugar
- 2 units egg yolks
- 2 teaspoons pure vanilla extract
- 2.5 cups all-purpose flour
- 1.5 teaspoons baking powder
- 0.5 teaspoons kosher salt
Instructions
Preparation Steps
- Preheat oven to 350 degrees F. Line a cookie sheet with parchment paper and set aside.
- In a large mixing bowl, beat butter with sugar for 2-3 minutes until fully combined. Add in egg yolks and vanilla extract, beat until fluffy.
- Add flour, baking powder, and kosher salt. The mixture will be crumbly; continue beating until a cookie dough ball forms. Stop mixing at this point.
- Using a 2 Tablespoon cookie scoop, drop cookie dough onto prepared cookie sheet. Bake for 12-14 minutes until edges are just starting to brown. Remove from oven. Lightly tap the tops of each cookie with a spatula. Let cool on pans for a few minutes, then cool completely on a wire cooling rack.


