


There’s something about the smell of butter melting into sugar and cocoa in a warm kitchen that instantly takes me back to my childhood. I still remember how my grandma used to bake these chocolate shortbread cookies on rainy afternoons, the scent weaving through the house like a cozy hug. They’re not your run-of-the-mill cookie – these have the delicate crumbly bite of classic shortbread but with that rich, chocolatey twist that feels like a little indulgence wrapped in simplicity. Honestly, these cookies have been my secret weapon on nights when I crave something sweet but can’t muster the energy for a full cake or when unexpected guests show up and I need a quick, feel-good treat. If you like buttery shortbread but wish it had a bit more character, you’re going to love these chocolate shortbread cookies—they’ve been a staple in our home, and I bet they’ll sneak their way to your heart too.
What is chocolate shortbread cookies?
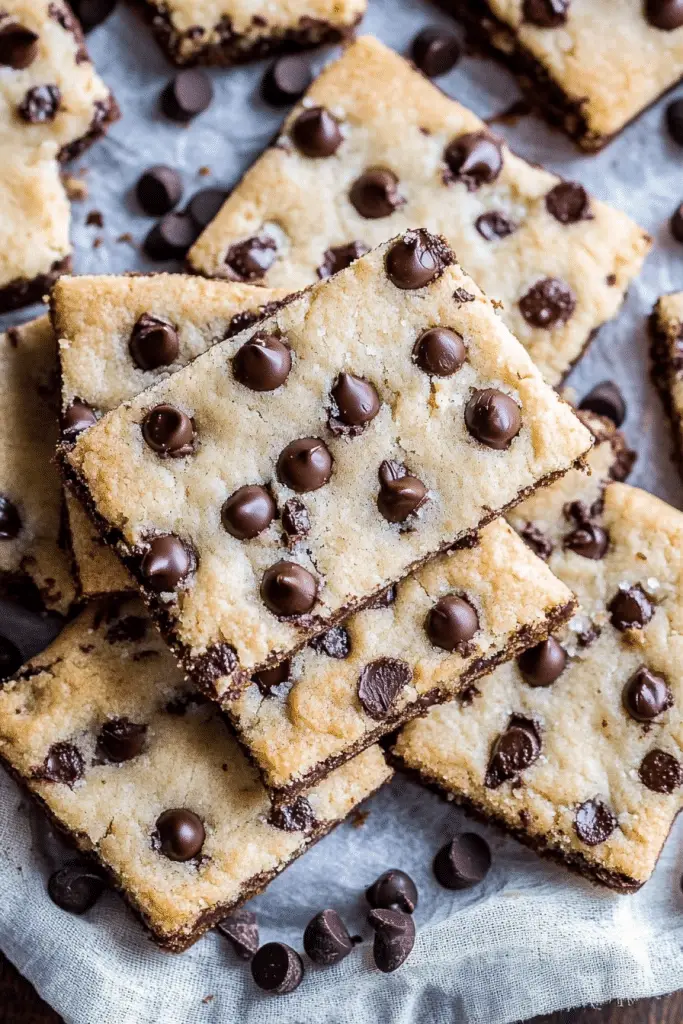
Think of chocolate shortbread cookies as the classic Scottish shortbread’s cooler, more adventurous cousin. Essentially, they’re buttery cookies with a melt-in-your-mouth tenderness, but with cocoa powder thrown into the mix for a rich, chocolate flavor without the density of a brownie or cake. Unlike chocolate chip cookies which are all about the chips and mix-ins, these are smooth and velvety right through, making them perfect for when you want something simple yet extraordinary. The name “shortbread” comes from the texture — “short” means crumbly and tender because of the high butter content, and “bread” is just the old-school term for a baked good. So in simple terms, chocolate shortbread cookies are buttery treats with a chocolate heart, perfect for those moments when you want subtle sweetness with a sophisticated edge.
Why you’ll love this recipe?
What I love most about these chocolate shortbread cookies is how the flavor and texture come together so effortlessly—it’s that perfect balance of buttery richness and deep cocoa that’s not overly sweet but incredibly satisfying. One of the biggest wins here is the simplicity. You don’t have to be a whiz in the kitchen to whip these up; the ingredients are straightforward and usually already in your pantry. No fancy gadgets or weird flours, just good butter, sugar, and cocoa powder. Plus, it’s wallet-friendly. Butter and cocoa might sound indulgent, but compared to other desserts, this recipe won’t have you breaking the bank.
Another reason I keep coming back to this recipe is how versatile it is. You can easily dress these cookies up for a festive occasion with a drizzle of white chocolate or a sprinkle of sea salt, or keep them simple as your afternoon tea companion. They’re also perfect for gifting — who doesn’t love a box of homemade cookies, right? If you’re a fan of other buttery delights like classic shortbread or even lemon bars, this is a lovely way to shake things up without losing that familiar, comforting vibe. Honestly, once you make these, you might find yourself reaching for them more than your usual chocolate chip cookies. It’s happened to me more times than I can count!
How do I make chocolate shortbread cookies?
Quick Overview
This recipe is a breeze, and that’s part of its charm. You mix your dry ingredients separately, cream together the butter and sugar until soft and fluffy, then gently fold everything to avoid overworking the dough. After that, you press the dough into a pan or form cookies, bake until tender with just a hint of crisp at the edges, and then—if you’re feeling fancy—you glaze or dust them for that finishing touch. The best part? These cookies hold up well, so you can make the dough ahead or keep extras for days. It’s comfort food, but without fuss.
Ingredients
For the Main Batter:
- 1 cup (2 sticks) unsalted butter, softened – Use quality butter for the best flavor. I swear, this makes all the difference.
- ¾ cup granulated sugar – Just enough sweetness to complement the chocolate without overpowering.
- ¼ cup unsweetened cocoa powder – Sift it first to avoid lumps; I like Dutch-processed for its mellow flavor.
- 2 cups all-purpose flour – You can swap in a mix of whole wheat if you want a nuttier twist, but this is my standard.
- ½ teaspoon salt – Balances the sweetness and enhances the chocolate.
For the Glaze (Optional):
- ½ cup powdered sugar – Sifted
- 2-3 tablespoons milk or cream – Adjust for the right consistency. I tested with almond milk and loved how it gave a subtle nuttiness.
- ½ teaspoon vanilla extract – Adds warmth to the glaze.
- Pinch of salt – To cut the sweetness.
Step-by-Step Instructions
Step 1: Preheat & Prep Pan
First things first, preheat your oven to 325°F (160°C). That slightly lower temp lets the cookies bake slowly, which helps develop the tenderness they’re famous for. Line a baking sheet with parchment paper or a silicone mat—this’ll keep the bottoms from browning too much and make cleanup a snap. I like using a rimmed baking sheet because these cookies can sometimes spread just a fraction.
Step 2: Mix Dry Ingredients
In a medium bowl, sift together the flour, cocoa powder, and salt. Don’t skip sifting; it helps everything blend smoothly and avoids those annoying cocoa lumps. Once combined, give it a light whisk to make sure it’s evenly mixed. This dry mix is your cookie base’s backbone — you want it well incorporated before adding the wet ingredients.
Step 3: Mix Wet Ingredients
In a large bowl, use a hand or stand mixer to cream the softened butter and sugar together. This will take about 3-4 minutes until the mixture is pale, fluffy, and smells heavenly—think sweet buttery clouds. If the butter is too cold, it won’t cream properly, so I always make sure it’s nice and soft but not melted.
Step 4: Combine
Gradually add the dry ingredients to the wet mixture, folding gently with a spatula or mixing on low speed. The key here is to be gentle—you want the dough to come together without overmixing, which can make the cookies tough. It might look crumbly at first, but keep folding until it clings together. If it feels too dry, a teaspoon of milk can rescue it, but usually, the butter and flour ratio gets it just right.
Step 5: Form Cookies
Now, you can choose your shape! I usually roll the dough into a log, wrap it in parchment, and chill—then slice into rounds before baking. If you’re short on time, just scoop spoonfuls onto your baking sheet and gently press them down. Either way, keep the thickness even to ensure consistent baking.
Step 6: Bake
Bake your cookies for 18-22 minutes. You’re looking for the edges to firm up and just start to crisp without darkening too much. The centers might look a bit soft but will set as they cool. I like to rotate the tray halfway through baking for even color. That golden little stretch after the cookies come out, when they’re cooling on the sheet, is pure magic—it’s when the edges get that beautiful melt-in-your-mouth texture.
Step 7: Cool & Glaze
Let the cookies cool on the tray for 10 minutes – this keeps them from breaking when you transfer them to a wire rack. Once fully cooled, if you’re adding glaze, whisk powdered sugar, milk, vanilla, and a pinch of salt until smooth. Drizzle or dip the tops for a shiny, sweet finish. Pro tip: Thin glaze with more milk for a sheer coat, or make it thicker for a lovely crackly top.
Step 8: Slice & Serve
If you baked the dough as a slab, slice with a sharp knife warmed under hot water—this gives you neat edges instead of crumbs everywhere. Serve at room temp, perhaps with a cup of tea or coffee. These cookies are lovely on their own but also fantastic alongside buttered bread or fresh fruit.
What to Serve It With
For Breakfast: Nothing beats waking up to a slightly crumbly chocolate shortbread cookie with your morning coffee or a latte. I like setting one on the side of my mug, letting the steam gently soften the cookie edges before the first bite. Trust me, it perks you up better than just coffee alone.
For Brunch: These cookies add a touch of warmth and sweetness to a brunch platter—pair them with fresh berries, a pot of Earl Grey, or your favorite sparkling tea. I remember bringing a batch to a brunch with friends, and they disappeared before the avocado toast!
As Dessert: Serve alongside vanilla ice cream or whipped cream for a simple yet elegant dessert. Occasionally, I’ll sprinkle a little sea salt over the cookies right after glazing for that salty-sweet dance that makes you want just one more. If you’re feeling festive, a pinch of cinnamon in the dough adds a lovely holiday vibe.
For Cozy Snacks: These cookies are my go-to when I’m nestling into a blanket with a good book on a chilly day. They bring a cozy comfort without being too heavy or overly sweet—a perfect mid-afternoon treat.
Top Tips for Perfecting Your Chocolate Shortbread Cookies
Butter Quality Matters: I learned early on that not all butters are created equal. Using a European-style butter with higher fat content makes these cookies silkier and more flavorful. It’s a game changer.
Don’t Overmix: Once you add the flour and cocoa, mix just until combined. Overworking activates the gluten and can turn your tender cookies into something tougher than you’d want.
Swirl It Up: For a little flair, try swirling in white chocolate or raspberry jam before baking for a marbled effect. It’s a fun twist I picked up from a friend, and it makes the cookies look bakery-fancy without fuss.
Glaze Wisely: The glaze isn’t a must, but I recommend it if you have the time. Use a light hand when applying; too thick and it can mask that delicate crumb and buttery richness you worked so hard for.
Try Brown Sugar: I sometimes swap half the granulated sugar for light brown sugar for a more caramel-y depth. Just a heads up—it makes the cookies a tiny bit softer, which my kids adore.
Temperature and Timing: Ovens vary! I always start checking mine at 18 minutes. The cookies should look set but not browned, baking too long dries them out. Keeping a close eye is crucial for that perfect melt-in-your-mouth texture.
Storing and Reheating Tips
Room Temperature: These cookies store beautifully at room temp in an airtight container for up to 5 days. Just make sure the container is well sealed; otherwise, they can dry out and lose that tender crumb.
Refrigerator Storage: If you prefer your cookies chilled or want to keep them longer, layer them between parchment paper in an airtight container and refrigerate for up to 10 days. They taste great cold or brought back to room temperature.
Freezer Instructions: Wrap cookies tightly in plastic wrap or foil, then store in a freezer-safe container or bag for up to 3 months. When you’re ready, thaw them overnight at room temp, or gently warm for a few seconds in the microwave to revive that buttery softness.
Glaze Timing Advice: If you’re planning to store glazed cookies, let the glaze dry completely before packaging to avoid stickiness. For freezing, I usually glaze after thawing to keep that crisp finish fresh.
Frequently Asked Questions
Final Thoughts
Chocolate shortbread cookies have this wonderfully nostalgic and buttery charm that just feels like home in every bite. Whether you’re a cookie veteran or new to the world of baking, this recipe is forgiving, straightforward, and totally addictive. I’ve made these countless times during holidays, school pickups, and quiet evenings, and I never get tired of that perfect crumb crossing paths with deep chocolate notes. If you give this recipe a try, I’d love to hear about your own twists or how you served it up! Don’t forget to leave a comment or rating—it always brightens my day to see your results. Here’s to many delicious moments ahead. Happy baking!
chocolate shortbread cookies
Ingredients
Main Ingredients
- 1 cup unsalted butter softened
- 0.75 cup powdered sugar
- 1 teaspoon vanilla extract
- 0.5 teaspoon almond extract
- 2 cups all-purpose flour
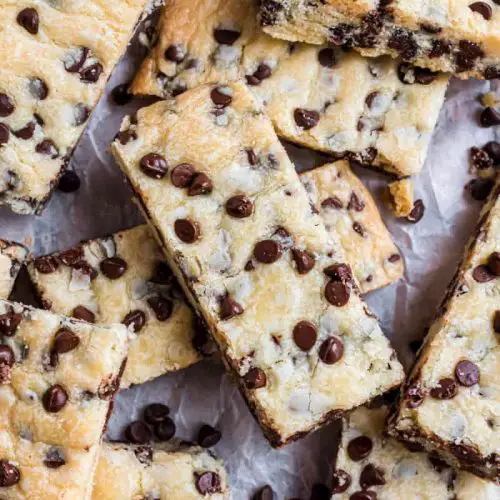
- 1.25 cups mini chocolate chips
Instructions
Preparation Steps
- Line a 15x10-inch baking sheet with parchment paper. Set aside. Preheat oven to 350 degrees Fahrenheit.
- In a large mixing bowl, beat butter with powdered sugar, vanilla extract, and almond extract until creamy. Add in flour and beat until combined. Fold in mini chocolate chips.
- Drop dough into center of baking sheet, and using the heels of your hand, press dough into a large rectangle about 12x10-inches and 0.25-inch thick.
- Bake for 20-25 minutes until edges begin to lightly brown. Remove from oven and immediately cut into strips using a pizza cutter. Cool completely before serving. Store in an airtight container for up to 5 days.


