


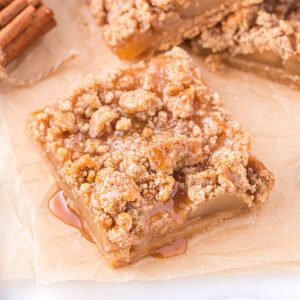
Oh, you guys. If there’s one thing that screams “cozy autumn” louder than a crackling fireplace, it’s the scent of baking apples and warm spices wafting through the house. And for me, nothing captures that feeling quite like these incredible Caramel Apple bars. I’m not talking about those complicated, time-consuming apple pies that feel like a commitment and a half. No, no. These are different. Think of them as the ultimate hug in bar form, combining all the gooey, spiced goodness of a classic caramel apple but in a format that’s ridiculously easy to make and even easier to devour. Honestly, if you’re craving something truly special but don’t have hours to spend in the kitchen, these are your absolute lifesaver. They’re so good, my kids have started asking for them for their birthday treats, and that, my friends, is the highest praise I can give any recipe!
What are Caramel Apple Bars?
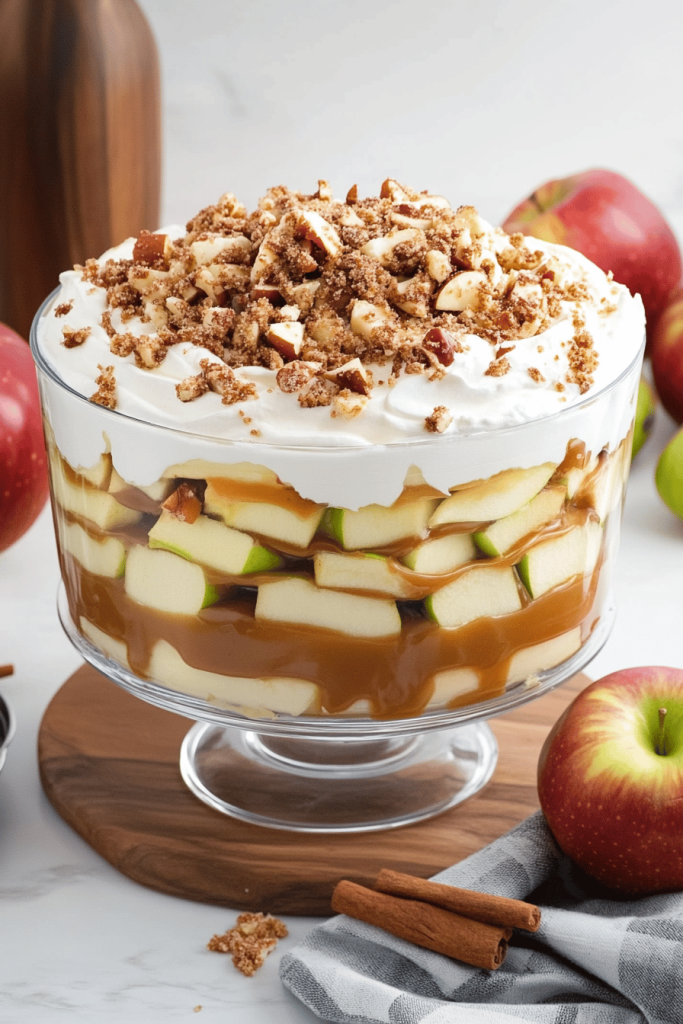
So, what exactly *are* Caramel Apple bars? Let me paint you a picture. Imagine a wonderfully tender, slightly chewy, spiced base – kind of like a blondie but with that irresistible apple flavor baked right in. Then, there’s a generous layer of warm, tender apple chunks swimming in a sweet, caramelly sauce, all topped off with a simple, luscious caramel drizzle. It’s like your favorite fall orchard treat, all deconstructed and reinvented into a perfectly portable, incredibly satisfying bar. The name itself just sounds comforting, doesn’t it? It’s the kind of dessert that feels both nostalgic and brand new, a familiar flavor profile made wonderfully approachable. It’s essentially a deconstructed caramel apple, baked into a dreamy bar that’s less fussy than a pie but delivers all the same deliciousness. It’s the ultimate way to get your apple fix!
Why you’ll love this recipe?
Let’s break down why this caramel apple bars recipe has become such a staple in my kitchen, and why I just know it’s going to become one of your favorites too. First off, the flavor. Oh, the flavor! It’s this perfect symphony of sweet, tart apples, warm cinnamon and nutmeg, and that rich, buttery caramel. It’s the kind of flavor that just makes you close your eyes and savor every bite. But it’s not just about taste; it’s about how incredibly easy this is to whip up. Seriously, if you can stir a few things together, you can make these bars. I’ve made them on weeknights when I’ve had guests unexpectedly drop by, and they always disappear faster than you can say “apple season.” And let’s talk about budget-friendliness. Apples are usually quite affordable, especially when they’re in season, and the other ingredients are pantry staples. So you get a gourmet-level dessert without breaking the bank. Plus, they’re so versatile! You can serve them warm with a scoop of vanilla Ice Cream, or they’re perfectly delicious at room temperature for a quick snack or breakfast treat (don’t judge, we’ve all done it!). Compared to a full-on apple pie, these are a fraction of the effort and yield just as much joy. What I love most about these caramel apple bars is that they capture the essence of fall in a way that’s both comforting and incredibly convenient. They’re just pure, unadulterated happiness in bar form!
How do I make caramel apple bars?
Quick Overview
Making these Caramel Apple bars is a straightforward process that yields incredibly impressive results. You’ll start by preparing a simple, spiced batter that forms the base. While that bakes briefly, you’ll toss your apples with sugar and spices to create the luscious filling. Then, you’ll layer everything up, maybe with a little swirl for good measure, and bake until golden and bubbly. A final drizzle of caramel ties it all together. It’s designed to be foolproof, even if you’re new to baking. The beauty of this recipe lies in its simplicity; it allows the natural flavors of the apples and spices to truly shine without any complicated techniques.
Ingredients
For the Main Batter:
* 2 cups all-purpose flour (I always measure mine by spooning it into the cup and leveling, never scoop directly from the bag – it makes a difference!)
* 1 teaspoon baking soda (Make sure yours isn’t expired, or your bars won’t get that lovely lift!)
* 1 teaspoon ground cinnamon
* ½ teaspoon ground nutmeg
* ¼ teaspoon ground ginger (optional, but it adds a lovely warmth)
* ½ teaspoon salt
* 1 cup (2 sticks) unsalted butter, softened (using good quality butter really makes these sing!)
* 1 ½ cups packed light Brown Sugar (the molasses in brown sugar is key for that chewy texture and rich flavor)
* 2 large eggs (at room temperature, they incorporate much better!)
* 1 teaspoon vanilla extract (use the good stuff, it’s worth it)
For the Filling:
* 3-4 medium apples (Honeycrisp, Fuji, or Gala work beautifully here – they hold their shape and have a lovely balance of sweet and tart. Avoid mealy apples!)
* 2 tablespoons granulated sugar
* 1 teaspoon ground cinnamon
* 1 tablespoon lemon juice (just a little to brighten the flavors and prevent browning)
For the Glaze:
* ½ cup caramel bits or soft caramels, unwrapped
* 2 tablespoons milk or heavy cream (heavy cream makes it extra rich!)
* ¼ teaspoon vanilla extract (for that extra layer of flavor)
Step-by-Step Instructions
Step 1: Preheat & Prep Pan
First things first, get your oven preheated to 350°F (175°C). Then, grab an 8×8 inch baking pan. I like to line mine with parchment paper, leaving an overhang on two sides. This makes lifting the bars out super easy later, no sticking guaranteed! A little grease on the bottom and sides before lining can’t hurt either.
Step 2: Mix Dry Ingredients
In a medium bowl, whisk together the flour, baking soda, cinnamon, nutmeg, ginger (if using), and salt. Give it a good whisk to make sure everything is evenly distributed. This ensures your leavening agents and spices are perfectly mixed in, so you don’t get any pockets of salt or baking soda. It’s a simple step, but important for a consistent bake.
Step 3: Mix Wet Ingredients
In a large bowl, cream together the softened butter and packed brown sugar using an electric mixer until light and fluffy. This can take a few minutes, and it’s important to get enough air into the mixture for a tender bar. Then, beat in the eggs one at a time, making sure each is fully incorporated before adding the next. Stir in the vanilla extract. The mixture should look smooth and slightly thickened.
Step 4: Combine
Now, gradually add the dry ingredients to the wet ingredients, mixing on low speed or by hand until *just* combined. Be careful not to overmix here! Overmixing develops the gluten in the flour, which can lead to tough bars. Stop mixing as soon as you don’t see any dry flour streaks. It’s okay if the batter looks a little thick and rustic.
Step 5: Prepare Filling
Peel, core, and chop your apples into bite-sized pieces. I prefer cubes about ½ inch in size. In a separate bowl, toss the chopped apples with the granulated sugar, cinnamon, and lemon juice until they’re evenly coated. The lemon juice not only brightens the flavor but also prevents the apples from turning brown while you’re working. You want them tender but not mushy.
Step 6: Layer & Swirl
Spread about two-thirds of the batter evenly into the prepared baking pan. Don’t worry if it’s not perfectly smooth. Dollop spoonfuls of the apple filling over the batter. Then, gently spread the remaining batter over the apples, trying to cover as much as possible. You can even use a knife to gently swirl some of the apple mixture into the top layer of batter for a pretty marbled effect. It doesn’t have to be perfect, the charm is in its rustic beauty!
Step 7: Bake
Bake for 30-40 minutes, or until the edges are golden brown and a toothpick inserted into the center comes out with moist crumbs attached (not wet batter). The apples should be tender when pierced with a fork. Ovens can vary, so keep an eye on them. If the top is browning too quickly, you can loosely tent it with foil.
Step 8: Cool & Glaze
Let the bars cool in the pan on a wire rack for at least 20-30 minutes. This is crucial for them to set up properly. While they’re cooling, prepare the glaze. In a small microwave-safe bowl, combine the caramel bits and milk/cream. Microwave in 30-second intervals, stirring in between, until smooth and melted. Stir in the vanilla extract. Drizzle the glaze over the slightly cooled bars. If the bars are too hot, the glaze will just melt into them; too cool, and it won’t spread as easily. Aim for warm to the touch.
Step 9: Slice & Serve
Once the glaze has set a bit, use the parchment paper overhangs to carefully lift the entire slab out of the pan. Let it cool completely on a cutting board before slicing into bars. If you’re impatient like me, a warm bar is still delicious, just a bit messier! I like to cut mine into about 12-16 squares, depending on how generous I’m feeling. Enjoy them as is, or with a dollop of whipped cream or a scoop of ice cream!
What to Serve It With
These caramel apple bars are wonderfully versatile and fit into almost any occasion, which is another reason I adore them! For breakfast, they’re a delightful treat alongside a strong cup of coffee or a steaming mug of chai. Imagine cutting a small square and enjoying it while you read the morning news – pure bliss. For a more relaxed brunch spread, they’re perfect alongside some fruit salad and maybe some scrambled eggs. They add that touch of sweetness without being overly decadent. As a dessert, oh boy! They are divine served warm with a scoop of good quality vanilla bean ice cream, or a dollop of freshly whipped cream. You could even sprinkle a few toasted pecans over the top for a bit of crunch. And for those cozy, spontaneous snack attacks? They’re just perfect on their own, perhaps with a glass of cold milk or even a hard cider if you’re feeling festive. My family has a tradition of having these with hot apple cider on the first crisp fall evening, and it’s just magical. They truly are a crowd-pleaser, no matter how you serve them.
Top Tips for Perfecting Your Caramel Apple Bars
Over the years, I’ve learned a few tricks that help make these caramel apple bars absolutely perfect every single time. So, let’s dive into some of my best wisdom!
Apple Selection & Prep: The type of apple really matters. I stick to firm, slightly tart apples like Honeycrisp, Fuji, or Gala. They hold their shape beautifully during baking and provide a nice contrast to the sweet batter and caramel. Avoid softer apples like McIntosh, as they can turn to mush. When chopping, aim for uniform ½-inch pieces. This ensures they cook evenly. Don’t skip the lemon juice in the filling; it prevents browning and brightens the apple flavor wonderfully.
Mixing Advice: The key to a tender bar is *not* overmixing the batter once you combine the wet and dry ingredients. Mix just until no dry flour streaks remain. A few little lumps are perfectly fine! Overmixing develops gluten, leading to a tough, chewy bar, and we want tender and delicious. When creaming the butter and sugar, make sure your butter is truly softened – not melted, but yielding to the touch. This incorporates air, which helps create a lighter texture.
Swirl Customization: While not strictly necessary, a little swirl can elevate the visual appeal. Don’t go overboard; a few gentle swirls with a knife or skewer are all you need. The goal is to marble the apple filling into the batter, not to mix them into oblivion. This adds pockets of juicy apple throughout the bar.
Ingredient Swaps: If you find yourself without brown sugar, you can use an equal amount of granulated sugar, but you’ll lose some of that signature chewiness and depth of flavor. For a dairy-free option, ensure your butter substitute is a good baking blend, and use a dairy-free milk (like almond or oat milk) for the glaze. I’ve tested it with almond milk, and it actually made the glaze even creamier!
Baking Tips: Always use the baking time as a guideline. Ovens are notoriously different. Look for those golden-brown edges and test the center with a toothpick. If it comes out with moist crumbs, it’s ready. If it’s still wet batter, give it a few more minutes. Tent the bars with foil if the top starts browning too quickly before the center is cooked.
Glaze Variations: The simple caramel glaze is fantastic, but you can get creative. For a richer glaze, use heavy cream instead of milk. If you don’t have caramel bits, you can melt down actual soft caramels (about 10-12 pieces), but they might require a bit more liquid to reach the right drizzling consistency. You could also skip the glaze entirely and just dust the cooled bars with powdered sugar for a simpler finish.
Storing and Reheating Tips
One of the best things about these caramel apple bars is how well they keep, making them perfect for meal prep or enjoying leftovers. For room temperature storage, keep them in an airtight container at a cool, dry place for up to 2 days. They tend to be even chewier and more flavorful after a day, so that’s a win-win!
If you plan to keep them for longer, refrigerator storage is your best bet. Store them in an airtight container in the fridge for up to 4-5 days. They’re still delicious cold, but if you prefer them warm, you can gently reheat individual bars in a microwave for about 15-20 seconds, or pop them into a toaster oven at a low temperature (around 200°F/95°C) for a few minutes until warmed through. Make sure the glaze has solidified before refrigerating.
Freezing is also a fantastic option for making a batch ahead of time. Let the bars cool completely and the glaze to set. Cut them into individual bars, wrap each one tightly in plastic wrap, then place them in a freezer-safe bag or container. They’ll keep well in the freezer for up to 2-3 months. To thaw, simply remove them from the freezer and let them come to room temperature. You can then gently warm them if desired. I find they hold their texture and flavor remarkably well, which is why I often make a double batch and freeze half for those moments when a craving strikes!
Frequently Asked Questions
Final Thoughts
I truly hope you give these caramel apple bars a try. They’re more than just a recipe; they’re a little slice of autumn magic that brings so much joy to my kitchen and my family’s table. The combination of tender spiced apples, that comforting chewy base, and the sweet caramel drizzle is just unbeatable. They’re the perfect example of how simple ingredients can come together to create something truly spectacular. If you love apple desserts, or if you’re looking for a treat that’s both impressive and incredibly easy to make, I can’t recommend these enough. They’ve become a treasured recipe in our home, and I’m so excited for them to become a treasured recipe in yours too! Feel free to experiment with different apple varieties or add-ins like chopped walnuts or a pinch of cardamom to the batter – I’d love to hear how yours turn out! Let me know in the comments below what you think, or share your own tips and variations. Happy baking, and may your home be filled with the wonderful aroma of these delicious bars!
Caramel Apple Bars
Ingredients
Shortbread Layer
- 0.5 cup salted butter softened
- 0.5 cup dark brown sugar lightly packed
- 1.5 cups all-purpose flour spooned and leveled
Filling and Streusel
- 30 ounces apple pie filling 1.5 cans
- 0.75 cup dark brown sugar lightly packed
- 1 cup all-purpose flour spooned and leveled
- 0.5 tsp cinnamon
- 6 tbsp cold salted butter cut into 1" cubes
- 0.5 cup caramel syrup plus more for topping
Instructions
Preparation Steps
- Preheat the oven to 350 degrees Fahrenheit and spray a 9x13 inch baking pan with cooking spray.
- For the shortbread layer, use a mixer to beat the salted butter and dark brown sugar together until creamy and fluffy, about 3-5 minutes.
- Beat in the all-purpose flour until combined. You should have a crumbly dough.
- Press into the bottom of the 9x13 inch baking pan and bake in the oven for 15-20 minutes.
- Remove the pan with the shortbread layer from the oven and set it aside.
- Turn the oven up to 375 degrees Fahrenheit.
- Pour the apple pie filling onto the shortbread layer in the pan and spread it out evenly.
- Prepare the streusel by whisking the dark brown sugar, all-purpose flour, and cinnamon together. Cut the cold butter into the mixture.
- Top the apple pie filling with the streusel mixture. Drizzle caramel syrup over the entire dish and then bake in the oven for 25-30 minutes or until the streusel has turned golden brown.
- Plate and serve warm. Drizzle additional caramel sauce over the top if desired.


