


The moment the oven door closes and the kitchen fills with the soft, yeasty perfume, I’m transported back to Sunday mornings at my grandma’s house. There were pancakes on the griddle, coffee steaming in chipped mugs, and a basket of warm dinner rolls waiting like little suns on the table. This recipe is a love letter to those memories—soft, pillowy, a touch sweet, with a whisper of Garlic Butter that somehow makes everything feel special. Dinner rolls aren’t just bread; they’re the tiny, golden-brown hugs you reach for when you need a little comfort. I’ll be honest: these are always the first thing that disappear at our table—my kids grab them warm, and I catch myself tearing off the first butter-slicked bite before anyone else. If you’re feeding a crowd, they’re a lifesaver on busy nights, easy to portion, easy to reheat, and completely kid-approved. I’ve even swapped in almond milk to test a dairy-free version, and guess what? The texture stayed beautifully tender, which totally surprised me. Trust me, you’ll want these on your dinner table as often as you can swing it.
What is dinner roll?
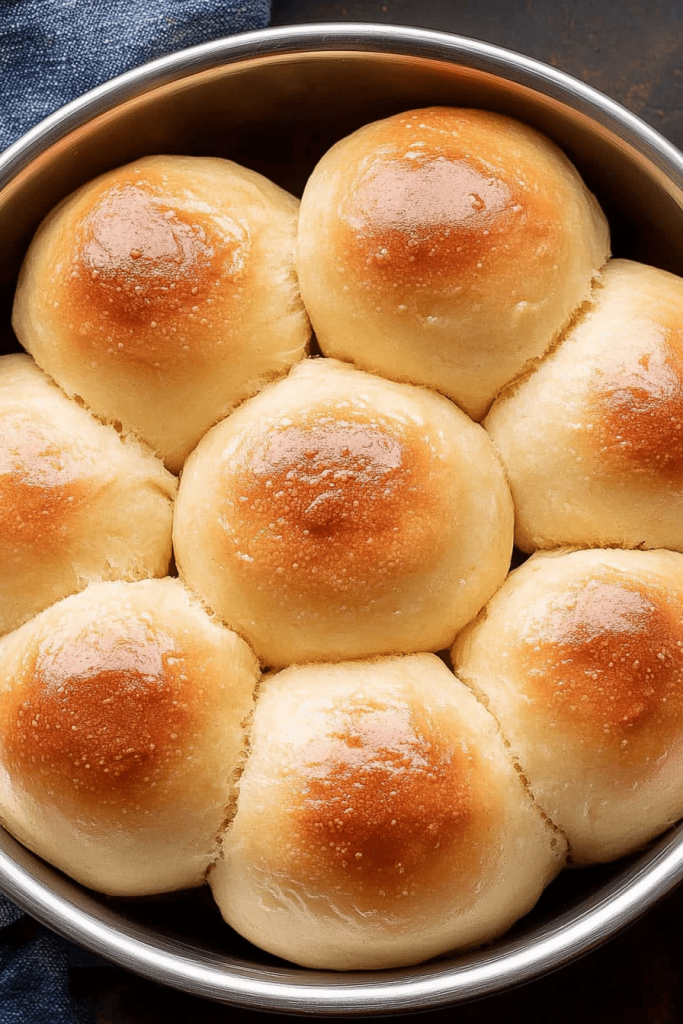
Think of dinner rolls as tiny, cloud-soft loaves shaped into rounds that you can pop into your mouth in two bites. They’re essentially enriched yeast bread—milk, butter, a touch of sugar, and a gentle kiss of egg—that yields a tenderness you can sink your teeth into without feeling heavy. The name likely comes from their role: they’re the soft, comforting bread that appears at the dinner table alongside roasts, soups, and stews. This particular rendition leans into a garlic-butter swirl and a light glaze, turning plain dinner rolls into an irresistible little package you can customize with herbs, cheese, or a drizzle of honey. It’s the kind of recipe that’s forgiving enough for beginners and luscious enough for seasoned bakers, a little project you can finish in the time it takes to brew one more cup of coffee.
Why you’ll love this recipe?
What I love most about these dinner rolls is how they feel in your hands: warm, soft, and just a touch springy, like a perfect pillow of bread. The flavor is friendly and familiar—toast-y notes from butter, a whisper of sweetness from the sugar, and a hint of garlic from the savory glaze that doesn’t overshadow the dough. This recipe is a masterclass in simplicity: you’ll whisk dry ingredients, whisk wet ingredients, bring them together, and let the dough do the heavy lifting. The hands-on time isn’t long, but you’ll taste the care in every bite. Budget-wise, these rolls are friendly: pantry staples, decent yield, and no fancy equipment required. They scale beautifully, too—halve the recipe for a small dinner or double it for a weekend gathering. And flexibility is built in: you can swap milks, use different herbs, add cheese into the swirl, or keep it classic. If you’ve ever wanted to pull off bakery-worthy rolls at home without complicated steps, this is your entry point. My kids ask for seconds regularly, and I’m not embarrassed to admit I sneak one while I’m brushing the glaze on the last batch. In short: the aroma, the texture, and the universal appeal make these rolls a go-to in our kitchen—every single time.
How do I make dinner rolls?
Quick Overview
This method is all about building a soft, airy dough, then turning it into little swirled packages that feel like a warm hug. You’ll proof the dough once for flavor and tenderness, roll it out with a garlic-butter filling, cut into rounds, give them a second rise, bake until golden, and finish with a butter-honey glaze. The beauty is in the balance: not too sweet, not too dense, and just fancy enough for a weeknight dinner or a weekend feast. If you’ve never braided bread or rolled dough into a tight swirl before, don’t sweat it—you’ll feel the rhythm after a couple of turns. The result is a tray of dinner rolls that rise tall, stay tender, and look irresistibly glossy when you pull them from the oven.
Ingredients
For the Main Batter:
- 3 1/2 cups bread flour (or all-purpose flour, a touch less if your flour is very heavy)
- 2 1/4 teaspoons active dry yeast (one packet roughly)
- 1/4 cup granulated sugar
- 1 teaspoon salt
- 1 cup warm milk (around 110°F). I’ve tested with almond milk and found it still yields a wonderfully tender crumb—just note the flavor shifts.
- 1/3 cup unsalted butter, melted
- 1 large egg
For the Filling:
- 4 tablespoons unsalted butter, melted
- 2 cloves garlic, finely minced
- 1 tablespoon fresh parsley, chopped
- 1/4 cup shredded sharp cheddar (optional, for a melty swirl)
For the Glaze:
- 2 tablespoons unsalted butter, melted
- 1 tablespoon honey (or maple syrup for a dairy-free touch)
- Pinch of salt
- Optional: a light dusting of flaky sea salt or sesame seeds for a bakery-style finish
Step-by-Step Instructions
Step 1: Preheat & Prep Pan
Preheat your oven to 375°F (190°C). Lightly grease two 9-inch round cake pans or line a Sheet Pan with parchment. If you want a more rustic look, you can bake these in a 9-by-13 inch pan as a single sheet of golden bread. The key is to give the rolls room to expand so they bake up tall and not crowded. I usually pop a little butter into the pan and swirl it around to prevent sticking and add a touch of extra flavor right from the start. The apartment smells amazing even before the dough is formed, and that’s when I know dinner is about to get very good indeed.
Step 2: Mix Dry Ingredients
In a large bowl, whisk together flour, sugar, and salt until they’re evenly distributed. This step is tiny but mighty—air gets trapped here, and you’ll notice the dough feels lighter as you work with it. A well-mixed dry blend sets the foundation for tender rolls, so don’t skip this moment. If you’ve got a stand mixer with a paddle, you can use it on low here too, just until everything is combined and not floury on the bottom.
Step 3: Mix Wet Ingredients
In a separate bowl, mix the warm milk, melted butter, and egg. The temperature of the liquid matters—too hot and you’ll kill the yeast, too cool and it’ll stall the rise. If your kitchen is chilly, you can warm the milk a touch more and let it rest for a minute so it’s comfortable to the touch but not hot. I’ll sometimes sprinkle a pinch of yeast into the milk to wake it up, then swirl it with the egg and butter. The aroma when the wet meets dry is magical—a little fruity, a little rich, a lot cozy.
Step 4: Combine
Pour the wet mixture into the dry ingredients and mix until a shaggy dough forms. If you’re using a stand mixer, knead on medium-low for 6–8 minutes until the dough is smooth and springs back when pressed. If you’re kneading by hand, turn the dough onto a lightly floured surface and knead with your heels of your hands, rotating and folding until the surface looks glossy and supple. The dough should pass the poke test—press with your finger; if it springs back slowly, you’re in good shape.
Step 5: Prepare Filling
While the dough rests, whisk together the melted butter, minced garlic, and parsley. If you want a cheesy swirl, sprinkle in the cheddar and fold gently. The purpose of the filling is to create a fragrant, savory surprise inside each roll. You can scale back the garlic if you’re serving kids per picky preferences, or amp it up for garlic lovers. If you’re not into cheese, a simple herb butter works beautifully too. I sometimes mix in a teaspoon of grated Parmesan for a crisp edge on the swirl.
Step 6: Layer & Swirl
Roll the dough into a roughly 12-by-18-inch rectangle on a lightly floured surface. Brush on an even layer of the Garlic Butter filling, then starting with the long edge, roll the dough into a tight log. Slice the log into 12 even pieces and place them in the prepared pans, cut-side down. If you prefer a sheet-pan approach, space the rolls about 1 inch apart and let them touch as they bake; they’ll create a beautiful pull-apart effect. For extra height, you can tuck a few extra slices into every second slot to build a fuller top. Cover loosely with a clean kitchen towel and let rise in a warm spot until the rolls look puffy and nearly doubled in size, about 25–35 minutes. That second rise is where the magic happens—soft, pillowy centers with just the right amount of air pockets.
Step 7: Bake
Bake for 18–22 minutes, rotating the pans halfway through if your oven runs hot on one side. You want them to be golden on top and just barely browning on the edges. If you see the tops browning too quickly, tent with a sheet of foil for the last 5–7 minutes. The rolls should sound hollow when tapped and have a gentle spring to the touch. The house will smell incredible—the kind of scent that makes you want to pull a chair up to the counter and slice one warm for a quick taste test.
Step 8: Cool & Glaze
Remove the rolls from the oven and let them rest on the pan for about 5–10 minutes. While they warm, whisk together the glaze ingredients. Drizzle or brush the glaze over the warm rolls so it soaks in a little and leaves a glossy finish. If you prefer a simpler finish, brush with melted butter as soon as they come out of the oven and skip the glaze; you’ll still have a rich, buttery bite that’s irresistible. The glaze adds a touch of sweetness and a pretty sheen, but it’s absolutely optional—these rolls stand strong on their own.
Step 9: Slice & Serve
To serve, give the pan a light shake to settle the rolls and keep them from sticking. Use a sharp knife or a serrated knife to cut along the pan if you’re aiming for a neater presentation after baking. Best served warm, these dinner rolls are perfect straight from the oven with a pat of butter melting into every nook. They’re also fantastic at room temperature the next day—reheat gently in a 300°F oven for 5–7 minutes to recapture that bakery-soft crumb. My family loves them with roasted chicken, a bowl of soup, or a simple tomato-basil salad. They pair beautifully with a touch of herb butter or a light honey drizzle for a slightly sweeter version. If you’re not feeding a crowd, you can freeze the unbaked rolls after the second rise, then bake them directly from the freezer, adding a few extra minutes to the bake time.
What to Serve It With
These dinner rolls shine on a cozy table and play nicely with a lot of dishes. They’re comfortable enough for breakfast alongside scrambled eggs, but they can also hold their own as part of a Sunday roast supper. Here are a few ideas that we love in our house:
For Breakfast: Serve warm with scrambled eggs and a dollop of creamy avocado on the side. A quick jam or Lemon Butter on top makes a bright morning bite, and the soft crumb is a nice contrast to a robust cup of coffee. The aroma itself is enough to spark conversations around the table before the day begins.
For Brunch: Pair with smoked salmon, dill, and cream cheese, or keep it simple with a spread of herbed butter and a fruit platter. A pitcher of citrusy sparkling water or a light Bloody Mary will complete the scene and keep things festive without getting fussy.
As Dessert: A light lemon glaze drizzled over warm rolls can moonlight as a cross between a dinner roll and a quick pastry. Serve with a berry compote or a scoop of vanilla ice cream for a comforting, not-too-sweet finale. If you want to keep the savory profile, a dusting of flaky sea salt and a squeeze of fresh lemon adds just enough brightness to finish the plate elegantly.
For Cozy Snacks: After a long day, I like these with a bowl of tomato soup or a simple bowl of roasted vegetables. The little bites are easy to share, easy to hold, and the buttery garlic aroma makes the whole house feel like a warm hug. My kids love tearing off a warm roll and slathering it with honey or butter while the evening winds down—the kind of small, ordinary joy that sticks with you.
These rolls also pair wonderfully with roasted chicken, beef pot roast, and hearty stews. For a holiday dinner, the soft texture and golden tops make an almost celebratory presentation—serve with herb butter, a dab of cranberry sauce on the side, and a plate of roasted root vegetables for a complete, comforting meal.
Top Tips for Perfecting Your Dinner Rolls
These tips come from years of testing, tasting, and adjusting in a busy kitchen. I’ve learned that small changes can have big effects on flavor and texture, so don’t be afraid to experiment a little.
Dough Prep: Keep your liquid warm, not hot. The right temperature wakes up the yeast without killing it, which means better rise and tenderness. If your kitchen runs cool, place the dough in a slightly warm oven (turned off) with a bowl of hot water on the rack below to create a gentle proofing environment. Avoid overproofing—if the dough looks puffy but not too airy, you’re ready to shape and bake.
Mixing Advice: Don’t rush the kneading. A well-kneaded dough develops gluten that yields those soft, elastic rolls. You’ll know you’re done when the dough is smooth, slightly tacky, and passes the poke test—press your finger in; if it springs back slowly, you’re good.
Swirl Customization: The swirl is your moment to personalize. If you want a cheesier bite, add more cheddar to the filling. For a fresh herb kick, increase the parsley or add chives. If you’d rather a garlic-forward center, amp up the garlic in the filling. For color and extra aroma, brush the tops with a little more butter right before baking so they glisten and brown beautifully.
Ingredient Swaps: Milk can be swapped for dairy-free alternatives like almond milk or oat milk; you may need to adjust the butter slightly if using a lighter milk. For a vegan version, substitute the egg with 1 tablespoon ground flaxseed whisked with 3 tablespoons water per egg and use a dairy-free butter substitute. If you want a whole wheat crumb, swap up to 1 cup of the flour for white whole wheat; the rolls will be heartier but still tender with proper hydration and time for the dough to rest.
Baking Tips: Oven variance is real—keep an eye on the tops. If your oven cooks hot, rotate the trays and reduce the bake time a bit. A light glaze helps lock in moisture and adds shine, but you can skip it if you prefer a matte finish. For a stronger crust, bake a minute or two longer; for a softer crumb, pull them out a touch early and tent with foil to prevent over-browning.
Glaze Variations: Switch up the glaze to fit the occasion: a simple honey-butter glaze for a touch of sweetness, a lemon glaze for a bright finish, or a drizzle of maple-syrup-infused butter for a cozy, autumnal note. If you’re adding toppings, sesame seeds, poppy seeds, or flaky salt provide nice texture and a visual pop on top.
What I’ve learned is that the best dinner rolls aren’t about chasing perfection; they’re about creating a little moment of warmth you can share. Once you nail the dough, the options feel endless, and the house just feels more inviting when these rolls are on the table. My own tests taught me to trust the dough’s rhythm—let it rest enough, but not too long—and to let the glaze catch the warmth of the rolls so they glow as they set. It’s those small, practical adjustments that turn a good batch into something we reach for again and again.
Storing and Reheating Tips
Fresh rolls are a joy, but you’ll want to keep them tasting great long after the bake. Here are my go-to guidelines so you can make these ahead or rescue leftovers with minimal effort:
Room Temperature: Store cooled rolls in a clean, dry container or a resealable bag for up to 2 days. Keep them away from direct sunlight or heat to prevent drying out. If you’re serving them later in the day, a quick 10-minute warm-up in a 300°F oven helps rekindle the softness.
Refrigerator Storage: For longer storage, place in an airtight container and refrigerate up to 4 days. Reheat gently—wrap in foil and heat at 325°F for about 8–10 minutes to restore softness. If they feel a touch dry, brush with a little melted butter before reheating to refresh their moisture and flavor.
Freezer Instructions: You can freeze both baked and unbaked rolls. For baked rolls, let cool completely, wrap tightly in foil or plastic wrap, then place in a freezer bag for up to 2–3 months. To reheat, thaw, wrap, and warm at 300–325°F for 12–15 minutes, then finish with a quick brush of melted butter. For unbaked rolls, freeze after the second rise; bake from frozen, adding 5–7 minutes to the bake time.
Glaze Timing Advice: If you plan to freeze or refrigerate, you can apply the glaze after reheating. Glaze stays glossy best when applied to warm, freshly baked rolls, but a quick reheat will refresh it nicely if you’re serving later.
In all, these rolls hold up beautifully with proper storage, and the simple reheating rituals make them almost as good as fresh-baked, even when you’re pressed for time.
Frequently Asked Questions
Final Thoughts
Whether you’re feeding a busy weeknight crowd or planning a cozy weekend gathering, these dinner rolls bring warmth to the table in a way that feels personal and comforting. They’re forgiving enough for bakers at any level, but they reward patience with a light, airy crumb and a buttery perfume that makes the whole house feel special. If you try these, I’d love to hear how you customized the swirl—did you go full garlic-cheddar, or keep it simple with fresh herbs? Share your tweaks in the comments, rate the recipe, and tell me about your own family traditions around warm bread. And if you’re craving more cinnamon-sugar or herb-forward tweaks, there are plenty of related recipes to explore next—the soft, buttery world of enriched breads is full of beautiful variations. Happy baking!
Soft and Buttery Dinner Rolls
Ingredients
Dough
- 0.25 cup warm water about 105-115 degrees F
- 2.25 teaspoon active dry yeast
- 0.5 cup warm milk about 105-115 degrees F
- 0.25 cup granulated sugar
- 2 large eggs room temperature
- 0.5 cup unsalted butter melted
- 3.5 cup all-purpose flour plus more for dusting
- 1 teaspoon salt
Egg Wash
- 1 large egg beaten
- 1 tablespoon milk
Instructions
Making the Dough
- In a large bowl, combine the warm water, active dry yeast, and granulated sugar. Let it sit for 5-10 minutes until frothy.
- Add the warm milk, 2 large eggs, and melted butter to the yeast mixture. Whisk to combine.
- In a separate bowl, whisk together the flour and salt.
- Gradually add the dry ingredients to the wet ingredients, mixing until a shaggy dough forms. Knead the dough on a lightly floured surface for 8-10 minutes, or until smooth and elastic. Alternatively, use a stand mixer with a dough hook attachment.
- Place the dough in a lightly oiled bowl, cover with plastic wrap, and let it rise in a warm place for 1-1.5 hours, or until doubled in size.
Shaping and Baking
- Punch down the risen dough and divide it into 12 equal pieces. Shape each piece into a smooth ball.
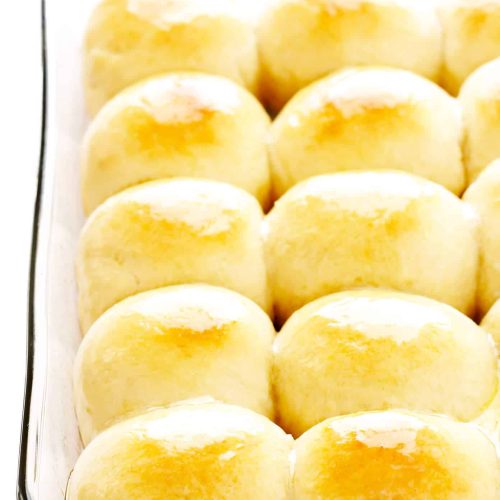
- Arrange the dough balls in a greased 9x13 inch baking dish, leaving a little space between them. Cover and let them rise again for 30 minutes.
- Preheat your oven to 375 degrees F (190 degrees C).
- In a small bowl, whisk together the egg and milk for the egg wash. Brush the tops of the rolls with the egg wash.
- Bake for 12-15 minutes, or until golden brown and cooked through.
- Brush with melted butter immediately after removing from the oven, if desired.


