


You know those moments? The ones where a craving hits, a sudden need for something sweet and satisfying, but the thought of baking a whole cake or a batch of cookies feels like too much effort? That’s exactly when these almond toffee bites become my Absolute Best friend. They’re not just a recipe; they’re a little bit of kitchen magic that always saves the day. Honestly, they’re so ridiculously easy, I almost feel guilty sharing them! But then I remember how much joy they bring, and I just can’t keep them to myself. Imagine delicate, buttery toffee with a delightful crunch from toasted almonds, all in one perfect, bite-sized piece. They’re a far cry from those complicated chocolate-covered toffees you might be thinking of – this is simpler, faster, and in my humble opinion, way more addictive. My family devours them, my friends beg for the recipe, and honestly, I’ve lost count of how many batches I’ve whipped up on a whim. They’re my go-to for impromptu get-togethers, a little pick-me-up on a Tuesday afternoon, or honestly, just because. If you’re looking for that perfect sweet treat without the fuss, you’ve found your match.
What are almond toffee bites?
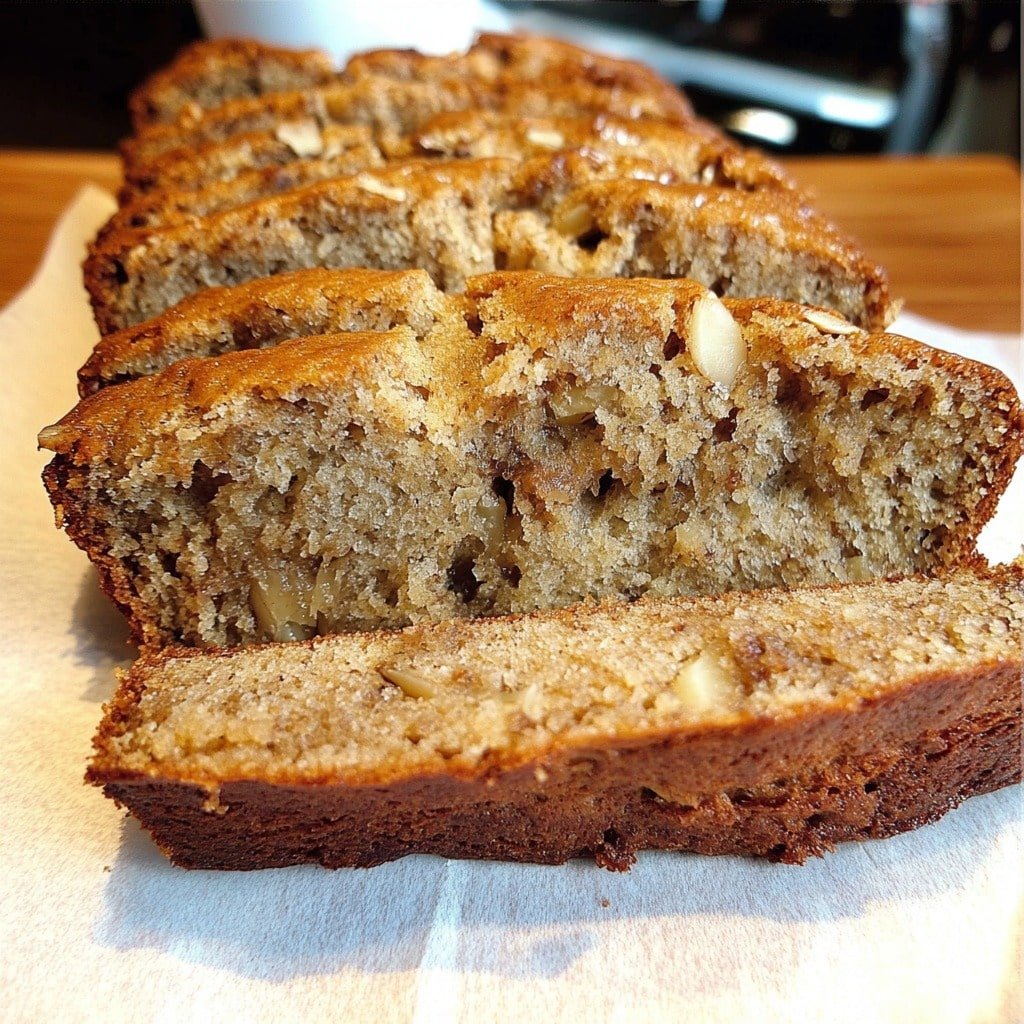
So, what exactly are these magical little morsels? Think of them as the ultimate shortcut to that classic, delightful crunch of toffee, but without all the fuss of tempering chocolate or dealing with rock-hard candy. These almond toffee bites are essentially a rich, buttery, caramelized base studded with plenty of toasted almonds, all set up into convenient little pieces. They’re the kind of treat that melts in your mouth but leaves you with a satisfying, nutty crunch. The name itself is pretty straightforward – it’s toffee, it’s got almonds, and it’s in bite-sized form. It’s essentially my simplified, weeknight-friendly answer to those times I’m dreaming of a Heath bar or a really good brittle, but without needing to commit to a whole afternoon of candy making. They’re humble, yet incredibly satisfying, and I promise, they’re the kind of thing you’ll find yourself reaching for more often than you’d probably like to admit!
Why you’ll love this recipe?
Oh, where do I even begin with why you’ll absolutely adore these almond toffee bites? First off, the flavor. It’s pure bliss. You get that deep, rich, caramel-y goodness from the toffee, perfectly balanced by the warm, nutty notes of toasted almonds. It’s a classic combination for a reason, and in this bite-sized format, it’s just perfection. Then there’s the simplicity. Seriously, this is one of those recipes that makes you feel like a baking superhero because it’s so darn easy. I’ve whipped these up when I’ve had barely any time left before guests arrive, and they’ve always been a massive hit. And let’s talk about budget-friendliness! Most of the ingredients are pantry staples, making this an incredibly cost-effective way to satisfy a serious sweet tooth. Unlike some fancy desserts, these don’t require expensive or hard-to-find ingredients. Beyond that, the versatility is a huge win. You can have them on their own, obviously, but they’re also fantastic crumbled over Ice Cream or yogurt. They make a lovely little edible gift, too. What I love most about this recipe is that it delivers such a big flavor payoff for such minimal effort. It’s proof that you don’t need complicated techniques to create something truly delicious and impressive. It’s the kind of recipe you’ll return to again and again, just like I do. Plus, the smell that fills your kitchen as they bake? Pure comfort!
How do I make almond toffee biscuits?
Quick Overview
This recipe is all about bringing simple, delicious ingredients together to create a delightful toffee experience without any of the usual candy-making stress. You’ll be mixing up a quick, buttery base, folding in plenty of toasted almonds, and then baking it all until golden and bubbly. The beauty here is in the speed and simplicity; it’s designed for those moments when you need a sweet fix fast. You’ll be amazed at how quickly these come together from pantry staples to a finished treat. It’s the kind of recipe that reassures you that delicious homemade goodies don’t always require hours in the kitchen.
Ingredients
For the Main Batter:
* 2 cups all-purpose flour: I always make sure my flour is fresh. If it’s been in the pantry for a while, I give it a little whisk to aerate it before measuring. It makes a difference! You can use a gluten-free blend if needed, but be aware the texture might change slightly.
* 1 teaspoon baking soda: This helps give our bites that slight lift and tender texture. Make sure it’s not expired – baking soda loses its power over time, and you don’t want flat toffee!
* 1/2 teaspoon salt: Salt is crucial for balancing the sweetness and enhancing all those lovely flavors.
* 1 cup (2 sticks) unsalted butter, softened: Softened, not melted! This is key for getting that perfect, tender crumb. I usually leave my butter on the counter for about an hour before I start. Use good quality butter if you can; it really shines through here.
* 1 1/2 cups granulated sugar: The backbone of our toffee sweetness. Make sure it’s granulated, not powdered.
* 2 large eggs: These bind everything together. I always bring them to room temperature quickly by placing them in a bowl of warm water for about 10 minutes if I forget to take them out of the fridge. It helps them incorporate better.
* 1 teaspoon vanilla extract: Pure vanilla extract, if possible. It adds a wonderful depth of flavor that really complements the almonds and caramel.
For the Filling:
* 1 1/2 cups chopped almonds, lightly toasted: Toasted almonds have so much more flavor than raw ones. I just spread them on a baking sheet and toast them in a 350°F (175°C) oven for about 8-10 minutes, watching them carefully so they don’t burn. Chop them to your preferred size – some like them finer, some chunkier. I like a mix!
For the Glaze:
* 1 cup powdered sugar: Sifted, if you want a super smooth glaze. No lumps, please!
* 2-3 tablespoons milk (or almond milk for extra flavor!): Start with 2 tablespoons and add more until you reach your desired drizzling consistency. Almond milk really bumps up the nutty flavor, which I love.
* 1/2 teaspoon vanilla extract: For that extra hint of sweetness and aroma.
Step-by-Step Instructions
Step 1: Preheat & Prep Pan
First things first, let’s get our oven warmed up to 350°F (175°C). While it’s heating, grab a standard 9×13 inch baking pan. You can grease it lightly with butter or cooking spray, but what I *always* do is line it with parchment paper, leaving an overhang on the sides. This makes lifting the baked toffee out so much easier, trust me! You’ll thank yourself later when you’re trying to get those perfect squares out.
Step 2: Mix Dry Ingredients
In a medium bowl, whisk together the 2 cups of all-purpose flour, 1 teaspoon of baking soda, and 1/2 teaspoon of salt. Give it a good mix until everything is well combined. This ensures the leavening agent and salt are evenly distributed, which is important for an even bake and balanced flavor. Set this aside for now.
Step 3: Mix Wet Ingredients
In a large bowl, cream together the softened 1 cup of unsalted butter and 1 1/2 cups of granulated sugar until light and fluffy. This is where you want to get a good mixer going! Then, beat in the 2 large eggs, one at a time, until fully incorporated. Stir in the 1 teaspoon of vanilla extract. You’re looking for a smooth, creamy mixture here.
Step 4: Combine
Now, gradually add the dry ingredients to the wet ingredients, mixing on low speed or by hand until just combined. Be careful not to overmix! Overmixing can develop the gluten too much, leading to a tougher toffee. You want to mix until you no longer see streaks of flour. The batter will be thick, almost like a Cookie Dough.
Step 5: Prepare Filling
Gently fold in the 1 1/2 cups of lightly toasted, chopped almonds. Make sure they are distributed evenly throughout the dough. This is where the magic happens – all those lovely nutty bits getting ready to bake into chewy goodness.
Step 6: Layer & Swirl
Spoon the almond mixture evenly into your prepared baking pan. You can use a spatula to spread it out, but don’t worry about making it perfectly smooth – a slightly rustic look is part of the charm! You can even press down a little with your hands (lightly floured if it’s sticky) to create an even layer.
Step 7: Bake
Bake in your preheated 350°F (175°C) oven for 25-30 minutes, or until the edges are golden brown and the center is set. You can test for doneness by inserting a toothpick into the center; it should come out with moist crumbs, not wet batter. Keep an eye on it, as ovens can vary!
Step 8: Cool & Glaze
Let the toffee cool in the pan on a wire rack for at least 20-30 minutes. You want it mostly cool, but still slightly warm. While it’s cooling, whisk together the 1 cup of powdered sugar, 2 tablespoons of milk, and 1/2 teaspoon of vanilla extract. Add more milk, a teaspoon at a time, if needed, until you get a nice drizzling consistency. Once the toffee is mostly cool, drizzle the glaze generously over the top. This is the part my kids always try to “help” with!
Step 9: Slice & Serve
Once the glaze has set a bit (this usually takes another 15-20 minutes), use the parchment paper overhang to lift the entire slab out of the pan onto a cutting board. Cut into bite-sized squares or rectangles. I like to make them small, about 1-inch squares, but you can cut them however you like! Serve immediately or store for later.
What to Serve It With
These almond toffee bites are so versatile, they fit into almost any occasion! For breakfast, I love having one (okay, maybe two!) with my morning coffee. The toffee and almond flavors are just the perfect sweet accompaniment to a rich brew. They’re not overly sweet, so they don’t feel like a dessert first thing. For a more elegant brunch, I’ll often arrange them on a nice platter alongside fresh berries and maybe some mini muffins. They add a touch of indulgence without being heavy. As dessert? They’re fantastic on their own, of course, but I also love to crumble them over a scoop of vanilla bean ice cream or a bowl of Greek yogurt for a delightful textural contrast. They’re also surprisingly good alongside a warm apple crisp or a slice of Pound Cake. And for those cozy, no-reason-to-celebrate evenings? They’re perfect with a cup of tea or hot chocolate. My personal family tradition is to have them with hot cocoa on movie nights, especially during the colder months. It feels like such a special treat, and they disappear faster than you can say “seconds, please!”
Top Tips for Perfecting Your Almond Toffee Bites
I’ve made these almond toffee bites more times than I can count, and I’ve learned a few little tricks along the way that I think you’ll find super helpful. First, when it comes to the almonds, don’t skip toasting them! It’s a small step, but it transforms their flavor from bland to brilliantly nutty. I usually toast them for about 8-10 minutes at 350°F (175°C), just until they’re fragrant and lightly golden. Watch them like a hawk, though, because they go from perfect to burnt in a flash! For mixing, the key is *not* to overmix once you add the flour. Mix until just combined. Overmixing develops the gluten too much, which can make your toffee tough instead of tender and chewy. Think gentle folding, not vigorous beating, at that stage. When it comes to the swirl, I don’t actually swirl anything for these! It’s just a simple, delicious base with almonds mixed in. But if you’re feeling adventurous, you could potentially swirl in some chocolate chips or a spoonful of jam right before baking for a different twist, though I haven’t personally tested that for this specific recipe yet. My ingredient swaps have been pretty successful. If you don’t have almonds, walnuts or pecans would work beautifully, just make sure to toast them too. For the butter, you *must* use softened, not melted, butter for the best texture. Melted butter can make the batter too greasy. For baking, I always place my pan on the middle rack of the oven. If your oven tends to bake unevenly, you might want to rotate the pan halfway through. The toothpick test is your best friend here – moist crumbs mean it’s done! Too much longer and it might get dry.
Now, about the glaze. The consistency is everything. Start with 2 tablespoons of milk and add more *very slowly*, just a teaspoon at a time, until it’s thin enough to drizzle easily but not so thin that it runs off everywhere. A slightly thicker glaze is also nice if you prefer more of a frosting-like topping. I’ve even tried using a bit of lemon juice instead of vanilla in the glaze for a brighter flavor, which was surprisingly delicious! And if you’re not a fan of glazes, a simple dusting of powdered sugar or some extra chopped nuts over the warm toffee works wonderfully. I’ve learned through trial and error that letting the toffee cool slightly before glazing is crucial; if it’s too hot, the glaze will just melt away and disappear. But if it’s too cold, the glaze won’t spread as smoothly. Patience is a virtue here! Another little trick I picked up is that if your batter seems a bit too stiff after adding the flour, a tiny splash more milk can help. But again, be super careful not to make it too wet. These little nuances are what make a recipe truly shine, and I’m so glad I can share them with you.
Storing and Reheating Tips
One of the best things about these almond toffee bites is how well they store! Once they’ve cooled completely (and the glaze is set, if you’ve added it), you can keep them at room temperature in an airtight container for up to 3-4 days. I usually just pop them in a good quality cookie tin or a plastic container with a tight-fitting lid. They tend to stay wonderfully chewy and delicious. If you live in a very humid climate, you might want to add a little food-safe desiccant packet to the container to keep them extra fresh, but I’ve never really needed to. If you need them to last longer, or if you’ve made a huge batch (which I totally understand!), they can be stored in the refrigerator for about a week. Just make sure they’re in an airtight container; refrigeration can sometimes dry out baked goods if they’re exposed to air. When you want to enjoy them from the fridge, I find they’re best served at room temperature, so just take them out about 20-30 minutes before you plan to eat them. They’ll regain their lovely chewiness.
For longer storage, freezing is your best friend! You can freeze the baked and cooled toffee bites (glazed or unglazed) for up to 2-3 months. The key to freezing is proper wrapping. I like to wrap each piece individually in plastic wrap or parchment paper, then place them in a freezer-safe bag or container. This prevents freezer burn and keeps them fresh. To thaw, simply transfer the frozen bites to the refrigerator overnight, or let them sit at room temperature for a few hours. If you froze them unglazed, you can glaze them once they’re thawed and mostly at room temperature. If they were already glazed, they’re ready to go! Reheating isn’t usually necessary for these, as they’re delicious at room temperature or even slightly chilled. However, if you wanted to warm them up slightly (perhaps to soften the glaze or just enjoy them warm), you could pop them in a low oven (around 250°F / 120°C) for just a few minutes, but be very careful not to overdo it or they might burn. Honestly, though, they’re so good at room temperature, I rarely bother with reheating.
Frequently Asked Questions
Final Thoughts
Honestly, these almond toffee bites are more than just a recipe to me; they’re a little piece of kitchen happiness. They’re the perfect example of how simple ingredients and a few straightforward steps can create something truly delightful. The balance of buttery toffee, toasted almonds, and that satisfying chew makes them utterly irresistible. They’re proof that you don’t need to spend hours in the kitchen to achieve incredible flavor and a treat that everyone will love. I truly hope you give these a try, and I can’t wait to hear how much you and your loved ones enjoy them! If you love this recipe, you might also enjoy my recipes for [link to another recipe, e.g., Chewy Chocolate Chip Cookies] or my [link to another recipe, e.g., Easy No-Bake Peanut Butter Bars] for more simple sweet treats. Happy baking, and please let me know in the comments below how your almond toffee bites turned out – I’d love to hear about any variations you tried or any special family traditions you create around them!

Almond Toffee Bites
Ingredients
Main Ingredients
- 0.5 cup unsalted butter
- 0.5 cup margarine
- 1 cup granulated sugar
- 0.25 teaspoon kosher salt
- 0.5 teaspoon vanilla extract
- 12 ounce milk chocolate melted
- 1 cup unblanched whole almonds
- 1 cup finely ground walnuts
Instructions
Preparation Steps
- On a foil-lined baking dish (11x7) or in a silicone brownie bite pan (with 24 bites), arrange almonds in a single layer. Set aside.
- In a heavy pan, combine butter, margarine, sugar, salt, and vanilla extract. Cook over medium-high heat with a wooden spoon until butter melts, stirring constantly. Bring mixture to a rolling boil.
- Continue boiling and stirring for an additional 5-7 minutes until candy turns the color of almonds (about 300 degrees F). Pour over almonds. If using the brownie bite pan, use a small metal scoop to get toffee into each bite, working quickly!
- Cool completely.
- When candy is cooled and set (about 2 hours), spread melted chocolate over the top of the toffee. Sprinkle generously with ground walnuts. If doing both sides, use only half of the chocolate and walnuts. Allow the top to set before flipping over and doing the bottom. When set, pop out of the silicone pan and store in airtight containers, or cut into pieces. Enjoy!


