


You know those mornings? The ones where the house is still quiet, the tree lights are twinkling, and you just *need* something utterly comforting to kick off the magic? That’s exactly when this Christmas morning casserole comes into play. Honestly, it’s become my secret weapon for making those special days feel just a little bit more relaxed and a whole lot more delicious. For years, I’d wrestle with complicated baked goods on Christmas morning, feeling like I was performing some kind of culinary acrobatics before I’d even had my first cup of coffee. Then, a friend shared a version of this, and it was like a light bulb went off. It’s got all the cozy, sweet flavors you dream of, but it’s surprisingly straightforward. If you love a good Overnight French Toast bake but want something a little more… well, *festive*, then this Christmas morning casserole is your new best friend. It’s the kind of dish that smells like pure happiness wafting from the oven, and trust me, it disappears faster than Santa’s sleigh on Christmas Eve.
What is this Christmas morning casserole?
So, what exactly *is* this magical Christmas morning casserole? Think of it as the ultimate comfort food hug baked into a dish. It’s essentially a sweet, tender, slightly custardy bake studded with festive flavors that just sing of the holidays. The name might sound a little fancy, but it’s more about the *feeling* it evokes – that feeling of warmth, family, and waking up to something truly special. It’s not overly complicated, which is key for any busy holiday morning. It’s got a beautiful balance of sweetness and a touch of spice, with a texture that’s somewhere between a dense cake and a soft Bread Pudding. It’s that perfect bite that makes you want to snuggle up on the couch with a mug of hot chocolate and just savor the moment. It’s familiar, yet exciting, and always a guaranteed hit with everyone, from the pickiest eaters to the most discerning grown-ups.
Why you’ll love this recipe?
Oh, where do I even begin with why this Christmas morning casserole is an absolute must-try? First off, the FLAVOR. It’s like a warm hug for your taste buds. We’re talking cinnamon, a hint of nutmeg, maybe a whisper of orange zest – all mingling with sweet, tender goodness. It’s not overwhelmingly sweet, just perfectly balanced to feel indulgent without being heavy. Then there’s the SIMPLICITY. I cannot stress this enough. You can literally prep most of this the night before, which is a total game-changer on Christmas morning. No frantic last-minute baking! You just pull it out of the fridge, pop it in the oven, and let the amazing aroma fill your home. It’s also incredibly COST-EFFECTIVE. Most of the ingredients are pantry staples, making it a budget-friendly way to serve a crowd or a family a truly special breakfast. And let’s talk VERSATILITY. While it’s perfect for Christmas morning, it’s also fantastic for any weekend brunch, a special breakfast treat, or even a comforting dessert. What I love most about this is that it’s forgiving. Even if you’re not an expert baker, this casserole practically makes itself. It’s the kind of recipe that makes you feel like a baking superstar without all the stress. It’s a definite step up from your average cereal, but still manageable when you’ve got a million other things to do!
How do I make a Christmas casserole?
Quick Overview
The beauty of this Christmas morning casserole lies in its simplicity. It’s a one-bowl wonder for the main batter, a quick mix for the filling, and a simple drizzle for the glaze. You’ll mix your wet and dry ingredients, fold in some festive goodness, and then it’s assembly time. The best part? You can assemble it the night before, letting the flavors meld beautifully. On Christmas morning, just bake until golden and irresistible. It’s that easy to achieve a show-stopping breakfast!
Ingredients
For the Main Batter:
This is the heart of our casserole, so we want it to be tender and flavorful. I always use unsalted butter, but if you only have salted, just reduce the added salt slightly. And good quality vanilla extract makes a difference!
- 2 cups all-purpose flour
- 1.5 cups granulated sugar (you can reduce this to 1 cup if you prefer it less sweet)
- 2 teaspoons baking powder
- 1 teaspoon ground cinnamon
- 1/2 teaspoon ground nutmeg
- 1/4 teaspoon salt
- 1 cup milk (whole milk gives the richest texture, but 2% works fine)
- 1/2 cup unsalted butter, melted and slightly cooled
- 2 large eggs, at room temperature
- 1 teaspoon vanilla extract
For the Filling:
This is where we pack in all those delicious holiday flavors! Feel free to customize this part based on what you love.
- 1 cup finely chopped pecans or walnuts (optional, but highly recommended for crunch!)
- 1/2 cup dried cranberries or raisins (or a mix!)
- 1 tablespoon brown sugar
- 1 teaspoon ground cinnamon
For the Glaze:
A simple glaze takes this casserole from delicious to divine. The consistency is key here – you want it drippy, not thick like frosting.
- 1 cup powdered sugar
- 2-3 tablespoons milk (or orange juice for a citrusy kick)
- 1/2 teaspoon vanilla extract
Step-by-Step Instructions
Step 1: Preheat & Prep Pan
Get your oven preheated to 350°F (175°C). Grab a 9×13 inch baking dish. I like to lightly grease mine with butter or cooking spray, just to be sure nothing sticks. If you’re feeling fancy, you can also line it with parchment paper, leaving an overhang on the sides to make lifting it out easier later.
Step 2: Mix Dry Ingredients
In a large bowl, whisk together the flour, granulated sugar, baking powder, cinnamon, nutmeg, and salt. Give it a good whisk until everything is well combined and there are no pockets of baking powder. This ensures an even rise and distribution of flavor throughout the casserole.
Step 3: Mix Wet Ingredients
In a separate medium bowl, whisk together the milk, melted butter, eggs, and vanilla extract. Whisk until it’s all beautifully emulsified and smooth. Making sure your eggs and butter aren’t too hot will prevent them from scrambling!
Step 4: Combine
Pour the wet ingredients into the bowl with the dry ingredients. Stir gently with a spatula or wooden spoon until *just* combined. A few small lumps are perfectly okay! Overmixing can lead to a tough casserole, and nobody wants that. We’re going for a tender, cake-like crumb.
Step 5: Prepare Filling
In a small bowl, mix together the chopped nuts (if using), dried cranberries or raisins, Brown Sugar, and cinnamon. This little mix of goodness is going to create pockets of chewy, crunchy deliciousness throughout your casserole.
Step 6: Layer & Swirl
Pour about half of the batter into your prepared baking dish and spread it evenly. Sprinkle about half of the filling mixture over the top. Then, dollop the remaining batter over the filling and spread it as best you can. Don’t worry about it being perfectly even; it’ll bake out. Sprinkle the rest of the filling over the top. If you’re feeling artistic, you can gently swirl it in with a knife, but it’s not essential!
Step 7: Bake
Bake for 35-45 minutes, or until a toothpick inserted into the center comes out clean. The top should be golden brown and fragrant. Keep an eye on it, as oven temperatures can vary. If you notice the top browning too quickly, you can loosely tent it with foil.
Step 8: Cool & Glaze
Let the casserole cool in the baking dish for at least 15-20 minutes. This is important so it holds its shape when you cut into it. While it’s cooling, whisk together the powdered sugar, 2 tablespoons of milk (or orange juice), and vanilla extract in a small bowl until smooth. If it’s too thick, add another tablespoon of liquid, a teaspoon at a time, until you reach a drizzly consistency. Drizzle the glaze generously over the slightly cooled casserole.
Step 9: Slice & Serve
Once the glaze has set a bit, slice it into squares and serve warm. It’s absolutely heavenly on its own, but a little dollop of whipped cream or a side of fresh berries is always welcome!
What to Serve It With
This Christmas morning casserole is so versatile, it can truly be the star of any meal! For a classic Christmas Breakfast, I love pairing it with a steaming mug of good quality coffee – maybe a festive spiced blend if you have one. A few fresh berries on the side add a lovely pop of color and freshness. For a more elaborate CHRISTMAS BRUNCH, I’ll serve it alongside some savory elements to balance the sweetness, like crispy bacon, a frittata, or some smoked salmon. Elegant plating with a sprig of rosemary or a dusting of powdered sugar makes it feel extra special. If you’re looking for a simple CHRISTMAS DESSERT, this works wonderfully too! Serve it warm with a scoop of vanilla bean ice cream or a drizzle of chocolate sauce. It’s a lighter option than a heavy cake but just as satisfying. And for those COZY SNACKS throughout the holiday season, it’s perfect served at room temperature with a glass of milk or even a warm cup of tea. My family has a tradition of making a small batch just for an afternoon treat after opening presents, and it always feels so wonderfully comforting and loved.
Top Tips for Perfecting Your Christmas Morning Casserole
After making this dish more times than I can count, I’ve picked up a few little tricks that make all the difference. For the filling, if you’re using nuts, toasting them lightly beforehand *really* intensifies their flavor and adds an extra layer of deliciousness. Just a few minutes in a dry skillet until fragrant is all you need. When it comes to mixing the batter, I always say ‘less is more’. Overmixing develops the gluten in the flour, which can lead to a tough, chewy texture. Stop stirring as soon as you don’t see any dry flour. It’s better to have a few tiny lumps than to overwork it! For the swirl, don’t go crazy trying to make perfect patterns. A few haphazard dollops and a gentle swirl with a knife or skewer are all you need for beautiful marbling. For ingredient swaps, if you’re not a fan of cranberries, chopped dried cherries or even diced apples (tossed with a little cinnamon) work beautifully in the filling. If you don’t have milk for the glaze, a splash of orange juice adds a lovely citrus note that complements the cinnamon perfectly. When it comes to baking, I’ve learned that every oven is a little different. Always do the toothpick test to ensure it’s cooked through. If your casserole is browning too fast on top, a piece of foil tented loosely over it will do the trick. For the glaze, the consistency is key. You want it thin enough to drizzle but not so thin that it just runs off. Start with less liquid and add more as needed. I’ve also found that letting the casserole cool for at least 15 minutes before glazing helps the glaze set nicely without melting into the cake.
Storing and Reheating Tips
This Christmas morning casserole is fantastic for making ahead, which is why I love it so much for the holidays! If you have any leftovers (a big if at my house!), you can store them at ROOM TEMPERATURE for up to two days, provided it’s well-covered with plastic wrap or in an airtight container. It actually gets even more delicious the next day as the flavors meld. For longer storage, keep it in the REFRIGERATOR. Wrap the entire dish tightly in plastic wrap, then in foil, or place it in an airtight container. It will stay good in the fridge for up to 4-5 days. When you’re ready to reheat, you can simply pop a slice in the microwave for 20-30 seconds until warmed through. For a crisper edge, you can reheat individual slices in a toaster oven or a regular oven at around 300°F (150°C) for about 10 minutes. If you’re making the entire casserole ahead of time and want to FREEZE it, I recommend baking it, letting it cool completely, and then wrapping it tightly in plastic wrap and then a layer of foil. It will keep in the freezer for up to 2 months. Thaw it overnight in the refrigerator before reheating. A note on the glaze: I almost always add the glaze *after* the casserole has cooled slightly after baking. If you plan to store leftovers without glazing immediately, you can store the glaze separately in a small container in the fridge and drizzle it on just before serving.
Frequently Asked Questions
Final Thoughts
I truly hope this Christmas morning casserole becomes a cherished part of your holiday traditions, just like it has for my family. It’s more than just a recipe; it’s about creating those moments of joy, comfort, and shared deliciousness that make the holidays so special. It’s that perfect balance of festive flavor and effortless execution that I always strive for in my kitchen, especially on busy mornings. If you enjoyed this, you might also love my Peppermint Bark Brownies for another festive treat or my Easy Gingerbread Loaf for a quick, cozy bake. There’s something incredibly satisfying about making something so beautiful and delicious from scratch, and this casserole delivers every single time. Don’t be afraid to play around with the filling or glaze to make it your own! I can’t wait to hear how yours turns out in the comments below, or if you have any favorite variations to share. Happy baking, and wishing you the happiest of holidays!
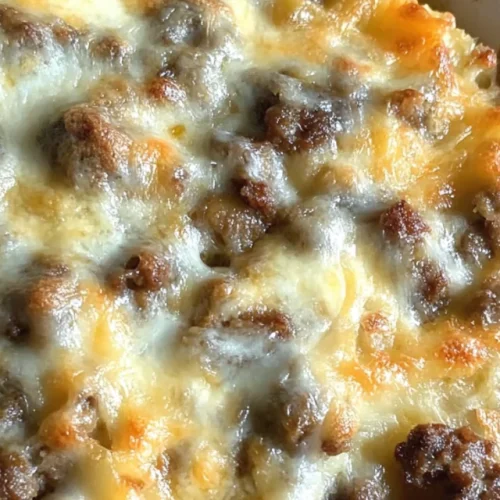
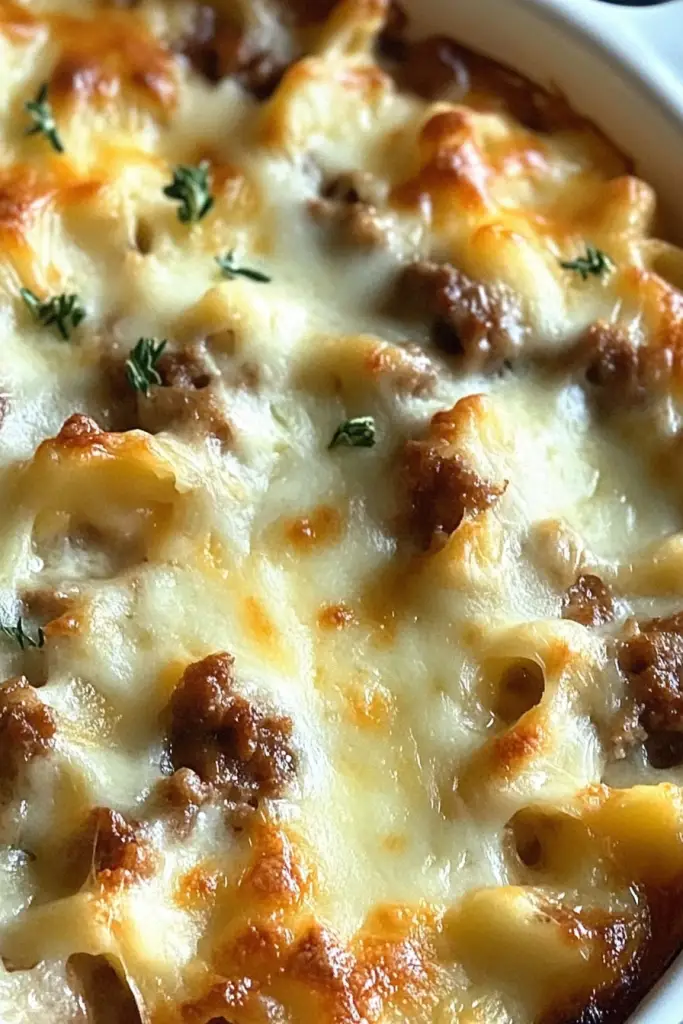
Christmas Morning Casserole
Ingredients
Main Ingredients
- 1 pound breakfast sausage
- 12 large eggs
- 2 cups milk
- 2 cups shredded cheddar cheese
- 0.5 teaspoon salt
- 0.25 teaspoon black pepper
- 1 loaf stale bread cubed
Instructions
Preparation Steps
- Preheat oven to 350°F (175°C). Grease a 9x13 inch baking dish.
- In a skillet, cook the breakfast sausage until browned. Drain off any excess grease. Spread the cooked sausage evenly over the bottom of the prepared baking dish.
- In a large bowl, whisk together the eggs, milk, salt, and pepper until well combined.
- Add the cubed stale bread to the egg mixture and let it soak for about 10 minutes, stirring occasionally to ensure all pieces are moistened.
- Pour the bread and egg mixture over the sausage in the baking dish.
- Sprinkle the shredded cheddar cheese evenly over the top.
- Bake for 45-50 minutes, or until the casserole is set and the cheese is melted and lightly browned.
- Let stand for 5-10 minutes before serving.


