


When the evenings start to cool and the kitchen fills with the scent of cocoa, I crave something cozy and a little bit special. This is the moment chocolate nut fudge slides into the pan, a reminder of childhood candy jars and grandmas who could fix a sweet with a wink. Chocolate nut fudge is my version of comfort in a square—rich, glossy, and just a touch chewy, with toasted nuts adding crunch and warmth. Think of it as the grown-up version of a treat you’d steal from the dessert table at family gatherings, yet simple enough to make on a weeknight. I always say this one’s a lifesaver on busy nights: whip, swirl, bake, and you’ve got a crowd-pleaser in under an hour. The first bite tastes like a hug—silky chocolate, a whisper of vanilla, and that satisfying crack from the edges when you slice. If you’ve got a craving for something sweet but don’t want to pull out a big pan of cake, this fudge slides right into the moment and disappears in minutes at my house. Welcome to my chocolate nut fudge, where simple pantry staples become a little celebration in every bite.
What is chocolate nut fudge?
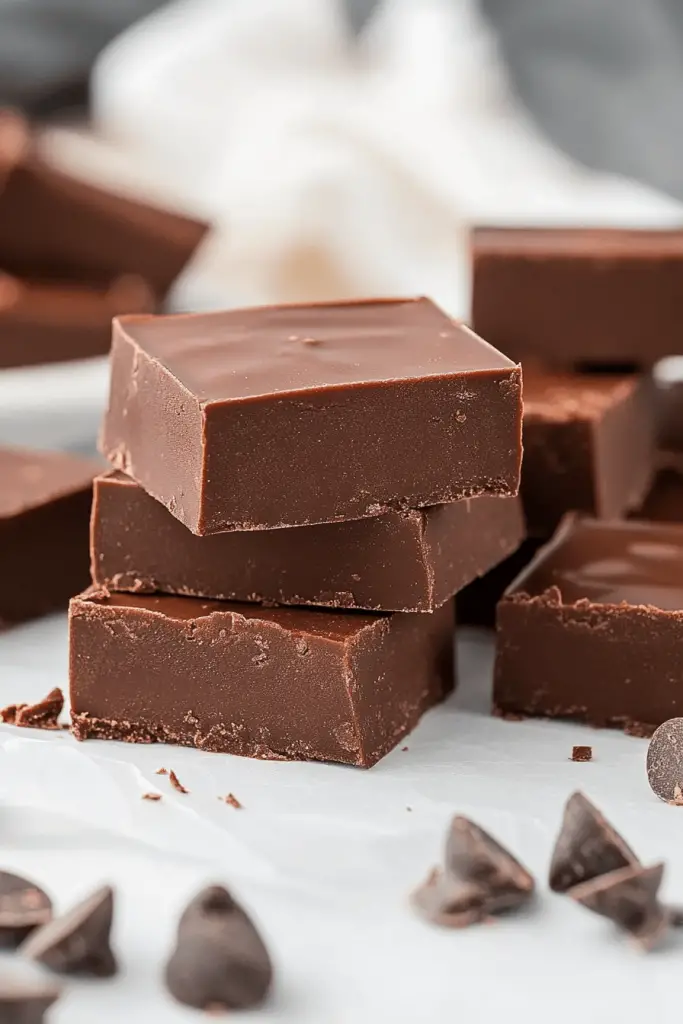
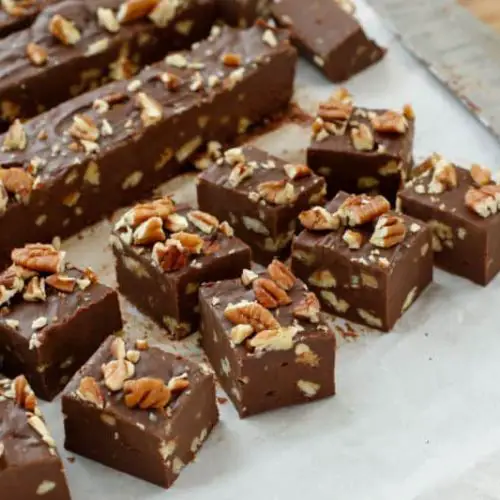
Chocolate nut fudge is essentially a concentrated chocolate confection studded with nuts, melted into a glossy, rich slab that’s set but tender. The name hints at the star players: deep chocolate and a generous crunch from toasted nuts. Think of it as a grown-up candy bar you can cut into perfect squares for sharing. I love how the nuts—hazelnuts, walnuts, or pecans—bring toffee-like warmth and a subtle saltiness that makes the chocolate sing. This version leans on a quick bake to set the fudge with a crisp edge, then a soft, luscious center. It’s a little candy, a little dessert, and a lot of cozy nostalgia. My kids actually ask for this all the time, especially when friends come over after school; it’s reliably delicious, and the process feels almost ceremonial in the best possible way.
Why you’ll love this recipe?
What I love most about this chocolate nut fudge is how forgiving it is without sacrificing flavor. It’s practically foolproof for first-timers and still feels special enough for entertaining. The flavor is unapologetically chocolate-forward, with a toasty note from the nuts that keeps it from tasting flat. The simplicity is a real gift: a handful of pantry staples, a quick chocolate melt, and a gentle bake in One Pan. It’s cost-efficient, too—you’re turning chips, butter, a splash of milk or water, and a handful of nuts into something impressive. And the versatility is fantastic: swap in almonds for a milder bite, use pecans for a buttery crunch, or go for a smoky peanut-chocolate swirl. What I love most about this fudge is its story—my grandmother would melt the very best chocolate on the stove and whisper, “Taste this, you’ve earned it.” This recipe carries that legacy, but it’s adapted for modern kitchens and real-life schedules. It’s a treat you can tailor to your mood or your pantry, which makes it endlessly appealing.
How do I make chocolate nut fudge?
Quick Overview
In a nutshell, you melt chocolate with butter and a touch of milk or cream, stir in a few pantry staples, and pour the glossy mixture into a lined pan. While it cools, you toast and chop the nuts, then swirl a luscious filling through the middle for a surprise texture. A quick bake tightens the fudge and helps it set with a clean edge. After cooling, you drizzle a shiny glaze on top for that professional-looking finish. The steps are simple, and the results feel indulgent enough to satisfy a midnight craving or impress guests at a quick holiday gathering. If you’re craving chocolate nut fudge, this version gets you there with minimal fuss and maximum flavor.
Ingredients
For the Main Batter:
- 2 cups semi-sweet chocolate chips or chopped good-quality dark chocolate (70% works beautifully, but milk chocolate is lovely too)
- 1/2 cup unsalted butter, cut into cubes
- 1/2 cup sweetened condensed milk or whole milk for a lighter touch
- 1 teaspoon vanilla extract
- 1/4 teaspoon sea salt
For the Filling:
- 3/4 cup toasted mixed nuts (pecans, walnuts, almonds—your call), roughly chopped
- 2 tablespoons finely chopped crystallized ginger (optional, for a kick) or 2 tablespoons creamy peanut butter for a swirl
- 1/4 cup finely chopped toffee bits (optional, for extra crackle)
For the Glaze:
- 1 cup dark chocolate chips
- 2 tablespoons unsalted butter
- 1 teaspoon light corn syrup or honey (optional, for shine)
- Pinch of flake salt (to finish)
Step-by-Step Instructions
Step 1: Preheat & Prep Pan
Preheat your oven to 350°F (175°C). Line a 9×9-inch square pan with parchment paper, letting a little overhang hang out for easy removal. I always double-line the pan so the fudge slices lift out cleanly—trust me, it’s worth it. While the oven warms, you can toast the nuts. This little step deepens the nutty flavor and adds a welcome crunch. If you’re in a hurry, skip toasting; you’ll still get great flavor, but toasty nuts are a nice upgrade.
Step 2: Melt the Main Batter
In a medium saucepan over low heat, combine the chocolate chips and butter. Stir slowly until everything has melted into a glossy, velvety pool. Remove from heat and whisk in the Condensed Milk, vanilla, and salt. The mixture should feel thick, like a luxurious ganache about to set. If you’re using almond milk, you may want to add an extra tablespoon or two to loosen the mixture slightly, but not so much that it won’t hold its shape once baked.
Step 3: Mix in the Nuts
Stir in two-thirds of your chopped nuts into the batter. The rest will become your top crunch. If you’re using the Peanut Butter swirl option, drop dollops on the batter and gently swirl with a knife after you pour the mixture into the pan.
Step 4: Prepare Filling
Spread the remaining nuts in a light, even layer on the bottom of the pan. For the swirl option, dollop small spoonfuls of Peanut Butter over the nut layer and swirl into the batter in a few lines. If you’re using toffee bits, sprinkle them evenly across this layer for a sweet, crackly surprise in every bite.
Step 5: Combine
Pour the warm chocolate batter over the nut layer, smoothing the top with a spatula. Gently tilt the pan to ensure the batter spreads evenly. If you want a more dramatic look, you can reserve a small portion of batter to create a marbled top once you’ve poured—the swirl will settle into pretty ribbons as it bakes.
Step 6: Layer & Swirl
Sprinkle the remaining toasted nuts over the top. If you planned for a marbled effect, run a thin blade or toothpick through the surface to create delicate swirls. You want to see pockets of shiny chocolate and neat lines of nutty bits for a rustic, homemade finish. This is where the personal touch comes alive—make it yours.
Step 7: Bake
Place the pan in the preheated oven and bake for 22–28 minutes, until the top looks set but not dry. The edges will look a touch glossy; that’s the fudge forming its crust. Don’t overbake, or the center may become too firm. If you’re using a different pan size, start checking at the 20-minute mark and go from there. Let the fudge rest in the pan on a cooling rack for about 15 minutes before moving to the next step. The heat will continue to set the middle gradually, and you don’t want it to crack as it cools completely.
Step 8: Cool & Glaze
Refrigerate the pan for at least 1–2 hours to finish setting. The cooler environment helps the fudge slice cleanly and keeps the glaze smooth if you’re finishing with a topping. For the glaze, gently melt the chocolate chips and butter together until smooth, with the optional corn syrup or honey for extra gloss. Pour over the cooled fudge in a thin, even layer, letting the glaze run to the edges. A light sprinkle of flaky salt on the glaze amplifies the chocolate flavor and finishes that bakery-ish look I adore. If you prefer no glaze, a simple dusting of cocoa powder or a pinch of sea salt also tastes fantastic and keeps things a touch lighter.
Step 9: Slice & Serve
Once the glaze is set, use the parchment overhang to lift the fudge from the pan in one piece. Place it on a cutting board and slice into neat squares or generous rectangles, depending on your mood. I like 1½- to 2-inch squares; they’re bite-sized without being stingy. The edges should snap with a clean crack, and the center should yield to a little pressure for that perfect fudgy texture. Serve with a thermos of coffee or a cold glass of milk, and watch the room light up. This chocolate nut fudge is the kind of dessert that disappears in moments at my house—I swear the first bite triggers a chorus of “mmmm” from every corner of the kitchen.
What to Serve It With
Chocolate nut fudge is versatile enough to fit into breakfast, brunch, or dessert moments. Here are a few ideas that friends and family have adored, with a few of my own twists:
For Breakfast: A small square alongside a mug of strong coffee or a dollop of whipped ricotta and citrus zest creates a surprising, grown-up start to the day. The fudge’s richness pairs beautifully with a bright, citrusy coffee or a lightly sweetened latte. It’s a secret weapon for slow Sunday mornings when you want to treat yourself without loading up on heavy pastries.
For Brunch: Slice it into thin bars and plate with fresh figs, a wedge of brie, and a drizzle of orange honey. The contrast between the fudgy sweetness and tangy cheese makes the table feel festive without trying too hard. My sister-in-law loves a bite of fudge with a glass of sparkling rosé for a playful mid-morning celebration.
As Dessert: Serve fudge squares warm with a scoop of vanilla Ice Cream and a sprinkle of sea salt. The ice cream’s creaminess melts into the fudge, and the crunch from the nuts stays crisp enough to surprise with every bite. For a more refined finishes, pair with espresso crema and a few raspberries for color and acidity that cut through the chocolate.
For Cozy Snacks: Keep a tray on the counter or in the fridge for easy cravings. A small fudge square with a hot cup of tea becomes a comforting ritual after a long day. My kids love a quick bite before bedtime when they’ve earned a little sweetness after homework and chores.
This chocolate nut fudge isn’t just a dessert; it’s a memory-in-a-square. I’ve shared it with friends who claimed it tasted like a wrapped gift from the kitchen—a little bit of luxury that doesn’t demand a lot of effort. It’s friendly to customize, forgiving in texture, and deeply satisfying in flavor. If you’re cooking for a crowd, you can scale the recipe up or down without losing the magic. Give it a try this weekend, and I bet you’ll be asked for the recipe before the glaze even sets.
Top Tips for Perfecting Your Chocolate Nut Fudge
These tiny refinements make a big difference, especially when you’re after that flawless glossy finish and a soft, clean-cut center.
Nuts Prep: Toasting nuts deeply enhances their aroma and adds a robust flavor that stands up to the rich chocolate. If you’re using hazelnuts or pecans, lay them in a single layer on a sheet pan and toast at 350°F for 8–10 minutes, tossing once. Let them cool completely before chopping. I pat them dry with a towel to remove any residual oil from toasting—this helps keep the fudge from getting greasy. If you want a lighter nut flavor, skip toasting, but I highly recommend the extra depth.
Mixing Advice: Don’t overcook the chocolate mixture once you add the condensed milk. Keep it just warm enough for the butter to melt smoothly, then whisk in the rest quickly. A glossy, lump-free batter is your friend here. If you see a few small lumps, keep whisking off the heat for a minute or two—the residual heat will melt them away without scorching the chocolate.
Swirl Customization: A clean, gentle swirl creates a visually appealing ribbon effect. Use a narrow knife to drag lines through the batter after you’ve poured it into the pan. The more patient you are with the swirling, the prettier the finished fudge looks. If you’re using a peanut butter swirl, cold dollops of peanut butter pressed in before the bake will hold their shape and melt into the fudge just enough for pockets of flavor.
Ingredient Swaps: You can swap the dark chocolate for milk chocolate for a milder, creamier fudge, or go with white chocolate for a striking contrast if you like. Nuts can be swapped for toasted seeds like pumpkin or sunflower if you want a nuttier crunch without the traditional peanut or almond bite. For a dairy-free version, try coconut milk plus a little coconut oil and dairy-free butter substitute—you’ll still get that luscious melt-in-your-mouth texture, though the flavor will skew slightly in a tropical direction.
Baking Tips: If you’re using a slightly hotter oven or your pans run large, start checking at 20 minutes. A fudgy center should spring back just a little when touched. If your oven runs cool, you might need a few extra minutes. The key is that the center should be soft but not jiggly when you pull it from the oven. Let the fudge rest for a bit on the counter before chilling; the residual heat will finish setting without drying out the edges.
Glaze Variations: For a lighter finish, skip the glaze and dust with cocoa. If you want shine, a thin glaze of tempered chocolate with a teaspoon of corn syrup provides a beautiful, glassy surface. You can also add a splash of espresso powder to the glaze for a mocha kick or a pinch of chili powder for a subtle heat that warms the back of the palate. Don’t be afraid to experiment—this is where your personality shows through.
Lessons learned: I’ve found the chocolate-to-butter ratio is the true king here. Too little butter makes the fudge crumbly; too much can make it greasy. I keep to the medium balance for a smooth, luscious bite. I’ve also learned to chill before slicing; it helps with clean edges and makes the squares hold their shape when plated with a scoop of vanilla ice cream. And yes, I’ve burnt the first batch by letting the heat run a little too high—the smell will remind you to slow down next time. Trust the process, and you’ll end up with a batch you’re proud to share.
Storing and Reheating Tips
Smart storage helps the fudge stay fresh and appealing longer. Here’s how I keep mine at peak flavor and texture.
Room Temperature: In an airtight container, fudge will keep for up to 5 days if you live in a cool kitchen. If your room is a bit warmer, you might want to refrigerate after the first day to preserve the glossy glaze and prevent the center from getting too soft. Layer parchment between slices to prevent sticking. I often keep a batch in the kitchen for quick snacking and another in the fridge for a later treat—the two-storage setup keeps things interesting.
Refrigerator Storage: Refrigerated fudge stays fresh for about 2 weeks. The texture becomes a touch firmer in the fridge, which some folks love for those crisp-cut edges. If you prefer a more fudgy center after chilling, let slices sit at room temperature for 10–15 minutes before serving to soften slightly. The glaze remains glossy after chilling as long as you store it properly, so keep the container covered to prevent condensation from affecting the surface.
Freezer Instructions: For longer storage, wrap slices tightly in plastic wrap and freeze for up to 3 months. Thaw overnight in the refrigerator and bring to room temperature before serving. Freezing can intensify the chocolate flavor, which I personally adore, but if you’re after a super smooth texture, consider freezing only the unglazed slabs and glazing after thawing for the best-restored gloss.
Glaze Timing Advice: If you’re freezing, glaze after thawing for best appearance. If you’re planning to serve soon, glaze while the fudge is still slightly warm for a smooth, even coat. The glaze will firm up as it cools, giving you that professional finish you’re after.
These tips have saved more batches than I can count. The little routines—parchment-ringed pans, toasting nuts, and a patient cooling period—are what keep this fudge consistently delectable, no matter when you make it.
Frequently Asked Questions
Final Thoughts
This chocolate nut fudge is a recipe I reach for whenever I want a little magic in a square. It’s not a complicated dessert, but it feels special in the best possible way—the kind of treat that brings people together, a tray passed around with smiles and a few “this is amazing” compliments. I love that it’s adaptable: switch up the nuts, swap the swirl, or play with the glaze until you land on your own signature fudge. It’s a recipe you’ll return to again and again, a comforting ritual you can share with friends and family. If you try it, come back and tell me your tweaks—I’m always excited to hear how your kitchen twists this classic into something uniquely yours. Happy baking! And as always, thanks for cooking with me. Can’t wait to hear how yours turns out!
Chocolate Nut Fudge
Ingredients
Main Ingredients
- 2 cups dark chocolate chips
- 14 ounces sweetened condensed milk
- 0.25 cup butter
- 1 teaspoon vanilla extract
- 1 cup chopped pecans plus about 2 tablespoons for topping
Instructions
Preparation Steps
- Combine the chocolate chips, sweetened condensed milk, and butter in a medium microwave-safe glass bowl. Microwave on high for 90 seconds. Stir well. If not fully melted and combined, microwave for another 15 seconds.
- Stir in the vanilla extract until the mixture is smooth. Add 1 cup of chopped pecans and stir to combine. Pour the fudge mixture into a parchment-lined loaf pan (approximately 8x4 inches). Spread evenly with a spatula to about 1-inch thickness. Sprinkle the remaining 2 tablespoons of chopped pecans over the top.
- Chill the fudge in the refrigerator until firm, about 1-2 hours. Once set, cut into 1-inch squares. Store in an airtight container in the refrigerator for up to one week.


