


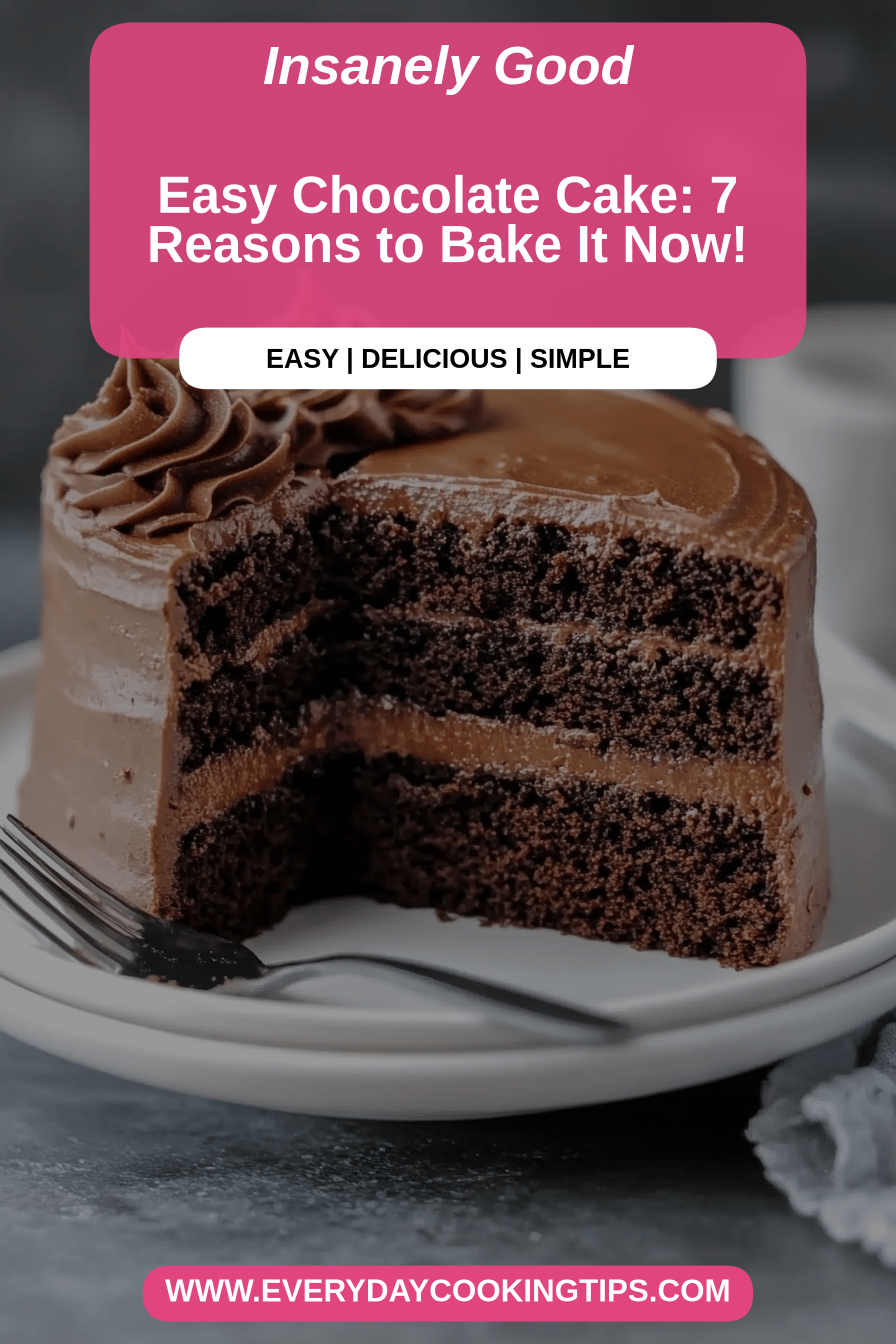
There are some recipes that just feel like a warm hug. You know the ones – they’re reliable, comforting, and always turn out just right, no matter what life throws at you. This Chocolate Cake is exactly that for me. It’s the one I reach for when I need to impress guests, when the kids demand a treat, or honestly, when I just need a little bit of chocolatey joy myself. It’s not fussy, it’s not complicated, but oh boy, does it deliver. When I think of a truly magnificent chocolate cake, this is it. It’s leagues beyond your average box mix, but surprisingly simple, which is my favorite kind of magic in the kitchen. I’ve made it for birthdays, potlucks, and even just a Tuesday afternoon, and it always disappears in a flash. It’s a true crowd-pleaser, and the best part? It tastes like it took hours to make, but I promise you, it’s my go-to for busy nights.
What is the secret behind this no fail chocolate cake?
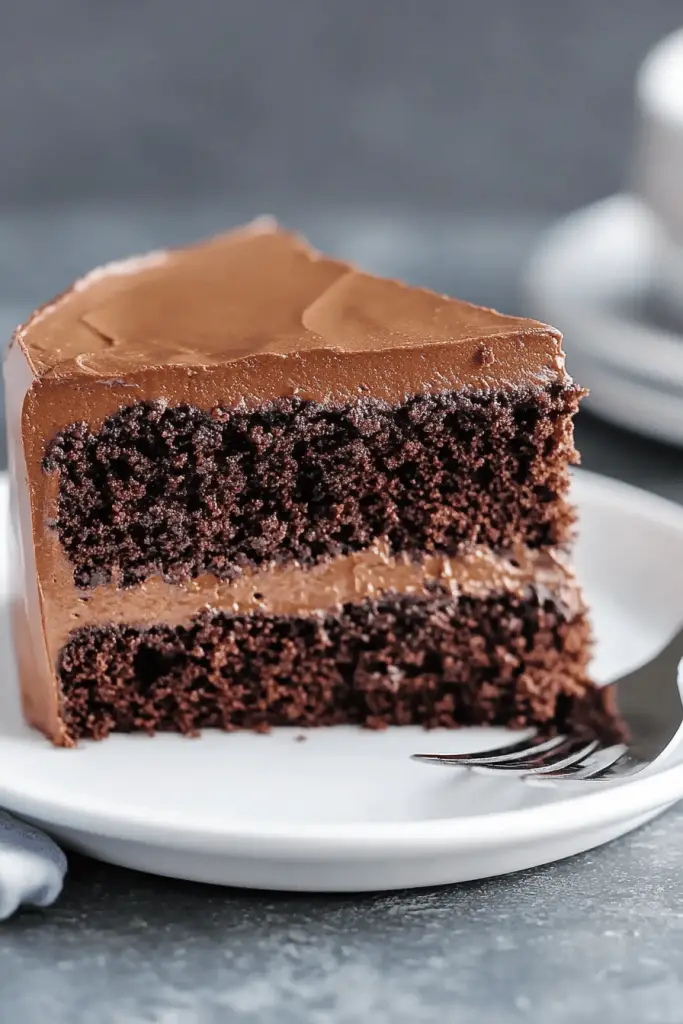
So, what exactly makes this chocolate cake so special and why do I call it my “no-fail” recipe? Think of it as your best friend in cake form – always there for you, dependable, and always brings the cheer. It’s essentially a deeply moist, incredibly rich chocolate cake that’s surprisingly forgiving. The name “no-fail” really comes from its incredible consistency. Even if I’m a bit distracted, or my oven decides to be a bit quirky, this cake still turns out beautifully. It has a tender crumb and a deep, Dark Chocolate flavor that isn’t too sweet. It’s the kind of cake that makes people close their eyes and savor each bite. It’s not overly dense like some chocolate cakes can be, nor is it too light and airy where it crumbles apart. It strikes that perfect balance, making it ideal for just about any occasion, from a casual coffee break to a fancy dessert spread.
Why you’ll love this recipe?
Honestly, where do I even begin with why this chocolate cake is a winner? First and foremost, the FLAVOR. It’s intensely chocolatey without being bitter. I use a good quality cocoa powder, and it makes all the difference. The texture is just divine – it’s incredibly moist and tender, with a crumb that practically melts in your mouth. It stays that way for days, which is a huge win in my book. Then there’s the SIMPLICITY. I’m not kidding when I say this is easy. You mix some things, then you mix other things, and then you combine them. No complicated steps, no fancy techniques. It’s the kind of recipe you can whip up even after a long day. And let’s talk COST-EFFICIENCY. Most of the ingredients are pantry staples, so you don’t need to break the bank. It proves that you don’t need expensive ingredients for an amazing result. What I love most about this chocolate cake is its VERSATILITY. You can dress it up or down. Serve it plain with a dusting of powdered sugar, or go all out with a rich frosting or a simple ganache. It’s perfect for a birthday celebration, a holiday gathering, or just because. It’s even better than my old favorite vanilla cake for some occasions! I’ve also found that I can tweak it slightly – sometimes I add a hint of espresso powder to deepen the chocolate flavor even more, and it’s just spectacular. This is the recipe that makes me feel like a baking pro, even on my most tired days.
How do I make a no fail chocolate cake?
Quick Overview
This chocolate cake comes together in a few simple stages. You’ll whisk together your dry ingredients, then your wet ingredients, and then combine them gently. We’ll bake it until a tester comes out clean, and then let it cool before glazing. It’s straightforward, meaning you’ll have a beautiful, delicious chocolate cake ready to enjoy with minimal fuss. The beauty of this method is that it creates a super moist cake without any complicated steps like creaming butter for ages or separating eggs. It’s truly designed for ease and maximum flavor payoff.
Ingredients
What is the magic to create magic?
For the Main Batter:
* 2 cups all-purpose flour: Make sure it’s fresh! I usually measure mine by spooning it into the cup and leveling it off to avoid packing too much in. Too much flour can make a cake dry, and we definitely don’t want that.
* 2 cups granulated sugar: This gives us that lovely sweetness and helps with moisture.
* 3/4 cup unsweetened cocoa powder: This is where the deep chocolate flavor comes from. I prefer Dutch-processed cocoa for a richer, darker color and a smoother taste, but natural cocoa works too. Just be aware the color might be a little lighter.
* 2 teaspoons baking soda: Our leavening agent, essential for a good rise.
* 1 teaspoon baking powder: A little extra lift never hurt anyone, right?
* 1 teaspoon salt: Balances the sweetness and enhances the chocolate flavor. Don’t skip it!
* 1 cup milk: Whole milk gives the best richness, but I’ve tested this with almond milk and oat milk too, and it actually made it even creamier! So, use what you have. Room temperature is best.
* 1/2 cup vegetable oil: Or any neutral-flavored oil like canola or sunflower. This is key for that incredible moistness that lasts.
* 2 large eggs: At room temperature. They bind everything together and add richness.
* 2 teaspoons vanilla extract: Pure vanilla extract makes a difference, so go for the good stuff if you can.
* 1 cup boiling water: This sounds a little strange, but trust me, it ‘blooms’ the cocoa powder, intensifying the chocolate flavor and creating a wonderfully tender crumb. It’s a game-changer!
For the Filling:
* 1 cup powdered sugar, sifted: For a smooth, lump-free filling.
* 1/4 cup softened unsalted butter: Make sure it’s truly soft, not melted.
* 2 tablespoons milk (or cream): Just enough to get the right consistency.
* 1/2 teaspoon vanilla extract: A touch of flavor.
For the Glaze:
* 1 cup powdered sugar, sifted: Again, sifted for smoothness.
* 2-3 tablespoons milk (or cream): Add gradually until you get a pourable, but not too thin, consistency.
* 1 tablespoon unsweetened cocoa powder: For that classic chocolate glaze.
* 1/2 teaspoon vanilla extract: Optional, but nice!

Step-by-Step Instructions
Step 1: Preheat & Prep Pan
First things first, let’s get the oven preheated to 350°F (175°C). You’ll need two 8-inch or 9-inch round cake pans. Grease them really well with butter or non-stick spray, then flour them, tapping out any excess. Or, you can line the bottoms with parchment paper for extra insurance against sticking. A well-prepped pan is your first defense against a cake tragedy!
Step 2: Mix Dry Ingredients
Grab a large mixing bowl. Add the flour, sugar, cocoa powder, baking soda, baking powder, and salt. Whisk them all together really well. You want to make sure everything is evenly distributed so you don’t end up with pockets of baking soda or salt. This step is super important for a consistent rise and flavor throughout the cake.
Step 3: Mix Wet Ingredients
In a separate medium bowl, whisk together the milk, vegetable oil, eggs, and vanilla extract until they’re just combined. Don’t over-mix here, just give it a good whisk until everything is incorporated.
Step 4: Combine
Now, pour the wet ingredients into the bowl with the dry ingredients. Mix on low speed with an electric mixer (or vigorously by hand with a whisk) until just combined. The batter will be thick at this point. Then, carefully pour in the boiling water. Be cautious, as it will be hot! Mix on low speed until the batter is smooth and pourable. It will seem thin, and that’s perfectly okay. This is what makes the cake so moist.
Step 5: Prepare Filling
While the Cake Batter is resting for a moment, let’s whip up the filling. In a small bowl, beat together the softened butter and sifted powdered sugar until it’s crumbly. Then, add the milk and vanilla extract and beat until it’s smooth and creamy. If it seems too thick, add another teaspoon of milk; if too thin, a bit more powdered sugar. You want it spreadable but not runny.
Step 6: Layer & Swirl
Divide the batter evenly between your prepared cake pans. You can gently spread the filling over one of the cake layers, almost to the edges. Then, carefully place the second cake layer on top. Now, for the glaze! In a medium bowl, whisk together the sifted powdered sugar, cocoa powder, and 2 tablespoons of milk and vanilla until smooth. Add more milk, a teaspoon at a time, until you reach a nice, thick but pourable consistency. Drizzle this over the top of the cake, letting it drip down the sides naturally.
Step 7: Bake
Pop those pans into your preheated oven. Bake for about 30-35 minutes for 8-inch pans, or 35-40 minutes for 9-inch pans. You’ll know it’s done when a wooden skewer or toothpick inserted into the center comes out clean, with no wet batter attached. Ovens can vary, so start checking around the 30-minute mark. Trust your skewer!
Step 8: Cool & Glaze
Once baked, let the cakes cool in the pans on a wire rack for about 10-15 minutes. Then, carefully invert them onto the wire rack to cool completely. It’s super important that the cakes are completely cool before you frost or glaze them, otherwise, everything will melt and get messy. Once cool, prepare the glaze as described in step 6 and drizzle it over the top.
Step 9: Slice & Serve
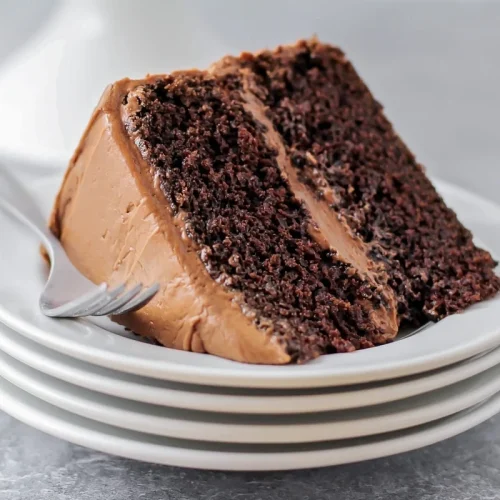
Once the glaze has set a bit, it’s time for the best part! Slice your beautiful chocolate cake and enjoy. I love serving this cake slightly warm, but it’s also delicious at room temperature. For an extra special touch, a dollop of whipped cream or a scoop of vanilla Ice Cream is always a good idea.
What to Serve It With
This versatile chocolate cake is a true chameleon! For a simple breakfast treat, a slice alongside a steaming mug of coffee is pure bliss. The rich chocolate cuts through the bitterness of the coffee beautifully. For a more leisurely brunch, I love to serve it with fresh berries – raspberries or strawberries add a lovely tartness that complements the chocolate. A dusting of powdered sugar and a few artfully placed berries make it look so elegant. When it’s dessert time, this cake shines! It pairs wonderfully with a rich vanilla bean ice cream, a silky Chocolate Mousse, or even a tart raspberry coulis. It’s decadent enough to be the star of any dinner party. And for those cozy, late-night cravings? A thick slice, maybe warmed up slightly, with a glass of cold milk is pure comfort. My kids always ask for this cake when they’ve had a tough day at school. It’s just that kind of recipe – comforting, familiar, and always brings a smile.
Top Tips for Perfecting Your “No-Fail” Chocolate Cake
Over the years, I’ve learned a few little tricks that make this chocolate cake even better. First, when it comes to the cocoa powder, don’t skimp on quality. A good Dutch-processed cocoa powder really makes a difference in the depth of flavor and the beautiful dark color. I’ve also found that if I have the time, letting the dry ingredients sit for about 15 minutes after whisking them together can really help hydrate the flour and cocoa, leading to an even more tender cake. For the mixing, the key is not to overmix once the wet and dry ingredients are combined. Just mix until it’s all come together. Overmixing develops the gluten in the flour, which can lead to a tougher cake. So, gentle is the name of the game here. When it comes to the boiling water, yes, it seems counterintuitive to add it to cake batter, but it’s crucial! It blooms the cocoa and creates that super moist, melt-in-your-mouth texture. Just pour it in slowly and mix until smooth. If your cake seems to be browning too quickly on top before the inside is cooked, you can loosely tent it with foil for the last 10-15 minutes of baking. This also helps keep the top moist. For the glaze, consistency is everything. I usually start with 2 tablespoons of milk and add more only if needed. You want it thick enough to coat the cake but thin enough to drip elegantly. If it gets too thin, just whisk in a little more powdered sugar. And finally, remember that ovens vary! My oven runs a little hot, so I often bake this cake at 325°F (160°C) for a slightly longer time to ensure it’s perfectly cooked through without drying out. Always trust the skewer test!
Storing and Reheating Tips
One of the best things about this chocolate cake is how well it keeps! At room temperature, sealed in an airtight container or wrapped well with plastic wrap, it’s usually good for about 2-3 days. The moistness from the oil and the cocoa powder helps it stay fresh. If you’ve glazed it, that adds another layer of protection. If you need to keep it longer, the refrigerator is your friend. Again, wrap it tightly or store it in an airtight container. It should stay delicious for up to 5 days in the fridge. I actually think the flavors meld even more overnight! For longer storage, freezing is a fantastic option. I like to freeze the cake unfrosted, wrapped very tightly in plastic wrap, then in a layer of aluminum foil, or placed in a freezer-safe container. It will keep well in the freezer for up to 3 months. When you’re ready to thaw, just transfer it to the refrigerator overnight. If you want to reheat a slice, you can do it very gently in the microwave for about 10-15 seconds – just enough to take the chill off and make it wonderfully tender again. I usually wait to add the glaze until just before serving if I’m planning on freezing it, or I’ll re-glaze it after thawing for the best look.
Frequently Asked Questions
Final Thoughts

This chocolate cake recipe is more than just a dessert to me; it’s a reliable companion in the kitchen. It’s the recipe I turn to when I want guaranteed deliciousness, and it never, ever lets me down. The deep chocolate flavor, the unbelievably moist crumb, and the simple process all add up to a truly perfect chocolate cake. It’s the kind of cake that makes people feel happy and cared for. If you’re looking for a go-to chocolate cake recipe that’s easy to make and spectacular to eat, you’ve found it. I’d love for you to try it and let me know how it turns out for you! Please leave a comment below with your thoughts, any variations you tried, or if you have any questions. And if you loved this cake, you might also enjoy my [link to another recipe, e.g., “decadent brownie recipe”] or my [link to another recipe, e.g., “easy vanilla cupcake recipe”]. Happy baking, and I can’t wait to hear about your chocolate cake adventures!
Classic Chocolate Cake
Ingredients
Dry Ingredients
- 2 cups all-purpose flour
- 2 cups granulated sugar
- 0.75 cup unsweetened cocoa powder
- 2 teaspoons baking soda
- 1 teaspoon baking powder
- 1 teaspoon salt
Wet Ingredients
- 2 large eggs
- 1 cup milk
- 0.5 cup vegetable oil
- 2 teaspoons vanilla extract
- 1 cup boiling water
Instructions
Preparation Steps
- Preheat your oven to 350°F (175°C). Grease and flour two 9-inch round cake pans.
- In a large bowl, whisk together the flour, sugar, cocoa powder, baking soda, baking powder, and salt.2 cups all-purpose flour
- In a separate bowl, whisk together the eggs, milk, oil, and vanilla extract.2 cups all-purpose flour
- Add the wet ingredients to the dry ingredients and mix until just combined. Do not overmix.
- Carefully stir in the boiling water. The batter will be thin.2 cups all-purpose flour
- Pour the batter evenly into the prepared cake pans.
- Bake for 30-35 minutes, or until a wooden skewer inserted into the center comes out clean.
- Let the cakes cool in the pans for 10 minutes before inverting them onto a wire rack to cool completely.


