


You know those nights, right? The ones where the clock is ticking, the kids are humming with that pre-dinner energy that usually means chaos, and you just need something *good*, something everyone will devour without a second thought? That’s where these Chicken Nuggets come in. Seriously, they’re my absolute go-to. They’re worlds away from those sad, rubbery frozen things you might remember from childhood. These are genuinely crispy, incredibly juicy, and packed with a flavor that makes you wonder why you ever bothered with anything else. I’ve tried making healthier versions, air-fried versions, and baked versions, but this specific recipe for chicken nuggets? It hits that perfect sweet spot that even my pickiest eaters approve of. It’s the kind of recipe that feels like a culinary magic trick, but I promise, it’s so straightforward.
What are some of the best chicken nuggets?
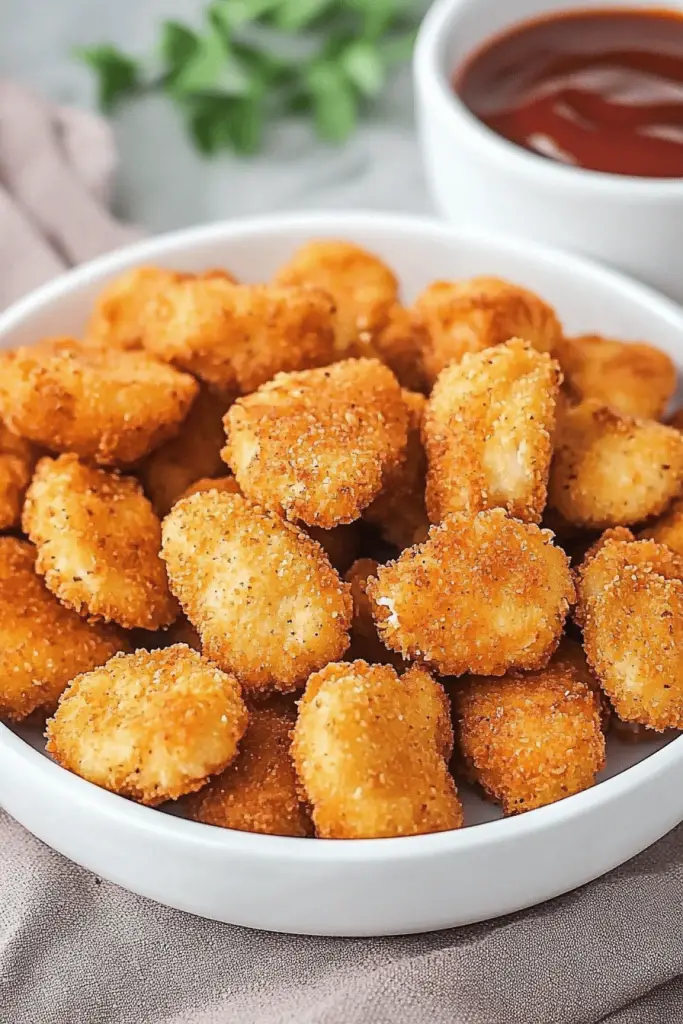
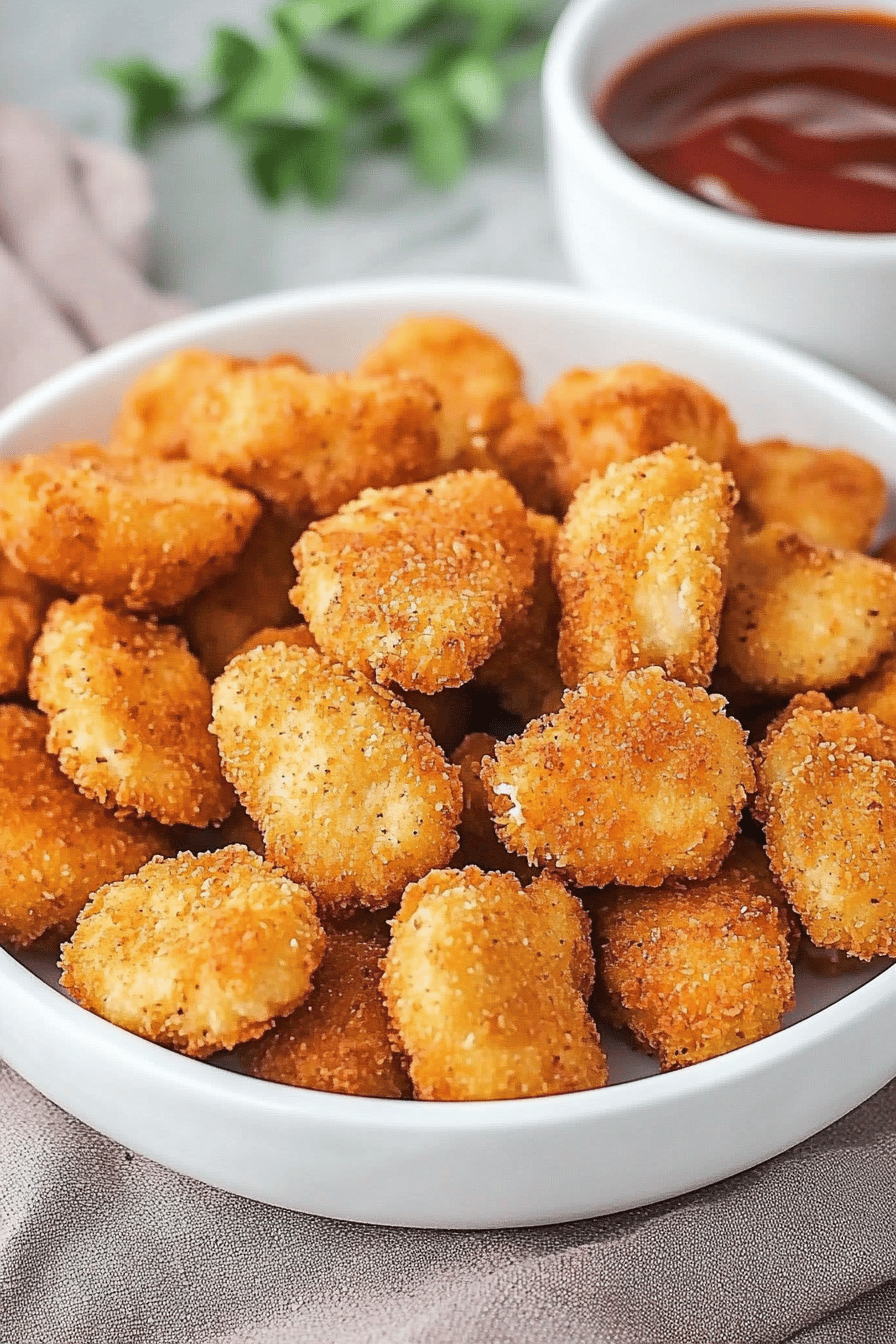
Okay, so when I say “chicken nuggets,” I’m not talking about your average fast-food fare. Think of these as the elevated, homemade version of that beloved classic. They’re bite-sized pieces of tender chicken breast, coated in a simple, yet utterly addictive, savory batter, and then fried to a perfect golden crisp. The magic really happens in the balance of flavors – it’s savory, a little bit salty, and has this subtle depth that makes them so moreish. They’re essentially the ultimate Comfort Food, reimagined. It’s the kind of dish that sparks joy and nostalgia, all wrapped up in a delightfully crispy package. They’re what I whip up when I need a quick weeknight dinner win, or even when I’m feeling a little fancy and want to serve them as an appetizer for guests.
Why you’ll love this recipe?
What are some of the reasons why I love this recipe for chicken nuggets?flavor is just out of this world. The chicken stays incredibly juicy on the inside because of how we prepare it, and the coating gets this amazing crunch that’s just perfect. It’s not overly seasoned, so it’s a blank canvas for dips, but it has enough inherent deliciousness that you could honestly eat them plain. Then there’s the simplicity. I know, I know, “fried” might sound intimidating, but this method is surprisingly easy and doesn’t make a huge mess. Most of the work is just chopping and mixing, and the actual cooking time is quite fast. Plus, these are wonderfully cost-efficient. Chicken Breast is usually pretty affordable, and the other ingredients are pantry staples. You get a massive amount of deliciousness for a fraction of the cost of buying them frozen or eating out. And the versatility! Oh my goodness, you can serve these with absolutely anything. They’re amazing with fries, of course, but they’re also fantastic in a lunchbox, on a salad, or even tucked into a wrap. What I love most about these chicken nuggets is that they feel like a treat, but they’re so easy to make that you can have them any day of the week. It’s a win-win-win!
How do you make these delicious chicken nuggets?
Quick Overview
This recipe is all about creating a flavorful, moist chicken nugget with an irresistible crunch. We’ll start by prepping our chicken, then move on to mixing a simple yet flavorful batter. The key is in the frying technique, which ensures a golden exterior and tender interior every single time. It’s a straightforward process that’s really quite forgiving, even for beginner cooks. Trust me, the result is so worth the minimal effort.
Ingredients
For the Main Batter:
1 cup all-purpose flour
1 teaspoon salt
1/2 teaspoon Black Pepper
1/2 teaspoon paprika (smoked paprika is fantastic here if you have it!)
1/4 teaspoon garlic powder
1/4 teaspoon onion powder
1 large egg
1/2 cup milk (whole milk makes it a bit richer, but any will do)
1 tablespoon Dijon mustard (this is a secret weapon for flavor!)
For the Filling:
1.5 lbs boneless, skinless Chicken Breasts
1 tablespoon olive oil
Salt and pepper to taste
For Frying:
3-4 cups vegetable oil, canola oil, or peanut oil (enough to come about 2 inches up the side of your pot)

Step-by-Step Instructions
Step 1: Preheat & Prep Pan
First things first, grab a large, heavy-bottomed pot or a Dutch oven. Pour in your frying oil – you want it to be about 2 inches deep. This depth is crucial for getting those nuggets nice and evenly fried. Place the pot over medium-high heat and let it come up to temperature. You’re aiming for 350°F (175°C). If you don’t have a thermometer, don’t worry! You can test it by dropping a tiny bit of batter into the oil. If it sizzles vigorously and floats to the top immediately, your oil is ready. While the oil heats up, prepare your chicken.
Step 2: Mix Dry Ingredients
In a medium bowl, whisk together the flour, salt, pepper, paprika, garlic powder, and onion powder. Make sure it’s all well combined. This dry mix is what’s going to give our chicken nuggets that delicious, crispy coating. Getting the spices mixed evenly now means every bite will have that perfect flavor balance. I always give it a good whisk to make sure there are no clumps of flour.
Step 3: Mix Wet Ingredients
In a separate, larger bowl, whisk the egg, milk, and Dijon mustard together until well combined. The Dijon mustard might seem a little unusual in a nugget batter, but trust me on this one – it adds a wonderful tang and depth that just elevates the whole thing. It also helps emulsify the batter, making it smoother and more even. Whisk until everything is nicely blended and a uniform pale yellow color.
Step 4: Combine
Now, we bring the wet and dry together. Pour the dry ingredients into the bowl with the wet ingredients. Whisk gently until just combined. You don’t want to overmix this batter! A few small lumps are perfectly fine, even desirable. Overmixing can develop the gluten too much, leading to a tougher coating. It should be a thick, pourable batter, but not watery. If it seems too thick, you can add a tablespoon of milk at a time until it reaches the right consistency. If it seems too thin, add a tablespoon of flour.
Step 5: Prepare Filling
Take your chicken breasts and trim off any excess fat. I usually cut them into roughly 1-inch pieces. You want them to be bite-sized so they cook through quickly and evenly. Pat them dry with paper towels; this helps the batter adhere better. Season the chicken pieces lightly with salt and pepper. You can do this right in the bowl you’ll be coating them in to save on dishes!
Step 6: Layer & Swirl
Add the seasoned chicken pieces to the batter. Gently toss them to ensure each piece is fully coated. You want a nice, even layer of batter all around. The batter should cling to the chicken. If it seems like it’s sliding off too much, your batter might be a tad too thin – let it sit for a minute or two, or add a tiny bit more flour. I find that letting them sit in the batter for just a few minutes before frying helps the coating adhere even better.
Step 7: Bake
Carefully add a few chicken nuggets to the hot oil, being careful not to overcrowd the pot. Overcrowding will lower the oil temperature too much, leading to greasy nuggets instead of crispy ones. Fry them in batches. They’ll typically take about 4-6 minutes per batch, depending on the size of your pieces and how hot your oil is. You’re looking for a beautiful golden-brown color and a perfectly crispy exterior. Use a slotted spoon or a spider strainer to remove them from the oil.
Step 8: Cool & Glaze
As each batch of chicken nuggets comes out of the oil, transfer them to a wire rack set over a baking sheet. This is key to keeping them crispy – it allows air to circulate around them, preventing them from steaming and getting soggy. You can lightly sprinkle them with a tiny bit more salt while they’re still hot, if you like. If you’re adding a glaze, now is the time to do it. You can drizzle it over, or even toss them gently in a bowl with the glaze. Wait for them to cool down a bit before serving, so no one burns their tongue!
Step 9: Slice & Serve
Once they’re cooled slightly and perfectly golden, your homemade chicken nuggets are ready! You can serve them whole, or if you prefer, you can give them a quick slice to show off that juicy chicken inside. They’re best served warm, right off the rack, but honestly, they’re still pretty fantastic at room temperature. Arrange them on a platter and get ready for the smiles!
What to Serve It With
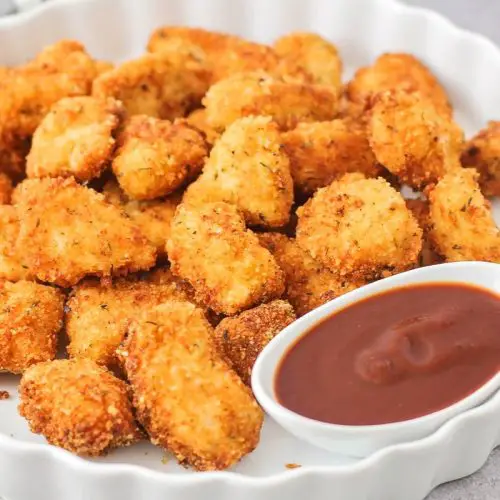
These chicken nuggets are such a crowd-pleaser, and they pair beautifully with so many things! For a classic feel, of course, you can’t go wrong with some crispy french fries or sweet potato fries. My kids also love them with a side of mac and cheese – pure comfort food heaven! For a slightly healthier option, I often serve them with a big, vibrant salad or some steamed broccoli. They’re also fantastic in a wrap with some lettuce, tomato, and a drizzle of your favorite sauce. For a fun appetizer spread, I’ll put out a variety of dipping sauces like honey mustard, BBQ sauce, ranch dressing, or even a spicy sriracha mayo. They’re even surprisingly good for breakfast if you’re having a lazy weekend brunch; just serve them alongside some scrambled eggs and fruit. Honestly, the possibilities are endless, and that’s part of what makes this recipe so special.
Top Tips for Perfecting Your Chicken Nuggets
Over the years, I’ve picked up a few tricks that make these chicken nuggets absolutely perfect every single time. One of the biggest things is patting the chicken really dry before coating it. This might seem small, but it makes a world of difference in how well the batter adheres. Don’t skip this step! When it comes to mixing the batter, remember my earlier tip: don’t overmix. A few lumps are your friend here. It leads to a lighter, crispier coating. If you can, let the coated chicken sit in the batter for about 5-10 minutes before frying. This allows the batter to really cling to the chicken and set up a bit, so you’ll have fewer nuggets where the coating falls off in the fryer. For frying, the most crucial part is maintaining the oil temperature around 350°F (175°C). If it’s too low, you get greasy nuggets; too high, and the outside burns before the inside is cooked. Use a thermometer if you have one, or the “drop test” method I mentioned. And definitely fry in batches! Overcrowding is the enemy of crispy food. For ingredient swaps, I’ve experimented a bit. If you’re out of Dijon mustard, a little bit of yellow mustard works in a pinch, though the flavor will be slightly different. You can also play with the spices in the dry mix – add a pinch of cayenne for a little heat, or some dried herbs like parsley or thyme for a different flavor profile. For the oil, while vegetable or canola is standard, I’ve found that peanut oil gives an extra lovely flavor if you don’t have any allergies to consider. Lastly, for that perfect crispy texture, don’t skip the wire rack for draining. It’s the secret to avoiding that dreaded soggy bottom.
Storing and Reheating Tips
These chicken nuggets are so good, you might actually have leftovers, which is a minor miracle in my house! If you do, storing them properly is key to maintaining their deliciousness. For room temperature storage, I wouldn’t leave them out for more than two hours, as they are fried and contain chicken. If you need to store them for a bit longer but don’t have fridge space immediately, I’d cover them loosely with foil. For refrigerator storage, let the nuggets cool completely first. Then, transfer them to an airtight container or a resealable plastic bag. They should stay good in the fridge for about 3-4 days. When you reheat them, the goal is to get that crispiness back! My favorite method is in a preheated oven or a toaster oven at around 375°F (190°C) for about 5-10 minutes, until heated through and crispy. You can also use an air fryer, which is excellent for reviving them. Avoid the microwave if you can, as it tends to make them a bit soft and chewy. If you’re planning to freeze them for later, I highly recommend flash-freezing them first. Spread the cooled nuggets in a single layer on a baking sheet and freeze until solid, then transfer them to a freezer bag. This prevents them from clumping together. They’ll keep well in the freezer for up to 2-3 months. To reheat from frozen, you can go straight into the oven or air fryer, just add a few extra minutes to the cooking time.
Frequently Asked Questions
Final Thoughts
So there you have it – my go-to recipe for the most incredible homemade chicken nuggets! I truly hope you give these a try. They’re more than just a meal; they’re a little taste of pure comfort and joy, easy enough for any night of the week and delicious enough to make everyone ask for seconds. If you love this recipe and are looking for other easy weeknight dinners, you might also enjoy my [link to another recipe, e.g., Sheet Pan Lemon Herb Chicken and Veggies] or my [link to another recipe, e.g., Quick and Easy Weeknight Pasta]. I can’t wait to hear what you think of these chicken nuggets! Let me know in the comments below how yours turned out, or if you tried any fun variations. Happy cooking!
Chicken Nuggets
Ingredients
Main Ingredients
- 0.5 kg boneless, skinless chicken breasts cut into 1-inch pieces
- 1 cup all-purpose flour
- 2 large eggs beaten
- 1.5 cup panko breadcrumbs
- 0.5 teaspoon salt
- 0.25 teaspoon black pepper
- 0.5 teaspoon garlic powder
- 0.5 cup vegetable oil for frying
Instructions
Preparation Steps
- In a shallow dish, combine flour, salt, pepper, and garlic powder.
- In another shallow dish, whisk the eggs.
- In a third shallow dish, place the panko breadcrumbs.
- Dip each chicken piece into the flour mixture, then into the beaten eggs, and finally coat thoroughly with panko breadcrumbs.
- Heat the vegetable oil in a large skillet over medium-high heat.
- Carefully place the coated chicken nuggets into the hot oil, working in batches if necessary to avoid overcrowding.
- Fry for 3-4 minutes per side, or until golden brown and cooked through. The internal temperature should reach 74°C (165°F).
- Remove the nuggets from the skillet and place them on a wire rack set over a baking sheet to drain excess oil.
- Serve hot with your favorite dipping sauces.


