


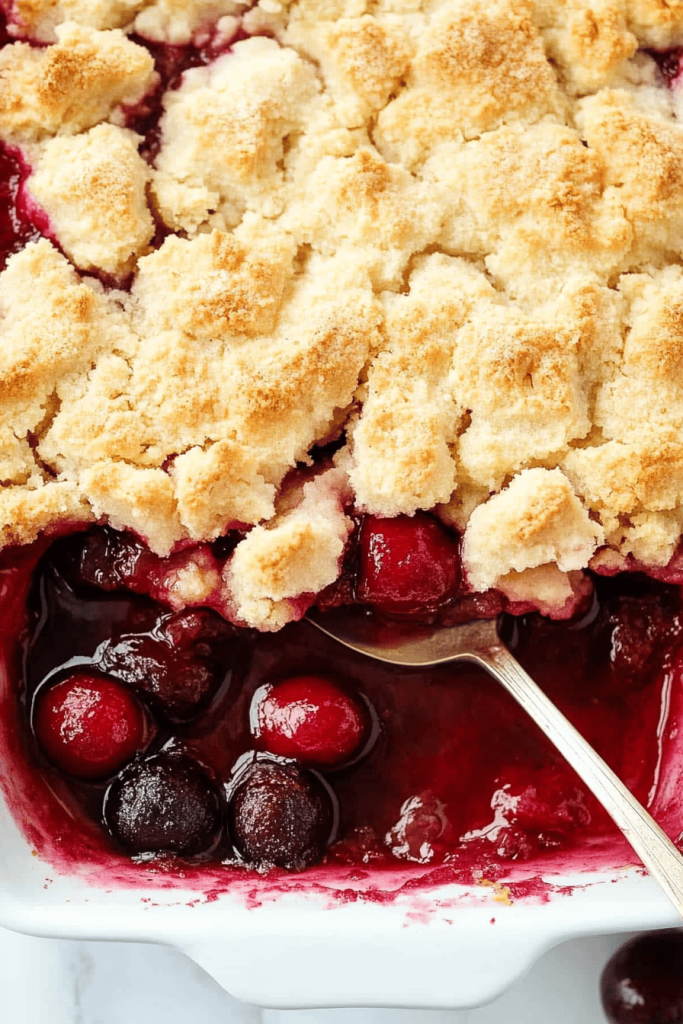
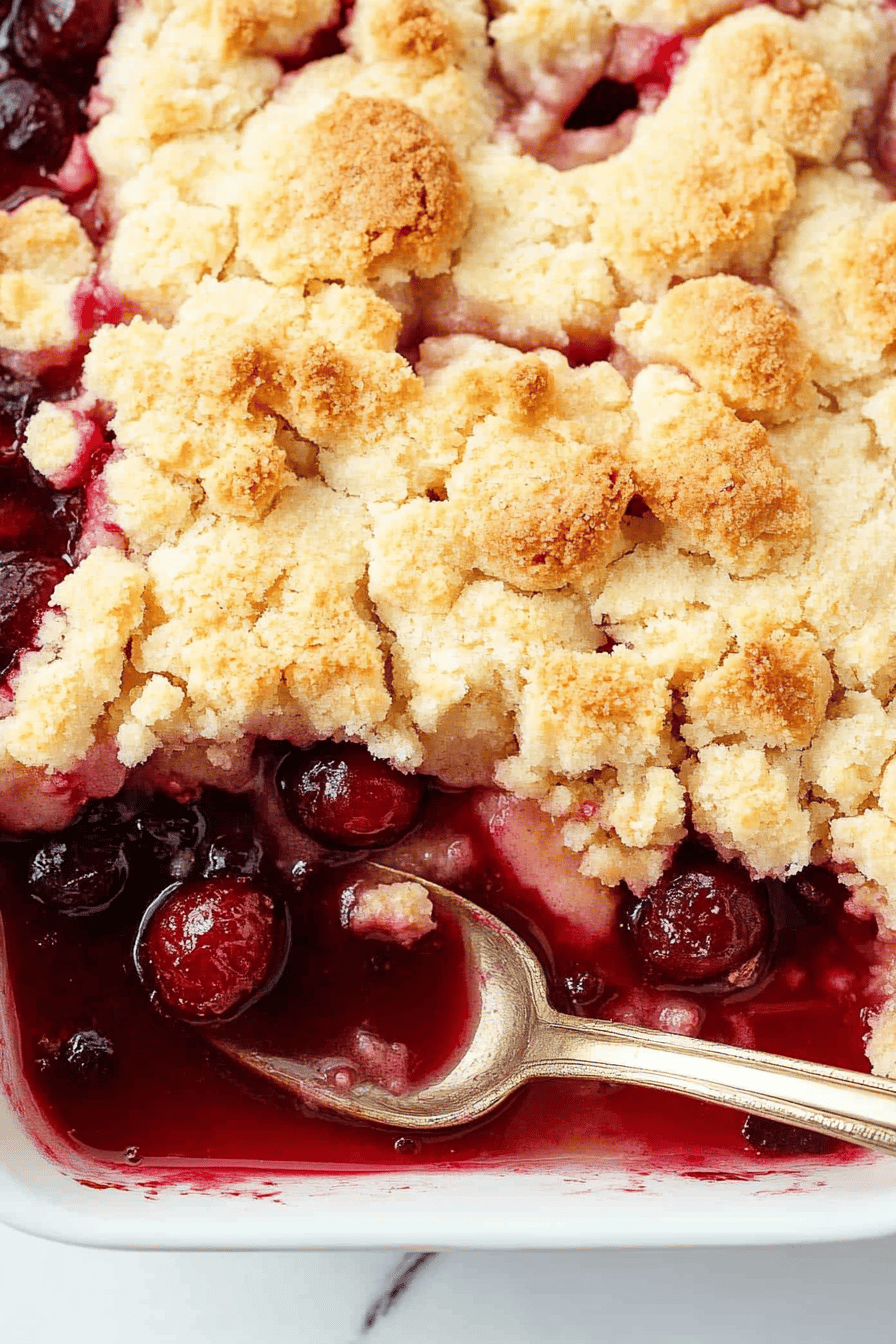
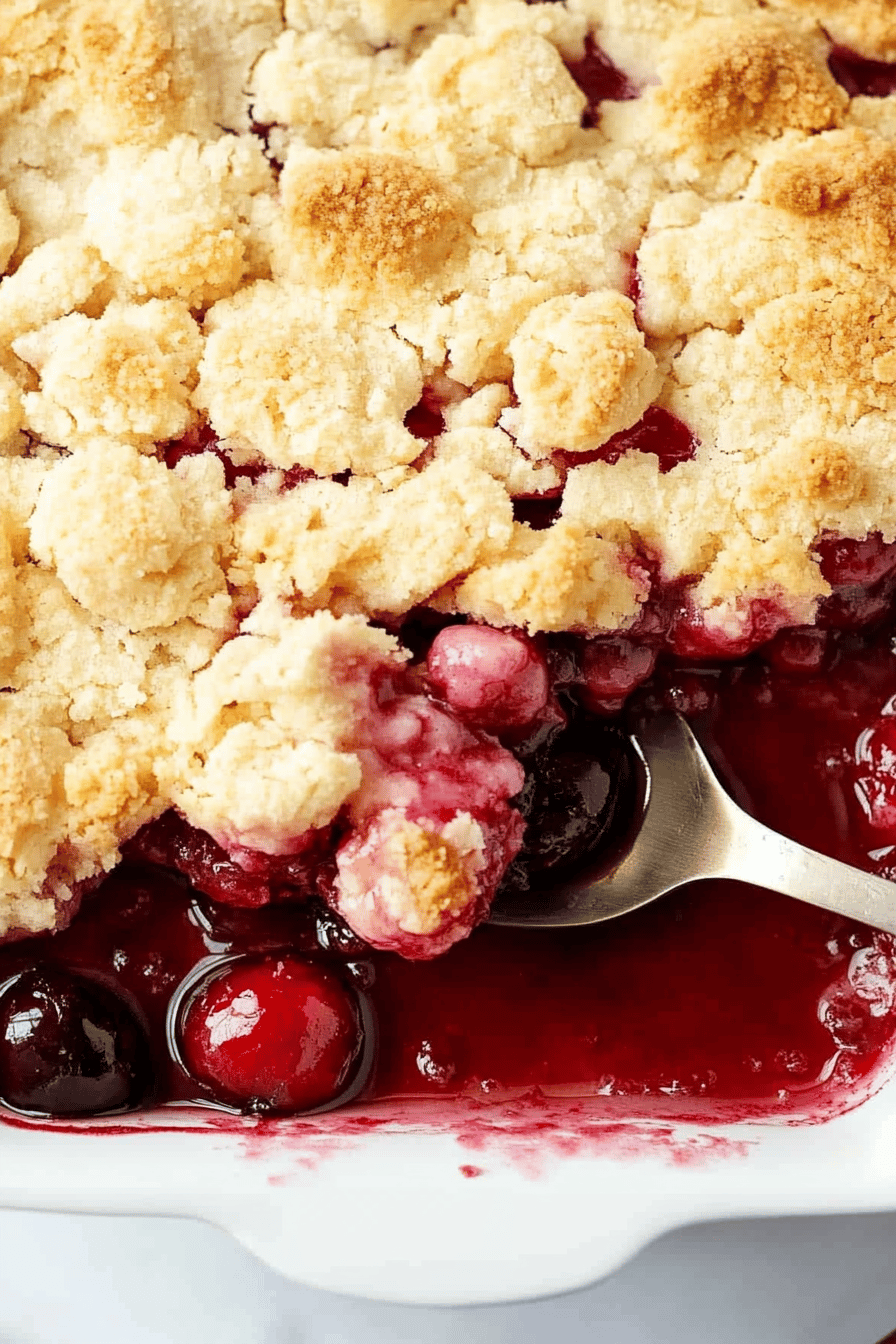
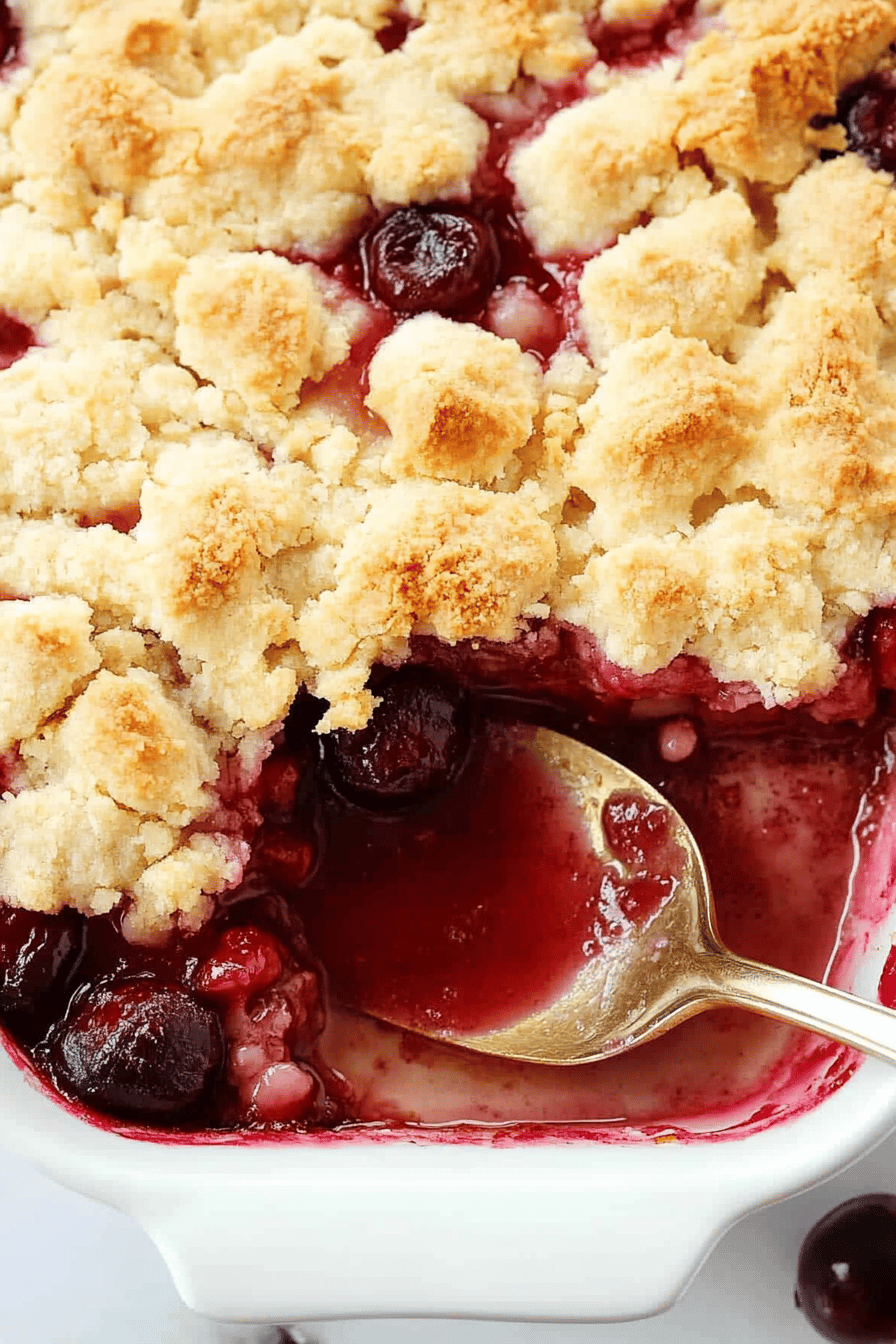
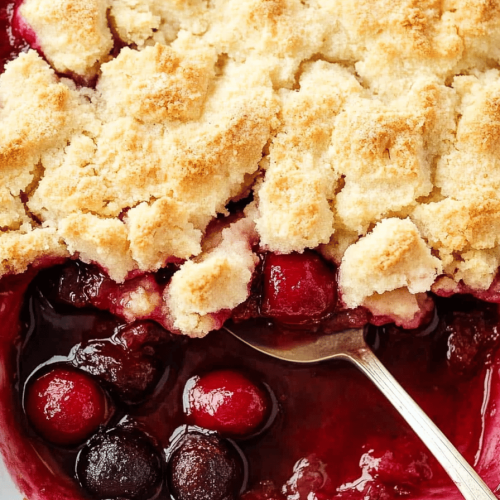
There’s something truly captivating about a well-made cherry Cobbler Recipe. The rich aroma of cherries, combined with the buttery, crumbly topping, makes for an irresistible dessert that’s perfect for any occasion. Whether you’re hosting a dinner party or simply satisfying a sweet tooth, this cherry cobbler is sure to be a crowd-pleaser, offering the perfect balance of tart and sweet flavors.
My love for cherry cobbler traces back to the warm summer evenings of my childhood. Every year, at the peak of cherry season, my grandmother would invite the entire family over for what she called a ‘Cherry Jubilee’. It was a day dedicated to picking cherries, laughing together, and ending with her famous cherry cobbler. The sight of fresh cherries bubbling beneath a golden crust was as delightful then as it is now. The recipe I share today is inspired by her classic, cherished over generations.
Why You’ll Love This Recipe
This cherry cobbler stands out for its simplicity and delectable flavor. It’s the kind of recipe anyone can make—even those new to baking—yet impresses like something crafted by an expert. Here are a few reasons why it’s a must-try:
- Quick and Easy: With minimal preparation time, this dessert comes together with ease, making it perfect for both unexpected guests and planned gatherings.
- Affordable Ingredients: Most of the ingredients are pantry staples and inexpensive, allowing you to create a fabulous dish without breaking the bank.
- Customizable: This recipe encourages creativity. You can easily substitute cherries for other seasonal fruits or adapt it to suit dietary preferences.
- Nostalgic Flavors: The combination of sweet cherries and buttery crust evokes a sense of comfort and tradition, like the classic flavors that families have enjoyed for generations.
Ingredients Notes
Fresh ingredients make all the difference when it comes to crafting an unforgettable cherry cobbler. Below are some notes to guide you through selecting and preparing each component:
- Cherries: While fresh cherries are ideal for this recipe, frozen cherries work well too, especially outside of cherry season. If using frozen, make sure they’re thawed and drained.
- Sugar: Adjust the sugar based on the sweetness of your cherries. Tart cherries might need a bit more sugar to taste.
- Flour: All-purpose flour provides structure to the cobbler topping. For gluten-free guests, try a gluten-free flour blend.
- Butter: Always use unsalted butter. It allows you to control the amount of salt in your recipe.
- Lemon Juice: A splash of lemon juice enhances the tartness of the cherries, adding a fresh zing to balance the sweetness.
Recipe Steps
Step 1
Preheat your oven to 350 degrees Fahrenheit (175 degrees Celsius). This ensures your cobbler will bake evenly and develop a golden crust.
Step 2
In a large mixing bowl, combine the pitted cherries, sugar, and lemon juice. Toss them gently to coat the cherries evenly. Allow this mixture to sit and macerate while preparing the topping.
Step 3
In a separate bowl, whisk together the flour, sugar, baking powder, and a pinch of salt. Add cold, cubed butter and mix using your fingers or a pastry cutter until the mixture resembles coarse crumbs.
Step 4
Gently pour the cherry mixture into a baking dish, spreading it out to form an even layer. Evenly distribute the cobbler topping over the cherries, making sure all fruits are covered.
Step 5
Place the baking dish in the preheated oven, and bake for 40–45 minutes or until the topping is golden brown and the cherry juices are bubbling around the edges. Let it cool slightly before serving.
Storage Options
To store leftover cherry cobbler, allow it to cool to room temperature, then cover it tightly with aluminum foil or plastic wrap. You can refrigerate it for up to four days. For longer storage, consider freezing it: simply wrap it tightly with foil, followed by plastic wrap, to avoid freezer burn. To reheat, thaw overnight in the refrigerator if frozen, then warm in a 350-degree oven until heated through—this will help maintain the crispiness of the topping.
Variations & Substitutions
- Flour Alternatives: Substitute with almond or oat flour for a nutty twist or to accommodate gluten-free diets.
- Fruit Swaps: Replace cherries with mixed berries, peaches, or plums, depending on what’s in season.
- Sweetener Choices: For a naturally sweetened version, consider using honey or maple syrup instead of granulated sugar.
- Spice It Up: Add a dash of cinnamon or nutmeg to the topping for additional warmth and flavor.
Serving Suggestions
Cherry cobbler can be served warm as a comforting dessert on cool evenings or chilled during hot summer days. Pair it with a scoop of vanilla Ice Cream or a dollop of freshly whipped cream to complement its fruitiness. For a unique twist, drizzle some chocolate sauce or caramel over the top. It’s perfect for picnics, family dinners, or as a sweet, indulgent breakfast topping for Greek yogurt.
Frequently Asked Questions
Can I use canned cherries for this recipe?
Yes, canned cherries are a viable option if fresh or frozen cherries aren’t available. Opt for cherries canned in juice instead of syrup to avoid an overly sweet cobbler. Be sure to drain them fully before mixing with other ingredients, and consider reducing the sugar slightly, as canned cherries might be pre-sweetened.
How can I make this recipe vegan?
To make a vegan cherry cobbler, replace the butter with a dairy-free alternative like coconut oil or vegan margarine. Additionally, confirm that your chosen sugar is vegan-friendly, as some vendors use bone char in processing. With these simple swaps, you can enjoy this classic dessert adhering to a plant-based lifestyle.
What can I do if my topping is too dry?
If your topping seems too dry, incorporate a little more butter or a tablespoon of milk (dairy or non-dairy) until it achieves a crumbly consistency. Take care not to overmix, as this can lead to a dense rather than a flaky texture. A properly hydrated topping will lend a delectable crunch atop the juicy cherries.
Is there a sugar-free version of this recipe?
For a sugar-free variation, use sugar substitutes like Stevia or erythritol, which mimic the sweetness of sugar without added calories. Keep in mind that some substitutes have unique flavors or sweetness levels, so adjusting the quantity to taste during preparation is advisable.
How do I prevent the filling from becoming too runny?
To ensure a thick, luscious filling, mix in one or two tablespoons of cornstarch with the cherry mixture before baking. This will help to thicken the cherry juices as they cook and bubble. If you find your filling too thin after baking, allow the cobbler to cool slightly; it will naturally thicken as it sets.
Cherry Cobbler Recipe
Ingredients
Main Ingredients
- 4 cups sweet cherries, pitted fresh or frozen
- 1 cup granulated sugar
- 2 tablespoons all-purpose flour for thickening
- 1 teaspoon vanilla extract
- 1 cup all-purpose flour for cobbler crust
- 1 cup milk
- 8 tablespoons unsalted butter, melted
Instructions
Preparation Steps
- Preheat the oven to 350°F (175°C).
- In a mixing bowl, combine cherries, 1 cup sugar, 2 tablespoons flour, and vanilla extract. Stir to combine.
- Pour the cherry mixture into a greased baking dish.
- In another bowl, mix 1 cup flour, milk, and melted butter until smooth. Pour over the cherry mixture.
- Bake in the preheated oven for 45 minutes, or until the top is golden brown.


