


Okay, picture this: it’s a weeknight, you’re craving something decadent but don’t want to spend hours in the kitchen. This Butterfinger Poke Cake is my absolute go-to. It’s moist, it’s packed with that signature peanut butter and chocolate crunch, and honestly, it’s way easier than making a layer cake from scratch. Think of it as a leveled-up version of those classic chocolate pudding poke cakes, but with a candy twist that’ll have everyone begging for seconds. I’ve made this for potlucks, birthdays, even just a random Tuesday night, and it *always* disappears in record time. This Butterfinger Poke Cake is a total crowd-pleaser!
What is Butterfinger Poke Cake?
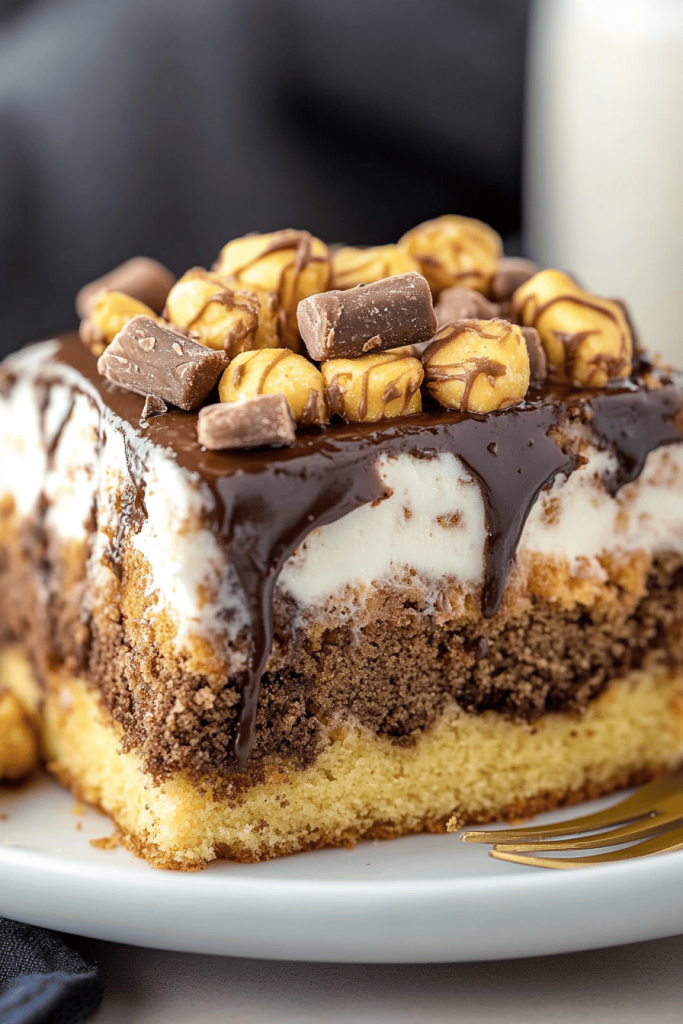
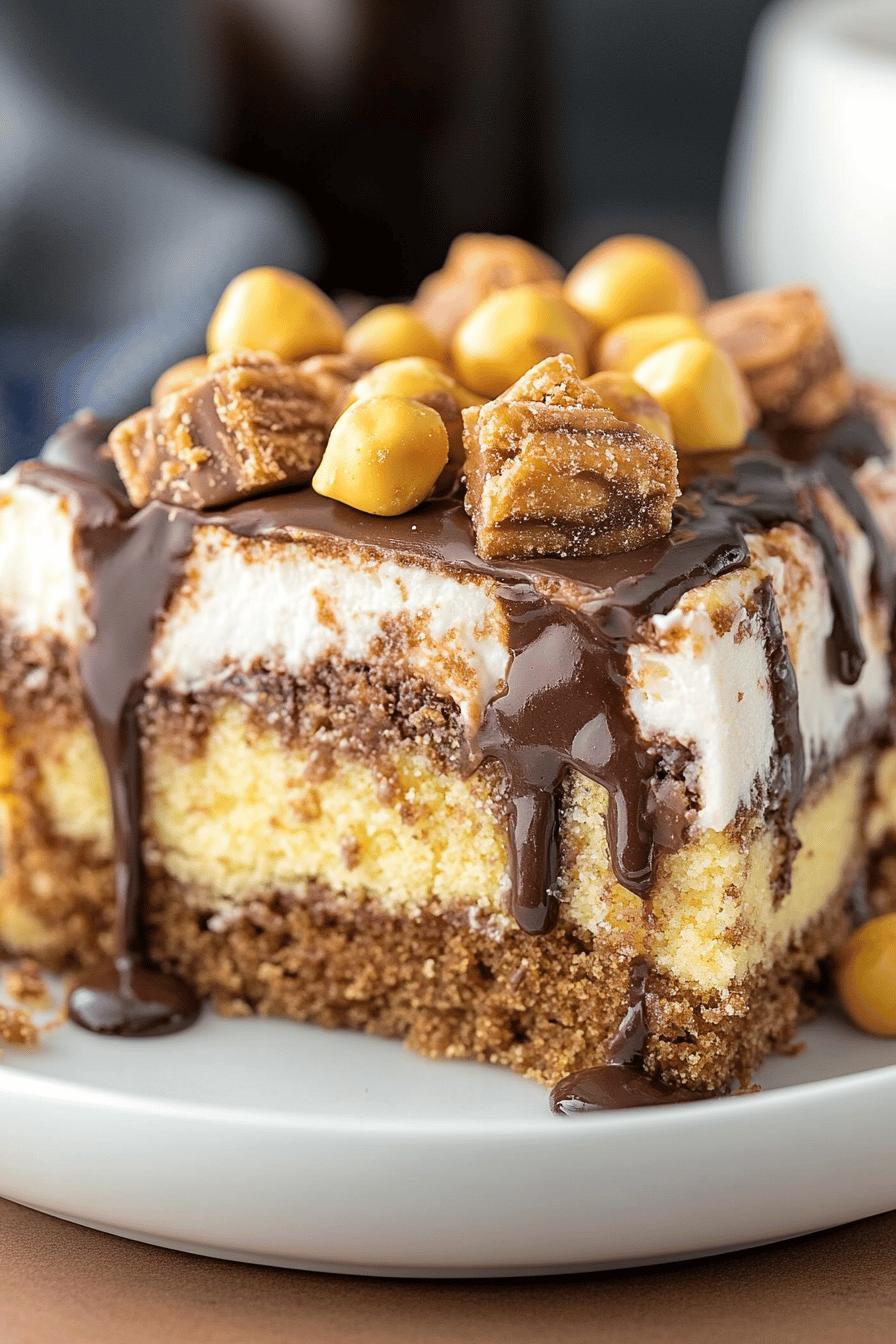
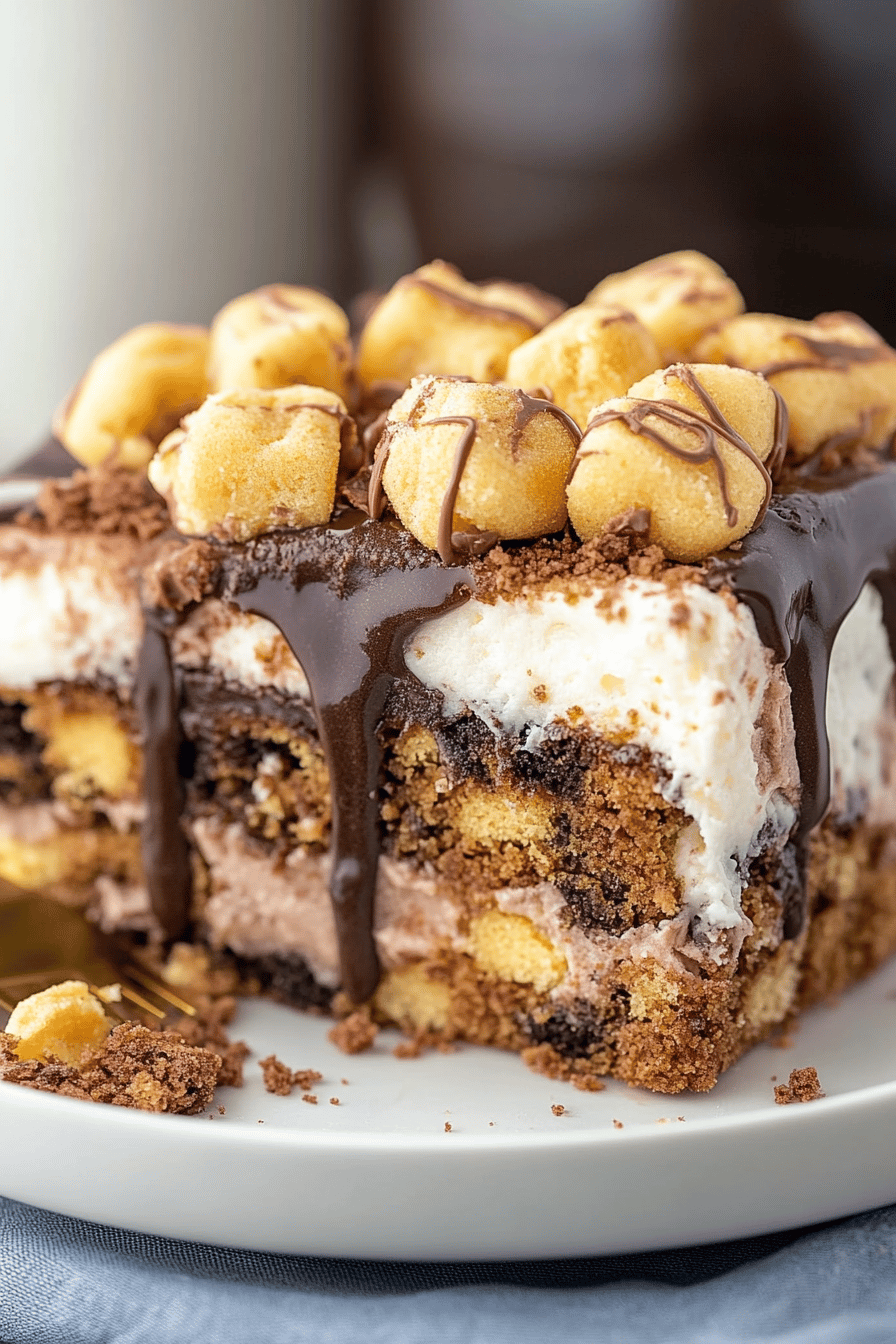
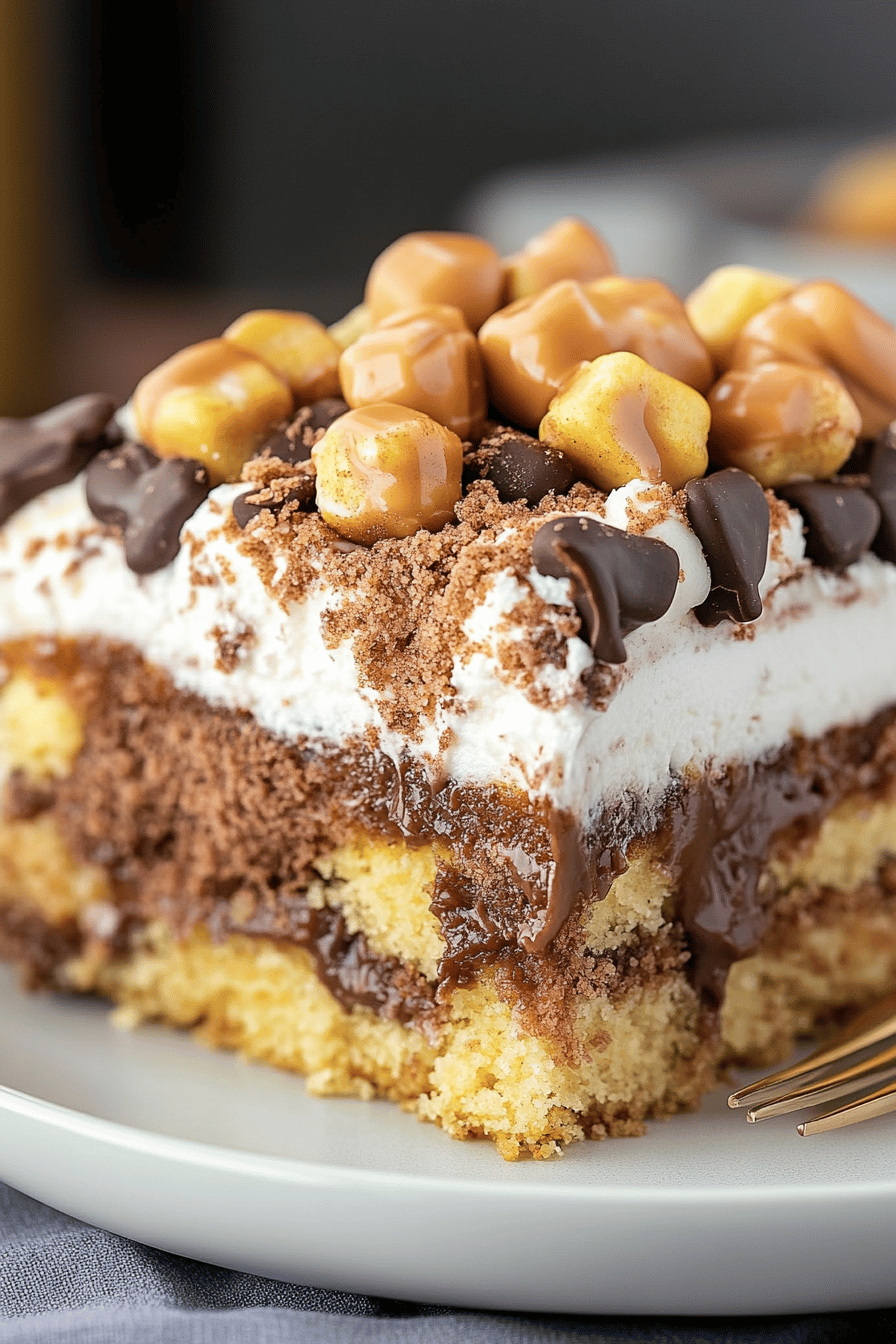
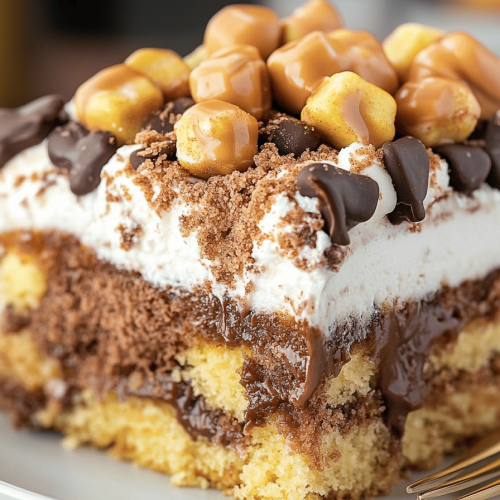
A Butterfinger Poke Cake is basically a baked cake – usually a simple yellow or vanilla cake – that gets “poked” all over with holes after it comes out of the oven. These holes are then filled with a sweet, creamy mixture, often Sweetened Condensed Milk or a pudding mixture. In this case, we’re using a combination that gets infused with chopped Butterfinger candy! The cake then gets topped with whipped cream or frosting and even MORE Butterfinger pieces. Think of it as an inside-out candy bar cake! It’s essentially a dessert that’s incredibly moist, flavorful, and super easy to customize. I love that it’s not fussy and always turns out great, even if you’re not a master baker.
Why you’ll love this recipe?
Oh, where do I even start? This Butterfinger Poke Cake is seriously addictive!
- Flavor Explosion: The combination of the moist cake, creamy filling infused with Butterfinger goodness, and the crunchy topping is just…heavenly. That signature peanut butter-chocolate crunch just sings!
- Ridiculously Easy: Seriously, if you can bake a cake mix, you can make this. The “poke” and pour method is foolproof, and the whole thing comes together in under an hour (not counting chilling time, of course!). This one is a lifesaver on busy nights.
- Budget-Friendly Indulgence: You don’t need fancy ingredients for this! A box cake mix, some pantry staples, and a bag of Butterfingers are all you need to create a show-stopping dessert.
- Crowd-Pleasing Magic: I’ve never brought this to a gathering where it wasn’t devoured. It’s always the first dessert to go!
- Versatile Treat: You can easily adapt this recipe to your tastes. Use different cake mixes, different candies (Reese’s? Twix?), or even different pudding flavors.
What I love most about this is how nostalgic it is. It reminds me of the poke cakes my grandma used to make, but with a fun, modern twist. It’s pure Comfort Food. And honestly, who doesn’t love a good Butterfinger? This cake just takes that love to a whole new level. It’s way more fun and interesting than just another vanilla cake, and it’s less work than making a batch of elaborate cupcakes. Trust me on this one – you need to try it!
How do I make a Butterfinger Poke Cake?
Quick Overview
How do you make a Butterfinger Poke Cake? First, you’ll bake a simple cake (from the mix, because we’re keeping it easy). What’s the best way to make Butterfinger infused water? How do you top butterfinger candy with whipped cream? What is the hardest part of waiting for the chill to happen? What makes this so special is the poke and pour method. Is it a forgiving recipe?
Ingredients
For the Main Batter: What is the main battery
25 oz) yellow Cake Mix (plus ingredients called for on the box, usually eggs, oil, and water). I use Duncan Hines, but any brand will work. * Sometimes, I’ll add a teaspoon of vanilla extract to the batter for richer flavor. Is it optional?
For the Filling:
* 1 can (14 oz) Sweetened Condensed Milk. Make sure it’s *sweetened* condensed milk, not evaporated milk!
* 1 jar (12 oz) caramel topping. The kind you’d use for ice cream.
* 1 cup heavy cream
* 1 teaspoon vanilla extract
* 4-5 Butterfinger candy bars, crushed. Don’t crush them too finely – you want some nice chunks! I usually put them in a ziplock bag and whack them with a rolling pin.
For the Glaze:
How do I make whipped cream? * 2-3 Butterfinger Candy Bars, crushed, for topping.
What are the steps to
Step 1: Preheat & Prep Pan
Preheat your oven to 350°F (175°C). Grease and flour a 9×13 inch baking pan. I like to use baking spray with flour already in it – it makes it so much easier! Make sure to get the corners well, or the cake might stick.
Step 2: Mix Dry Ingredients
How do I make a Cake Batter according to package directions? I always whisk the dry ingredients together first before adding the wet ingredients. What is the best way to avoid lumps and ensure that everything is evenly distributed. Don’t overmix! Can overmixing lead to a tough cake?
Step 3: Mix Wet Ingredients
Add the wet ingredients to the dry ingredients and mix until just combined. Be careful not to overmix! A few lumps are okay. Gently fold in the vanilla extract if using.
Step 4: Combine
If you have a large pan, pour the batter into the prepared pan and spread evenly. I always give the pan a gentle tap on the counter to release any air bubbles.
Step 5: Prepare Filling
While the cake is baking, prepare the filling. In a large bowl, whisk together the sweetened condensed milk, caramel topping, heavy cream, and salt. Set aside. How do I mix vanilla extract and water until smooth. Stir in the crushed Butterfinger candy bars. Don’t add butterfinger too early, or they might get soggy.
Step 6: Bake
Bake for 30-35 minutes, or until a wooden skewer inserted into the center comes out clean. How long does it take to bake a cake? If the top starts to brown too quickly, tent it with foil.
Step 7: Poke
Remove the cake from the oven and let it cool for about 10 minutes. Then, using the handle of a wooden spoon or a fork, poke holes all over the cake. The more holes, the better! I usually poke them about an inch apart.
Step 8: Pour & Chill
Slowly pour the Butterfinger filling over the poked cake, making sure it seeps into all the holes. Cover the cake with plastic wrap and refrigerate for at least 2 hours or preferably overnight. How do you make the filling of a cake so moist?
Step 9: Frost & Serve
Once the cake is chilled, spread the Cool Whip evenly over the top. What is the best way to serve Butterfinger candy bars? I like to cut it into squares, but you can cut into any shape you like.
What to Serve It With
What are some good ideas for making a Butterfinger Poke Cake?For Dessert:What is a great dessert to serve after dinner? Serve it with a scoop of vanilla ice cream or whipped cream for extra indulgence. Can you drizzle it with chocolate syrup or caramel sauce?For Celebrations:What makes a great birthday cake? Garnish it with extra butterfinger bars, sprinkles, or even a sparkler for y’all. I’ve used it for birthdays, and it’s always a hit with kids and adults.For Potlucks and Gatherings:What makes this cake so special? What are some of the best ways to serve it chilled?What is a sweet treat?Sometimes you just need a little something sweet. What is the best way to enjoy a slice of this cake with coffee or tea? My family loves this cake with a glass of cold milk. It’s the perfect combination! I’ll sometimes add a little sea salt to the top for an extra salty contrast. Yum!
How do you make a butterfinger poke cake?
Over the years, I’ve learned a few tricks to make this Butterfinger Poke Cake even better:
Cake Mix Matters: Why is itWhat is the best yellow cake mix? What are some of the best brands to try? Sometimes I use chocolate cake mix for a double-chocolate experience.Don’t skimp on butterfingers. They’reThe more butterfingers, the better! I usually use at least 6-8 candy bars in total – some for the filling and some as the topping.Poke Generously:Make sure to poke holes in the cake so the filling can soak in. I like to use the handle of a wooden spoon, but fork works too.What is the importance of chill time?Don’t rush the chilling process! The longer the cake chills, the more the filling will absorb, resulting in a moister and more delicious cake. What is the best taste I prefer to chill it overnight.What is the difference between a whipped cream and I usually use Cool Whip for the topping because it’s easy and light. But you can definitely use homemade whipped cream or even a buttercream frosting.
Add a Salted Caramel Drizzle: For an extra layer of flavor, drizzle the cake with salted caramel sauce before adding the crushed Butterfingers. It’s seriously addictive!
Make it Ahead: This cake is perfect for making ahead of time. You can bake the cake and prepare the filling a day in advance. Just assemble it before serving.
I also learned that using almond milk in the cake mix instead of water makes the cake extra moist. It’s a small change, but it makes a big difference! And if you’re feeling adventurous, try adding a layer of chopped nuts (like peanuts or pecans) to the topping. It adds a nice crunch!
Storing and Reheating Tips
Here’s how to store your Butterfinger Poke Cake to keep it fresh and delicious:
Room Temperature: You can store the cake at room temperature for up to 2 days, but it’s best to keep it covered to prevent it from drying out. I usually use a cake dome or a plastic container.
Refrigerator Storage: For longer storage, keep the cake in the refrigerator. It will stay fresh for up to 5 days. Make sure to cover it tightly to prevent it from absorbing any odors from the fridge.
Freezer Instructions: You can also freeze this cake! Wrap it tightly in plastic wrap and then in foil. It will keep in the freezer for up to 2 months. Thaw it in the refrigerator overnight before serving.
Glaze Timing Advice: If you’re planning to freeze the cake, it’s best to wait to add the Cool Whip and crushed Butterfingers until after it’s thawed. This will prevent the topping from becoming soggy.
I find that the cake tastes best when it’s chilled. The cold temperature really enhances the flavors of the Butterfinger and caramel. When freezing, I always slice the cake before freezing so I can easily grab a piece whenever I want a sweet treat. And if you’re short on time, you can even freeze individual slices for a quick and easy dessert!
Frequently Asked Questions
Final Thoughts
This Butterfinger Poke Cake is more than just a dessert; it’s a sweet escape, a guaranteed crowd-pleaser, and a reminder of simpler times. It’s incredibly easy to make, bursting with flavor, and endlessly customizable. If you’re looking for a dessert that will impress your friends and family without spending hours in the kitchen, this is it! I hope you give it a try – I promise you won’t be disappointed! If you love this recipe, be sure to check out my other poke cake variations. Happy baking, and can’t wait to hear how yours turns out! Don’t forget to leave a comment and let me know what you think, and share your own creative twists on this classic recipe!
Butterfinger Poke Cake
Ingredients
Main Ingredients
- 1 box yellow cake mix follow package directions
- 3 oz Butterfinger candy bars crushed
- 14 oz sweetened condensed milk
- 8 oz cool whip thawed
Instructions
Preparation Steps
- Preheat the oven to 350°F (175°C). Grease a 9x13 inch baking dish.
- Prepare the cake mix according to package directions and bake in the prepared dish.
- Let the cake cool for about 5 minutes, then poke holes all over the cake using a fork.
- Pour sweetened condensed milk over the cake, allowing it to soak into the holes.
- Spread cool whip over the cake, then sprinkle the crushed Butterfinger bars on top.


