


You know those recipes that just feel like sunshine in a bowl? The ones that you can whip up in a flash, taste absolutely divine, and make everyone around you ask for the secret? Well, this Bruschetta Dip is exactly that for me. It’s my go-to for potlucks, lazy weeknight appetizers, and even when unexpected guests pop by. Honestly, I can’t remember the last time I hosted a gathering without this glorious dip making an appearance. It’s that ridiculously easy and wonderfully delicious. It’s like a deconstructed bruschetta, but in a warm, gooey, dippable form that’s frankly, even better than the original in my book. Forget the toast for a second, and imagine all those vibrant, fresh flavors melding together into something truly magical. If you’ve ever loved classic bruschetta, you are going to absolutely adore this bruschetta dip.
What is Bruschetta Dip?
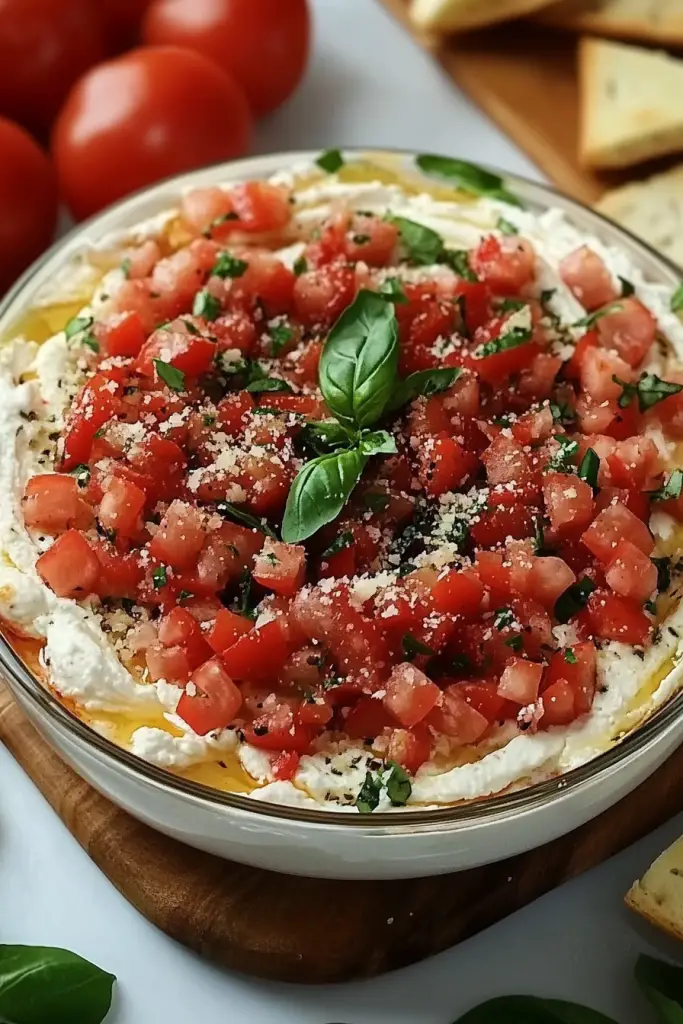
So, what exactly *is* bruschetta dip? Think of it as all the best parts of traditional bruschetta – the ripe tomatoes, the fragrant garlic, the fresh basil, the tangy balsamic – but transformed into a warm, melty, incredibly comforting dip. Instead of serving it on toasted bread slices individually, we’re taking all those wonderful ingredients, layering them with creamy cheese, and baking it until it’s bubbly and golden. It’s essentially a warm tomato and cheese dip with all the classic Italian flavors you’d expect from a perfect bruschetta. The name itself just perfectly describes what it is – a dip inspired by everyone’s favorite Italian appetizer. It’s rustic, it’s hearty, and it’s just plain good food.
Why you’ll love this recipe?
There are so many reasons why this bruschetta dip has become a staple in my recipe collection, and I just know you’re going to feel the same way. Firstly, let’s talk about the flavor explosion. You get that bright, zesty burst from the tomatoes, the pungent warmth of garlic, the subtle sweetness of balsamic, and then the incredible creaminess from the cheese. It’s a symphony of tastes that just works so beautifully together. And the aroma while it’s baking? Oh my goodness, your kitchen will smell like the most amazing Italian trattoria.
Secondly, the simplicity of this recipe is a lifesaver. I can honestly have this ready to go into the oven in under 15 minutes. It’s perfect for those nights when you’re craving something special but don’t have a lot of time, or when you need to pull together a last-minute appetizer. No fancy techniques, no complicated steps – just straightforward goodness.
And let’s not forget about budget-friendliness! The ingredients are super accessible and don’t break the bank, making it a fantastic option for feeding a crowd without spending a fortune. Plus, the versatility is a huge win. While it’s incredible with Crusty Bread or pita chips, I’ve also used it as a sauce for pasta, a topping for grilled chicken, or even spread on a sandwich. It’s just so adaptable! It’s a crowd-pleaser in every sense of the word. My family devours it, and friends always rave. It’s a guaranteed hit, every single time.
How do I make Bruschetta Dip?
Quick Overview
Making this bruschetta dip is incredibly straightforward. We’ll combine fresh chopped tomatoes, garlic, herbs, and a touch of balsamic vinegar with creamy cheeses, then bake it until it’s warm, bubbly, and utterly irresistible. It’s a simple layering and baking process that yields maximum flavor with minimal effort. You’ll be amazed at how quickly this comes together, and the result is pure Comfort Food bliss. Seriously, it’s almost too easy!
Ingredients
For the Main Dip:
2 pounds ripe Roma tomatoes, finely diced (about 4-5 cups) – I always go for Roma because they have less water content, which means a richer flavor.
1/4 cup extra virgin olive oil – Use a good quality one; it really makes a difference!
4 cloves garlic, minced – Don’t be shy with the garlic, it’s crucial for that authentic flavor.
1 teaspoon dried Italian seasoning (or a mix of dried oregano, basil, and thyme)
1/2 teaspoon salt, or to taste
1/4 teaspoon Black Pepper, or to taste
8 ounces cream cheese, softened – This is the secret to its incredible creaminess.
8 ounces shredded mozzarella cheese – For that glorious cheesy pull.
4 ounces grated Parmesan cheese – Adds a salty, nutty depth.
For the Topping:
1/4 cup fresh basil leaves, thinly sliced (chiffonade)
2 tablespoons balsamic glaze – You can buy this pre-made or easily make your own by simmering balsamic vinegar until reduced.
Step-by-Step Instructions
Step 1: Preheat & Prep Pan
First things first, let’s get our oven preheated to 375 degrees Fahrenheit (190 degrees Celsius). While that’s warming up, grab a medium-sized oven-safe baking dish or skillet. A 9-inch round pan or a small cast-iron skillet works perfectly for this recipe. You don’t need to grease it; the olive oil and cheese will prevent any sticking. Just have it ready to go!
Step 2: Mix Dry Ingredients (well, sort of!)
In a large bowl, combine your beautifully diced Roma tomatoes. Add the minced garlic, extra virgin olive oil, Italian seasoning, salt, and black pepper. Give it all a good stir to make sure everything is nicely coated. This step is all about building that foundational flavor. Let it sit for a few minutes while you prep the cheeses; it allows the tomatoes to release some of their juices and mingle with the seasonings.
Step 3: Mix Wet Ingredients (the creamy base!)
In a separate, slightly smaller bowl, take your softened cream cheese. You can give it a quick beat with a fork or a whisk to loosen it up a bit, but it’s not strictly necessary since it will be mixed in with everything else. Add the shredded mozzarella and grated Parmesan cheese to the cream cheese. This is where the magic starts to happen, creating that luscious, cheesy base.
Step 4: Combine
Now, pour the tomato mixture into the bowl with the cheeses. Gently fold everything together until it’s just combined. You don’t want to overmix and break down the tomatoes too much; we still want some texture. The mixture should be chunky and vibrant. Trust me on this; just gentle folding is key!
Step 5: Prepare Filling (Already Done!)
This recipe is so simple, we’ve already essentially prepared the “filling” in the previous steps! The combined tomato and cheese mixture is our glorious filling.
Step 6: Layer & Swirl (It’s Already Mixed!)
Since we mixed the tomatoes directly into the cheese mixture, there’s no separate layering or swirling needed here! Just spoon the entire mixture into your prepared baking dish or skillet, spreading it out evenly.
Step 7: Bake
Pop that dish into your preheated oven. Bake for 25-30 minutes, or until the dip is heated through, the cheese is wonderfully melted and bubbly, and the edges are starting to turn a beautiful golden brown. You’ll see it puff up slightly. The aroma will be absolutely intoxicating by this point!
Step 8: Cool & Glaze
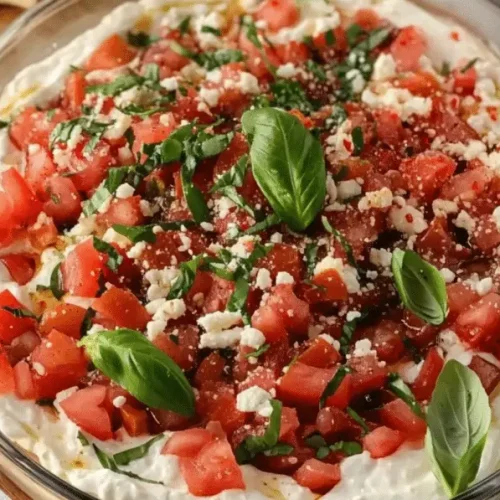
Once it’s out of the oven, let it rest for about 5-10 minutes. This is crucial! It allows the dip to set slightly and prevents anyone from burning their mouths on molten cheese (though I’ve been guilty of that!). Then, sprinkle generously with your fresh, thinly sliced basil and drizzle with the balsamic glaze. The fresh basil adds a pop of brightness, and the balsamic glaze gives it that perfect sweet and tangy finish.
Step 9: Slice & Serve
Serve your bruschetta dip warm, right out of the oven, with your favorite dippers. It’s fantastic with toasted baguette slices, pita chips, crackers, or even fresh veggies like cucumber and bell pepper slices. Get creative!
What to Serve It With
This bruschetta dip is incredibly adaptable, making it perfect for any occasion. For a casual breakfast or brunch, I love serving it alongside some scrambled eggs and crispy bacon. A simple toast or a fluffy English muffin is perfect for scooping. When I’m going for a full-on brunch spread, it’s a star player. I’ll plate it up in a nice dish with a variety of breads, maybe some olives and a light salad. It feels fancy but is still so easy!
As a straight-up dessert appetizer (yes, it works!), I’ll sometimes serve it with a side of lightly sweet crostini or even some savory shortbread. It’s a little unexpected but always a hit. And for those cozy snack moments at home? This dip is pure comfort. I’ll pair it with hearty crackers, maybe some gluten-free pretzels, or even just a fork if I’m being completely honest! My kids also love it with tortilla chips, which is a fun, slightly unexpected twist that they adore. You really can’t go wrong.
Top Tips for Perfecting Your Bruschetta Dip
Over the years, I’ve learned a few tricks that really elevate this bruschetta dip from good to absolutely spectacular. First, when it comes to the tomatoes, using ripe, flavorful ones is key. If your tomatoes aren’t super juicy and flavorful, a tiny pinch of sugar in the tomato mixture can help bring out their sweetness. Dicing them finely ensures they cook down nicely and distribute their flavor throughout the dip without making it too watery.
When you’re mixing the ingredients, be gentle! You don’t want to mash the tomatoes into a pulp. A light folding action is all you need to combine the creamy cheeses with the zesty tomato mixture. This preserves some lovely texture and keeps the dip from becoming a homogenous paste. The goal is a creamy base with little pockets of tomato goodness.
For the balsamic glaze, you can totally buy it, but making your own is surprisingly easy and often tastes better. Just simmer a cup of balsamic vinegar in a small saucepan over medium-low heat until it’s thickened to a syrupy consistency. It should coat the back of a spoon. Let it cool completely before drizzling; it will thicken more as it cools. And don’t skip the fresh basil! It adds a pop of freshness that cuts through the richness of the cheese beautifully. A sprinkle of flaky sea salt on top before serving is also a little luxury that makes a big difference.
If you’re feeling adventurous with ingredient swaps, try adding a pinch of red pepper flakes to the tomato mixture for a little heat, or stir in some chopped sun-dried tomatoes for an extra layer of intense tomato flavor. I’ve even experimented with adding a bit of finely chopped Kalamata olives for a briny kick, and it was delicious! For a dairy-free option, you can explore some of the good quality vegan cream cheeses and shredded mozzarella alternatives out there; I’ve tested a few, and some work wonderfully well, though the texture might be slightly different.
Baking is pretty forgiving, but keep an eye on it. You want it bubbly and golden, not scorched. If your oven tends to run hot, you might want to place your baking dish on a baking sheet to catch any potential drips and to ensure even heating. And remember that resting period after baking? It’s not just for safety; it allows the flavors to meld and the dip to firm up just enough so that your dippers don’t fall apart. It’s a small step, but it’s worth it for the perfect bite.
Storing and Reheating Tips
This bruschetta dip is best enjoyed fresh, but if you happen to have any leftovers (which is rare in my house!), here’s how to keep it delicious. If it’s just cooled a bit and you won’t finish it immediately, you can store it covered at room temperature for up to 2 hours. After that, it’s best to refrigerate it to prevent spoilage.
For refrigerator storage, let the dip cool completely. Transfer any leftovers to an airtight container. It will stay good in the fridge for about 3-4 days. When you’re ready to reheat, the best way is to gently warm it in the oven. Cover the dish with foil and bake at a low temperature, around 300 degrees Fahrenheit (150 degrees Celsius), for about 15-20 minutes, or until heated through. You can also reheat smaller portions in the microwave, stirring occasionally, but the oven method tends to yield a better texture.
I don’t typically freeze this dip because of the dairy content, as it can sometimes affect the texture upon thawing. However, if you absolutely must freeze it, allow it to cool completely, then transfer it to a freezer-safe container. It should last for about 1-2 months. Thaw it overnight in the refrigerator and then reheat as directed above. Be prepared for a slightly creamier, perhaps less firm, consistency.
For the glaze timing advice, it’s always best to add the balsamic glaze and fresh basil right before serving or immediately after reheating. The glaze can become a bit sticky and lose its visual appeal if it sits too long on a warm dip, and the basil will wilt. So, a final flourish is best!
Frequently Asked Questions
Final Thoughts
So there you have it – my absolute favorite bruschetta dip recipe. It’s the kind of dish that brings people together, sparks conversation, and leaves everyone feeling happy and satisfied. It embodies everything I love about home cooking: simple ingredients, incredible flavor, and the joy of sharing delicious food with the people you care about. It’s proof that you don’t need to be a gourmet chef to create something truly spectacular.
I really hope you give this bruschetta dip a try. It’s become such a go-to for me, and I’m confident it will become one for you too. If you love this recipe, you might also enjoy my other appetizer recipes, like my easy Spinach Artichoke Dip or my Caprese Skewers – they’re all perfect for entertaining!
I’d absolutely love to hear what you think if you make it! Leave a comment below and tell me how it turned out, or share your own variations and favorite ways to serve it. Your feedback and stories truly make my day. Happy dipping!
bruschetta dip
Ingredients
Main Ingredients
- 0.5 cup diced tomatoes
- 2 cloves garlic minced
- 0.25 cup fresh basil chopped
- 1 tablespoon balsamic glaze
- 0.5 cup cream cheese softened
- 0.25 cup shredded mozzarella
- 0.125 cup grated Parmesan cheese
- 0.5 teaspoon salt
- 0.25 teaspoon black pepper
Instructions
Preparation Steps
- In a medium bowl, combine the diced tomatoes, minced garlic, chopped fresh basil, and balsamic glaze.
- In a separate bowl, beat the softened cream cheese until smooth. Stir in the shredded mozzarella and grated Parmesan cheese.
- Gently fold the tomato mixture into the cheese mixture. Season with salt and black pepper to taste.
- Transfer the bruschetta dip to an oven-safe dish. Bake at 375°F (190°C) for 5-7 minutes, or until heated through and the cheese is bubbly.
- Serve warm with your favorite crackers, baguette slices, or vegetable sticks.


