


Oh, this brownie refrigerator cake! It’s one of those recipes that just feels like a warm hug. You know those days when you desperately need something sweet, something chocolatey, something that feels a little bit decadent, but the thought of preheating the oven and dealing with a full-blown cake feels like too much work? This is your answer. Seriously, I’ve made this countless times when that late-night craving hits, or when I need a crowd-pleaser that doesn’t stress me out. It’s like a No-Bake Cheesecake met a rich, fudgy brownie and they decided to have a delicious baby. If you’ve ever loved a classic no-bake chocolate pie or a layered icebox cake, then get ready, because this brownie refrigerator cake is going to be your new obsession. It’s ridiculously easy, incredibly satisfying, and always disappears in minutes at my house. I first stumbled upon a version of this years ago, and after a few tweaks and personalizations, it’s become an absolute staple in my recipe repertoire. Trust me, you’re going to want to bookmark this one!
What is a Brownie Refrigerator Cake?
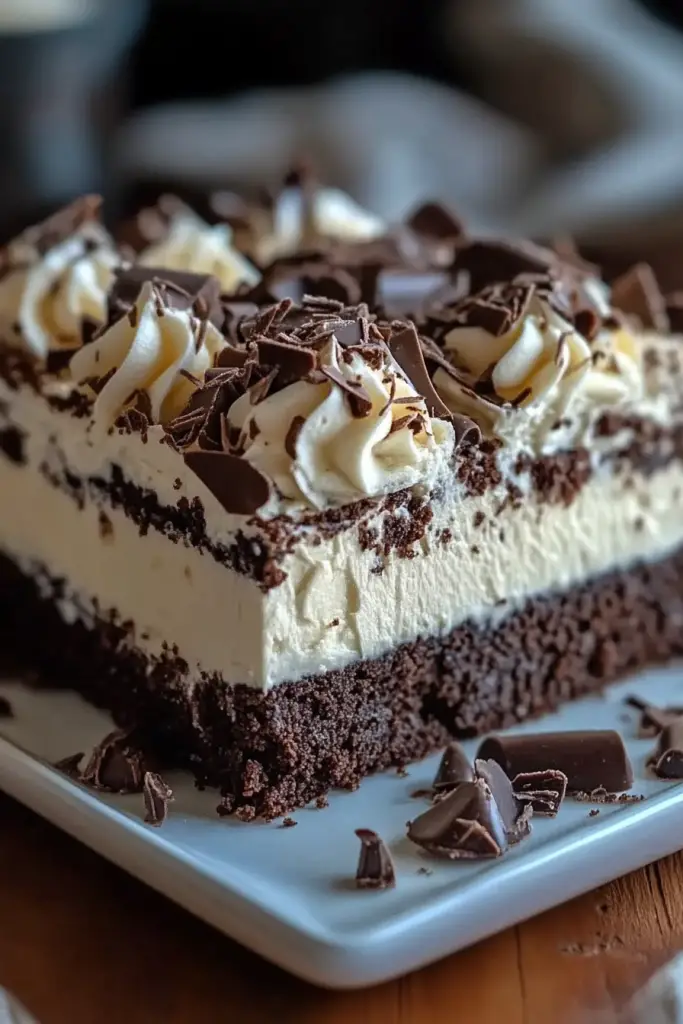
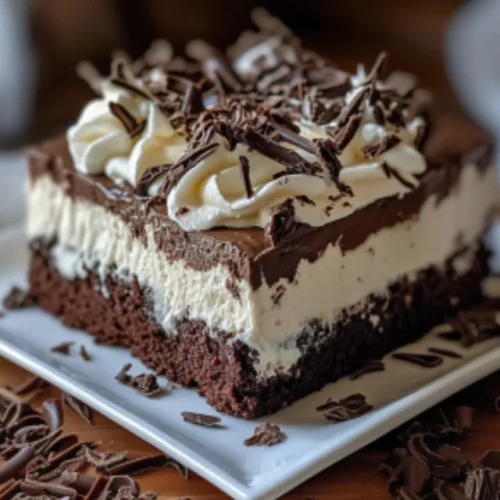
So, what exactly *is* a brownie refrigerator cake? It’s basically a dreamy, no-bake dessert that gives you all the rich, chocolatey goodness of brownies without any of the baking fuss. Think of it as a layered masterpiece where the components come together in your fridge to create something truly magical. We’re talking about a base that’s reminiscent of a dense, fudgy brownie (but made no-bake, of course!), a creamy, dreamy filling that’s usually a sweet, often chocolate-infused Cream Cheese mixture, and sometimes a luscious chocolate ganache or whipped topping to finish it all off. The name comes from the fact that it’s assembled and then chilled in the refrigerator to set, allowing all those flavors to meld beautifully. It’s the ultimate shortcut to dessert heaven, perfect for when you want something impressive without the oven time. It’s less about a traditional cake structure and more about layers of pure, unadulterated chocolate bliss.
Why you’ll love this recipe?
Let me count the ways! First and foremost, the flavor. Oh my goodness, the flavor! You get that deep, intense chocolate from the brownie-like base, which is perfectly complemented by the creamy, slightly tangy filling. It’s rich but not heavy, sweet but balanced. If you’re a chocolate lover, this is your soulmate dessert. Then there’s the sheer simplicity of it all. Seriously, this recipe is a lifesaver on busy nights or when unexpected guests pop over. You don’t need any fancy equipment, just a few bowls and your refrigerator. It’s proof that you can create something incredibly delicious without slaving away in the kitchen for hours. And speaking of delicious, let’s talk about the cost-effectiveness. The ingredients are pretty standard pantry staples, making this a budget-friendly way to enjoy a truly spectacular dessert. No need for expensive specialty items here! Plus, it’s so versatile. I’ve made this with different types of chocolate, added berries, nuts, or even a swirl of caramel. It’s the kind of recipe that lets you play around and make it your own. What I love most about this brownie refrigerator cake is that it delivers that “wow” factor without the stress. It’s elegant enough for a dinner party but casual enough for a Tuesday night treat. It’s also a great alternative if you’re looking for something similar to my No Bake Chocolate Peanut Butter Bars., but with a different, purely chocolatey profile. It’s the perfect blend of comforting familiar
How to Make Brownie Refrigerator Cake
Quick Overview
Making this brownie refrigerator cake is surprisingly straightforward. You’ll start by creating a no-bake brownie-like base by mixing crushed cookies or graham crackers with melted butter and cocoa. This gets pressed into your serving dish. Then, you’ll whip up a wonderfully smooth and creamy chocolate filling, usually involving Cream Cheese, sugar, and melted chocolate or cocoa powder. This luscious filling is spread over the base. The magic happens in the fridge, where it chills and sets beautifully. Finally, a rich chocolate glaze is drizzled over the top, and once that sets, your masterpiece is ready to slice and enjoy. It’s a process of simple assembly and patient chilling, resulting in layers of pure joy.
Ingredients
For the Main Batter (No-Bake Brownie Base):
2 cups chocolate cookie crumbs (Oreos work wonderfully, crumbs and all!)
1/2 cup unsalted butter, melted
1/4 cup unsweetened cocoa powder
1/4 cup granulated sugar
Pinch of salt
For the Filling:
16 ounces Cream Cheese, softened
1 cup powdered sugar
1/2 cup unsweetened cocoa powder
1 teaspoon vanilla extract
1/2 cup heavy cream
For the Glaze:
1 cup semi-sweet chocolate chips
1/4 cup unsalted butter
2 tablespoons milk or heavy cream
Step-by-Step Instructions
Step 1: Preheat & Prep Pan
Even though this is a no-bake cake, we still need a good base! You’ll want to grab an 8×8 or 9×9 inch square baking dish. You can line it with parchment paper, leaving some overhang on the sides. This makes it SO much easier to lift the cake out later. No need to grease it if you’re using parchment.
Step 2: Mix Dry Ingredients
In a medium bowl, combine your chocolate cookie crumbs, unsweetened cocoa powder, granulated sugar, and a pinch of salt. Give it a good whisk to make sure everything is well incorporated and there are no big clumps of cocoa powder. This is where we build that deep chocolate flavor for our brownie base.
Step 3: Mix Wet Ingredients
Pour the melted butter into the dry ingredients. Stir everything together with a fork or spatula until the mixture resembles coarse, damp sand. It should all hold together when you squeeze a bit in your hand. If it feels too dry, add another tablespoon of melted butter.
Step 4: Combine
Transfer this crumbly mixture to your prepared baking dish. Now, use the bottom of a glass or a flat measuring cup to firmly press the mixture evenly into the bottom of the dish. You want a nice, compact layer. This is crucial for a stable base!
Step 5: Prepare Filling
In a large bowl, beat the softened Cream Cheese with an electric mixer until it’s completely smooth and creamy. Add the powdered sugar and 1/2 cup cocoa powder and beat again until well combined. Stir in the vanilla extract. In a separate small bowl, whip the heavy cream until stiff peaks form. Gently fold the whipped cream into the cream cheese mixture until it’s just combined and no streaks remain. Be careful not to overmix!
Step 6: Layer & Swirl
Spoon the cream cheese filling evenly over the brownie base. Use an offset spatula or the back of a spoon to smooth the top. At this point, you can absolutely add a swirl! I sometimes melt a little extra chocolate and drizzle it over the top and then swirl it in with a toothpick for an extra visual flair, but it’s totally optional and delicious either way. If you’re feeling fancy, you could even swirl in some caramel sauce.
Step 7: Bake
This step is actually the ‘refrigerator’ part! Cover the dish tightly with plastic wrap and refrigerate for at least 4-6 hours, or preferably overnight, until the cake is firm and set. The longer it chills, the better the flavors meld and the firmer the texture will be.
Step 8: Cool & Glaze
Once the cake is firm, prepare the glaze. In a microwave-safe bowl, combine the chocolate chips, butter, and milk. Microwave in 30-second intervals, stirring in between, until the chocolate is melted and smooth. Alternatively, you can melt them gently in a double boiler. Pour this luscious glaze over the chilled cake and spread it evenly with an offset spatula. Let the glaze set at room temperature for about 15-20 minutes, or pop it back in the fridge for about 10-15 minutes to speed things up.
Step 9: Slice & Serve
Once the glaze is set, you can lift the cake out of the dish using the parchment paper overhang. Place it on a cutting board. For the cleanest slices, use a sharp knife that you’ve dipped in hot water and wiped dry between each cut. Serve chilled and enjoy the pure chocolate bliss of your homemade brownie refrigerator cake!
What to Serve It With
This brownie refrigerator cake is so versatile, it fits into almost any occasion! For a relaxed breakfast, I love serving a small slice with a strong cup of black coffee. The richness of the cake is surprisingly delightful with a hot, bitter coffee to cut through it. In the morning, I might even sprinkle a few fresh raspberries on top for a pop of color and freshness. For a more elegant brunch, I’ll plate a neat square with a dollop of lightly sweetened whipped cream and maybe a few chocolate shavings. A delicate drizzle of raspberry coulis can also elevate it beautifully. As a dessert, it’s a showstopper. I often serve it after a hearty meal with a scoop of good quality vanilla bean ice cream or a shot of espresso on the side. The contrast of the cold ice cream with the rich, chilled cake is divine. And for those cozy snack times? It’s perfect on its own, perhaps with a tall glass of cold milk. My family loves it after dinner, especially on movie nights. We just cut big, generous pieces and hunker down. It’s always a hit, and it’s so comforting and satisfying without being overly fussy. It truly is the perfect treat for any time of day.
Top Tips for Perfecting Your Brownie Refrigerator Cake
After making this brownie refrigerator cake more times than I can count, I’ve picked up a few little tricks that make all the difference. Firstly, for the base, the key is to get those crumbs nice and damp from the butter. If they’re too dry, the base won’t hold together properly, and you’ll end up with a crumbly mess. Press it down *firmly* – I can’t stress this enough! It’s like building the foundation of a house; it needs to be solid. When it comes to the filling, ensure your cream cheese is truly softened. Cold cream cheese will result in a lumpy filling, and no one wants that. Beat it until it’s super smooth before adding other ingredients. I’ve also learned that folding in the whipped cream gently is important; overmixing can deflate the air, making the filling less light and airy. For the chilling time, be patient! While 4-6 hours is the minimum, overnight is truly your best friend here. The cake will be significantly firmer and easier to slice cleanly, and the flavors will have time to deepen and marry beautifully. If you’re in a rush, you can speed up the glaze setting by placing it in the freezer for about 10-15 minutes, but don’t leave it too long or it might crack. For ingredient swaps, if you can’t find chocolate cookie crumbs, graham crackers with a tablespoon or two of extra cocoa powder work in a pinch. And for the glaze, if you prefer a darker, more intense chocolate flavor, feel free to use dark chocolate chips. For a lighter, sweeter glaze, milk chocolate is a good option, but you might want to reduce the butter slightly. I once accidentally used buttermilk instead of regular milk in the glaze, and it actually added a lovely tang! Experimentation is part of the fun, but always start with the base recipe to get a feel for it.
Storing and Reheating Tips
One of the best things about this brownie refrigerator cake is how well it stores. If you happen to have any leftovers (which is rare in my house!), you can keep it covered at room temperature for up to 2 days. I just use plastic wrap to cover the dish snugly. The refrigeration helps it maintain its structure, and the flavors actually continue to meld, which can be quite nice! For longer storage, refrigerator storage is your best bet. Keep it tightly covered in the dish, and it will stay delicious for up to 4-5 days. The texture will firm up a bit more in the fridge, which I personally enjoy. If you want to freeze it, which I do when I make a double batch, wrap the cake (once it’s fully set and glazed) very tightly in a double layer of plastic wrap, followed by a layer of aluminum foil. It can be frozen for up to 2 months. To thaw, transfer the frozen cake to the refrigerator and let it thaw overnight. You can then bring it to room temperature for about 30 minutes before serving if you prefer a slightly softer texture. The key with freezing and thawing is to do it slowly in the fridge to prevent condensation, which can make the cake soggy. For the glaze, it’s usually best to add it just before serving if you plan to store it for more than a day or two, as it can sometimes get a bit sticky over time. However, if you’re eating it within 2-3 days, glazing it beforehand is perfectly fine and makes serving much easier!
Frequently Asked Questions
Final Thoughts
So there you have it – my beloved brownie refrigerator cake! It’s a testament to how simple ingredients and a little bit of chilling time can create something truly spectacular. It’s the kind of dessert that brings smiles, sparks conversations, and creates those little moments of joy we all crave. Whether you’re a seasoned baker or just starting out, this recipe is designed to be your go-to for effortless elegance and pure chocolate indulgence. If you’re someone who adores rich, fudgy flavors but prefers to skip the oven, this is absolutely the recipe for you. It’s a winner every single time, and I can’t wait for you to experience it. Give it a try, and I promise you won’t be disappointed. I’d absolutely love to hear how yours turns out, so please leave a comment below and share your own twists or successes! Happy no-baking!
Brownie Refrigerator Cake
Ingredients
Brownie Base
- 2 large eggs
- 0.5 cup vegetable oil
- 0.5 cup water
- 1 box chocolate brownie mix (prepare according to package directions)
Chocolate Frosting
- 0.5 cup butter, softened
- 1 cup unsweetened cocoa powder
- 3 cups powdered sugar
- 0.25 cup milk
- 1 teaspoon vanilla extract
Instructions
Preparation Steps
- Prepare the brownie mix according to package directions. Pour into a greased and floured 9x13 inch baking pan.
- Bake according to package directions. Let cool completely in the pan.
- While the brownies are cooling, prepare the chocolate frosting. In a large bowl, cream together the softened butter and cocoa powder until well combined.
- Gradually add the powdered sugar, alternating with the milk, until smooth and creamy. Stir in the vanilla extract.
- Once the brownies are completely cool, spread the chocolate frosting evenly over the top.
- Refrigerate for at least 2 hours before slicing and serving.


