


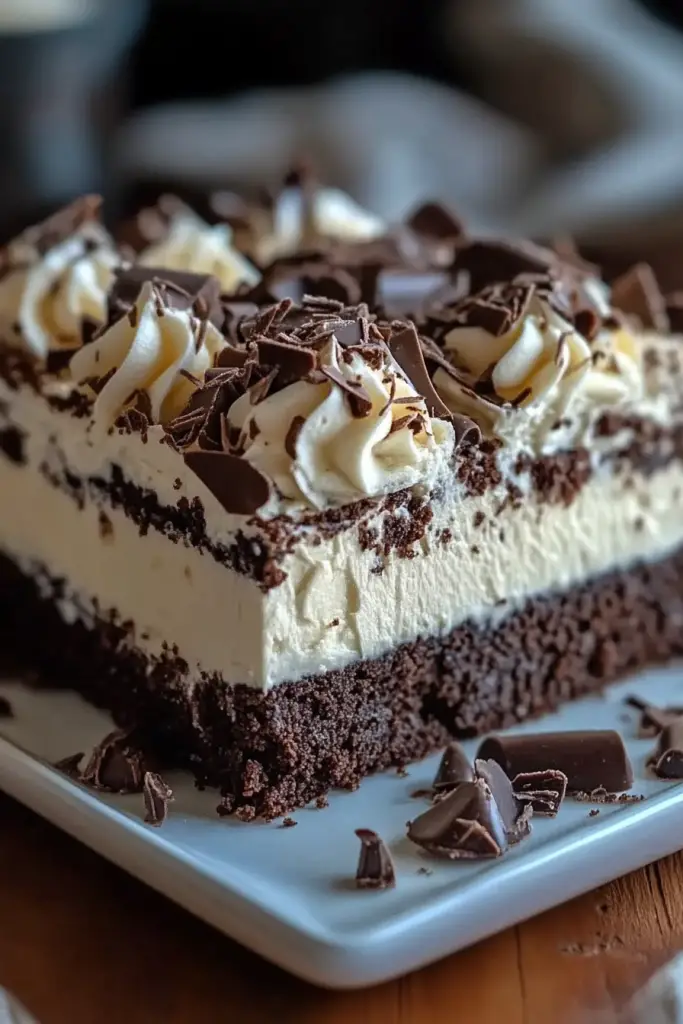
I can still smell the cocoa drifting through our kitchen on rainy Saturday afternoons—the first time I teased a spoonful of batter from a mug and realized you could have dessert in under five minutes. That moment wasn’t just about sugar; it was about cozy, quick sweetness that didn’t demand a whole oven’s worth of playful chaos. My friends call this little treasure a “lifesaver on busy nights,” and truth be told, it’s become my go-to after a long day. The brownie in a mug is the kind of treat that travels through memory like a well-loved recipe card—the crackle of the top, the glossy center, the way the steam fogs your glasses just enough to feel like a hug you can eat. If you’ve never treated yourself to a brownie in a mug, you’re in for a small, perfect surprise—one that tastes indulgent and feels almost celebratory, even when you’re just cooking for one. And yes, it compares nicely to the classic brownie; it’s like a brownie’s punchy little cousin—dense, intensely chocolatey, and just a whisk away from your spoon.
What is Brownie in a Mu
Think of a brownie in a mug as a single-serving chocolate brownie that you nuke or bake right in your mug. It’s essentially a tiny, fudgy cake made for one, sized perfectly for a late-night craving or a quick post-work treat. The name hints at exactly what you’ll get—a warm, chocolatey bowl of joy that fits your hands and your schedule. I love how versatile this concept is: you can go ultra-simple with pantry staples, or you can swirl in cream cheese, Peanut Butter, caramel, or a handful of chocolate chips for extra drama. It’s basically a tiny dessert that lets you customize every bite. I’ve found that the key to the best brownie in a mug is balance—just enough moisture, just enough sweetness, and a crackly top that gives way to a molten center. My kids actually ask for this all the time, and I rarely say no when I can dish up a treat in minutes.
Why you’ll love this recipe?
What I love most about this brownie in a mug is how it fits into real life. It tastes indulgent, but the help-yourself-on-a-busy-night vibe makes it feel like a personal little luxury. Here are the top reasons it’s a staple in my kitchen:
- Flavor: Deep chocolate, a touch of vanilla, and a glossy, fudgy center that’s everything you want in a brownie without any fuss. The aroma alone can stop a running household in its tracks. This brownie in a mug delivers more chocolate punch per bite than many other quick treats.
- Simplicity: Five minutes from cabinet to counter, and you’re tasting dessert before the kettle stops boiling. No mixer, no clean-up drama, just one mug and a spoon. That simplicity makes this a lifesaver on busy weeknights, and it’s perfect when you’re cooking solo.
- Cost-efficiency: What is the Pantry-friendly ingredients mean you’re not investing in specialty flours or fancy toppings. It’s a budget-friendly way to satisfy a sweet craving without breaking the bank.
- Versatility: This brownie in a mug is a blank canvas. Add a swirl of cream cheese, a spoonful of peanut butter, a drizzle of caramel, or a shower of sea salt to shift the mood from midnight snack to fancy dessert. I’ve also tested it with almond milk to keep things dairy-free, and yes—almond milk actually makes it a touch creamier.
- Storage-friendly: It’s perfect for single-serving leftovers—reheat gently and you’ve still got a cozy treat in minutes.
What I’ve learned over the years is that the simple act of stirring dry ingredients with wet, letting the batter rest for a moment, and then giving it a quick swirl with a filling creates a little dessert magic. This is the recipe I reach for when I want something sweet but don’t want to commit to a whole cake—brownie in a mug is basically a hug you sip with your eyes as the steam climbs from the mug’s rim.
How to Make Brownie in a Mug
Quick Overview
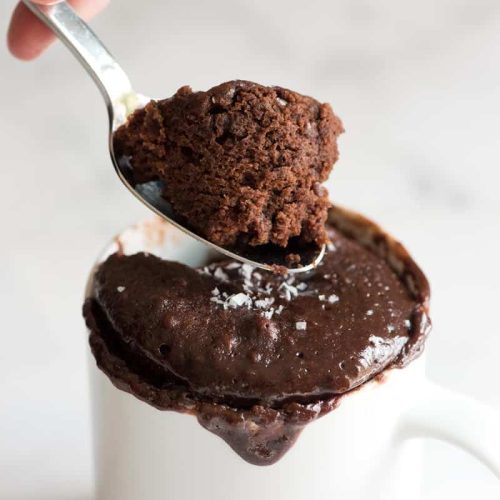
Here’s the quick version: mix dry ingredients right in a mug, whisk wet ingredients in a separate cup, pour into the mug, add a center swirl if you like, microwave in short bursts until the top springs back and the center looks set but moist. The result is a glossy, crackly top and a fudgy middle—the hallmark of a brownie in a mug. If you prefer baking over microwaving, you can bake this as a tiny 1-cake for a real oven experience, but the microwave method is my go-to for speed. Trust me on this—it’s ready in under five minutes and tastes like a bakery treat you’d order on a whim.
Ingredients
For the Main Batter:
- 4 tablespoons all-purpose flour
- 2 tablespoons granulated sugar
- 1 tablespoon brown sugar (optional for extra moisture)
- 2 tablespoons unsweetened cocoa powder
- 1/8 teaspoon baking powder
- Pinch of salt
- 3 tablespoons milk (dairy or non-dairy)
- 2 tablespoons neutral oil (like canola or light olive oil)
- 1/2 teaspoon vanilla extract
- 1–2 tablespoons mini chocolate chips (optional)
For the Filling:
- 1 tablespoon softened cream cheese or peanut butter
- 1 teaspoon sugar (adjust to taste)
- Few drops vanilla (optional)
- A tiny pinch of salt to keep it balanced
For the Glaze:
- 1–2 teaspoons milk
- 1–2 teaspoons melted chocolate or cocoa powder with a splash of vanilla
- Sprinkle of flaky salt or crushed candy for contrast (optional)
Step-by-Step Instructions
Step 1: Preheat & Prep Pan
No big preheat is needed if you’re using a microwave, but if you’re baking a tiny cake, preheat to 350°F (175°C). Lightly grease the mug with a quick spritz of oil or a tiny smear of butter so the brownie doesn’t cling. Have your fillings ready nearby—the fun part is layering in a swirl.
Step 2: Mix Dry Ingredients
In a small bowl or directly in the mug, whisk together the flour, sugar, cocoa powder, baking powder, and salt. I like using a fork for quick mixing; it keeps the texture light and avoids lumps. You’ll want to see the uniform, powdery color of the dry mix before moving on.
Step 3: Mix Wet Ingredients
In a separate cup, whisk the milk, oil, and vanilla until fully combined. A quick whisk to emulsify the oil helps keep the batter from looking greasy and makes it feel smooth when you bite into it. If you’re using dairy-free milk, you might notice a touch more richness with the oil; I’ve found almond milk works surprisingly well for a creamier center.
Step 4: Combine
Pour the wet into the mug with the dry ingredients. Stir until just combined; you don’t want to overmix. A few tiny pockets are fine, and that slight roughness gives you a more fudgy, rustic texture. If you see a few dry specks, don’t worry—these will hydrate in the microwave and disappear as the batter rises.
Step 5: Prepare Filling
Here’s where a little drama enters the scene. In a small spoon, blend the cream cheese (or Peanut Butter) with sugar and vanilla until smooth. A pinch of salt keeps it from tasting flat. If you’re using cream cheese, you can microwave it for 5–8 seconds to soften enough to swirl; if you’re using peanut butter, a quick stir helps loosen it a bit so it swirls nicely.
Step 6: Layer & Swirl
Spoon the main batter into the mug, leaving a little headroom. Dot or swirl in the prepared filling, then use a toothpick or knife to swirl gently through the center. You want a marbled look rather than a full mix—this is where the brownie in a mug becomes uniquely pretty and delicious.
Step 7: Microwave or Bake
Microwave: Cook on high for 60 seconds, then check. If the center looks barely set but not dry, give it 15–20 more seconds. The top should look glossy with a delicate crackle; the middle should be fudgy and moist. Oven bake (optional): Bake in a small, buttered ramekin at 350°F (175°C) for about 12–14 minutes, until the edges pull away slightly from the sides and a toothpick comes out with a few moist crumbs.
Step 8: Cool & Glaze
Let the brownie in a mug rest for a minute or two. If you’re glazing, whisk milk with melted chocolate and drizzle over the top while the surface is still warm so it sets into a glossy finish. A light sprinkle of flaky salt or a few crushed walnuts adds a perfect counterpoint to the sweetness. The glaze turns this into a little celebration—my kitchen smells like a fancy café for a moment, and I’m secretly smiling at how simple it was to make a bakery-worthy treat in minutes.
Step 9: Slice & Serve
Serve warm, with a dollop of whipped cream or a scoop of vanilla Ice Cream if you’re feeling extra indulgent. If you’re sharing, a small mug for each person makes the moment feel intimate and special. The first bite should reveal that classic brownie in a mug texture: a crackly top, a moist center, and a kiss of chocolate in your mouth. I like to finish with a few extra chocolate chips on top while the mug is still warm—the chips melt into glossy little pools that pool around each spoonful.
What to Serve It With
This brownie in a mug is fantastic on its own, but a few simple accompaniments can turn it into something that feels almost ritualistic. Here are serving ideas that have stood the test of time in my kitchen:
For Breakfast: Warm brownie in a mug with a generous dollop of yogurt and a quick drizzle of honey. It’s like a chocolaty upgrade to a cozy yogurt parfait. The contrast between the tangy yogurt and the deep chocolate is unexpectedly delightful, and the aroma makes the morning feel comforting rather than rushed.
For Brunch: Pair it with a strong cup of coffee or a cinnamon-spice latte. A small plate with fresh berries adds a bright note that keeps the sweetness in check while you savor the moment. This brownie in a mug shines when you share it with someone who appreciates a little indulgence between sips of coffee.
As Dessert: Serve with a scoop of Vanilla Bean ice cream and a light dusting of espresso powder for an adult-friendly twist. The contrast between the hot mug brownie and cold ice cream is magic—one bite is all you’ll need to feel pampered.
For Cozy Snacks: A mug brownie with a warm mug of milk or a chai tea is pure comfort. I’ve found that a pinch of flaky sea salt on top heightens the flavors and keeps the sweetness from tipping into cloying territory. It’s like a warm hug you can eat with a spoon, and the mess is minimal—perfection after a long day.
Top Tips for Perfecting Your Brownie in a Mug
Over the years, I’ve learned a few tricks that take this humble dessert from good to downright addictive. Here are my best tips, organized by technique:
Zucchini Prep: Not applicable here, but if you ever experiment with hidden veggie muffins, finely grated zucchini is a moisture booster. For this brownie in a mug, I stay with the classic ingredients, but I’ve tested almond milk and oat milk in place of dairy, and both made the batter feel creamier and more indulgent.
Mixing Advice: Don’t overmix the dry ingredients; a few lumps are okay. Overmixing makes the texture tougher rather than tender. When you combine wet and dry, a few streaks of flour are fine—remember, you want a rustic, fudgy crumb, not a perfectly smooth batter. If you see a dry patch after you stir, give it a gentle stir with a fork for a few seconds and let it rest for a minute—the rest period helps hydrate the flour and improves texture.
Swirl Customization: The swirl is where you can play. Use half the batter, dollop the filling in the center, then top with the rest of the batter. Use a skewer or toothpick to swirl lightly—don’t overly mix, or you’ll lose the pretty marble. I like adding a sprinkle of cocoa nibs on top before microwaving for a little crunch in the bite.
Ingredient Swaps: You can swap in half the flour with almond flour for a nuttier, slightly denser mug brownie. The texture shifts a bit, but it’s still delicious. If you’re reducing sugar, try using a teaspoon of maple syrup or a pinch of stevia, but taste the batter before microwaving—the sweetness balance can change with substitutions.
Baking Tips: An oven bake works for a tiny “cake” vibe, but the microwave is my go-to. If you must bake, use a small ramekin and 12–14 minutes at 350°F, then allow it to rest for a few minutes before glazing. Oven-baked versions tend to have a more defined center and a slightly drier edge, which some folks love—experiment and decide which texture you prefer in your brownie in a mug.
Glaze Variations: If you’re not into glaze, a simple dusting of powdered sugar or a tiny scoop of vanilla ice cream works beautifully. For gluten-free needs, you can glaze with a bit of melted chocolate and coconut oil to keep it shiney and smooth. If you want a peppermint twist, add a drop of peppermint extract to the glaze; it feels festive and fresh in the evening.
In short, my best lessons come from making this over and over, tweaking small things and noting how they shift the texture and flavor. The brownie in a mug is forgiving, and that’s exactly what makes it a personal favorite—you can chase that perfect fudgy center and still come away with something that feels incredibly comforting and familiar.
Storing and Reheating Tips
If you’re saving a bite for later, here’s how I handle the brownie in a mug so it still tastes great the next day. The texture can change a bit once it cools, but with the right storage, you can still enjoy it beyond the moment.
Room Temperature: If you’ve got leftovers (which doesn’t happen often in my house), keep the mug covered with plastic wrap or a small plate on top to trap moisture. This helps prevent the top from drying out. Eat within 1 day for best texture; after that, expect a firmer center but still delicious chocolate goodness.
Refrigerator Storage: Transfer any leftovers to an airtight container and refrigerate for up to 2 days. The glaze may firm up a bit, so you’ll want to reheat in short bursts to restore the gloss and gooey center.
Freezer Instructions: I don’t usually freeze a brownie in a mug, but if you do, wrap the mug (or the batter) tightly in plastic wrap and freeze for up to 2 months. Thaw overnight in the fridge and reheat in the microwave in short bursts, checking texture as you go. Freezing can mute some of the vibrant chocolate flavor, so this is more of a last-ditch plan than my preferred method.
Glaze Timing Advice: If you’re reheating with glaze, add the glaze after reheating to preserve the shine. If you reheat with glaze, the surface may crack slightly, but that crackled finish can still look appealing and taste deliciously fudgy.
Frequently Asked Questions
Final Thoughts
Brownie in a mug has earned a permanent spot on my kitchen counter—not because it’s fancy, but because it’s comforting, immediate, and endlessly customizable. It’s the dessert version of a warm hug you can carry in your hands, especially on those evenings when you crave something chocolatey and quick. The versatility keeps me exploring new fillings and glazes, while the core idea remains delightfully simple: a fudgy, chocolatey single-serve moment that tastes like a celebration. If you try this, I’d love to hear which variation you loved most—did you swirl in cream cheese or go full-chocolate with extra chips? Share your tweaks in the comments, rate the recipe, and tell me what you served it with. Happy baking, friend, and may every mug you reach for be a little doorway to comfort and joy!
brownie in a mug
Ingredients
Main Ingredients
- 0.25 cup all-purpose flour
- 0.25 cup granulated sugar
- 2 tbsp unsweetened cocoa powder
- 0.5 tsp baking powder
- 0.125 tsp salt
- 3 tbsp milk
- 2 tbsp vegetable oil
- 0.5 tsp vanilla extract
- 2 tbsp chocolate chips semi-sweet
Instructions
Preparation Steps
- In a large microwave-safe mug (at least 14 oz), whisk together the flour, sugar, cocoa powder, baking powder, and salt until no lumps remain.
- Add the milk, vegetable oil, and vanilla extract. Stir vigorously until the batter is completely smooth.
- Stir in the chocolate chips until evenly distributed.
- Microwave on high for 1 minute and 30 seconds. Do not overcook; the center should be slightly gooey.
- Let cool for 1 minute before enjoying. Optionally top with whipped cream or ice cream.


