


You know those recipes that just… *feel* like home? The ones that have little scribbles on the recipe card, maybe a faint stain from a forgotten ingredient, and just smell like pure comfort the moment you start mixing? This is one of those recipes for me. It’s my absolute go-to when I need something delicious and don’t want to spend hours in the kitchen. Honestly, it’s become the standard by which all other quick breads are judged in my house. If you’re anything like me, you probably have a surplus of zucchini from your garden (or a very generous neighbor!) and you’re on the hunt for that perfect recipe that yields a truly moist Zucchini bread, not a dry, crumbly disappointment. Well, my friend, you’ve found it. This isn’t just a recipe; it’s a little piece of my kitchen heart, shared with you. It’s the kind of treat that makes a Tuesday afternoon feel like a weekend and is always, *always* a hit.
What is Moist Zucchini Bread?
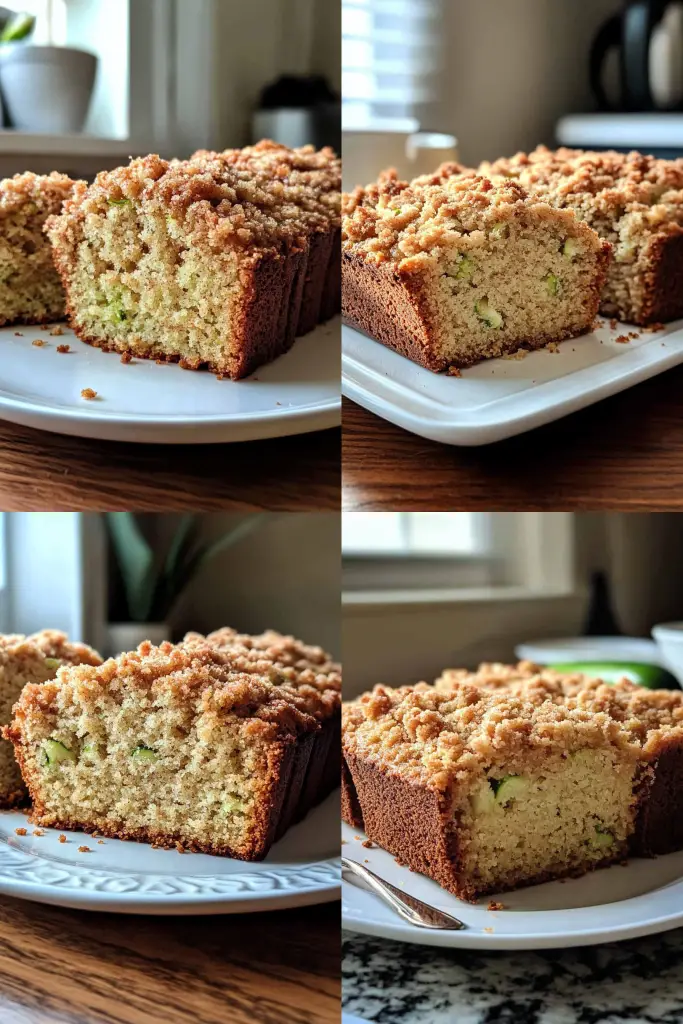
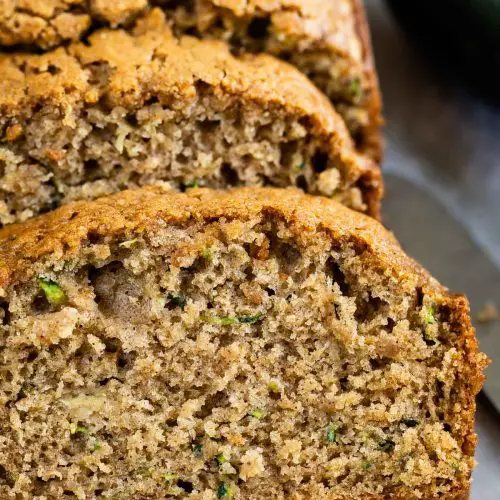
So, what exactly is this magical thing we call “moist zucchini bread”? Think of it as the ultimate comfort bake. It’s a Quick Bread, which means it’s leavened with baking soda or baking powder instead of yeast, making it super fast and easy to whip up. The star ingredient, of course, is zucchini. Don’t worry, it doesn’t taste like vegetables at all! The zucchini is grated finely and, as it bakes, it melts into the batter, lending an incredible moisture and tenderness that’s simply unparalleled. It’s essentially a fluffy, spiced cake that happens to be packed with a secret ingredient that makes it wonderfully dense and satisfying. It’s that perfect balance of sweet, slightly earthy (thanks to the zucchini and spices), and utterly delicious. It’s what you want when you’re craving something a little sweet but also hearty enough to hold its own. It’s the anti-dry-cake hero your baking arsenal needs.
Why you’ll love this recipe?
There are so many reasons this particular moist zucchini bread recipe has earned a permanent spot in my recipe binder, and I’m so excited to share them with you! First off, the flavor profile is just divine. It’s got that warm, comforting blend of cinnamon and nutmeg that makes your kitchen smell incredible while it’s baking. Then there’s the texture – oh, the texture! It’s unbelievably tender and moist, thanks to the clever use of zucchini and just the right balance of wet and dry ingredients. Seriously, it’s like biting into a cloud that’s been kissed by spices. And let’s talk about simplicity. This recipe is a lifesaver on busy weeknights or when unexpected guests pop by. You can have it mixed and in the oven in about 15 minutes. Plus, it’s incredibly cost-efficient, especially if you’re growing your own zucchini. It uses pantry staples that most of us already have on hand. What I love most about this recipe, though, is its versatility. It’s fantastic on its own, but it’s also a wonderful base for adding in chocolate chips, nuts, or even a swirl of Cream Cheese. It’s the perfect thing for a quick breakfast, a satisfying snack, or even a simple dessert after dinner. It’s honestly what I reach for when I need a little pick-me-up, and it never disappoints.
How do I make Zucchini bread?
Quick Overview
This recipe is designed for ease and maximum flavor. You’ll start by prepping your zucchini and then simply whisking together your wet and dry ingredients separately before combining them. A quick swirl of a delicious filling elevates it from good to absolutely spectacular. Bake until a tester comes out clean, and then finish it off with a simple, sweet glaze. It’s a straightforward process, and I promise, even if you’re new to baking, you’ll nail this on your first try!
Ingredients
For the Main Batter:
2 cups all-purpose flour: I always opt for unbleached flour for a better texture.
1 teaspoon baking soda: This is crucial for that lovely rise.
½ teaspoon baking powder: A little extra lift never hurt anyone!
½ teaspoon salt: Balances out the sweetness.
1 teaspoon ground cinnamon: The heart of that cozy flavor.
½ teaspoon ground nutmeg: Adds warmth and a hint of something special.
1 ½ cups granulated sugar: You can reduce this slightly if you prefer, but I find this amount perfect for that classic sweetness.
2 large eggs: At room temperature, they incorporate better.
¾ cup vegetable oil: Or a neutral oil like canola. Some people swear by melted butter, but oil guarantees that moistness.
½ cup milk: Whole milk is best for richness, but I’ve used almond milk and it was surprisingly creamy!
1 teaspoon vanilla extract: The essential flavor enhancer.
2 cups grated zucchini: Make sure to squeeze out as much liquid as you can! More on this below.
For the Filling:
½ cup packed Brown Sugar: The dark brown sugar gives a richer flavor.
¼ cup chopped walnuts or pecans (optional): For a delightful crunch.
1 teaspoon ground cinnamon: Enhances the main batter’s spice.
For the Glaze:
1 cup powdered sugar: Sifted to avoid lumps.
2-3 tablespoons milk: Adjust for desired consistency.
½ teaspoon vanilla extract: For a touch of sweetness.
Step-by-Step Instructions
Step 1: Preheat & Prep Pan
First things first, let’s get our oven ready. Preheat it to 350°F (175°C). While the oven is warming up, grab a 9×5 inch loaf pan. I like to grease it really well with butter or non-stick spray, and then dust it with a little flour, tapping out any excess. This ensures your beautiful loaf slides right out when it’s done. Sometimes, I even line it with parchment paper, leaving a little overhang on the sides to make lifting it out super easy – a trick I learned after a few stubborn loaves!
Step 2: Mix Dry Ingredients
In a large mixing bowl, whisk together the flour, baking soda, baking powder, salt, cinnamon, and nutmeg. Give it a good whisk to make sure all those spices are evenly distributed. You don’t want pockets of cinnamon in one bite and plain flour in another! This step ensures a uniform flavor throughout your bread.
Step 3: Mix Wet Ingredients
In a separate medium bowl, whisk together the granulated sugar, eggs, oil, milk, and vanilla extract until everything is well combined and smooth. It should look like a lovely, pale yellow liquid, ready to embrace the dry ingredients.
Step 4: Combine
Now, pour the wet ingredients into the bowl with the dry ingredients. Using a spatula or wooden spoon, gently fold them together until *just* combined. Be careful not to overmix! Seriously, a few streaks of flour are okay. Overmixing develops the gluten too much and can lead to a tougher bread, and we’re aiming for tender perfection here. Once it’s *almost* combined, add your squeezed-dry grated zucchini and fold it in gently.
Step 5: Prepare Filling
In a small bowl, mix together the Brown Sugar, chopped nuts (if using), and cinnamon for the filling. This little mixture is what gives you those delightful pockets of sweet, spiced goodness throughout the bread. It’s such a simple step that adds so much!
Step 6: Layer & Swirl
Pour about half of the batter into your prepared loaf pan. Sprinkle about half of the filling mixture evenly over the batter. Then, pour the remaining batter over the filling. Sprinkle the rest of the filling on top. Now, take a knife or a skewer and gently swirl it through the batter a few times to create those pretty patterns. Don’t over-swirl; you want distinct layers of filling!
Step 7: Bake
Place the loaf pan in the preheated oven. Bake for 50-65 minutes. The exact time will vary depending on your oven. You’ll know it’s ready when a wooden skewer or toothpick inserted into the center comes out clean. If the top starts to brown too quickly, you can loosely tent it with aluminum foil for the last 15-20 minutes of baking.
Step 8: Cool & Glaze
Once baked, let the zucchini bread cool in the pan for about 10-15 minutes. This allows it to set up a bit. Then, carefully invert it onto a wire rack to cool completely. Don’t try to glaze it while it’s hot; the glaze will just melt off! Once it’s fully cooled, whisk together the powdered sugar, milk, and vanilla extract until you have a smooth, pourable glaze. Drizzle it over the top of the cooled bread. Let the glaze set for about 15 minutes before slicing.
Step 9: Slice & Serve
Using a sharp knife, slice your beautiful, moist zucchini bread. I find it slices best when it’s completely cooled, especially with the glaze. Enjoy a slice with your morning coffee or as an afternoon treat. It’s perfect just as it is!
What to Serve It With
This moist zucchini bread is a chameleon in the best way possible, fitting in perfectly wherever you need a delicious bite. For a cozy breakfast, it’s absolutely divine served warm with a smear of good butter and a steaming mug of coffee. The simple flavors are the perfect way to start the day without being too heavy. At a leisurely brunch, I love to serve it alongside a fresh fruit salad and perhaps some scrambled eggs or yogurt parfaits. It adds a touch of sweetness and warmth to the spread. As a dessert, it’s wonderful with a scoop of vanilla bean ice cream or a dollop of lightly sweetened whipped cream. The spices in the bread pair beautifully with creamy, cool toppings. And for those “just because” moments, when you’re craving something sweet but don’t want to bake a whole cake, this zucchini bread is your answer. It’s perfect for a mid-afternoon snack with a glass of cold milk, or even a late-night treat when you need something comforting. My family loves it for “coffee break” – a midday pause with a sweet treat. I’ve even been known to crumble a slightly stale piece over some yogurt in the morning for added texture and flavor!
Top Tips for Perfecting Your Moist Zucchini Bread
Over the years, I’ve picked up a few tricks that I think really elevate this already fantastic recipe. So, lean in, because these are the secrets to truly amazing zucchini bread.
Zucchini Prep: This is arguably the most crucial step for getting that perfect moistness without a soggy bottom. Grate your zucchini (I prefer the medium-sized holes on a box grater). Then, and this is key, put the grated zucchini in a clean kitchen towel or cheesecloth and squeeze out as much liquid as you possibly can. Seriously, get in there and wring it out! This prevents excess water from making your bread dense or gummy. A food processor can shred it too quickly, releasing more water, so hand-grating is usually better.
Mixing Advice: Remember what I said about not overmixing? It bears repeating. Once the wet and dry ingredients meet, mix only until they’re *just* combined. A few streaks of flour are perfectly fine. Overmixing develops gluten, leading to a tough texture, and we want this bread to be wonderfully tender. Think of it as gentle coaxing, not aggressive beating.
Swirl Customization: Don’t be afraid to get a little artistic with your swirl! You can use a knife or a skewer to create patterns. For more pronounced swirls, you can even dollop spoonfuls of the filling mixture in different spots and then swirl. If you want a more marbled effect, just do a few gentle passes. For a more striped look, go a bit deeper. It’s all about visual appeal and those delicious pockets of flavor!
Ingredient Swaps: If you don’t have regular milk, buttermilk or even sour cream (about 1/4 cup mixed with 1/4 cup milk) can add even more richness and moisture. For a nut-free version, simply omit the nuts from the filling – the bread will still be delicious. You can also add about ½ cup of chocolate chips or chopped dried cranberries to the main batter for extra bursts of flavor. If you’re watching sugar, you *can* reduce it by about ¼ cup, but the texture might change slightly.
Baking Tips: Every oven is different, so get to know yours! Start checking for doneness around the 50-minute mark. A wooden skewer or toothpick is your best friend here. If the top is browning too fast, cover it loosely with foil. This prevents the outside from getting too dark before the inside is fully cooked. Placing the loaf pan on the middle rack usually ensures even baking.
Glaze Variations: The glaze is simple, but you can play with it! For a thinner glaze, add more milk, a teaspoon at a time. For a thicker, more frosting-like glaze, use less milk. You can also add a tiny bit of lemon zest or a drop of almond extract to the glaze for a different flavor profile. If you’re not a fan of glaze, a simple dusting of powdered sugar once cooled is also lovely.
Storing and Reheating Tips
Storing this moist zucchini bread is pretty straightforward, and it stays delicious for days! For best quality, I always recommend letting it cool completely before storing. At room temperature, it will keep beautifully in an airtight container for about 2-3 days. Just make sure it’s fully cooled so condensation doesn’t form inside the container, which can make the crust soft. If you live in a warmer climate or want it to last longer, the refrigerator is your friend. Wrap it tightly in plastic wrap, then place it in an airtight container or a zip-top bag. It should stay fresh in the fridge for up to a week, though it’s usually gone by then! For longer storage, especially if you’ve made a couple of loaves, freezing is a fantastic option. Wrap the cooled loaf tightly in plastic wrap, then in a layer of aluminum foil, and finally place it in a freezer-safe bag. It will keep its best quality for up to 3 months. To thaw, simply remove it from the freezer and let it come to room temperature, still wrapped. If you want to reheat it, a few minutes in a low oven (around 300°F or 150°C) can revive its warmth and freshness, especially if it’s not glazed. If it *is* glazed, I usually just let it come to room temperature, as reheating can sometimes make the glaze sticky or melty.
Frequently Asked Questions
Final Thoughts
So there you have it – my absolute favorite moist zucchini bread recipe. It’s a recipe that’s stood the test of time in my kitchen, always delivering that perfect balance of flavor, moisture, and ease. It’s the kind of bake that makes your home feel instantly cozier and always brings a smile to my family’s faces. If you love this recipe, you might also enjoy my {link to another quick bread recipe, e.g., Banana Bread} or my {link to another zucchini recipe, e.g., Zucchini Fritters}. They’re all winners in my book! I truly hope you give this moist zucchini bread a try. I can’t wait to hear how yours turns out and what delicious additions you might discover. Let me know in the comments below if you tried it and what you thought, or share your own favorite zucchini bread secrets! Happy baking, friends!
Moist Zucchini Bread
Ingredients
Dry Ingredients
- 1.5 cups all-purpose flour
- 0.5 teaspoon baking powder
- 0.5 teaspoon baking soda
- 0.5 teaspoon salt
- 2 teaspoons cinnamon
Wet Ingredients
- 0.5 cup vegetable oil
- 0.75 cup packed brown sugar
- 0.25 cup granulated sugar
- 2 large eggs
- 1 teaspoon vanilla extract
Other
- 1.5 cups shredded zucchini approximately 152g
Instructions
Preparation Steps
- Preheat oven to 350°F (175°C). Grease and flour an 8x4-inch or 9x5-inch loaf pan.
- In a small bowl, whisk together the flour, baking powder, baking soda, salt, and cinnamon. Set aside.
- In a large bowl, add the vegetable oil, brown sugar, and granulated sugar. Stir until smooth.
- Mix in the eggs, vanilla extract, and cinnamon until well combined.
- Stir in the dry ingredients until just combined. The mixture will be thick. Add the shredded zucchini and stir until incorporated. The batter will become looser and more pourable.
- Pour the batter into the prepared loaf pan.
- Bake for 50-60 minutes for a 9x5-inch pan, or 55-65 minutes for an 8x4-inch pan, or until a toothpick inserted into the center comes out clean.
- Let the bread cool in the pan for 10 minutes before removing it to a wire rack to cool completely. Slice and serve.


