


You know those dishes that just feel like a warm hug in a bowl? The ones that instantly transport you back to cozy evenings, the smell filling the entire house, and everyone gathering around the table with eager anticipation? For my family, that dish is unequivocally chili. And not just any chili, but *the* best Chili Recipe I’ve ever come across – one that’s been tweaked, tested, and perfected over years. It’s the kind of chili that makes me feel like a culinary superhero, even on the busiest weeknights. Forget those bland, watery versions you might have encountered; this is rich, hearty, bursting with flavor, and surprisingly simple to pull together. It’s the ultimate comfort food, a lifesaver on chilly days, and honestly, it’s the only chili recipe you’ll ever need.
What are some of the best chili recipes?
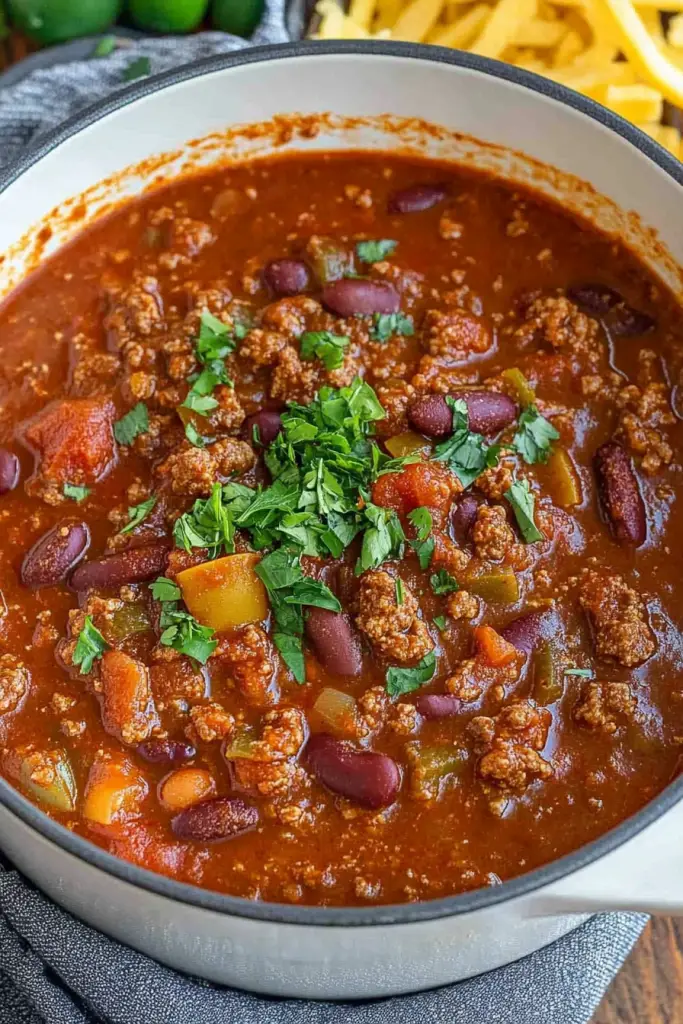
So, what makes this chili stand out from the crowd? Think of it as the ultimate crowd-pleaser. It’s a robust, deeply flavorful meat and bean chili, simmered to perfection with a secret blend of spices that gives it that irresistible depth. It’s not overly spicy, but it has a wonderful warmth that builds with every bite. It’s the kind of chili that has just the right amount of chunky texture from tender chunks of beef, hearty beans, and sweet tomatoes, all swimming in a savory, aromatic broth. It’s essentially a hug in a pot, designed to be fuss-free and utterly delicious. It’s the kind of dish that gets better the next day, which is always a win in my book!
Why you’ll love this recipe?
There are so many reasons why this chili has earned a permanent spot in my recipe rotation, and I have a feeling you’ll fall in love with it too! First and foremost, the flavor is just out of this world. It’s a complex symphony of savory, slightly sweet, and perfectly seasoned notes that just sing. The secret is in layering the flavors – browning the meat properly, sautéing the aromatics until they’re fragrant, and using a good quality tomato base. What I love most about this recipe is how forgiving it is. It’s incredibly simple to make, even if you’re not a seasoned chef. You can honestly ‘set it and forget it’ for a good chunk of the simmering time, which is a lifesaver when you’ve got a million other things going on. Plus, it’s incredibly budget-friendly! The ingredients are all pantry staples or easily found at any grocery store, making it a fantastic option for feeding a crowd without breaking the bank. And the versatility? Oh, the versatility! This chili is a blank canvas. You can serve it over rice, with cornbread, as a topping for baked potatoes, or even load it up with your favorite garnishes. It’s truly a meal that can be customized to everyone’s taste buds. It’s honestly the best Chili Recipe because it just works, every single time.
How do I make the best chili recipe?
Quick Overview
This chili is all about building layers of flavor. We’ll start by browning some GROUND BEEF with onions and garlic, then add in crushed tomatoes, beans, and a special blend of spices. It simmers away until everything melds together into a rich, savory masterpiece. It’s a straightforward process that guarantees a deeply satisfying meal, perfect for any night of the week.
Ingredients
For the Chili Base:
2 pounds ground beef (80/20 is my favorite for flavor)
1 large yellow onion, finely chopped
3 cloves garlic, minced
1 (28 ounce) can crushed tomatoes
1 (15 ounce) can diced tomatoes, undrained
1 (15 ounce) can kidney beans, rinsed and drained
1 (15 ounce) can pinto beans, rinsed and drained
1 cup beef broth (low sodium is best so you can control the salt)
2 tablespoons chili powder (use a good quality one!)
1 tablespoon cumin
1 teaspoon smoked paprika
1/2 teaspoon dried oregano
1/4 teaspoon cayenne pepper (optional, for a little kick)
Salt and freshly ground Black Pepper to taste
For Serving (Optional but Recommended!):
Shredded cheddar cheese
Sour Cream or Greek yogurt
Chopped fresh cilantro
Diced red onion
Crushed tortilla chips
Cornbread
Step-by-Step Instructions
Step 1: Brown the Beef and Aromatics
Grab a large, heavy-bottomed pot or Dutch oven. Heat it over medium-high heat. Add the ground beef and break it up with a spoon. Cook until it’s nicely browned, about 7-10 minutes. Drain off most of the excess grease, but leave a little in the pot for flavor. Add the chopped onion and cook until it starts to soften and turn translucent, about 5 minutes. Then, stir in the minced garlic and cook for another minute until fragrant – be careful not to burn it!
Step 2: Build the Flavor Base
Now it’s time for the magic to happen. Sprinkle in the chili powder, cumin, smoked paprika, oregano, and cayenne pepper (if you’re using it). Stir everything around and let it toast in the hot pot for about 30 seconds. This really wakes up the spices and releases their incredible aroma. It’s a small step, but it makes a huge difference in the final flavor!
Step 3: Add the Liquids and Beans
Pour in the crushed tomatoes, diced tomatoes (with their juice), and the beef broth. Stir everything together, scraping up any browned bits from the bottom of the pot – that’s pure flavor! Now, add in your rinsed and drained kidney beans and pinto beans. Give it a good stir to combine everything.
Step 4: Simmer to Perfection
Bring the chili to a simmer, then reduce the heat to low, cover the pot, and let it gently bubble away for at least 30 minutes, but an hour is even better. The longer it simmers, the more the flavors will meld and deepen. Stir it occasionally to make sure nothing is sticking to the bottom. This is where all the magic happens!
Step 5: Season and Taste
After it’s had a good simmer, it’s time to season! Taste the chili and add salt and freshly ground black pepper as needed. This is where you can really adjust it to your personal preference. If you want it spicier, add a pinch more cayenne. If you want it richer, a tiny splash more beef broth can help. Get it tasting just right for you.
Step 6: Serve it Up!
Ladle the hot chili into bowls. Now comes the fun part – the toppings! Pile on your favorites: a generous sprinkle of shredded cheddar cheese, a dollop of cooling sour cream, some fresh cilantro, a bit of diced red onion for crunch, or even some crushed tortilla chips for extra texture. And of course, a side of warm cornbread is practically mandatory!
Tips for Success
Don’t rush the browning of the beef; that’s where a lot of the savory flavor comes from. Toasting the spices before adding liquids is a game-changer. And remember, chili is always better the next day when all those flavors have had time to marry!
What to Serve It With
This chili is a star on its own, but the right accompaniments can take it from delicious to divine! For a truly classic pairing, you absolutely cannot go wrong with warm, homemade cornbread. The slight sweetness and tender crumb of cornbread are the perfect contrast to the rich, savory chili. I like to make a batch of my favorite cheddar jalapeño cornbread – the little bit of spice is just perfect. If you’re looking for something lighter, a simple side salad with a vinaigrette dressing can be refreshing. For a heartier meal, serving it over fluffy white rice or even a baked potato turns it into a complete feast. My kids absolutely love chili cheese fries, so we’ll sometimes just top some oven-baked fries with this chili and loads of cheese. And don’t forget the toppings! A little bowl of shredded cheddar, a dollop of sour cream, some chopped fresh cilantro, and a sprinkle of diced red onion make all the difference. Each person can customize their bowl exactly how they like it!
Top Tips for Perfecting Your Best Chili Recipe
Over the years, I’ve learned a few tricks that elevate this chili from good to truly spectacular. First, don’t skimp on browning the meat! That crispy, browned bit is where all the deep, savory flavor lives. Take your time with it. When you’re adding your spices, toasting them for just 30 seconds in the hot pot before adding liquids is a crucial step that awakens their aromatic oils. Trust me on this one; it makes a world of difference. I always recommend using a good quality chili powder; it’s the backbone of the flavor. If you can find a dark, rich chili powder, go for it! For the beans, I usually use kidney and pinto, but feel free to experiment with black beans or even cannellini beans. Just make sure to rinse and drain them well. The simmering time is key – the longer, the better. If you have the time, let it simmer for at least an hour, or even two, stirring occasionally. It allows all those delicious flavors to meld and deepen beautifully. If you find your chili is a little too thick, a splash of beef broth or even water can thin it out. If it’s too thin, you can simmer it uncovered for a bit longer to let some of the liquid evaporate. And for the spice lovers out there, don’t be afraid to add a pinch more cayenne or even a dash of your favorite hot sauce. Adjust it to your heat preference! I’ve also found that adding a tiny bit of unsweetened cocoa powder (just about a teaspoon) during the simmering stage adds an incredible depth and richness without making it taste like chocolate. It’s my little secret!
Storing and Reheating Tips
One of the best things about this chili is that it’s even better the next day! Once it’s cooled down a bit, I like to store it in an airtight container in the refrigerator. It will stay delicious for about 3-4 days. Reheating is super simple; just scoop out what you need into a saucepan, add a tiny splash of water or beef broth if it seems a little thick, and heat it gently over medium-low heat, stirring occasionally, until it’s warmed through. You can also reheat individual portions in the microwave. If you’re planning to freeze it, make sure it’s completely cooled. Portion it into freezer-safe containers or heavy-duty freezer bags. It should last for up to 3 months in the freezer. When you’re ready to thaw, transfer it to the refrigerator overnight and then reheat as usual. I find that the glaze doesn’t hold up as well in the freezer, so I usually recommend adding fresh toppings like cheese and sour cream after reheating. This way, your chili is always fresh and delicious, no matter when you decide to enjoy it!
Frequently Asked Questions
Final Thoughts
There you have it – my absolute favorite, the best chili recipe that I’ve been making for years! It’s a dish that truly embodies comfort and flavor, and I can’t wait for you to try it and make it your own. The warmth, the heartiness, the incredible depth of flavor – it’s everything I look for in a perfect meal. Whether you’re feeding a hungry family on a chilly evening, hosting a game day get-together, or just craving something deeply satisfying, this chili is guaranteed to hit the spot. If you love this recipe, you might also enjoy my Slow Cooker Pulled Pork or my Classic Beef Stew for more comforting meal ideas. I hope this chili brings as much joy and warmth to your table as it does to mine. Don’t forget to let me know in the comments how yours turns out, and I’d love to hear about any fun variations you come up with! Happy cooking!

Best Chili Recipe
Ingredients
Main Ingredients
- 1 pound ground beef
- 1 large onion, chopped
- 2 cloves garlic, minced
- 1 can diced tomatoes, undrained 28 ounce
- 1 can kidney beans, drained and rinsed 15 ounce
- 1 can black beans, drained and rinsed 15 ounce
- 0.5 cup beef broth
- 2 tablespoons chili powder
- 1 teaspoon cumin
- 0.5 teaspoon salt
- 0.25 teaspoon black pepper
Instructions
Preparation Steps
- In a large pot or Dutch oven, brown the ground beef over medium-high heat. Drain off any excess grease.
- Add the chopped onion and minced garlic to the pot and cook until softened, about 5 minutes.
- Stir in the diced tomatoes (undrained), kidney beans, black beans, beef broth, chili powder, cumin, salt, and pepper.
- Bring the mixture to a boil, then reduce heat and simmer, covered, for at least 1 hour, stirring occasionally.
- Taste and adjust seasonings if needed. Serve hot.


