


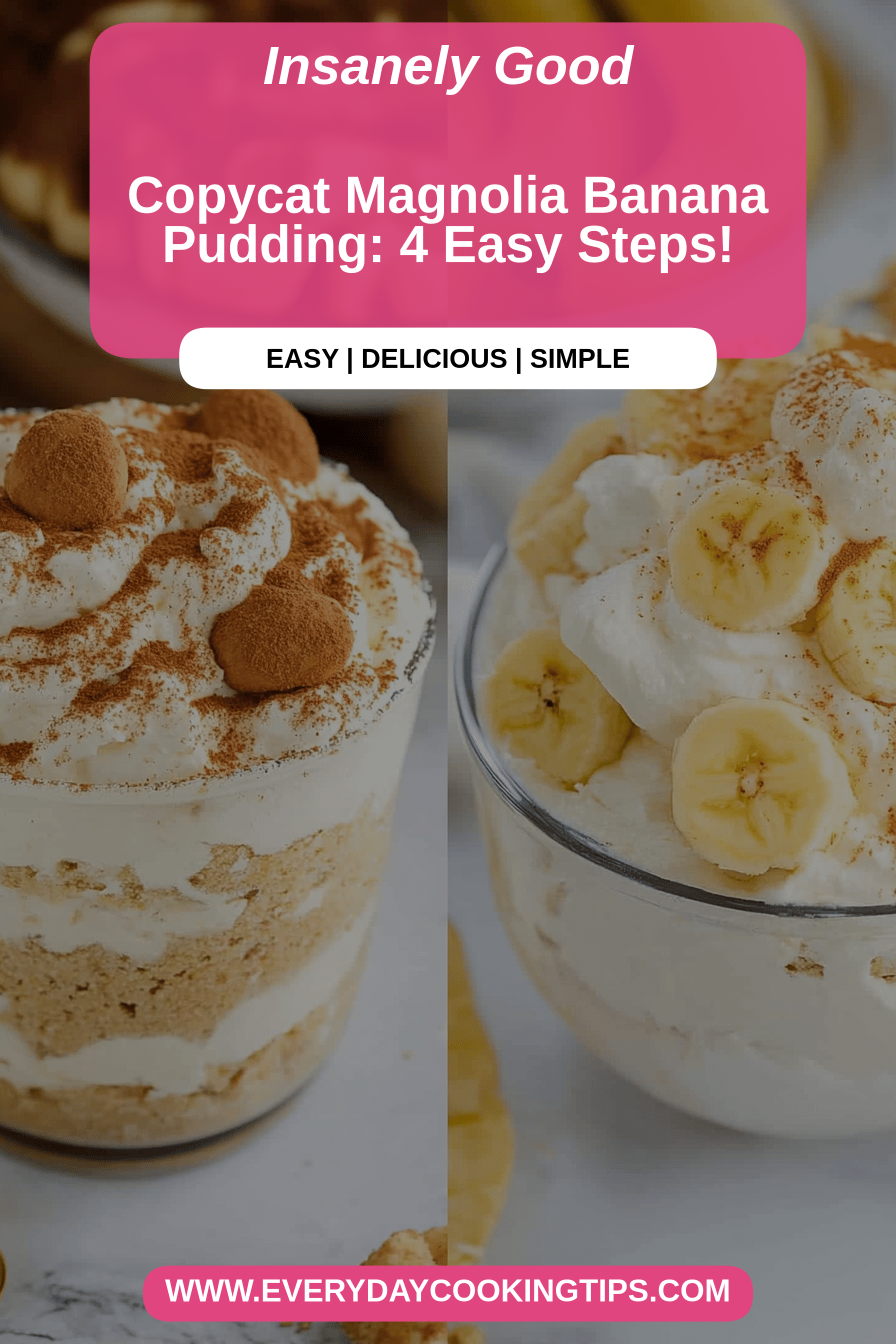
Oh, you guys. I have a secret. Well, it’s not really a secret anymore, because I’ve made it for pretty much everyone I know, and it always disappears in minutes. I’m talking about Banana Pudding. Not just any banana pudding, mind you. This is the one. The kind that makes you close your eyes with the first bite. It’s like a warm hug on a chilly evening, or a sunshine-filled memory on a gloomy day. It’s honestly one of my absolute favorite comfort foods, right up there with my grandma’s pot roast. If you’ve ever had those store-bought puddings that are just… fine, this is going to blow them out of the water. It’s creamy, it’s got those delightful little surprises from the bananas and cookies, and that slightly caramelized top? Pure magic. I’ve spent years tweaking this recipe, and I’m so excited to finally share my go-to, fool-proof banana pudding with you all.
What is banana pudding?
So, what exactly *is* this glorious concoction we’re diving into? At its heart, Banana Pudding is a layered dessert, typically made with sliced ripe bananas, vanilla-flavored pudding, and some sort of cookie or wafer. Think of it as the ultimate creamy, dreamy treat that’s both incredibly satisfying and surprisingly easy to whip up. It’s not a fussy cake or a complicated pie; it’s more like a delightful, spoonable hug. Some versions are baked, creating a delightful custardy topping, while others are chilled and layered. Mine leans towards the baked side, because that slightly golden, almost brûléed top? It’s just unbeatable. The “banana” in banana pudding is obviously key, and the “pudding” refers to that lusciously smooth, creamy base that holds everything together. It’s simple, it’s elegant in its own way, and it always brings a smile to people’s faces.
Why you’ll love this recipe?
What are some good banana pudding recipes?flavor is just out of this world. It’s a delicate balance of sweet, creamy vanilla, the soft, natural sweetness of ripe bananas, and the subtle crunch from the cookies. It’s not overly sweet, which is something I always strive for. Then there’s the simplicity. I know it looks impressive, but I promise you, it’s remarkably easy to make. Even if you’re not a seasoned baker, you can absolutely nail this. Most of the magic happens in the oven while you relax. And let’s talk about Cost-efficiency: What is the best way to measure cost-efficiency?! The ingredients are pretty standard pantry staples, and you can often whip this up without a special trip to the grocery store. It’s a budget-friendly way to make a dessert that feels incredibly decadent. Plus, it’s so versatile! Serve it warm, serve it chilled, drizzle it with caramel… the possibilities are endless. What I love most about this particular recipe is that it has that nostalgic, homemade quality that’s hard to replicate. It reminds me of simpler times, and it’s always a guaranteed crowd-pleaser, whether it’s for a family weeknight dessert or a special occasion. If you’re a fan of other comforting classics like a good bread pudding or even a No-Bake Cheesecake, you’re going to adore this banana pudding.
How to Make Banana Pudding
Quick Overview
This banana pudding is all about building layers of flavor and texture. We’ll start by creating a luscious vanilla custard, then gently fold in ripe bananas and a favorite cookie. It gets baked until golden and set, then cooled to perfection. The beauty of this method is that it’s straightforward, with minimal active time. It’s the kind of dessert that feels special but doesn’t require you to spend all day in the kitchen. You’ll be amazed at how easily this comes together, making it a lifesaver on busy nights when you want something truly delicious without the fuss.
Ingredients
For the Pudding Base:
* 1 cup granulated sugar: This is our main sweetener, providing that classic pudding sweetness. Make sure it’s granulated for even dissolving. I’ve tried it with superfine sugar, and it dissolves even faster, which is a nice little trick if you’re in a rush!
* 1/2 cup cornstarch: This is our thickening powerhouse. Don’t skimp on this; it’s what gives our pudding that gorgeous, velvety texture. I always use non-GMO cornstarch if I can find it.
* 1/4 teaspoon salt: Just a pinch to enhance all the other flavors and balance the sweetness. It really makes a difference!
* 4 cups whole milk: For the creamiest result, whole milk is my go-to. You can use 2%, but it might be slightly less rich. I’ve even tested it with almond milk once when I was out of dairy, and surprisingly, it worked! It just made it a little less dense, which some people might actually prefer.
* 6 large egg yolks: These add incredible richness and that beautiful, custardy body. Make sure your eggs are at room temperature; they’ll incorporate much better. Save those whites for meringues or an omelet!
* 2 tablespoons unsalted butter: Cut into pieces. This adds a lovely sheen and mouthfeel to the pudding. Use good quality butter; you can really taste it here.
* 2 teaspoons pure vanilla extract: Non-negotiable! Use the good stuff. The quality of your vanilla will really shine through.
For the Filling & Topping:
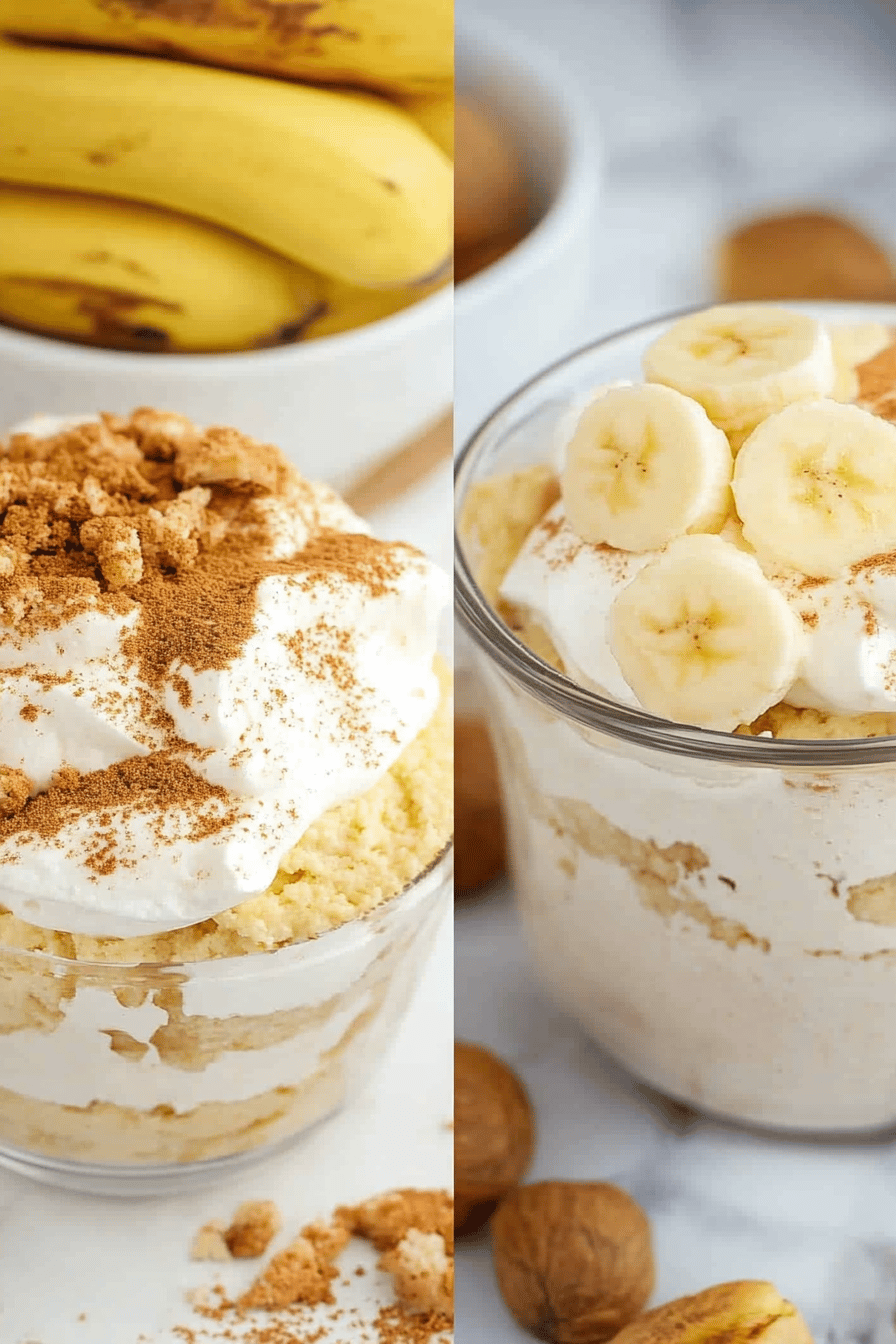
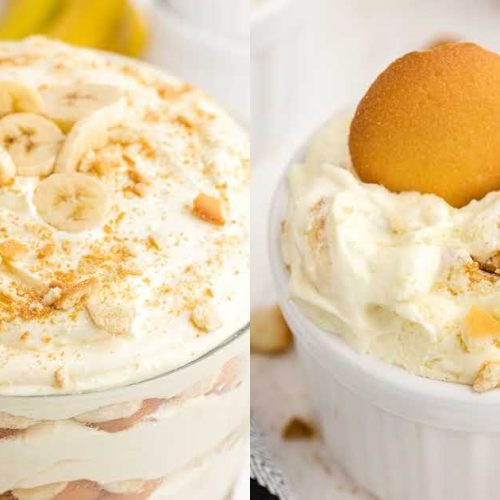
* 4-5 ripe bananas, sliced: The riper, the sweeter and more flavorful! Look for bananas with at least a few brown spots. I slice mine about 1/4 inch thick.
* 2 cups vanilla wafer cookies: These are my favorite classic choice, but graham crackers or even Shortbread Cookies work beautifully too. Just make sure they’re good quality so they hold up nicely.
* Optional: Meringue or Whipped Cream: If you’re going for a baked meringue topping, you’ll need 3-4 egg whites, 1/4 cup sugar, and 1/2 teaspoon cream of tartar. For whipped cream, just heavy cream and a touch of powdered sugar.
For the Glaze (Optional, but highly recommended!):
* 1/4 cup heavy cream: This makes the glaze smooth and luxurious.
* 1 tablespoon butter: For a little richness.
* 1/2 teaspoon vanilla extract: To echo the pudding flavor.
Step-by-Step Instructions
Step 1: Preheat & Prep Pan
First things first, let’s get our oven ready. Preheat it to 350°F (175°C). You’ll also need a 9×13 inch baking dish. You don’t need to grease it, as the pudding itself is quite rich. Just have it clean and ready to go.
Step 2: Mix Dry Ingredients
In a medium bowl, whisk together the granulated sugar, cornstarch, and salt. Give it a good whisk until everything is thoroughly combined and there are no lumps of cornstarch. This step is crucial for a smooth pudding; you don’t want any starchy pockets!
Step 3: Mix Wet Ingredients
In a separate large bowl, whisk together the egg yolks until they’re slightly lighter in color. Gradually whisk in the milk until it’s well combined. You want everything to be homogenous.
Step 4: Combine
Now, we’re going to temper the egg yolks. This is a fancy way of saying we’re gently warming them up so they don’t scramble when they hit the hot stovetop. Slowly ladle about a cup of the warm milk mixture into the egg yolks, whisking constantly. Once that’s incorporated, pour the tempered egg yolk mixture back into the pot with the remaining milk. Pour this mixture into a medium saucepan. Cook over medium heat, stirring constantly with a whisk, until the pudding thickens significantly. This can take anywhere from 8-12 minutes. It should be thick enough to coat the back of a spoon. Once thickened, remove from heat and stir in the butter and vanilla extract until the butter is melted and everything is smooth and glossy. Trust me, the smell at this stage is heavenly!
Step 5: Prepare Filling
While the pudding is still warm (but not boiling hot), it’s time to assemble. Arrange a layer of sliced bananas on the bottom of your baking dish. Then, scatter a layer of vanilla wafer cookies over the bananas. Spoon about half of the warm pudding mixture over the cookies and bananas, making sure to get an even coating. Repeat with another layer of bananas, then cookies, and finally the remaining pudding.
Step 6: Layer & Swirl
This step is where you get to play with the appearance. You want to make sure all those cookies and bananas are nicely covered by the pudding. If you’re using meringue, whip your egg whites with cream of tartar until foamy, then gradually add the sugar, beating until stiff, glossy peaks form. Spoon dollops of meringue over the top of the pudding, making sure it seals to the edges of the dish to prevent shrinkage. You can make little swirls or peaks with the back of a spoon. If you’re using whipped cream, you’ll add that *after* baking and cooling.
Step 7: Bake
Bake in the preheated oven for about 25-30 minutes, or until the meringue is golden brown and the pudding is set. If you’re not using meringue, bake for about 20-25 minutes, or until the edges are just starting to bubble. You don’t want to overbake it, or it can become rubbery. The key is that beautiful golden hue on top.
Step 8: Cool & Glaze
Let the banana pudding cool on a wire rack for at least 30 minutes. If you’re adding a glaze, gently heat the heavy cream and butter in a small saucepan until the butter is melted and the cream is warm. Stir in the vanilla. Drizzle this warm glaze over the top of the pudding. It adds an extra layer of shine and flavor that is just divine. Once cooled slightly, cover it with plastic wrap, pressing it gently onto the surface to prevent a skin from forming (unless you like that!). Chill in the refrigerator for at least 2-3 hours, or until completely set. This chilling time is crucial for all those flavors to meld together beautifully.
Step 9: Slice & Serve
Once chilled and firm, slice into generous portions. This banana pudding is best served cold or at room temperature. Garnish with a little extra whipped cream or a sprig of mint if you’re feeling fancy. Enjoy every spoonful!
What to Serve It With
This banana pudding is pretty much a standalone superstar, but it also plays wonderfully with other things! For a cozy breakfast, I love a small scoop with my morning coffee. The sweetness is just enough to feel like a treat without being overpowering. For a more elaborate brunch spread, it’s a fantastic addition alongside lighter fare like fresh fruit salads and maybe some savory quiches. I like to serve it in pretty individual ramekins for an elegant touch. As a dessert, it’s perfection on its own, but if you’re feeling adventurous, a drizzle of salted caramel or a dollop of chocolate ganache can be pretty spectacular. I’ve also served it with a scoop of vanilla bean Ice Cream, and it was pure bliss! For those cozy snack moments, especially on a rainy afternoon, it’s the ultimate comfort food. I often pair it with a glass of cold milk – it’s a classic combo for a reason! My family also loves it with a side of shortbread cookies for extra crunch, or even just a few extra banana slices if they’re really craving that flavor.
Top Tips for Perfecting Your Banana Pudding
I’ve made this banana pudding more times than I can count, and over the years, I’ve picked up a few little tricks that I think make all the difference. First, regarding the banana prep: use really ripe bananas! They’re naturally sweeter and have a softer texture that blends better. I usually slice mine about a quarter-inch thick. If your bananas are super ripe and a bit mushy, that’s actually perfect. For mixing advice, the key is gentle handling. When you’re incorporating the pudding mixture, you don’t want to overmix or beat it vigorously once the cookies are in; you want to keep some of that cookie texture. The same goes for the cornstarch – make sure it’s fully dissolved in the sugar before adding liquid to avoid a starchy pudding. For swirl customization, if you’re not doing meringue, you can create beautiful patterns by layering the pudding and cookies slightly unevenly, or even gently swirling a bit of chocolate sauce or caramel through the pudding before it sets. For ingredient swaps, if you can’t find vanilla wafers, graham crackers are a great alternative, offering a slightly different but equally delicious flavor profile. You can also experiment with shortbread for a more buttery cookie. For baking tips, watch the meringue carefully. It can go from perfectly golden to burnt in a flash! If your oven runs hot, consider reducing the temperature by 25 degrees. Always check the center; it should be set but still have a slight wobble. And finally, for glaze variations, if you want something a little different, try adding a pinch of cinnamon or a touch of orange zest to the glaze for a brighter flavor. A dark chocolate glaze is also decadent, though it’s a bit less traditional. The key is to make sure your glaze is warm, not hot, when you drizzle it, so it melts beautifully without cooking the pudding further.
Storing and Reheating Tips
This banana pudding is actually quite forgiving when it comes to storage, which is one of the things I love about it. If you have any leftovers (which is rare in my house!), you can store it at room temperature for up to 2 hours. After that, it’s best to refrigerate it. For refrigerator storage, make sure it’s in an airtight container or tightly covered with plastic wrap. I like to press the plastic wrap directly onto the surface of the pudding to prevent a skin from forming, especially if I didn’t top it with meringue. It will keep well in the fridge for about 2-3 days, though I find the texture is best within the first two days. The cookies can get a little softer over time, which some people actually prefer! I haven’t tried freezing this banana pudding before, as the bananas and pudding texture can change quite a bit upon thawing, so I don’t recommend it. For glaze timing advice, it’s best to add the glaze either right after baking and while it’s cooling slightly, or just before serving if you want it to stay a bit more distinct. If you’re refrigerating it for longer, the glaze will set up nicely on top. If you want to reheat it, which I only recommend if you didn’t use meringue, you can do so very gently in the microwave for short bursts, or just let it come to room temperature. Honestly though, it’s best enjoyed cold or at room temp!
Frequently Asked Questions
Final Thoughts

So there you have it – my absolute favorite banana pudding recipe. It’s the kind of dessert that feels like a warm hug, perfect for any occasion, whether it’s a cozy night in or a gathering with loved ones. The combination of creamy pudding, sweet bananas, and tender cookies, all topped with that gorgeous golden meringue (or a simple glaze!), is just perfection. It’s a testament to how simple ingredients can create something truly magical. If you love comforting, homemade desserts, I really think you’ll adore this one. It’s one of those recipes I go back to again and again because it never fails to impress and always brings so much joy. If you give this banana pudding a try, please let me know what you think in the comments below! I’d love to hear your favorite variations or how your family enjoyed it. Happy baking, and enjoy every single spoonful!
Classic Banana Pudding
Ingredients
For the Pudding
- 0.5 cup granulated sugar
- 0.25 cup cornstarch
- 3.5 cups milk whole milk recommended
- 4 large egg yolks
- 2 tablespoons butter
- 1.5 teaspoons vanilla extract
For Assembly
- 1 box vanilla wafers about 36 cookies
- 3 large bananas sliced
Instructions
Preparation Steps
- In a medium saucepan, whisk together the granulated sugar and cornstarch until well combined.
- Gradually whisk in the milk until smooth. Cook over medium heat, stirring constantly, until the mixture begins to thicken and bubble, about 5-7 minutes. Remove from heat.
- In a small bowl, whisk the egg yolks. Slowly temper the egg yolks by whisking about 1 cup of the hot milk mixture into them. Then, pour the tempered egg yolk mixture back into the saucepan.
- Return the saucepan to medium-low heat and cook, stirring constantly, until the pudding is thick enough to coat the back of a spoon, about 2-3 more minutes. Do not boil.
- Remove from heat and stir in the butter and vanilla extract until the butter is melted and the pudding is smooth.
- Pour the pudding into a bowl. Press plastic wrap directly onto the surface of the pudding to prevent a skin from forming. Let it cool slightly at room temperature, then refrigerate for at least 2 hours, or until well chilled.
- To assemble: Arrange a layer of vanilla wafers in the bottom of a 9x13 inch baking dish or individual serving dishes.
- Top the wafers with a layer of sliced bananas.
- Spoon a generous layer of the chilled pudding over the bananas and wafers.
- Repeat layers of wafers, bananas, and pudding until all ingredients are used, ending with a layer of pudding.
- Garnish with additional vanilla wafers or banana slices, if desired. Refrigerate for at least 1 hour before serving to allow the flavors to meld.


