


You know those recipes? The ones that feel like a warm hug, that you can whip up without even looking at the instructions because you’ve made them so many times? For me, that’s this Bacon Corn Dip. It’s not just a dip; it’s a memory maker. I remember the first time I made it for a summer potluck. I was nervous because I’d never attempted anything quite like it, but within minutes of setting it down, the whole dish was gone! People were practically fighting over the last spoonfuls, and the compliments just kept rolling in. It has that perfect balance of savory, creamy, and just a hint of sweetness that makes you keep coming back for more. It’s honestly so much better than any store-bought dip, and way more satisfying than a basic seven-layer dip on a game day. This Bacon Corn Dip is my secret weapon for making any gathering feel extra special, without adding any stress to my kitchen time.
What is Bacon Corn Dip?
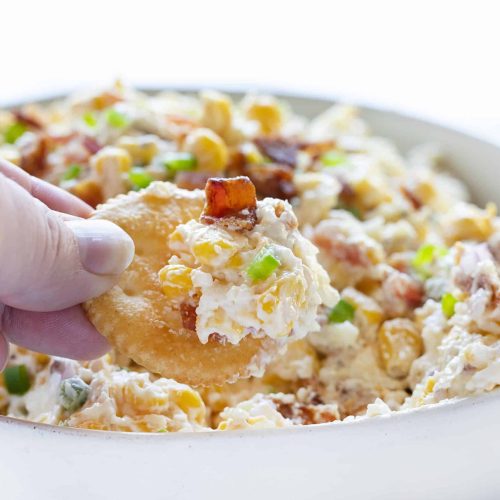
So, what exactly *is* this magical concoction we’re calling Bacon Corn Dip? Think of it as the ultimate party starter, a creamy, dreamy blend of smoky bacon, sweet corn, and a few other key players that just sing together. It’s not a salsa, it’s not a queso – it’s something entirely its own glorious thing. The name pretty much says it all, right? We’ve got that irresistible salty crunch from perfectly cooked bacon, mingled with the pops of sweetness from tender corn kernels. Then, it all comes together in this luscious, creamy base that’s just begging to be scooped up. It’s essentially the comfort food version of a gourmet appetizer, and the origin story is probably as simple as someone saying, “Wouldn’t it be amazing if we combined all the best things into one dip?” And you know what? They were absolutely right!
Why you’ll love this recipe?
What is the best Bacon Corn Dip recipe?
The Flavor Bomb: What is the Flavor Bomb? First off, the taste. It’s a symphony of savory and sweet. The bacon provides that smoky, salty foundation that we all crave, while the corn adds these delightful bursts of natural sweetness. Then you have the creamy binder that just melts in your mouth. It’s incredibly satisfying without being heavy, and it hits all the right notes. Every single bite is a little taste of heaven, I promise you. It’s the kind of flavor that makes people ask for the recipe immediately, and then ask for it again the next time you see them!
Seriously Simple: Now, for my busy bees out there (and let’s be honest, who isn’t these days?), the simplicity is a huge win. You don’t need any fancy techniques or hours of simmering. Most of the magic happens in a few simple steps, and you can even do some of the prep ahead of time. It’s a lifesaver for those weeknight gatherings or when unexpected guests pop by. I often make it while the kids are doing their homework, and it’s ready before you can even say “snack time!”
Budget-Friendly Bliss: I love a recipe that doesn’t break the bank, and this one is a champion in that department. The ingredients are all pretty common, readily available at any grocery store, and they don’t cost an arm and a leg. You get a gourmet-tasting dip for a fraction of the price you’d pay at a restaurant or fancy deli. It makes entertaining feel so much more accessible.
Versatility is Key: And the versatility! While it’s an absolute star as a dip with chips or crackers, I’ve also found other delicious ways to enjoy it. I’ll sometimes serve a small dollop over grilled chicken or fish, and it’s incredible! You can also easily tweak it to your liking. Love a little spice? Add some jalapeños. Craving more cheesiness? Go for it! It’s a fantastic base that’s open to your personal touch. It reminds me a bit of my amazing Loaded Baked Potato Soup, in that it’s packed with delicious, familiar flavors that just work so well together in a comforting dish. This Bacon Corn Dip truly stands out for its unique creamy texture and the way the bacon and corn play off each other.
How to Make Bacon Corn Dip
Quick Overview
The process for making this incredible Bacon Corn Dip is surprisingly straightforward. You’ll start by crisping up some bacon and sautéing a few aromatics. Then, you’ll bring together some creamy elements with the corn and cooked bacon, before a short bake that melds all those glorious flavors together. What makes this method so fantastic is how quickly it comes together, and the baking step really deepens the flavors, making it way more exciting than a no-bake dip. Trust me, the aroma filling your kitchen while it bakes is pure magic!
Ingredients
For the Main Batter:
Bacon: 8-10 slices, thick-cut is my preference for that extra chewy bite!
Onion: 1 small yellow onion, finely diced. I find yellow onion offers a nice mild sweetness here, but sweet Vidalia onions work beautifully too.
Garlic: 2 cloves, minced. Fresh garlic is a must for that pungent aroma and flavor.
Cream Cheese: 8 ounces, softened. This is the creamy heart of our dip! Make sure it’s at room temperature so it whips up smoothly.
Sour Cream: 1 cup. It adds tanginess and helps create that wonderfully rich, yet not heavy, texture. You can use full-fat for the creamiest result.
Mayonnaise: 1/2 cup. Don’t skip this! It adds another layer of richness and helps bind everything together beautifully. I’ve tried it without and it just isn’t the same.
Corn: 2 cups. I love using fresh or frozen corn kernels here. If using frozen, make sure it’s thawed. Canned corn works in a pinch, but I find the texture and sweetness of fresh or frozen is superior.
Cheddar Cheese: 1.5 cups, shredded. A sharp cheddar gives the best flavor, but a mix of cheddar and Monterey Jack is also fantastic for extra meltiness.
Salt and Black Pepper: To taste. Remember the bacon is salty, so season cautiously at first.
For the Topping (Optional but Highly Recommended!):
More Bacon: 2-3 slices, crumbled. For that extra crunch and visual appeal.
More Cheese: 1/2 cup, shredded. A little extra on top gets beautifully bubbly.
Chives or Green Onions: 2 tablespoons, chopped. For a fresh, oniony finish.
Step-by-Step Instructions
Step 1: Preheat & Prep Pan
First things first, let’s get our oven preheated to 375 degrees Fahrenheit (190 degrees Celsius). While that’s warming up, grab a large skillet. We’re going to cook our bacon until it’s nice and crispy. You can do this on the stovetop or even in the oven for more even cooking. Once it’s rendered and golden brown, remove the bacon from the skillet and place it on a paper towel-lined plate to drain. Don’t wipe out that skillet just yet – we’ll use those delicious bacon drippings!
Step 2: Mix Dry Ingredients
This isn’t really a “dry ingredient” step in the traditional sense like a cake, but this is where we start building flavor. In that skillet with the reserved bacon drippings (pour off any excess, leaving about a tablespoon), add your finely diced onion. Sauté it over medium heat until it’s softened and translucent, which usually takes about 5-7 minutes. Then, toss in your minced garlic and cook for another minute until fragrant. Be careful not to burn the garlic! This step is crucial for developing a deep, savory base for our dip.
Step 3: Mix Wet Ingredients
Now for the creamy goodness! In a large mixing bowl, add your softened cream cheese, sour cream, and mayonnaise. Use a spatula or a hand mixer on low speed to beat these together until they’re smooth and well combined. You want a luscious, creamy base. If your cream cheese isn’t fully softened, it might be a little lumpy, but don’t worry too much; the heat from baking will help smooth it out.
Step 4: Combine
Crumble about two-thirds of your cooked bacon into the creamy mixture. Add the sautéed onion and garlic from the skillet. Stir in the corn kernels and the shredded cheddar cheese. Gently fold everything together until it’s all just incorporated. You don’t want to overmix; we’re aiming for a rustic, chunky texture where you can see all the delicious components. Season with salt and pepper to your liking, remembering that the bacon will add saltiness.
Step 5: Prepare Filling
Actually, this step is already done within Step 4! The “filling” is essentially the combined mixture of bacon, corn, cheese, and the creamy base. The beauty of this dip is how all these elements come together seamlessly. No separate filling preparation is needed beyond combining everything in the bowl.
Step 6: Layer & Swirl
There’s no real layering or swirling needed for this particular dip as it’s a mixed dip. We’re not making a marbled cake here! Once everything is combined in the bowl, you’ll transfer the mixture into your baking dish. I like to use a shallow, oven-safe dish, about 8×8 inches or a similar-sized pie plate. Spread it out evenly. If you’re adding the optional topping now, sprinkle the remaining crumbled bacon and shredded cheese evenly over the top.
Step 7: Bake
Pop your baking dish into the preheated oven. Bake for about 20-25 minutes, or until the dip is heated through, bubbly around the edges, and the cheese on top is melted and slightly golden. Keep an eye on it, as oven temperatures can vary. The goal is to warm everything up and let those flavors meld into pure deliciousness.
Step 8: Cool & Glaze
Once it’s out of the oven, let the Bacon Corn Dip sit for about 5-10 minutes before serving. This allows it to cool slightly and thicken up a bit, making it easier to scoop. There’s no “glaze” in the traditional sense, but if you opted for the topping of extra bacon and cheese, this is when it becomes perfectly gooey and irresistible. Garnish with fresh chives or green onions right before serving for a pop of color and freshness.
Step 9: Slice & Serve
Serve this delicious Bacon Corn Dip warm, directly from the baking dish. It’s perfect for dipping tortilla chips, sturdy crackers, vegetable sticks, or even crusty bread. The aroma alone will have everyone gathered around, so have your serving utensils ready!
What to Serve It With
This Bacon Corn Dip is so versatile, it can truly fit into any meal or gathering. It’s not just for game days, though it certainly shines there!
For Breakfast: Yes, you read that right! A small dollop of this warm, savory dip alongside scrambled eggs or over a perfectly poached egg is absolutely divine. It adds a wonderful richness and a hint of smoky goodness to your morning. Imagine it with some crispy home fries – a breakfast of champions!
For Brunch: This is where it really shines. Serve it in a pretty dish alongside other brunch favorites like mini quiches, a fresh fruit salad, and maybe some fluffy pancakes or waffles. It’s unexpected and incredibly delicious, providing a savory counterpoint to sweeter dishes. It also pairs wonderfully with a mimosa or a bloody mary!
As Dessert: Okay, hear me out! While it’s not a sweet dessert, it can function as a savory “dessert” course for a sophisticated party, especially when paired with a wonderful wine. Think of it like a deconstructed cheese board element. It’s a fantastic palate cleanser after a rich meal, offering a comforting, familiar flavor profile.
For Cozy Snacks: This is its natural habitat! Serve it warm with a big bowl of tortilla chips, pita bread, or even some sturdy pretzel crisps. It’s the ultimate comfort food for a movie night, a casual get-together with friends, or just when you’re craving something incredibly satisfying. My family loves it with extra crispy tortilla chips so they don’t break when scooping up all that cheesy goodness.
I’ve also found that it’s fantastic alongside grilled chicken or even steak. Just a spoonful adds an incredible layer of flavor. My kids, who are usually picky eaters, absolutely devour this dip. They love scooping it up with anything they can find, and I love that they’re getting a good dose of corn and cheese!
Top Tips for Perfecting Your Bacon Corn Dip
I’ve made this Bacon Corn Dip more times than I can count, and through those batches, I’ve learned a few little tricks that can take it from good to absolutely spectacular.
Bacon Prep: Don’t be shy with the bacon! I really prefer using thick-cut bacon because it provides a satisfying chew and a more intense flavor. Cooking it until it’s perfectly crispy is key. You want that crunch, not limp, greasy bacon. And remember to drain it well on paper towels. Also, don’t discard all those precious bacon drippings from the skillet – they are pure liquid gold for sautéing your onions and adding an extra layer of smoky flavor right from the start.
Mixing Advice: When you’re combining all the ingredients in the bowl, fold them gently. You’re not making a cake batter where you need to develop gluten. We want to keep some of the texture of the corn and bacon visible. Overmixing can make it a bit mushy. Just stir until everything is *just* combined. The cream cheese, sour cream, and mayo should form a luscious base, and the add-ins should be evenly distributed without being pulverized.
Corn Selection: While canned corn works in a pinch, I strongly recommend using fresh or frozen corn. Fresh corn, when it’s in season, has an unparalleled sweetness and pop. If you use frozen corn, make sure it’s fully thawed and pat it dry with a paper towel before adding it to the dip. This helps prevent the dip from becoming too watery.
Ingredient Swaps: Feel free to play around! If you’re not a fan of onions, you can omit them, though they do add a nice depth. For cheese, I love sharp cheddar for its robust flavor, but a blend of cheddar and Monterey Jack, or even adding some pepper jack for a little heat, works wonderfully. If you want a tangier dip, you can swap out some of the sour cream for Greek yogurt, though it might make it a little less rich.
Baking Tips: Baking is really about bringing everything together and getting it wonderfully bubbly and hot. I like to bake it in a slightly shallower dish so the heat can reach the center more effectively. Keep an eye on it during the last few minutes of baking; you want the cheese on top to be melted and perhaps slightly golden, but you don’t want it to burn. If your oven tends to run hot, you might want to reduce the temperature slightly or keep it in for a few minutes less.
Serving Variations: While I adore serving it warm, sometimes I’ll make it ahead and reheat it. If you’re reheating, it might need a tiny splash of milk or cream to loosen it back up. Also, don’t underestimate the power of a fresh garnish. Those chopped chives or green onions really cut through the richness and add a beautiful pop of color and freshness. I learned this the hard way – a dip without a little something green on top just feels incomplete to me now!
Storing and Reheating Tips
This Bacon Corn Dip is so good, you might actually have leftovers – a rare but wonderful occurrence in my house! Knowing how to store and reheat it properly will ensure you can enjoy it just as much the second (or third!) time around.
Room Temperature: Because of the dairy components, I don’t recommend leaving this dip out at room temperature for more than two hours, especially in warmer weather. After that, it’s best to store any leftovers.
Refrigerator Storage: Once the dip has cooled down a bit, transfer any leftovers into an airtight container. It will stay fresh in the refrigerator for about 3-4 days. I usually just cover the baking dish tightly with plastic wrap or aluminum foil if I know I’ll be eating it within a day or two. The texture holds up really well!
Freezer Instructions: Yes, you can freeze this dip! However, the texture of the dairy components might change slightly upon thawing. If you plan to freeze it, I recommend freezing it *before* baking. Portion it into freezer-safe containers or a freezer bag, and it should be good for about 2-3 months. Thaw it overnight in the refrigerator and then bake as usual, perhaps adding a few extra minutes to ensure it’s heated through.
Glaze Timing Advice: If you’ve topped your dip with extra bacon and cheese, you’ll want to add that right before you bake it the first time. If you’re reheating a baked dip that you didn’t freeze, you can sprinkle a little fresh cheese and bacon bits on top before popping it back in the oven for a few minutes to melt and warm through. For dips that are going to be stored for a few days, I find it’s best to add any fresh garnishes like chives or green onions right before serving to keep them looking their best.
Frequently Asked Questions
Final Thoughts
So there you have it – my beloved Bacon Corn Dip! It’s truly a recipe that has brought so much joy and deliciousness to my table, and I just know it will do the same for yours. It’s that perfect blend of comforting flavors, easy execution, and crowd-pleasing appeal that makes it an absolute winner every single time. Whether you’re hosting a big game party, a casual get-together, or just need a comforting snack, this dip is your answer.
I hope you feel inspired to give this Bacon Corn Dip a try. It’s more than just a recipe; it’s an experience, a memory in the making. If you love comforting, cheesy, savory dishes, you might also want to explore my recipe for {Link to another relevant recipe, e.g., “Creamy Chicken Enchilada Casserole”} – it has that same kind of cozy, family-favorite vibe!
I can’t wait to hear what you think of this Bacon Corn Dip! Please, let me know in the comments below how yours turns out, if you tried any fun variations, or what your favorite dipping companions are. Your feedback means the world to me, and I love seeing your culinary adventures! Happy baking, and more importantly, happy dipping!
Bacon Corn Dip
Ingredients
Main Ingredients
- 2 cans (15 ounces each) whole kernel corn drained
- 0.5 cup mayonnaise
- 6 ounces cream cheese softened
- 1 cup shredded cheddar cheese
- 1 cup shredded mozzarella cheese
- 0.5 cup grated parmesan cheese
- 1 medium jalapeños finely diced, save some for garnish
- 10 slices cooked bacon crumbled, reserve some for garnish
- 2 small red onions finely diced (or 1 large)
- 0.5 teaspoon kosher salt
- 0.25 teaspoon black pepper
Instructions
Preparation Steps
- In a large bowl combine corn, mayonnaise, cream cheese, cheddar cheese, mozzarella cheese, parmesan, and jalapeños. Stir with a spatula until combined.
- Add crumbled bacon (reserve some for garnish) and red onions.
- Season with salt and black pepper.
- Cover bowl and let sit in the fridge for at least 1 hour or up to overnight for a more intense flavor.
- Garnish with remaining bacon crumbles and jalapeño, and serve with crackers.


