


Okay, so you know how sometimes you just get that *craving*? That deep-down, undeniable need for something rich, decadent, and utterly satisfying? For me, that craving almost always leads me to peanut butter and chocolate. And when you combine that with the creamy, dreamy goodness of cheesecake, well, you’ve basically created edible magic. This Peanut Butter Cup Cheesecake is my absolute go-to when I want to impress someone, or honestly, just when I want to treat myself (which is often, let’s be real). It’s like a hug in dessert form, and the way the peanut butter swirls through the creamy cheesecake with those little bursts of chocolate… oh my goodness. It’s a showstopper, but I promise, it’s not nearly as intimidating as it sounds. Think of it as a glorious mashup of your two favorite childhood candies and your favorite fancy dessert. Pure bliss!
What is peanut butter cup cheesecake?
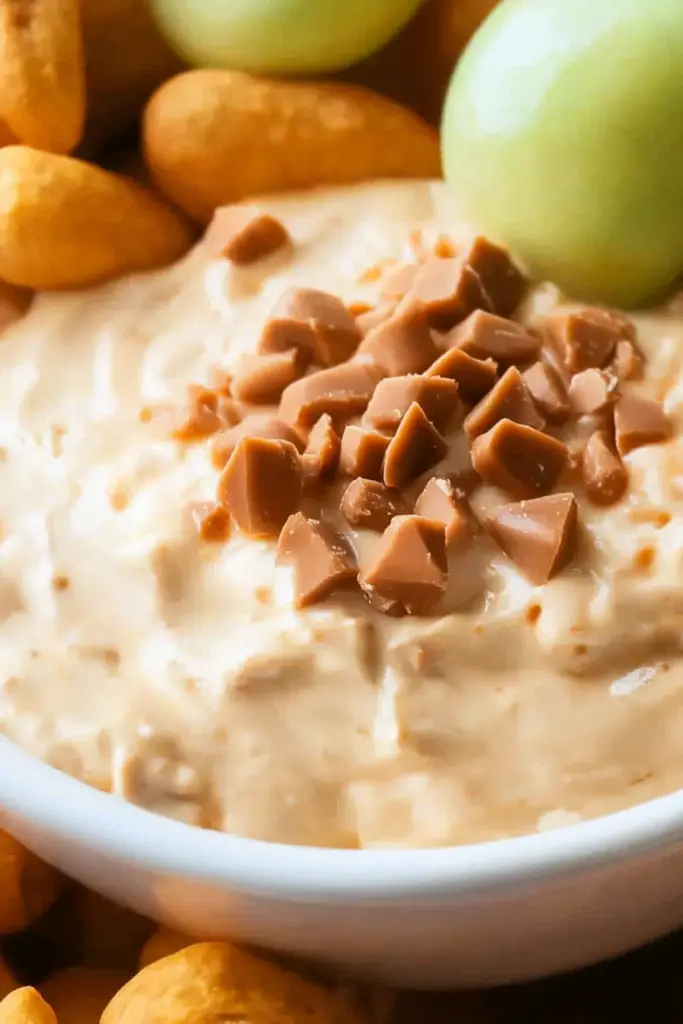
So, what exactly *is* this marvel of a dessert? It’s pretty much what it sounds like: a rich, creamy cheesecake infused with the irresistible flavor of peanut butter, studded with chunks of peanut butter cups, and often topped with even more chocolate and peanut butter goodness. It’s not your average New York-style cheesecake; this one’s got personality! It’s built on a foundation of a classic cheesecake recipe, but we’re seriously upping the ante with Creamy Peanut Butter folded right into the batter, and then we generously tuck in those iconic peanut butter cups. It’s decadent, it’s a little playful, and it’s always a crowd-pleaser. It’s essentially the ultimate indulgence for anyone who loves that classic peanut butter and chocolate combo. We’re taking something already amazing and making it even more spectacular.
Why you’ll love this recipe?
Honestly, where do I even begin? This Peanut Butter Cup Cheesecake is a winner for so many reasons. First off, the **flavor** is just out of this world. It’s that perfect balance of sweet, creamy cheesecake with that distinct, nutty, salty-sweet peanut butter punch. And when you bite into a chunk of melted peanut butter cup? Pure heaven. Then there’s the **simplicity**. I know, cheesecake can sound scary, right? But I’ve worked on this recipe for years, tweaking it so it’s surprisingly straightforward. It doesn’t require a water bath (hallelujah!), and most of the steps are just simple mixing. Even if you’re a beginner baker, you can absolutely nail this. And let’s talk about **cost-efficiency**. While it feels incredibly luxurious, the ingredients are all pretty standard pantry staples plus some Peanut Butter Cups. You get a whole lot of “wow” factor for your buck, making it perfect for parties or when you need a dessert that feels special without breaking the bank. Plus, it’s incredibly **versatile**! You can totally adjust the amount of peanut butter, the type of chocolate you use, or even add a caramel drizzle if you’re feeling extra fancy. It’s my favorite when I’m craving something sweet at 10pm but don’t want to bake a whole cake from scratch. It’s just… easy joy. What I love most about this recipe is that it taps into that nostalgic feeling of enjoying a peanut butter cup, but elevates it into a sophisticated dessert that everyone, from kids to grandparents, goes wild for. It’s a guaranteed hit, every single time.
How do I make a Peanut Butter Cup Cheesecake?
Quick Overview
This recipe is all about building layers of flavor and texture. We’ll start with a simple graham cracker crust, then move on to a luscious, creamy peanut butter-infused cheesecake filling packed with chocolatey Peanut Butter Cup goodness. The whole thing gets baked until it’s just set, then chilled to perfection. It’s straightforward: mix the crust, beat the filling ingredients until smooth, fold in the goodies, bake, and chill. Trust me, the hardest part is waiting for it to set!
Ingredients
For the Crust:
2 cups Graham Cracker crumbs (about 14-16 full sheets) (about 2 cups)
1/4 cup granulated sugar
1/2 cup (1 stick) unsalted butter, melted
*Tip: You can also use chocolate cookie crumbs for an extra chocolatey base! Just make sure they’re finely crushed.*
For the Peanut Butter Cheesecake Filling:
3 (8-ounce) blocks cream cheese, softened to room temperature
1 1/4 cups granulated sugar
1/2 cup creamy peanut butter (use your favorite smooth kind!)
2 large eggs, room temperature
1/2 cup sour cream, room temperature
1 teaspoon vanilla extract
1/2 cup chopped peanut butter cups (about 8-10 regular-sized cups)
For the Chocolate Ganache Glaze (Optional but HIGHLY Recommended):
1 cup semi-sweet chocolate chips
1/2 cup heavy cream
Step-by-Step Instructions
Step 1: Preheat & Prep Pan
Preheat your oven to 350°F (175°C). Grab a 9-inch springform pan. This is key because it makes getting the cheesecake out *so* much easier. Lightly grease the sides of the pan with butter or cooking spray. For the crust, combine the graham cracker crumbs and sugar in a medium bowl. Pour in the melted butter and stir until everything is evenly moistened, like wet sand. Press this mixture firmly and evenly into the bottom of the prepared springform pan. You can use the bottom of a glass or a measuring cup to get it nice and compact. Bake the crust for about 8-10 minutes, just until it’s lightly golden and smells toasty. Let it cool while you prepare the filling.
Step 2: Mix Dry Ingredients
This step is more about ensuring everything is ready to go. While we don’t have a separate “dry ingredients” step for the cheesecake filling itself in the traditional sense (like you would for a cake), we *do* need to make sure our cream cheese and sugar are perfectly combined before adding the wet ingredients. So, in a large bowl, you’ll combine the softened cream cheese and granulated sugar. The key here is to make sure the cream cheese is truly at room temperature. If it’s cold, you’ll get lumps, and nobody wants a lumpy cheesecake! We want this mixture to be super smooth and creamy.
Step 3: Mix Wet Ingredients
In that same large bowl with the cream cheese and sugar, now we’ll add the peanut butter. Beat everything together with an electric mixer (a hand mixer works great here) on medium speed until it’s light, fluffy, and incredibly smooth. Scrape down the sides of the bowl often to make sure everything is incorporated. Next, add the eggs, one at a time, beating well after each addition. Don’t overmix at this stage; just mix until the yolk disappears. Then, stir in the sour cream and vanilla extract. The sour cream adds that lovely tang and extra creaminess that balances the sweetness perfectly. Mix until just combined and smooth. It should look like a thick, beautiful, peanut-butter-hued batter.
Step 4: Combine
This is where we bring it all together! Gently fold in the chopped peanut butter cups into the cheesecake batter. You want to distribute them evenly, but try not to overmix, as this can toughen the cheesecake. The goal is to have those delightful pockets of chocolate and peanut butter throughout. If you’re feeling extra ambitious, you can reserve a few chopped cups to sprinkle on top right before baking for a little extra visual appeal.
Step 5: Prepare Filling
The filling preparation is really what we just did in steps 3 and 4. It’s all about getting that smooth, creamy, peanut-butter-laced batter ready. Ensure your cream cheese, eggs, and sour cream are all at room temperature; this is the absolute *most* crucial step for a smooth cheesecake. If you’re using a stand mixer, use the paddle attachment on low to medium speed. Avoid whipping too much air into the batter, as this can cause cracks. The goal is just a smooth, cohesive mixture.
Step 6: Layer & Swirl
Pour the peanut butter cheesecake filling evenly over the pre-baked crust. If you reserved any chopped peanut butter cups, sprinkle them on top now. If you want to get fancy, you can even drizzle a little extra melted peanut butter or chocolate sauce over the top and use a toothpick to gently swirl it in. This adds another layer of visual appeal and flavor. I usually just swirl in some extra peanut butter for a rustic look. It looks beautiful and tastes even better!
Step 7: Bake
Now for the baking! Place the springform pan on a baking sheet (this catches any potential drips and makes it easier to handle). Bake for about 55-70 minutes, or until the edges are set and slightly puffed, but the center still has a slight jiggle when you gently shake the pan. It’s okay if it looks a little soft in the middle; it will continue to set as it cools. Don’t overbake, or you’ll risk a dry cheesecake. I usually start checking around the 50-minute mark. Every oven is different, so keep an eye on it!
Step 8: Cool & Glaze
This is arguably the most important part for achieving that perfect, crack-free cheesecake texture. Once baked, turn off the oven and leave the oven door slightly ajar (you can prop it open with a wooden spoon). Let the cheesecake cool in the oven for about an hour. This gradual cooling prevents drastic temperature changes that can cause cracks. After that hour, carefully remove the cheesecake from the oven and let it cool completely on a wire rack. Once fully cooled, cover it loosely with plastic wrap and refrigerate for at least 4 hours, or preferably overnight. For the glaze: gently heat the heavy cream in a small saucepan until it just begins to simmer. Pour the hot cream over the chocolate chips in a heatproof bowl. Let it sit for 5 minutes, then whisk until smooth and glossy. Let the ganache cool slightly until it’s pourable but not too hot. Once the cheesecake is chilled and set, carefully pour or spread the ganache over the top. You can let it drip down the sides for a dramatic effect.
Step 9: Slice & Serve
Once the ganache is set (you can speed this up in the fridge for about 15-20 minutes), it’s time to slice and serve! Use a sharp knife dipped in hot water and wiped dry between each cut for the cleanest slices. This cheesecake is absolutely divine served cold, straight from the fridge. It’s also fantastic with a dollop of whipped cream or a drizzle of extra chocolate sauce. It’s seriously a showstopper on its own, though!
What to Serve It With
This Peanut Butter Cup Cheesecake is so rich and satisfying, it honestly doesn’t need much alongside it. But if you’re looking to create a full spread, here are some ideas:
For Breakfast: While it’s a dessert dream, a tiny sliver with your morning coffee can be an indulgent start to the day. It’s surprisingly good with a strong black coffee that cuts through the richness. I sometimes think of it as a celebratory breakfast treat!
For Brunch: Serve it as the grand finale to a relaxed brunch. It pairs beautifully with lighter, fruit-based dishes like a fresh fruit salad or some lemon-infused pastries. A sparkling rosé or a mimosa would be lovely beverage pairings here.
As Dessert: This is its natural habitat! Serve it with a scoop of good quality vanilla bean ice cream or a swirl of fresh whipped cream. A sprinkle of chopped peanuts or a drizzle of salted caramel sauce adds an extra touch of decadence. Coffee or a dessert wine like a port is a classic pairing.
For Cozy Snacks: On a chilly evening, a generous slice of this cheesecake with a warm mug of hot chocolate or a steaming cup of chai tea is pure comfort. It’s my go-to for movie nights when we want something special but easy to share. My kids love it with a glass of cold milk, of course!
My family has a tradition of having this on the last day of summer vacation – it feels like the ultimate way to celebrate and send off the season. Another favorite is to serve it alongside some fresh raspberries; the tartness of the berries is a fantastic counterpoint to the sweet, creamy cheesecake.
Top Tips for Perfecting Your Peanut Butter Cup Cheesecake
I’ve made this Peanut Butter Cup Cheesecake more times than I can count, and I’ve learned a few tricks along the way that I’m happy to share. These little tips can make all the difference between a good cheesecake and an absolutely *perfect* one.
Cream Cheese Prep: I can’t stress this enough – your cream cheese MUST be at room temperature. Take it out of the fridge at least 2-3 hours before you plan to start. If it’s still cold, it will clump up, and no amount of beating will get it perfectly smooth. This is the number one reason for lumpy cheesecake. I’ve learned this the hard way!
Mixing Advice: When you’re mixing the filling, go for “just combined” rather than “overbeaten.” Especially after adding the eggs. Overmixing incorporates too much air, which can lead to cracks as the cheesecake bakes and cools. Use your electric mixer on medium speed and scrape down the bowl frequently. The goal is a smooth, homogenous batter, not something frothy.
Swirl Customization: If you decide to swirl in extra peanut butter or chocolate, don’t go crazy. A few strategically placed drizzles and a gentle swirl with a toothpick or skewer is all you need. Too much swirling can muddy the flavors and textures. I love a good marbled effect, but sometimes a few well-placed dollops are just as pretty and delicious.
Ingredient Swaps: If you can’t find regular peanut butter cups, Reese’s Miniatures work perfectly too, just chop them up. For the crust, if you’re not a graham cracker fan, digestive biscuits or even chocolate wafers would be a delicious alternative. I’ve even used crushed shortbread cookies in a pinch, and it was lovely. The heavy cream for the ganache can be swapped for half-and-half in a pinch, but the ganache might be a little less rich and glossy.
Baking Tips: The gradual cooling process in the oven is crucial for preventing cracks. Don’t skip that step! Also, remember that cheesecake continues to cook as it cools. A slight jiggle in the center is exactly what you want. Overbaking is a common mistake that leads to a dry, crumbly texture. I always err on the side of slightly underbaked when I take it out of the oven.
Glaze Variations: If you’re not a fan of chocolate ganache, or just want something different, you could drizzle melted peanut butter or a caramel sauce over the top after chilling. A dusting of cocoa powder or powdered sugar is also a simple and elegant finish. You can even add a touch of espresso powder to the ganache for a mocha twist!
Storing and Reheating Tips
This Peanut Butter Cup Cheesecake is a bit of a diva when it comes to storage, but follow these simple rules and it’ll stay delicious for days.
Room Temperature: Honestly, unless it’s extremely warm in your house, I wouldn’t leave this out for more than an hour. Cheesecake is a dairy product, and it’s best kept chilled to maintain its quality and safety. If you’re serving it, just take it out of the fridge about 20-30 minutes before you plan to slice it so it’s not rock hard.
Refrigerator Storage: This is the best place for it. Once it’s completely cooled and the ganache is set, cover the springform pan loosely with plastic wrap, or transfer slices to an airtight container. It will keep well in the refrigerator for up to 3-4 days. The flavors actually meld and deepen over time, so it can be even better on the second day!
Freezer Instructions: Yes, you can freeze it! This is a lifesaver if you’ve made it ahead of time or have leftovers you want to save. It’s best to freeze it *before* you add the ganache, or at least before it’s fully set. Wrap the un-glazed cheesecake tightly in a layer of plastic wrap, followed by a layer of aluminum foil. It can be stored in the freezer for up to 2 months. To thaw, transfer it to the refrigerator overnight. Once thawed, you can add the ganache or your desired topping.
Glaze Timing Advice: If you’re planning to freeze the cheesecake, it’s best to freeze it without the ganache. Once it’s thawed in the fridge, you can then make a fresh batch of ganache to pour over the top. If you’re just refrigerating it, the ganache can be applied once the cheesecake is fully chilled and set.
Frequently Asked Questions
Final Thoughts
So there you have it – my absolute favorite Peanut Butter Cup Cheesecake recipe. I really hope you give this one a try. It’s the kind of dessert that makes people’s eyes light up when they take that first bite. It’s decadent, it’s comforting, and it’s ridiculously satisfying. It’s proof that sometimes, taking two beloved treats and combining them is pure genius. If you’re a fan of peanut butter and chocolate, or just a lover of a really good cheesecake, this one is for you. It’s perfect for birthdays, holidays, or just because you deserve something incredibly delicious.
If you try this recipe and absolutely fall in love (which I suspect you will!), please let me know in the comments below! I’d love to hear how it turned out for you, and if you added any of your own special touches. And if you’re looking for more ways to satisfy that peanut butter craving, you might want to check out my recipe for the most gooey peanut butter cookies you’ve ever had or my easy peanut butter fudge. Happy baking, and enjoy every single creamy, chocolatey, peanut-buttery bite!
Peanut Butter Cup Cheesecake
Ingredients
Crust
- 2.75 cups Oreo crumbs (about 31 Oreos)
- 5 tbsp unsalted butter, melted
Cheesecake Filling
- 24 oz cream cheese, room temperature
- 1 cup sugar
- 3 tbsp all-purpose flour
- 0.75 cup sour cream, room temperature
- 0.75 cup creamy peanut butter
- 2 tsp vanilla extract
- 4 large eggs, room temperature
- 34 mini Reese’s peanut butter cups, unwrapped, chopped
Chocolate Ganache
- 4 oz semi-sweet chocolate chips
- 6 tbsp heavy whipping cream
Peanut Butter Whipped Cream
- 0.75 cup heavy whipping cream, cold
- 0.5 cup powdered sugar
- 3 tbsp creamy peanut butter
- 0.5 tsp vanilla extract
Garnish
- 7 full size Reese’s peanut butter cups, unwrapped and cut in half
Instructions
Make the crust
- Preheat oven to 325°F (163°C). Line a 9-inch (23cm) springform pan with parchment paper in the bottom and grease the sides.
- Combine the crust ingredients in a small bowl. Press the mixture into the bottom and up the sides of the springform pan.
- Bake the crust for 8-10 minutes, then set aside to cool.
- Cover the outsides of the pan with aluminum foil so that water from the water bath cannot get in. Set prepared pan aside.
Make the cheesecake filling
- Reduce oven temperature to 300°F (148°C).
- In a large bowl, beat the cream cheese, sugar and flour on low speed until well combined and completely smooth. Be sure to use low speed to reduce the amount of air added to the batter, which can cause cracks. Scrape down the sides of the bowl.
- Add the sour cream, peanut butter and vanilla extract and mix on low speed until well combined.
- Add the eggs one at a time, mixing slowly to combine after each addition. Scrape down the sides of the bowl as needed to make sure everything is well combined.
- Mix in chopped Reese’s just until combined.
- Pour the cheesecake batter evenly into the crust.
- Place the springform pan inside another larger silicone pan. Then, place the inset pans into a larger pan and fill the outside pan with enough warm water to go about halfway up the sides of the silicone pan.
- Bake in the center rack of the oven for 1 hour 25 minutes. The center should be set, but still jiggly.
- Turn off the oven and leave the door closed for 30 minutes. The cheesecake will continue to cook, but slowly begin to cool as well.
- Crack the door of the oven for 30 minutes to allow the cheesecake to continue to cool slowly. This process helps prevent cracking.
- Remove the cheesecake from the oven and water bath wrapping. Let cool on the counter until the cheesecake is no longer warm.
- Refrigerate until firm, 5-6 hours or overnight.
- When the cheesecake is cool and firm, remove from the springform pan and set on a serving plate.
Decorate the cheesecake
- Make the chocolate ganache by putting the chocolate chips in a heat proof bowl and set them aside. Pour the heavy whipping cream into another heat proof bowl and microwave it until it just begins to boil, then pour it over the chocolate chips.
- Allow chocolate and cream to sit for 2-3 minutes, then whisk until smooth.
- Pour the ganache onto the cheesecake and spread into an even layer.
- Next make the whipped cream. Add the powdered sugar, peanut butter, vanilla extract and 3 tablespoons of the heavy cream to a medium bowl and whisk until thick and creamy.
- In a separate larger bowl, whip the remaining heavy cream until medium peaks form, about 1-2 minutes.
- Add the peanut butter mixture to the whipped cream and whip until no streaks remain and it forms stiff peaks, about 10-15 seconds. Be careful not to over whip during this step or it’ll separate and thin out, rather than thicken. Use a rubber spatula to fold everything together to ensure everything is evenly distributed.
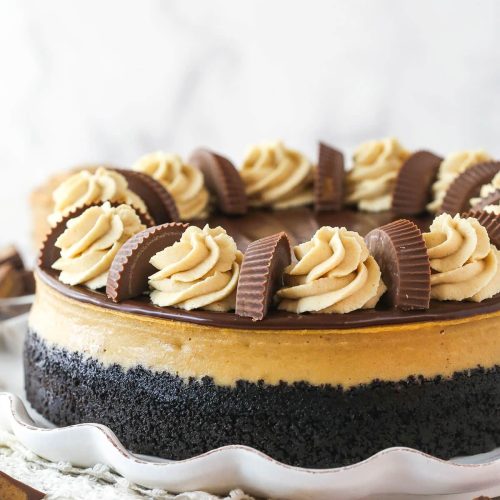
- Fill a piping bag fitted with a piping tip with whipped cream. Pipe shells of whipped cream around the edge of the cheesecake, leaving a bit of space between each mound of cream. Place a half of a large Reese’s between each mound of whipped cream.
- Refrigerate cheesecake until ready to serve. Best when stored well-covered and eaten within 3-4 days.


