


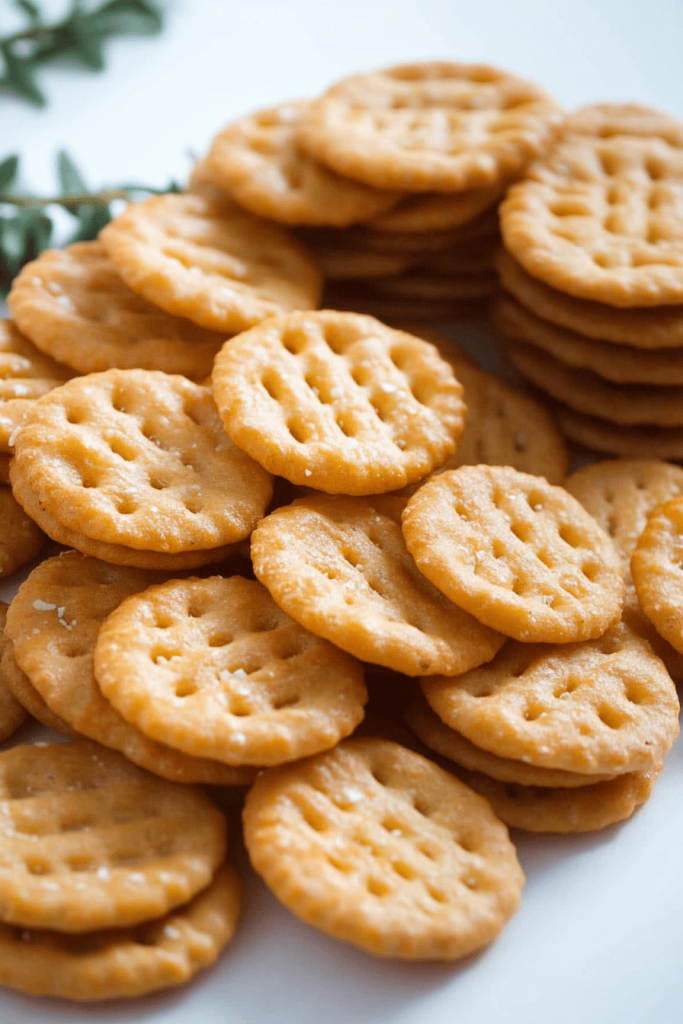
Oh, you guys. I have to tell you about these Alabama Fire Crackers. If you’ve ever been to a potluck, a family gathering, or even just scrolled through Pinterest looking for something to nibble on, you’ve probably seen something similar, but trust me, this is the *real* deal. These aren’t your average crackers; they’re little flavor bombs that bring a fantastic kick without being overwhelmingly spicy. They’re addictive, seriously. I first encountered them years ago at a friend’s barbecue in Alabama, and it was love at first bite. They were piled high on a platter, and I swear, within 15 minutes, the pile was almost gone! I knew right then and there I had to get the recipe. They’re so simple, yet so incredibly satisfying. Think of them as the grown-up, spicy cousin of cheese straws, but way easier to make and ten times more exciting. If you’re a fan of a good savory snack with a little zing, you’re going to adore these Alabama Fire Crackers. I always keep a batch ready to go, especially when unexpected guests pop by or when I just need a little something to perk up my afternoon. They’re a lifesaver on busy nights!
What are Alabama fire crackers?
So, what exactly are these magical little things we call Alabama Fire Crackers? At their heart, they’re a seasoned, baked cracker snack. The name “Fire Crackers” comes from the gentle, warming heat they deliver. It’s not a scorching, mouth-on-fire kind of heat, but more of a pleasant tingle that keeps you coming back for more. They get their distinctive flavor from a blend of spices, a touch of savory goodness, and often a little something that gives them that irresistible crunch. Think of them as a supercharged, spiced-up version of your favorite salty snack, with a personality all their own. They’re incredibly versatile; you can really play with the spice level and the specific seasonings to make them your own. It’s essentially a simple dough that gets infused with flavor, cut into bite-sized pieces, and baked until golden and crispy. They’re a testament to how a few simple ingredients and a little bit of love can create something truly special and utterly delicious. They’re perfect for parties, game days, or just when you’re craving something savory and exciting.
Why you’ll love this recipe?
Honestly, the list of reasons why you’ll fall head over heels for this Alabama Fire Crackers recipe is pretty long, but let me highlight a few of my absolute favorites. First and foremost, the flavor! It’s a symphony of savory, a little bit of tang, and that perfect amount of spice that just makes your taste buds sing. They’re not just hot; they’re complex. You get a hint of garlic, a whisper of onion, and that satisfying crunch that’s just *chef’s kiss*. What I love most is how unbelievably simple they are to whip up. Seriously, I can have a batch ready to go in under an hour, and that includes baking time. This is a lifesaver when I’m short on time but still want to serve something impressive. And let’s talk about budget-friendliness! The ingredients are all pantry staples, so you don’t need to break the bank to make a big batch. They’re perfect for feeding a crowd without spending a fortune. Plus, they’re so versatile! Serve them with a cheese board, pack them for a picnic, or just munch on them straight from the container. They’re also a fantastic alternative to store-bought snacks, which can often be loaded with things you can’t pronounce. These Alabama Fire Crackers are pure, simple, delicious goodness. My family devours them whenever I make them, and I’m always asked for the recipe. It’s one of those recipes that just makes people happy. They’re way more exciting than plain crackers, and so much easier than trying to whip up a complicated appetizer. If you’re looking for a go-to snack that always impresses and is ridiculously easy, this is it!
How do you make Alabama fire crackers?
Quick Overview
Making these Alabama Fire Crackers is a breeze, really. It all comes down to combining a few key ingredients into a dough, shaping it, and baking it to crispy perfection. You’ll mix up a simple, savory batter, press it into a thin layer, score it, and bake until it’s golden brown and has that satisfying crackle. The magic happens in the seasoning blend, which gives them their signature kick. It’s a one-bowl wonder for the most part, and the prep work is minimal. You really can’t mess this up, even if you’re new to baking. It’s a foolproof way to make a crowd-pleasing snack in no time.
Ingredients
For the Main Batter:
1 ½ cups all-purpose flour: This is our base, giving the crackers their structure. Make sure it’s fresh! Sift it if you like, though I usually just give it a good whisk in the bowl.
½ teaspoon baking powder: This little guy helps them get a nice, light crisp without being too airy.
½ teaspoon salt: Essential for bringing out all those other flavors.
¼ teaspoon garlic powder: For that savory depth that everyone loves.
¼ teaspoon onion powder: Adds another layer of savory goodness.
⅛ teaspoon cayenne pepper (or more, to taste!): This is where the “fire” comes from! Start with this and add more if you’re feeling brave or your friends love heat.
¼ cup vegetable oil (or other neutral oil like canola or grapeseed): This helps bind everything together and contributes to the crispiness. You can even use melted butter for a richer flavor, but oil is my go-to for simplicity.
2 tablespoons milk (or buttermilk for extra tang): Just enough to bring the dough together into a workable consistency. Buttermilk makes them extra tender and adds a nice subtle tang.
For the Optional Topping/Glaze (for extra flavor and shine!):
1 tablespoon melted butter: To brush over the crackers before baking for that gorgeous golden finish.
Pinch of flaky sea salt: For a delightful little crunch and pop of saltiness on top.
Step-by-Step Instructions
Step 1: Preheat & Prep Pan
First things first, let’s get that oven ready! Preheat your oven to 375°F (190°C). While it’s heating up, grab a large baking sheet. I like to line mine with parchment paper. It makes cleanup a breeze and ensures the crackers don’t stick. If you don’t have parchment, a lightly greased baking sheet will do just fine. Trust me, the parchment paper is a game-changer for easy cleanup!
Step 2: Mix Dry Ingredients
Grab a medium-sized mixing bowl. Add in your all-purpose flour, baking powder, salt, garlic powder, onion powder, and cayenne pepper. Give it all a really good whisk. You want everything to be evenly distributed, so you don’t end up with a bite that’s too spicy or one that’s bland. This step is key to getting that consistent flavor in every single cracker!
Step 3: Mix Wet Ingredients
In a separate, smaller bowl or even just a liquid measuring cup, combine your vegetable oil and milk. If you’re using buttermilk, now’s the time to add it. Give it a quick stir just to combine.
Step 4: Combine
Now, pour the wet ingredients into the bowl with the dry ingredients. Mix with a spatula or a sturdy spoon until a dough starts to form. It will look a bit crumbly at first, but keep mixing. You don’t want to overwork it – just mix until it comes together into a cohesive ball of dough. If it seems too dry and won’t come together, add another teaspoon of milk, just a tiny bit at a time. If it feels too sticky, you can add a tablespoon of flour, but usually, it’s pretty spot-on.
Step 5: Prepare Filling
This step is for the optional topping! Melt your butter in a small bowl. If you’re adding flaky sea salt, have it ready to go.
Step 6: Layer & Swirl
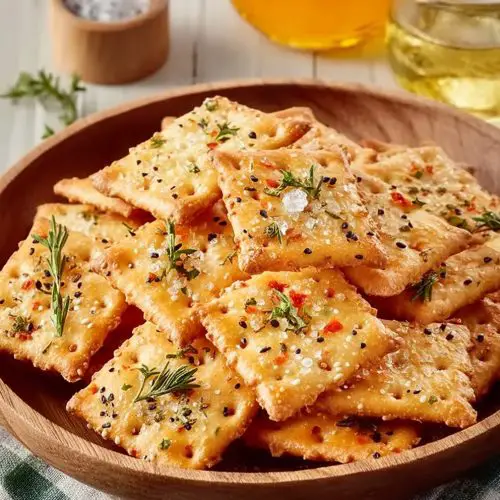
This is where it gets fun! Turn the dough out onto your parchment-lined baking sheet. Place another piece of parchment paper on top of the dough. Now, use a rolling pin to roll the dough out as thinly as possible. You want it to be almost paper-thin, like, really thin. The thinner you roll it, the crispier your crackers will be. Think about a quarter of an inch thick, or even less. Once it’s rolled out, remove the top layer of parchment. If you’re adding the optional topping, brush the melted butter evenly over the surface of the dough. Then, sprinkle with flaky sea salt if you’re using it. Now, grab a knife or a pizza cutter and score the dough into cracker-sized pieces. You don’t want to cut all the way through, just make light indentations. This makes it super easy to break them apart after baking. You can score them into squares, rectangles, or even diamond shapes – whatever makes you happy!
Step 7: Bake
Carefully slide the baking sheet into your preheated oven. Bake for 12-18 minutes, or until the edges are golden brown and the crackers look crisp. Keep an eye on them, especially towards the end, because thin crackers can go from perfectly baked to burnt really quickly! The exact time will depend on how thin you rolled your dough and your oven.
Step 8: Cool & Glaze
Once they’re beautifully golden and smell amazing, carefully remove the baking sheet from the oven. If you didn’t score them all the way through, this is where you can gently break them apart along the scored lines. Let them cool completely on the baking sheet. As they cool, they’ll become even crispier. If you opted for the melted butter and sea salt, now is when you’ll see that lovely shine and sprinkle of salt.
Step 9: Slice & Serve
Once they’re fully cooled and perfectly crisp, break them apart completely along the scored lines. You can serve them immediately, or store them in an airtight container. These are best enjoyed at room temperature, and honestly, they’re so addictive, they rarely make it to storage!
What to Serve It With
These Alabama Fire Crackers are so wonderfully versatile, they fit into almost any occasion. For breakfast? Hear me out! While they’re not exactly a sweet pastry, a few of these can be a surprisingly satisfying savory bite alongside a cup of coffee if you’re not feeling something heavy. The crunch is just delightful. For brunch, they’re absolute stars. Pile them high on a platter alongside deviled eggs, mini quiches, and fresh fruit salad. They add a lovely textural contrast and a zesty punch to balance out richer dishes. I love serving them with a creamy dill dip or a tangy remoulade. As dessert? Absolutely! After a rich meal, a small bowl of these is the perfect palate cleanser. They satisfy that craving for something savory and a little bit exciting without being overly sweet. They pair surprisingly well with a crisp white wine or even a light beer. And for cozy snacks? This is their natural habitat. They are the ultimate companion for a movie night, a casual get-together with friends, or just a quiet afternoon with a good book and a mug of tea. My kids absolutely love them as an after-school snack, and I often find myself sneaking a few while I’m doing dishes. They’re also fantastic crumbled over a salad for an extra layer of flavor and crunch, or served alongside a hearty soup. I’ve even seen them served with certain types of chili, where the spice level can really complement the richness of the chili. You really can’t go wrong!
Top Tips for Perfecting Your Alabama Fire Crackers
I’ve made these Alabama Fire Crackers more times than I can count, and over the years, I’ve picked up a few tricks that really make a difference. First, let’s talk about rolling the dough. The key to ultimate crispiness is rolling it out as thinly as you possibly can. I mean it, super thin! If you can see through it a little, that’s the sweet spot. Using two pieces of parchment paper for rolling really helps prevent sticking and makes the process so much smoother. Don’t be afraid to press down firmly with your rolling pin. Another thing I learned early on is about the spice level. The ¼ teaspoon of cayenne is a good starting point for a gentle warmth, but if you know your crowd loves a kick, don’t hesitate to increase it to ½ teaspoon or even a full teaspoon. Just remember, you can always add more heat, but you can’t take it away! So, maybe start with a little less and have some extra cayenne powder on hand to sprinkle on top for those who like it spicier. When it comes to mixing, the goal is to just bring the dough together. Overmixing can develop the gluten too much, leading to tougher crackers instead of delightfully crisp ones. So, mix just until it forms a cohesive ball. For the scoring step, I find using a pizza cutter gives me the cleanest, most even cuts. If you’re not scoring all the way through, remember to gently break them apart while they’re still warm but not scalding hot. This makes it so much easier than trying to snap them apart once they’re completely cooled and rock hard. If you’re ever unsure about the cayenne pepper, you can always substitute it with a pinch of red pepper flakes for a slightly different heat profile, or even a dash of smoked paprika for a smoky flavor without too much heat. For an extra layer of savory goodness, some people like to add a tablespoon of finely grated Parmesan cheese right into the dough with the dry ingredients. It adds a nutty, cheesy dimension that’s pretty fantastic! And finally, oven temperatures can vary wildly. Keep a close eye on your crackers during the last 5-7 minutes of baking. They should be a beautiful golden brown around the edges. If they’re browning too quickly on top but not crispy enough, you can try moving them to a lower rack in the oven for the last few minutes. These little tips have really elevated my fire crackers from good to absolutely irresistible!
Storing and Reheating Tips
These Alabama Fire Crackers are pretty robust, which is one of the things I love about them. For storing them at room temperature, make sure they are completely cooled. Once they are, pop them into an airtight container. They’ll stay wonderfully crisp for about 3 to 4 days this way. I often find they disappear long before that, though! If you happen to have leftovers that are a bit soft (which can happen if they weren’t cooled completely or the air is particularly humid), you can revive them. Spread them on a baking sheet and pop them back into a warm oven (around 300°F or 150°C) for about 5-10 minutes. They’ll crisp right back up. For refrigerator storage, I don’t typically recommend it as it can make them lose their crispness. However, if you absolutely need to, store them in an airtight container, and they should be okay for up to a week, but you’ll likely need to re-crisp them in the oven before serving. Freezing is another option if you’ve made a huge batch and want to keep them for longer. Once completely cooled, wrap them tightly in plastic wrap, then place them in a freezer-safe bag or container. They can stay frozen for about 1 to 2 months. To thaw, simply bring them out of the freezer and let them come to room temperature. For best results, I’d still give them a quick warm-up in the oven to bring back that perfect crunch. Regarding the glaze timing: if you use the optional melted butter and salt topping, it’s best applied just before baking. If you’re planning to store them for a while and want to refresh them, you can always re-melt some butter and brush it on before the re-crisping step in the oven. The key to preserving their quality is definitely ensuring they are totally cool before storing and using a truly airtight container.
Frequently Asked Questions
Final Thoughts
So there you have it – my beloved Alabama Fire Crackers! I truly hope you give these a try. They’re more than just a snack; they’re little bundles of joy that bring so much flavor and crunch. They remind me of good times, good company, and the simple pleasure of sharing delicious food. If you’re someone who loves a good savory bite with a kick, or if you’re looking for an easy recipe to impress your friends and family, these fire crackers are an absolute winner. They’re proof that you don’t need fancy ingredients or complicated techniques to create something truly memorable. They’re just so wonderfully satisfying, and the fact that they disappear in minutes at my house always tells me I need to make another batch. If you enjoy this recipe, you might also love my recipe for Spicy Cheesy Cornbread Muffins or my Homemade Ranch Seasoning Mix – they pair wonderfully! I can’t wait to hear how your Alabama Fire Crackers turn out! Please leave a comment below with your thoughts, your spice-level adventures, or any variations you tried. And if you share them on social media, be sure to tag me! Happy baking, and enjoy every single crispy, spicy bite!
Alabama Fire Crackers
Ingredients
Main Ingredients
- 1 sleeve saltine crackers
- 0.5 cup vegetable oil
- 1 tablespoon ranch seasoning mix
- 1 teaspoon garlic powder
- 0.5 teaspoon cayenne pepper (or more, to taste)
Instructions
Preparation Steps
- Preheat your oven to 250°F (120°C).
- In a large bowl, whisk together the vegetable oil, ranch seasoning mix, garlic powder, and cayenne pepper until well combined.
- Add the saltine crackers to the bowl and gently toss them to coat evenly with the spice mixture. Be careful not to break the crackers too much.
- Spread the coated crackers in a single layer on a baking sheet.
- Bake for 8-10 minutes, or until the crackers are lightly toasted and fragrant. Keep an eye on them to prevent burning.
- Remove from the oven and let them cool completely on the baking sheet. They will crisp up as they cool.
- Once cooled, store the Alabama Fire Crackers in an airtight container at room temperature.


