


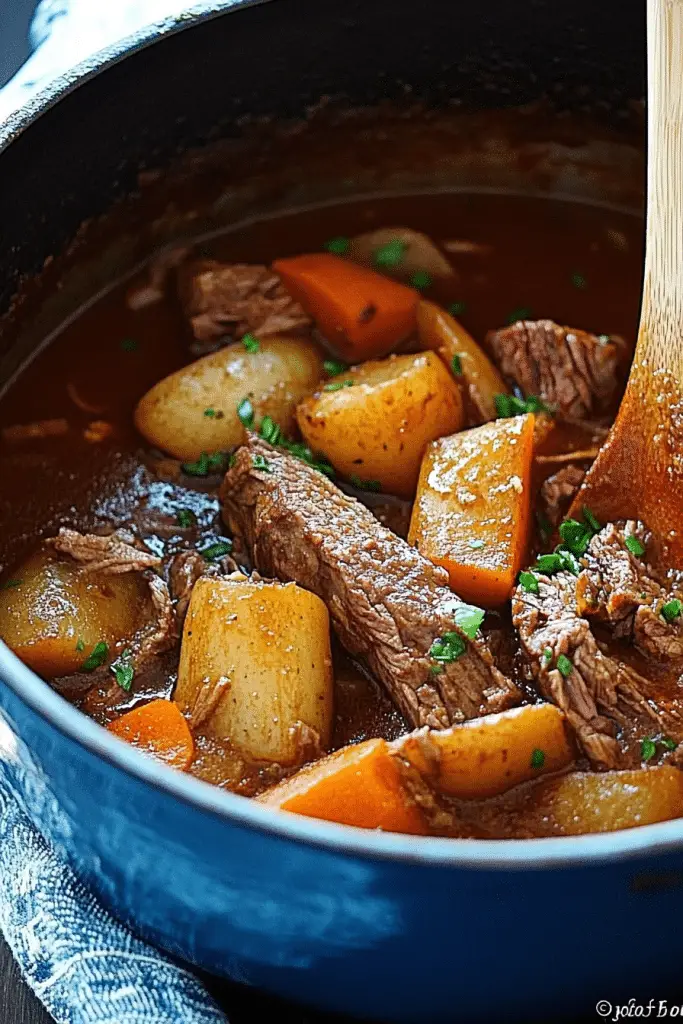
There’s something about walking into the kitchen on a chilly evening and being greeted by the rich, earthy aroma of braised beef slowly simmering away that just wraps you in a warm hug. This dish has that cozy, “home cooked” vibe that feels like a big sigh of relief after a long day. I remember the first time I made braised beef—my family was instantly hooked, especially my kids who usually prefer plain old spaghetti. Compared to a quick steak or a roast that’s dried out from rushing, this braised beef melts in your mouth and tastes like it’s been simmering for hours (even when you’re pressed for time). It’s one of those recipes that you lean on when you want something hearty, comforting, and unexpectedly easy to pull together.
What is braised beef?
So, let’s chat about what braised beef actually means. Think of it as a slow-cooked miracle where tougher cuts of beef get the VIP treatment—browned first, then gently simmered in a flavorful broth or sauce until they become tender enough to fall apart with a fork. The word “braise” comes from the French “braiser,” which is all about cooking with moist heat. It’s essentially a two-step cooking process: browning to lock in those rich flavors and then slow cooking at low heat to transform the beef into something unbelievably tender. It’s the kind of dish that turns humble, budget-friendly beef cuts into a melt-in-your-mouth showstopper. If you’re thinking it sounds complicated, don’t sweat it — braising is actually a super chill way to cook if you plan ahead. Plus, it’s one of those recipes where the depth of flavor only gets better the next day.
Why you’ll love this recipe?
What I love most about this braised beef recipe is how it’s the perfect trifecta of flavor, simplicity, and value. The flavor is out-of-this-world savory, with layers of caramelization from the initial sear and the slow-cooked richness from the broth soaking into every bite. It’s way deeper than just a regular roast, with hints of herbs and a touch of wine or broth that give it a subtle complexity without overwhelming your taste buds.
Also, you don’t have to be a kitchen whiz. I swear, if you can brown a piece of meat and pop a pot into the oven or on the stove to simmer, you’re halfway there. It’s mostly about patience and letting time do the heavy lifting. Plus, it’s budget-friendly because you can grab tougher cuts like chuck roast or brisket that are way more affordable than steaks but deliver unbelievable taste once braised. I’ve made this for everything from casual weeknight dinners to special holiday meals, and it works every time.
Another thing? Versatility. You can turn this into a stew, use the leftovers in tacos, or pile it onto mashed potatoes or creamy polenta. I’ve even shredded it up for sandwiches when I’m in a pinch. If you enjoy dishes like pot roast or slow-cooker beef stew, this one is right in your wheelhouse but delivers that extra wow factor I can’t seem to get enough of. Honestly, my family begs for it on busy days because it’s comforting, filling, and never boring.
How do I make braised beef?
Quick Overview
Here’s the gist of it: you start by seasoning and searing a great cut of beef to get that mouthwatering crust. Then you deglaze the pan with broth, wine, or even beer, toss in aromatics like garlic, onions, and herbs, cover it up, and let it braise low and slow either on the stovetop or in the oven. That slow cooking softens the beef into tender perfection and makes a luscious sauce from the cooking juices. It takes some time but the actual hands-on effort is minimal, and the results are always worth every minute.
Ingredients
For the main braised beef: For the main braised beef: For the main braised beef: For the main braised beef: For the main
- 3-4 pounds of beef chuck roast or brisket (choose well-marbled for tenderness)
- Salt and freshly ground black pepper (don’t be shy here—season well!)
- 2 tablespoons vegetable oil or olive oil (for searing)
- 3-4 cloves of garlic, smashed
- 1 large onion, roughly chopped
- 2 carrots, peeled and cut into chunks
- 2 stalks celery, cut into chunks (optional, but I love the flavor boost)
- Fresh herbs like thyme, rosemary, and bay leaves (tied together or loose)
For the Braising Liquid:
- 2 cups beef broth or stock (homemade or low-sodium store-bought works great)
- 1 cup dry red wine or additional broth (wine adds wonderful depth if you have it)
- 1 tablespoon tomato paste (optional, adds subtle sweetness and richer color)
- 1 tablespoon Worcestershire sauce or soy sauce (for umami punch)
Step-by-Step Instructions
Step 1: Preheat & Prep Pan
Start by heating a large, heavy-bottomed pot or Dutch oven over medium-high heat. I always use cast iron because it holds heat so well and gives a fantastic sear. Make sure your pan is hot before adding oil so you get that satisfying sizzle the second the meat hits the surface. While waiting, pat the beef dry with paper towels—moisture makes it harder to brown.
Step 2: Season and Sear the Beef
Generously salt and pepper all sides of the beef. Add oil to the hot pan, then carefully lay in the beef. Don’t rush or crowd the pan—sear in batches if needed. Let the beef brown without moving it for about 4-5 minutes per side until it’s beautifully caramelized and deep golden. This browning step is the secret to a richly flavored braise.
Step 3: Sauté Aromatics
Once the beef is browned, remove it to a plate. In the same pan, add the onion, carrots, celery, and garlic. Stir occasionally, scraping up any browned bits from the bottom. Let the veggies soften and get a little color, about 5-7 minutes. It adds layers of flavor that pull everything together.
Step 4: Deglaze the Pan
Pour in the red wine (or more broth) and tomato paste, stirring gently until the pan releases all those caramelized bits stuck to the bottom. Those bits are pure gold for your sauce, so don’t skip this step! Reduce the liquid for 2-3 minutes to concentrate the flavors.
Step 5: Assemble for Braising
Return the beef to the pot. Add the broth, Worcestershire sauce, and herbs, making sure the liquid comes halfway up the sides of the meat (not covering it completely). Bring everything to a gentle simmer.
Step 6: Slow Cook the Beef
Cover the pot tightly with a lid and transfer it either to a preheated 300°F (150°C) oven or keep it gently simmering on the stovetop over very low heat. Let it braise for about 3-4 hours, turning the beef once or twice, until it’s fork-tender and falling apart. The smell alone will make you want to pull it out early, but trust me—let it do its thing.
Step 7: Skim and Reduce Sauce
Once the beef is tender, carefully remove it and set it aside, covered to keep warm. Skim off any excess fat from the braising liquid, then simmer the liquid over medium heat until it thickens slightly to a rich sauce-like consistency. Taste and adjust seasoning with salt and pepper.
Step 8: Serve
Spoon the glossy sauce over the sliced or shredded beef. This is where that melt-in-your-mouth texture and deep sauce flavor really shine. Serve it piping hot and watch how quickly everyone digs in.
What to Serve It With
For Dinner: I love pairing my braised beef with creamy mashed potatoes or buttery polenta—perfect for soaking up that luscious sauce. Roasted root vegetables or a bright green vegetable like sautéed spinach balance the richness nicely.
For Cozy Lunches: Shred the leftovers and pile them into crusty sandwiches with a smear of horseradish or mustard. A crisp pickle on the side really cuts the richness.
For Something Special: Try serving it alongside buttery egg noodles or even creamy risotto. A glass of the same red wine used for the braise makes it all feel decadent and celebratory.
This recipe has become a staple when I want something comforting but also elegant enough to serve guests. We’ve enjoyed it for casual family meals and special occasions alike, which says a lot coming from a household with picky eaters. It always disappears fast—promise you’ll impress yours too.
Top Tips for Perfecting Your Braised Beef
Choosing Your Beef: Chuck roast or brisket are my go-to cuts—well-marbled and forgiving for slow cooking. If you try leaner cuts, expect less juicy results.
Searing Secrets: Make sure your beef is dry and your pan is hot before searing. Don’t overcrowd the pot, or you’ll steam instead of sear, and you don’t want that. Take your time to get a rich brown crust; it’s flavor gold.
Don’t Skip Deglazing: Those browned bits cling stubbornly to the pot but hold some of the deepest flavor in the dish. A good splash of wine or broth loosens them up and makes the sauce sing.
Low and Slow Every Time: Keep your oven or stove heat low and patient. Rushing this step leads to chewy beef, and that’s the opposite of what braising is all about.
Herbs and Aromatics: Fresh rosemary and thyme are my favorites—don’t be shy. You can also experiment with bay leaves or even a cinnamon stick for a warm twist. Garlic and onions are non-negotiable for me—they add sweetness and depth.
Adjusting the Sauce: After braising, the liquid might be a bit thin. Reduce it gently, and if you want a silkier finish, a small knob of butter stirred in right at the end works wonders. Just be sure to taste for seasoning before serving.
I learned the hard way to be patient and trust the process. The first time I rushed it, the beef was tough, and the sauce thin—no fun at all. But once I slowed down and gave the flavors time to mingle, it became a guaranteed crowd-pleaser. Every time I make it, I feel like I’m giving my family a warm, flavorful hug that sticks around for days.
Storing and Reheating Tips
Room Temperature: After serving, braised beef can sit covered on the counter for a couple of hours, but definitely don’t exceed 2 hours to keep it safe and fresh.
Refrigerator Storage: Store leftovers in an airtight container for up to 4 days. The flavors deepen overnight, so leftovers often taste even better than the first day. Be sure to cool the beef before refrigerating to avoid a soggy mess.
Freezer Instructions: Braised beef freezes beautifully. Wrap portions tightly in plastic wrap, then foil or vacuum seal them to avoid freezer burn. It can be stored for up to 3 months. Thaw overnight in the fridge before reheating gently on the stove or in the oven.
Glaze and Sauce: If you want to save some sauce separately for reheating or freezing, keep it in a sealed container. Reheat slowly to avoid breaking. I usually add fresh herbs or a splash of broth to revive its perfect texture after reheating.
Pro tip: I always reheat braised beef low and slow to keep it tender and juicy. Zapping it quickly in the microwave can dry it out, so patience works here too!
Frequently Asked Questions
Final Thoughts
Honestly, braised beef has been a game changer in my kitchen—it’s one of those recipes I come back to over and over because it’s reliable, delicious, and just fills the house with cozy vibes that everyone loves. Whether you’re new to slow-cooked meals or a seasoned pro, this one’s totally worth the time invested. Plus, the leftovers are so good you might end up making it on purpose again just for lunch the next day. If you want to experiment, try swapping herbs or adding your favorite root vegetables—every version has its own charm.
Can’t wait to hear how yours turns out—don’t be shy about leaving your thoughts, questions, or your own twists in the comments. Happy cooking and even happier eating!
braised beef
Ingredients
Main Ingredients
- 5 lbs beef brisket trimmed of all fat
- 1 tbsp matzo meal (or all purpose flour if not for Passover, gluten-free flour for gluten-free)
- black pepper to taste, freshly ground
- 1 tbsp olive oil
- 4 large white onions peeled and thickly sliced
- 3 tbsp tomato paste
- kosher salt
- 4 cloves garlic peeled and quartered
- 2 cups beef broth
- 3 large carrots peeled and trimmed 2 inches long
- 32 oz red potatoes quartered
- 0.25 cup fresh parsley chopped for garnish
Instructions
Preparation Steps
- Preheat the oven to 375°F.
- Lightly season the brisket with salt and pepper to taste and lightly dust with matzo meal.
- Heat the olive oil over medium-high heat in a large 7-quart Dutch oven or other heavy pot with a lid large enough to hold the brisket.
- Add the brisket to the pot and brown on both sides, about 10-12 minutes.
- Remove meat and set aside.
- Add the onions, salt and pepper to the pot and cook until soft and browned, about 10-12 minutes stirring constantly with a wooden spoon, scraping up any browned bits stuck to the bottom of the pot.
- Spread the tomato paste onto the brisket, season with salt and pepper and place back in the pot over the onions and add the carrots and garlic. Pour the broth over everything.
- Cover the pot, transfer to the oven, and cook the brisket for about 1 1/2 hours.
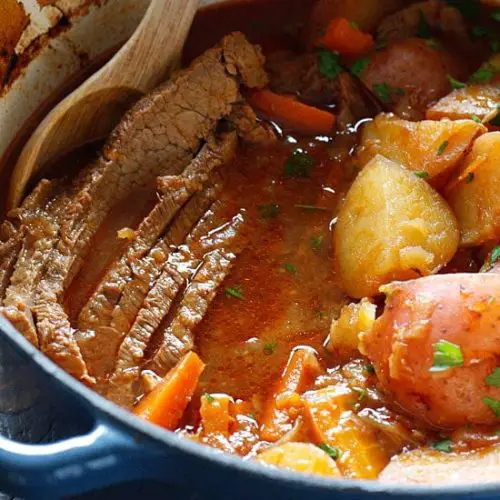
- Remove the brisket and transfer to a cutting board. Slice the brisket thin across the grain.
- Return the slices back to the pot, keeping the brisket together so it resembles the unsliced brisket.
- Add the potatoes and season with salt and pepper. Cover the pot and return to the oven.
- Reduce heat to 325°F and cook the brisket until it is fork-tender and the potatoes are cooked through, about 1 1/2 hours. Check once or twice during cooking to add more broth if needed.
- To serve arrange the meat on a platter with the carrots, onions, potatoes and some of the liquid and garnish with fresh chopped parsley. Serve the remaining gravy on the side.


