


There’s something so magical about the way warm strawberries and crumbly graham come together that feels like summer and cozy afternoons all in one bite. Every time I make these strawberry graham bars, I’m instantly transported back to my childhood, sitting in my grandma’s kitchen while the sweet smell of berries mingled with warm baked crust filled the air. It’s the kind of dessert you can whip up in a flash, and yet it tastes like you spent hours fussing over it. These bars have a soft, slightly tart strawberry center wrapped in buttery graham cracker goodness, and honestly, they fly off the plate faster than I can slice them. If you love simple, nostalgic treats like strawberry shortcake but want something easier and ready-to-go, this strawberry graham recipe is for you. Trust me, once you try it, it’ll be your go-to whenever you need a sweet fix with a little nostalgia and a lot of heart.
What is strawberry graham?
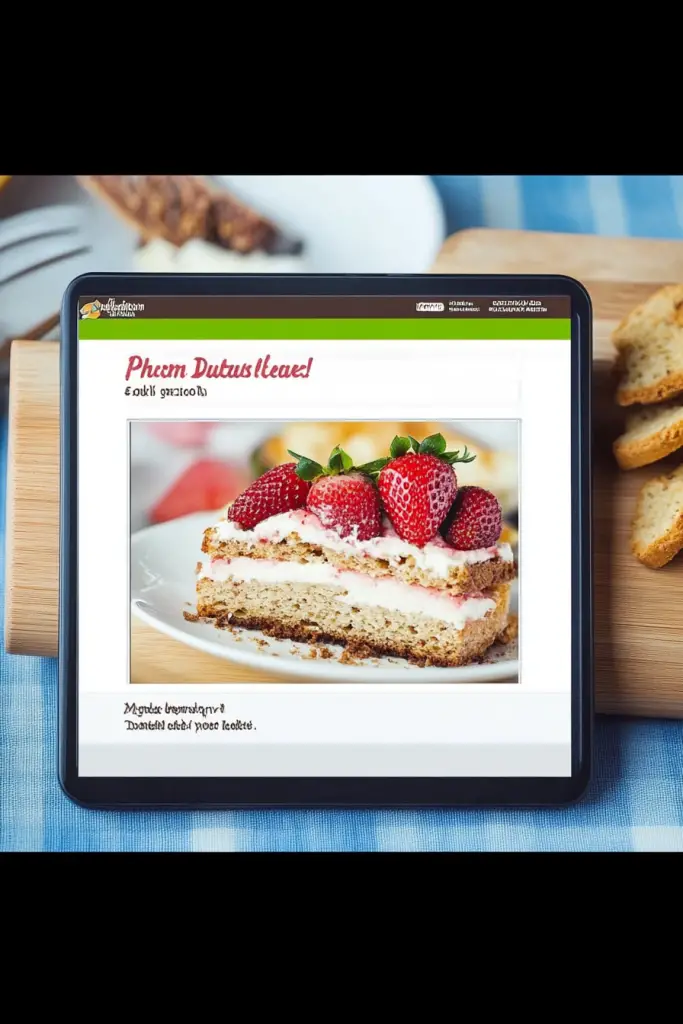
Think of strawberry graham as a cozy hug baked into a bar—it’s essentially a homemade graham cracker crust layered or swirled with a luscious strawberry filling or glaze. The name comes from the signature graham cracker crust that lends a buttery, slightly crunchy base, paired with fresh strawberries (or sometimes preserves) that bring just the right amount of fruity zing. It’s a happy marriage of textures and flavors that feels both simple and indulgent. This recipe takes the humble components we all know—graham crackers and strawberries—and turns them into something you’ll want to bake again and again. Whether you slice it into bars for a picnic or serve it warm with a scoop of ice cream, strawberry graham is a treat that’s as approachable as your favorite comfort food.
Why you’ll love this recipe?
What I love most about this strawberry graham recipe is how effortlessly it brings a smile to everyone’s face at our table. The flavor? It’s a perfectly balanced mix of buttery graham crust with that dreamy strawberry sweetness, not overly sugary but just right to make your taste buds dance. Plus, the fresh berries add a bright pop that feels so fresh and summery—no canned stuff here, just real strawberries doing their magic. The simplicity is a lifesaver; no fancy equipment or complicated steps, just a few bowls, a trusty spatula, and your favorite pan. And honestly, it’s a pretty budget-friendly dessert, especially when strawberries are in season—you can easily swap in frozen berries too, and it still turns out delicious.
Another thing that makes this one stand out is its versatility. I often make a batch for brunch, slicing it into neat squares with a dollop of whipped cream or a drizzle of honey on top. Other times, it’s a quick after-dinner snack or the perfect companion to my morning coffee. It’s also great for potlucks or weekend picnics because it travels well and doesn’t require complicated plating. If you’ve enjoyed strawberry shortcakes or even strawberry cheesecake bars, this one hits that same nostalgic note but with less fuss and more buttery graham goodness. My kids actually ask for this all the time, especially when strawberries are in season, which says a lot when you’ve got two picky eaters around!
How do you make strawberry graham crackers?
Quick Overview
This strawberry graham recipe is all about layering simple ingredients with a straightforward method that saves you time but still delivers big flavor. You start by making a buttery graham cracker crust that acts as your base, then prepare a luscious strawberry filling that’s sweet and slightly tart. The filling gets swirled gently into the batter for that gorgeous marbled effect. Once baked, you finish it off with a delicate glaze that seals in moisture and adds a bit of shine. It’s honestly easier than you’d think, and I love that there’s no need to fuss with multiple bowls or chill times—perfect for when life gets busy but you want that homemade touch.
Ingredients
For the Main Batter:
- 1 ½ cups graham cracker crumbs (I always crush mine fresh with a rolling pin for best texture)
- ¼ cup granulated sugar – just enough to sweeten the crust without overpowering
- ½ cup unsalted butter, melted and cooled slightly (quality butter really lifts the flavor here)
- 1 cup all-purpose flour – you can swap in white whole wheat for a nuttier taste
- 1 teaspoon baking powder
- ½ teaspoon salt
- 2 large eggs
- ½ cup sugar (adjust to your liking)
- 1 teaspoon vanilla extract
- ½ cup plain Greek yogurt (adds moisture and tang – I sometimes swap with sour cream)
For the Filling:
- 2 cups fresh strawberries, hulled and sliced (sometimes I use a mix of fresh and frozen depending on the season)
- ¼ cup sugar (feel free to reduce if your berries are super sweet)
- 1 tablespoon lemon juice (brightens up the flavor beautifully)
- 2 teaspoons cornstarch (helps to thicken the filling; you can swap with arrowroot powder)
For the Glaze:
- 1 cup powdered sugar
- 2 teaspoons fresh lemon juice (adds a nice zing and balances sweetness)
- 1–2 tablespoons milk or cream (adjust for your desired glaze consistency)
- Optional: ½ teaspoon vanilla extract for a subtle twist
Step-by-Step Instructions
Step 1: Preheat & Prep Pan
Start by preheating your oven to 350°F (175°C). Grease a 9×9 inch square baking pan with butter or line it with parchment paper, leaving a bit hanging over the edges so you can easily lift the bars out later. This little step saves you from any tricky slicing disasters down the road. I usually gently press the parchment to snugly fit — it makes cleanup a breeze, too!
Step 2: Mix Dry Ingredients
In a large bowl, combine the graham cracker crumbs, sugar, flour, baking powder, and salt. I like to whisk them together to make sure everything is evenly distributed. This creates that perfect crumbly texture that forms the bulk of your crust and base. If you miss whisking this bit, the rising can be uneven, so don’t skip it!
Step 3: Mix Wet Ingredients
In a separate bowl, whisk the eggs with sugar and vanilla extract until you get a pale, slightly frothy mixture—this tells me it’s well aerated and will give a light texture. Stir in the Greek yogurt and melted butter. The yogurt makes these bars wonderfully moist and lends a slight tang that complements the strawberry filling beautifully.
Step 4: Combine
Pour the wet ingredients into your dry mix and stir gently until just combined. Avoid overmixing—if there are a few dry streaks left, that’s totally fine. Overmixing can make the bars tough rather than tender. I learned this the hard way when trying to rush through and ended up with a dense one instead of my usual fluffy texture.
Step 5: Prepare Filling
Combine sliced strawberries, sugar, lemon juice, and cornstarch in a small saucepan. Heat over medium, stirring frequently until the mixture thickens and becomes syrupy, usually about 5-7 minutes. Let it cool slightly before using, or it can melt the batter if too warm. If you want a chunkier filling, simmer less. It’s always tempting to dive straight in, but wait a bit—it’s worth the patience.
Step 6: Layer & Swirl
Pour half of the batter into the prepared pan and smooth it out. Spoon the strawberry filling over it evenly, then dollop the remaining batter on top. Use a butter knife or skewer to gently swirl the layers together—go slow and steady for those beautiful marbled veins of strawberry and graham goodness. I find swirling in one direction in slow circles gives the prettiest look.
Step 7: Bake
Bake for 35–40 minutes until the top is golden and a toothpick inserted into the graham batter (avoiding filling swirls) comes out clean. I always check from about 30 minutes onward because ovens vary, and it’s easy to overbake these bars if you’re not watching. Once in a while, I’ve baked them just a tad less for an extra gooey center—completely irresistible!
Step 8: Cool & Glaze
Let the bars cool completely in the pan on a wire rack. This step is crucial for a neat glaze application. Once cooled, whisk the powdered sugar, lemon juice, and milk until smooth, adjusting the milk teaspoon by teaspoon until you get a nice drizzle consistency. Drizzle over the bars, then let the glaze set for at least 20 minutes before slicing. This glaze adds a tangy sweetness that’s just the perfect finishing touch.
Step 9: Slice & Serve
Use the parchment overhang to lift the whole slab gently from the pan and then slice into squares or rectangles. A sharp serrated knife works best, and I like to wipe the blade clean between cuts for neat slices. These bars are perfect warm or at room temperature, but trust me—fresh from the fridge isn’t bad either, especially with a smear of cream cheese or a scoop of vanilla ice cream.
What to Serve It With
For Breakfast: Pair your strawberry graham bars with a strong cup of black coffee or a vanilla latte. It’s like having a sweet breakfast treat without the guilt—my morning routine feels instantly upgraded with a slice and my favorite mug in hand.
For Brunch: Serve on a pretty platter alongside fresh whipped cream, a sprinkle of toasted almonds, and a pot of chamomile tea or sparkling lemonade. It adds a touch of elegance without any fuss, great for weekend gatherings when you want to impress effortlessly.
As Dessert: These bars shine as a light dessert topped with a scoop of vanilla bean ice cream or a dollop of tangy mascarpone cheese. Fresh mint leaves on top add a pop of color and an extra herbal note that surprises in a good way. My family insists this is dessert heaven.
For Cozy Snacks: Grab a bar with some herbal tea or your favorite cold glass of milk for an afternoon snack that’s both comforting and satisfying. Sometimes I throw in a handful of walnuts or pecans on top for crunch—my kids love that little twist.
It’s become a tradition in my house to bake these whenever strawberries start popping up at the market—no fancy occasion needed. Just moments to enjoy something homemade and sweet with the people you love.
Top Tips for Perfecting Your Strawberry Graham
Graham Prep: Freshly crushing graham crackers makes such a difference—I toss mine in a zip-top bag and roll with a pin. It gives a better texture compared to pre-packaged crumbs, which can be finer and less flavorful. If you catch your grahams on sale, stock up and freeze them to crush later.
Mixing Advice: Patience during the wet and dry ingredient combo is key. Mix gently and stop as soon as everything is incorporated. Overmixing developed gluten will make your bars tough, and that’s the last thing you want in a tender, buttery dessert. I always scrape the sides and bottom to be sure nothing’s left behind but stop stirring immediately after it comes together.
Swirl Customization: This is the fun part—be artistic! You can use a toothpick to create swirls that mimic marble or go wild with stripes for a more rustic look. Try swirling in small circles rather than big swoops to achieve even distribution and that lovely, delicate pattern. I sometimes save a little strawberry filling aside and drizzle it on top before glazing for extra flair.
Ingredient Swaps: Greek yogurt gives moisture and tang, but sour cream or even buttermilk work beautifully too (just swap cup for cup). I’ve tested almond milk in the glaze, and it actually added a creamier texture with a subtle nutty note. Whole wheat flour can replace half the flour for more fiber, but keep the other half all-purpose for a tender crumb.
Baking Tips: Oven temperatures vary wildly, so start checking your bars around 30 minutes. If your oven has hotspots, rotate the pan halfway through baking for a more even bake. When the top is golden and the sides start pulling away gently from the pan, you’re in good shape. Toothpick tests always help but avoid poking into the strawberry swirl—it’s meant to be gooey!
Glaze Variations: The glaze is pretty flexible—a touch of orange juice instead of lemon adds a fresh citrus twist, and swapping powdered sugar for honey powder (found at specialty stores) brings a richer flavor. For thicker glazes, add a bit more sugar; thinner, add more milk. Use a squeeze bottle for precise drizzle or a spoon for rustic charm.
I’ve learned over the years that letting the bars cool fully before glazing prevents the icing from melting off. It’s a tiny step that makes a huge difference in presentation and taste, and one of my favorite “little secrets” to share with friends.
Storing and Reheating Tips
Room Temperature: These bars keep well covered at room temperature for up to 2 days if your kitchen isn’t too warm. I usually cover them loosely with foil or a clean tea towel to keep that delicate moisture and prevent the glaze from drying out.
Refrigerator Storage: Store in an airtight container in the fridge for up to 5 days. The bars tend to firm up a bit, which I love. Just bring them to room temp or warm slightly in the microwave for about 15 seconds before enjoying—it brings back that fresh-baked softness.
Freezer Instructions: You can freeze strawberry graham bars for up to 2 months by wrapping them tightly in plastic wrap and then placing in a freezer-safe bag. Thaw overnight in the fridge and add fresh glaze if desired. Freezing can slightly change the texture but still gives you that satisfying grab-and-go treat.
Glaze Timing Advice: If you plan to freeze or store longer, add the glaze just before serving rather than before storing. Glaze can soften and absorb moisture in the fridge or freezer, so fresher application keeps that lovely sheen and tangy finish intact.
Frequently Asked Questions
Final Thoughts
Making strawberry graham bars feels like diving into a warm, nostalgic hug every time I bake them. There’s something so satisfying about turning simple ingredients into this melt-in-your-mouth, berry-filled delight that pulls smiles around my kitchen table. It’s a recipe that’s saved me on busy weeknights, brightened weekend afternoons, and become a sweet tradition I cherish with family and friends. If you’re looking for a dessert or treat that’s easy, comforting, and utterly irresistible, this one’s a must try. Definitely explore similar recipes like strawberry crumb bars or graham cracker cheesecake bars afterward—the flavors all share that same cozy charm.
Don’t be shy about making this recipe your own—swap ingredients, tweak the sweetness, or play with your favorite glaze variations. And when you do make it, I’d love to hear how yours turns out! Pop a comment below, share your tweaks, and let’s keep the strawberry love going. Happy baking!

strawberry graham
Ingredients
Main Ingredients
- 2 cups fresh strawberries
- 1.5 cups graham cracker crumbs
- 0.25 cups granulated sugar
- 0.5 cups unsalted butter, melted
- 8 oz cream cheese, softened
- 0.5 cups powdered sugar
- 1 tsp vanilla extract
- 1 cup whipped topping such as Cool Whip
Instructions
Preparation Steps
- Preheat the oven to 350°F (175°C).
- In a medium bowl, combine graham cracker crumbs, granulated sugar, and melted butter. Press the mixture into the bottom of a 9-inch springform pan.
- Bake the crust for 10 minutes. Remove from oven and allow to cool.
- In a large bowl, beat the cream cheese until smooth. Add powdered sugar and vanilla extract and mix until combined.
- Fold in the whipped topping gently until blended.
- Spread the cream cheese mixture over the cooled crust evenly.
- Arrange the halved fresh strawberries on top of the cream cheese layer.
- Chill the dessert in the refrigerator for at least 1 hour before serving.


