


There’s something about the smell of cherry pie baking that takes me right back to my grandma’s kitchen—sunlight streaming through the window, the hum of her old radio playing softly, and that unmistakable sweet-tart scent wrapping around the house like a cozy hug. I honestly think this cherry pie recipe has a magic of its own. It’s the kind of pie that disappeared in a flash during family gatherings, and my kids now beg me to make it every few weeks. If you love fruit pies but find some intimidating to make, trust me, this cherry pie is everything you want—a perfect balance of juicy, tangy filling and buttery, flaky crust without any fuss. It’s way easier than a fancy cheesecake and feels so much more comforting, kind of like that warm blanket you want on a chilly evening.
What is a cherry pie?
Think of cherry pie as the classic American fruit pie you probably grew up with or had at summer picnics. It’s essentially a pie filled with fresh or canned cherries sweetened just right and baked inside a flaky pie crust that’s tender but sturdy enough to hold all that luscious filling. The name is pretty straightforward—it’s a pie made with cherries—but what makes it special is how those deep red orbs burst with flavor, giving you that perfect mix of sweet and tart with every bite. Cherry pie is that nostalgic dessert that makes any occasion feel extra special, whether it’s a picnic in the park or a holiday dinner. In my house, it’s more than dessert; it’s a tradition wrapped in a flaky crust.
Why you’ll love this recipe?
What I adore most about this cherry pie recipe is how incredibly forgiving and versatile it is. First off, the flavor is just spot-on—the cherries hold onto their brightness, and the filling doesn’t get too runny or too thick. It’s that perfect “just-right” consistency where each bite offers a juicy pop of cherry balanced by that buttery crust. Now, I know pie can sound intimidating, but this version is surprisingly simple to pull off. I always say, if you can stir and roll dough, you’re already halfway there! Plus, the ingredients are budget-friendly—cherries (fresh when in season, or good-quality frozen works beautifully), sugar, simple flour, and staple kitchen staples like butter and eggs.
Versatility? Oh yes. This cherry pie plays well at breakfast (hello, a warm slice with morning coffee), shines at brunch alongside a light salad, and steals the show as a dessert with a scoop of vanilla ice cream on top. It’s also a total crowd-pleaser—I’ve lost track of how many times it’s disappeared in minutes at my house. Compared to other fruit pies like blueberry or apple, cherry pie has this enchanting tang that feels both nostalgic and fresh. Plus, I’ve adapted this recipe over the years to add subtle hints of almond extract or a quick glaze, which just ups the wow factor without complicating things.
How do I make a cherry pie?
Quick Overview
This cherry pie is basically all about layering simple flavors in a way that feels both homemade and a little special. You start by prepping your crust, then get your luscious cherry filling ready—it’s just cherries, sugar, and a few secret touches to pull out the flavor. Then comes the fun part: layering the filling and dough together with a little swirl for that perfect marble effect and baking it until golden. It’s one of those recipes that’s straightforward enough to whip up after work but feels like you’ve put in so much love and effort. Trust me, the smell alone makes waiting around totally worth it.
Ingredients
For the Crust:
- I always use unbleached for that rich, wheat flavor. I use 2 12 cups all-purpose flour (I always use unble
- 1 tsp salt
- 1 tsp sugar
- 1 cup cold unsalted butter, cubed (the colder the better for that flaky texture)
- 6-8 tbsp ice-cold water (in small increments to keep the dough tender)
For the Filling:
- 5 cups fresh or frozen tart cherries (thawed if frozen)
- 1 to 1 ¼ cups granulated sugar (depending on how sweet your cherries are)
- 3 tbsp cornstarch (helps thicken without cloudiness)
- 1 tbsp lemon juice (brightens the tartness just enough)
- ½ tsp almond extract (optional, but it adds a lovely warmth)
- A pinch of salt
For the Glaze:
- 1 egg, beaten (for egg wash to get that golden crust)
- 2 tbsp granulated sugar (sprinkled on top before baking for a subtle crunch)
- Optional: a simple powdered sugar glaze (mix ½ cup powdered sugar with 1-2 tbsp milk and a drop of vanilla)
Step-by-Step Instructions
Step 1: Preheat & Prep Pan
First things first—I always preheat the oven to 400°F (200°C). Then, I lightly butter a 9-inch pie dish or just give it a quick spray with nonstick cooking spray. This little step keeps your crust from sticking and helps those edges turn beautifully crisp. Let your oven fully preheat; I’ve learned that baking in a properly heated oven is crucial to that flaky crust magic.
Step 2: Mix Dry Ingredients
In a large bowl, whisk together your flour, salt, and sugar for the crust. This is just to evenly spread the salt and sugar before cutting in your butter. If you skip this, the salt ends up uneven, and that can mess with the taste. Getting this right is like laying a solid foundation for your crust to shine.
Step 3: Mix Wet Ingredients
Next, add your cold cubed butter to the flour mixture. I use a pastry cutter or my fingertips super quickly to rub the butter into the flour until the mixture resembles tiny peas—that’s your cue. Then add cold water, one tablespoon at a time, stopping as soon as the dough just comes together. The key here is to keep it cold and not overwork it, or the crust can get tough.
Step 4: Combine
Divide the dough into two disks, wrap them tightly in plastic wrap, and chill for at least 30 minutes. This chilling step is what makes the dough easier to roll and keeps your crust flaky. Rushing this step is the biggest rookie mistake I see—trust me, it pays off.
Step 5: Prepare Filling
While the dough chills, combine your cherries, sugar, cornstarch, lemon juice, almond extract, and salt in a bowl. Mix gently to coat all those juicy cherries without squishing them. If you want, you can taste and adjust sugar here. The cornstarch is your best friend—it thickens so nicely, and the filling won’t be soupy.
Step 6: Layer & Swirl
Roll out one disk of dough and line your pie plate with it. Pour in the cherry filling, then roll out the second disk. Here’s my favorite part: instead of just laying the top crust flat, I cut it into strips and weave a lattice or make fun swirls by folding and swirling sections over the filling for a homemade touch. You can also lightly brush the top crust with beaten egg for that irresistible golden sheen.
Step 7: Bake
Pop your pie on the middle rack and bake at 400°F for the first 15 minutes to help set the crust, then lower the heat to 350°F (175°C) and bake for another 35-40 minutes. You’ll know it’s done when the crust is deep golden, and juices bubble up through the lattice or slits. If the crust edges brown too fast, tent with foil halfway through.
Step 8: Cool & Glaze
Let the pie cool on a wire rack for at least 2 hours before slicing; this is essential to let the filling set up so it’s not runny. After cooling, if you love a shiny finish, drizzle with a powdered sugar glaze or dust with a little powdered sugar for extra sweetness.
Step 9: Slice & Serve
Cut into thick wedges using a sharp serrated knife (this helps keep the crust intact). Serve warm or at room temp, ideally with a scoop of vanilla ice cream or a dollop of whipped cream. My kids swear by it with a big spoonful of homemade whipped cream—that’s their happy place.
What to Serve It With
For Breakfast: A warm slice with freshly brewed black coffee or a dollop of Greek yogurt on the side—it’s like a morning hug that’s sweet without feeling too heavy.
For Brunch: Serve with a plate of sharp cheddar cheese cubes and a sparkling rosé or fruity iced tea. The contrast of salty and sweet always gets rave reviews.
As Dessert: This pie is a dream alongside vanilla bean ice cream, or drizzle some caramel sauce on top for a grown-up twist. A cup of hot herbal tea or coffee rounds it out beautifully.
For Cozy Snacks: Slices wrapped in parchment for a quick afternoon treat while curled up with a good book or during post-school snack time. Pair it with a glass of milk or chai latte for that extra comfort vibes.
In our family, this cherry pie is a staple at holiday dinners and weekend get-togethers. One of my fondest memories is bringing this pie to potlucks and watching it vanish before I could get seconds. It’s simple, classic, and just feels like home.
Top Tips for Perfecting Your Cherry Pie
Dough Prep: Keep everything cold—especially your butter and water. This makes the difference between a tough crust and a flaky, tender one. I usually chill my bowl and tools too if the kitchen is warm.
Mixing Advice: Don’t overmix once you add water. The dough should just hold together. Overworking develops gluten, which means a tougher crust. If it feels sticky, add a bit more flour, but sparingly.
Swirl Customization: For the swirl effect on top, use a small offset spatula or back of a spoon to fold and twist your dough gently over the filling. It adds a little artisan flair without extra effort.
Ingredient Swaps: I’ve swapped half the butter for cold coconut oil once, and it gave a lovely subtle coconutty aroma that paired surprisingly well with the cherries. Watch out though—too much coconut oil can affect texture, so keep to no more than half.
Baking Tips: Every oven’s a bit different. I recommend checking around 30 minutes in to make sure the crust isn’t browning too fast. If so, cover the edges with foil and keep baking until the filling bubbles. The bubbling juices mean the pie is perfectly cooked inside.
Glaze Variations: Sometimes I skip the sugar sprinkle and swirl a little honey or maple syrup on the baked crust once cooled for a natural shine and sweetness.
One lesson I’ve learned is never to rush cooling—cutting too soon means a runny mess, and no one wants that! Also, avoid piling on the sugar in the filling—the cherries shine brightest with balanced sweetness.
Storing and Reheating Tips
Room Temperature: You can keep the pie out covered loosely with foil for up to two days. It’s best to eat fresh but this pie holds well as the crust stays tender and the filling doesn’t dry out.
Refrigerator Storage: If you have leftovers, wrap tightly with plastic wrap or store in an airtight container for up to 4 days. Chilling helps the flavors meld, but the crust can lose a bit of its crispness.
Freezer Instructions: For longer storage, wrap pie tightly in plastic and then foil, freeze for up to 3 months. Thaw overnight in the fridge before gently reheating in a 350°F oven to revive the crust’s crispness.
Glaze Timing Advice: If you plan to freeze, avoid glazing before freezing—it can get messy and sticky. Glaze or sprinkle powdered sugar right before serving for best results!
Frequently Asked Questions
Final Thoughts
This cherry pie has been a part of so many happy moments in my life—from family dinners to impromptu weekend treats. It’s the kind of recipe that’s easy enough to make even when life is busy, yet rich with the kind of flavor and texture that feels like a warm hug on a plate. If you’ve been hesitant about making pie, I promise this is a fantastic place to start. And if you love this recipe as much as my family does, you might want to try my blueberry crumble or apple cinnamon pie next. I’d absolutely love to hear how yours turns out, so don’t forget to drop a comment below or share your cherry pie stories and tweaks. Happy baking!
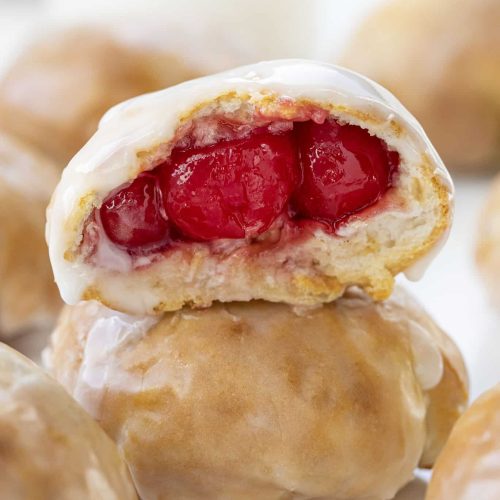
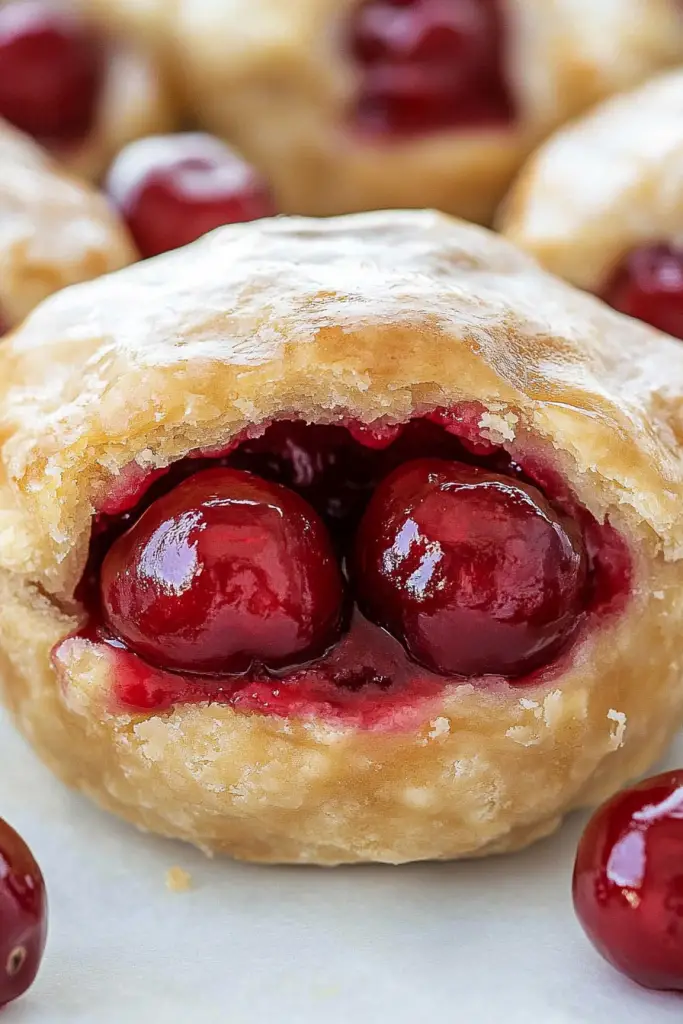
Cherry Pie Bombs
Ingredients
Main Ingredients
- 8 biscuits Pillsbury Grand biscuits (not flaky layers)
- 1 cup cherry pie filling
- 0.5 cup unsalted butter melted
For the Glaze
- 2 cups confectioners' sugar
- 3.5 tablespoons whole milk room temperature
Instructions
Preparation Steps
- Remove the biscuits from the can and peel to separate each into two layers. Press each layer of biscuit into a 4-inch circle. (You will have 16 circles.)
- Spoon about 1 tablespoon of the cherry pie filling into the center of each circle.
- Use your fingers to fold the sides together, pinching to seal. Shape into balls. Make sure the dough is the same thickness all around for even cooking.
- Brush the tops and bottoms of the bombs with melted butter.
- Spray the basket of your air fryer with nonstick cooking spray.
- Working in batches, place the bombs into an air fryer basket about 2 inches apart.
- Air fry at 330°F for 7-8 minutes, or until golden brown. Remove the pie bombs from the air fryer to let them cool slightly. As they are cooling, make the glaze.
Glaze and Serving
- To make the glaze, in a medium mixing bowl, combine the confectioners' sugar and milk. Whisk together until smooth. Add more milk to reach your desired consistency.
- Dip or roll each cherry pie bomb in the glaze. Place them on a wire rack over a baking sheet.
- Let the glaze firm up. Serve warm or at room temperature.


