


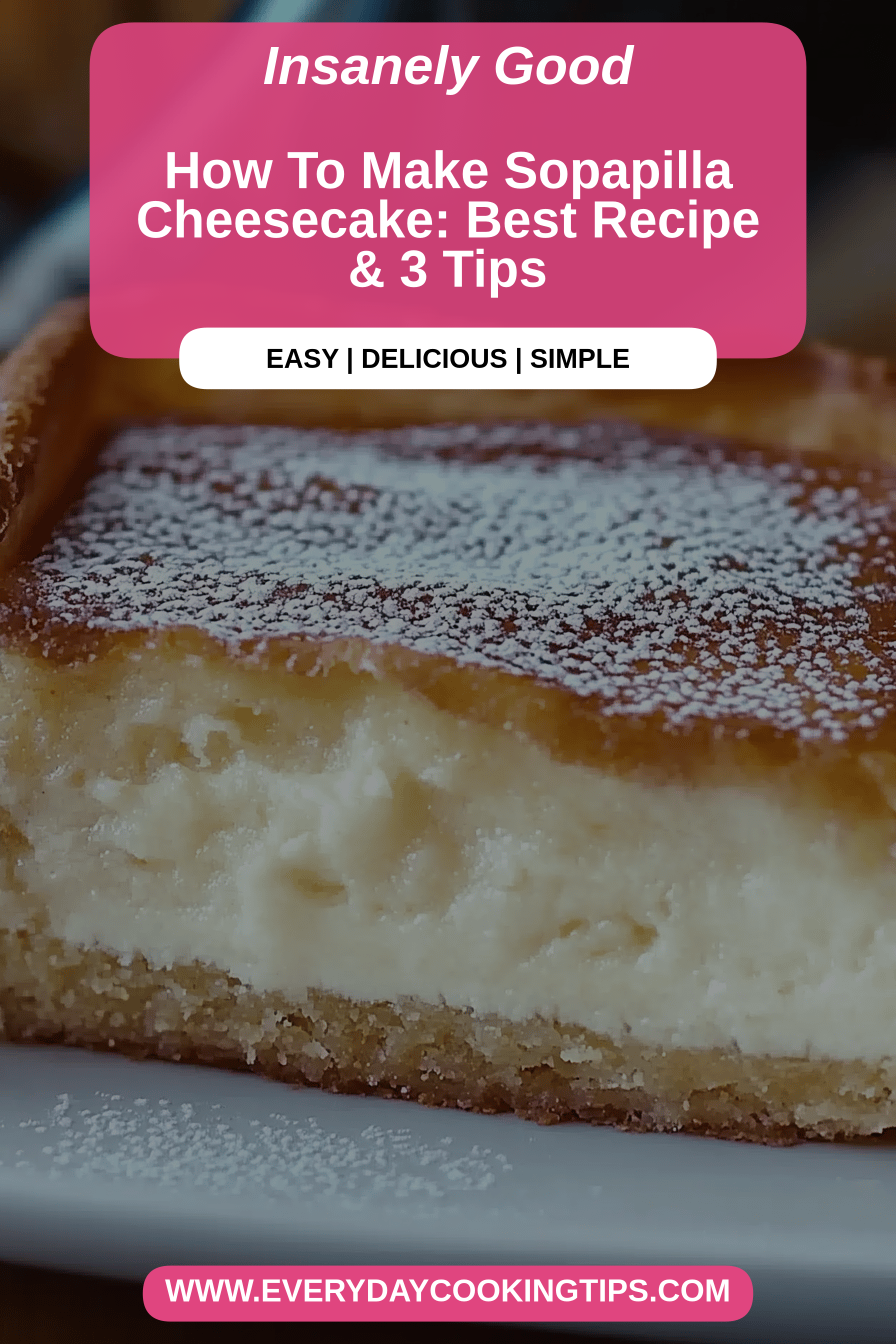
You know those desserts that just feel like a warm hug? The ones that make you close your eyes with the first bite and sigh with pure happiness? This sopapilla cheesecake is exactly that for my family. It’s not just a dessert; it’s a memory maker. I remember the first time I stumbled upon a recipe for something similar, and it was good, but it wasn’t *this*. This is the one that gets requested for birthdays, potlucks, and just because. It’s got that incredible cinnamon-sugar crust, a creamy, dreamy cheesecake filling, and a slightly crisp, almost fried edge reminiscent of a true sopapilla. Think of it as the best of both worlds: the comforting richness of cheesecake married with the irresistible, sweet crunch of a beloved treat. If you’ve ever loved a classic cheesecake but wished it had a bit more pizazz, or if you’re a sopapilla fan looking for a new adventure, you’ve found your match. This sopapilla cheesecake is a game-changer, and I can’t wait to share it with you.
What is Sopapilla Cheesecake?
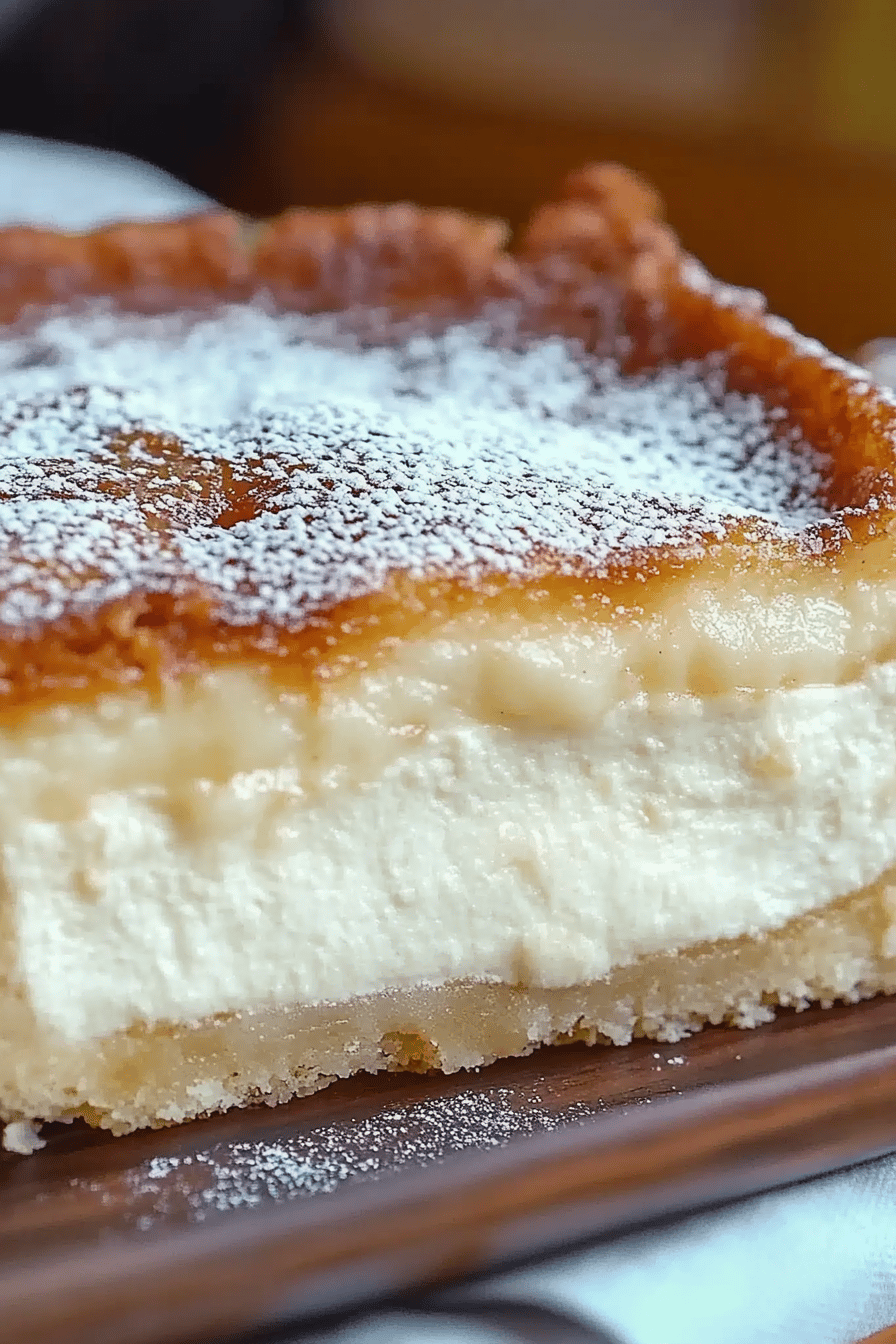
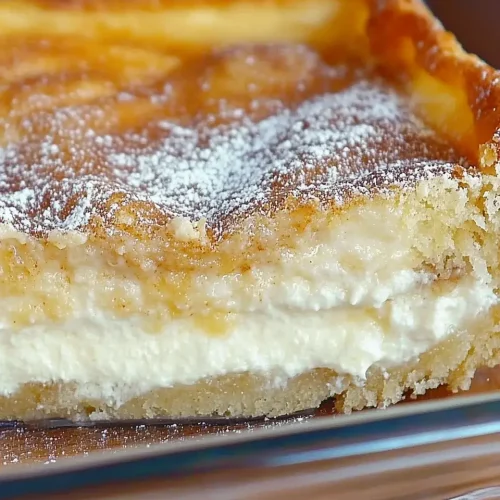
So, what exactly is this magical thing we’re calling sopapilla cheesecake? At its heart, it’s a baked dessert that cleverly combines elements of two incredibly popular treats. The base and crust are made from crescent roll dough, which gets brushed with butter and sprinkled generously with a cinnamon-sugar mixture before and after baking. This gives it that distinct, irresistible texture and flavor that’s so reminiscent of traditional sopapillas – those delightful, puffy fried pastries. The filling? That’s pure, unadulterated cheesecake goodness. It’s a rich, smooth mixture of Cream Cheese, sugar, and eggs, just like you’d find in any classic New York-style cheesecake. What makes it so special is how these two components come together in the oven. The crescent dough bakes up golden and slightly crisp on the edges, while the cheesecake filling bakes into a luscious, creamy layer on top. It’s essentially a cheesecake experience wrapped in the comforting, spiced hug of a sopapilla. It’s not fried like a traditional sopapilla, but it captures that delicious essence in a whole new way, making it so much easier to whip up at home.
Why you’ll love this recipe?
Honestly, where do I even begin with why this sopapilla cheesecake is a keeper? Let’s break it down because there are so many reasons. First off, the flavor is just out of this world. You get that wonderful tang from the Cream Cheese, perfectly balanced by the sweetness of the sugar and the warm, inviting spice of cinnamon. The crust is where the magic really happens; it gets this beautiful golden-brown color and a texture that’s slightly chewy in the middle and wonderfully crisp around the edges. It’s like biting into a cloud kissed by sunshine and cinnamon. Then there’s the simplicity factor. I’ve made more complicated desserts in my day, believe me. But this sopapilla cheesecake? It’s a lifesaver on busy nights when I want something truly special without spending hours in the kitchen. You can whip up the batter in minutes, and most of the work is just waiting for it to bake and cool. And speaking of ease, it’s surprisingly budget-friendly! Crescent rolls, cream cheese, sugar – these are all pantry staples or easy to find without breaking the bank. I’ve taken this to so many gatherings, and people are always amazed that I made it myself. It also feels really versatile. While it’s incredible on its own, I love adding a drizzle of honey or a dollop of whipped cream to really elevate it. It’s similar in spirit to a classic cheesecake or even a blondie, but it has its own unique personality. What I love most about this recipe, though, is the reaction it gets. Every single time, without fail, someone asks for the recipe. It’s a crowd-pleaser, a comfort food hero, and honestly, just pure joy in dessert form. It stands out because it’s familiar yet exciting, and it always brings smiles to the table.
How do you make Sopapilla cheesecake?
Quick Overview
Making this sopapilla cheesecake is surprisingly straightforward, which is a huge part of its charm. You’ll start by pressing a layer of crescent roll dough into your baking pan, then mixing up a simple Cream Cheese filling. After spreading that luscious filling over the dough, you’ll top it with more crescent dough, a generous cinnamon-sugar sprinkle, and then bake it until it’s golden and bubbly. The final touch is a sweet, simple glaze drizzled over the top once it’s cooled slightly. It’s the kind of recipe where the results far outweigh the effort, and you get that incredible, satisfying dessert with minimal fuss. Honestly, it’s almost foolproof!
Ingredients
For the Main Batter:
Two (8-ounce) cans refrigerated Crescent Roll dough (you’ll use both cans). Make sure they’re the kind without the perforations if you can find them, but either will work! I always buy the store brand, and it’s never let me down. The key is to have enough dough to form a good base and top layer.
For the Filling:
Two (8-ounce) packages Cream Cheese, softened. Don’t use low-fat or whipped cream cheese here; you want the full, creamy goodness of regular cream cheese. Let it sit out on the counter for about an hour to soften up completely. This makes it SO much easier to mix and ensures a silky smooth filling. Trust me on this one!
1 ½ cups granulated sugar, divided. We’ll use some in the filling and some for the topping. This amount gives us that perfect balance of sweet without being cloying.
2 large eggs. These are crucial for binding the filling and giving it that characteristic cheesecake texture. Make sure they’re at room temperature, too – they incorporate better!
1 teaspoon vanilla extract. A little goes a long way to add warmth and depth to the flavor. Pure vanilla extract is always my go-to.
For the Glaze:
½ cup powdered sugar. This makes for a smooth, luscious glaze. Sift it if you have time, but it’s usually fine as is.
2-3 tablespoons milk or heavy cream. Milk works perfectly fine, but if you want an extra decadent glaze, use heavy cream. You’ll add just enough to get a drizzly consistency.
½ teaspoon vanilla extract. Just a touch to enhance the glaze’s flavor.
Optional: Extra cinnamon-sugar for dusting.
Step-by-Step Instructions
Step 1: Preheat & Prep Pan
First things first, let’s get your oven preheated to 350 degrees Fahrenheit (175 degrees Celsius). While that’s heating up, grab a 9×13 inch baking pan. You’ll want to grease it really well. I usually use butter or cooking spray, making sure to get all the corners. This step is super important to prevent your delicious creation from sticking. Some people like to line it with parchment paper too, folding it over the sides to make lifting it out easier, but a good greasing usually does the trick for me.
Step 2: Mix Dry Ingredients
In a small bowl, combine about ½ cup of the granulated sugar with 1 tablespoon of ground cinnamon. Give it a good stir until it’s well combined. This is going to be your magical topping that gives the sopapilla cheesecake its signature flavor and golden crust. You’ll use some of this for the bottom layer and the rest for the top.
Step 3: Mix Wet Ingredients
In a large bowl, beat the softened cream cheese with an electric mixer until it’s nice and smooth and creamy. This might take a minute or two. Then, gradually add the remaining 1 cup of granulated sugar and beat again until everything is light and fluffy. Next, add in the 2 large eggs, one at a time, beating well after each addition. Finally, stir in the 1 teaspoon of vanilla extract. The mixture should look smooth, pale yellow, and wonderfully rich.
Step 4: Combine
Now for the fun part! Open up one can of the crescent roll dough. Gently unroll it and press it into the bottom of your prepared baking pan. Try to press it up the sides a little bit, about ½ inch, to create a bit of a crust edge. Don’t worry if it’s not perfectly smooth; rustic is good! Sprinkle about half of your cinnamon-sugar mixture evenly over this dough layer. Then, carefully spoon and spread the cream cheese filling over the cinnamon-sugar. Try to get it as even as possible, but again, perfection isn’t the goal here.
Step 5: Prepare Filling
This step is really just about ensuring your cream cheese filling is perfect before you spread it. Make sure your cream cheese is truly softened – this is key for a smooth texture. If it’s still a bit firm, you can microwave it for about 15-20 seconds on low power, but be careful not to melt it! You want it pliable, not liquid. Taste the filling before adding the eggs; if you prefer it a little sweeter, you can add another tablespoon of sugar, though I find this amount is usually just right. The eggs help set the filling, so don’t skip them, and make sure you beat them in well.
Step 6: Layer & Swirl
Take your second can of crescent roll dough and carefully unroll it. You can either gently press it into a second layer on top of the cream cheese filling, or if you’re feeling artistic, you can cut it into strips and weave a lattice top. I usually just press it down carefully, trying to cover the entire surface. Once the top layer of dough is in place, sprinkle the remaining cinnamon-sugar mixture evenly over the top. This is what will give you that amazing, golden, crunchy top layer that’s so characteristic of this dessert.
Step 7: Bake
Pop your pan into the preheated oven. Bake for about 25-30 minutes, or until the top is beautifully golden brown and the filling is set. You can test for doneness by gently shaking the pan; the center should be mostly firm, with just a slight jiggle. If the top starts to brown too quickly, you can loosely tent it with foil. I always keep an eye on it, as ovens can be a bit finicky!
Step 8: Cool & Glaze
Once it’s baked to perfection, carefully remove the pan from the oven. Let it cool in the pan for about 15-20 minutes before you even think about glazing. This allows the cheesecake to set up properly. While it’s cooling, whisk together the powdered sugar, 2 tablespoons of milk (or cream), and the ½ teaspoon of vanilla extract in a small bowl. Add more milk, just a teaspoon at a time, until you reach a pourable, drizzly consistency. It shouldn’t be too thin or too thick. Once the sopapilla cheesecake has cooled a bit, drizzle the glaze generously over the top. You can use a spoon or a piping bag for this. For an extra touch, you can sprinkle a little more cinnamon-sugar over the glaze while it’s still wet.
Step 9: Slice & Serve
This is the best part! Let the sopapilla cheesecake cool completely for the best texture and clean slices. This usually takes a couple of hours at room temperature. If you can wait that long! Some people like it slightly warm, which is also delicious. Use a sharp knife to cut it into squares. I usually cut mine into 12 or 16 pieces, depending on how generous I’m feeling. Serve it on its own, or with a dollop of whipped cream, a scoop of vanilla ice cream, or even a drizzle of extra honey. It’s perfect at room temperature, but it’s also divine slightly chilled straight from the fridge.
What to Serve It With
This sopapilla cheesecake is so versatile, it truly shines at any meal or occasion. For a special treat first thing in the morning, I love serving a warm slice alongside a strong cup of coffee. The sweet, cinnamon-spiced flavors are the perfect wake-up call, and the slightly gooey cheesecake is pure bliss. It’s a delightful departure from typical breakfast pastries. When we’re hosting a weekend brunch, this is always a star. I’ll plate it nicely, maybe with a few fresh berries on the side for color and a touch of tartness, and pair it with mimosas or fresh orange juice. It feels elegant enough for guests but is still so comforting. As a dessert, well, it’s a no-brainer! It’s fantastic on its own, of course, but for an after-dinner treat, a scoop of vanilla bean ice cream melting into the warm cheesecake is absolute heaven. Sometimes I’ll drizzle a little more caramel sauce over the top for an extra indulgence. And on those lazy evenings when a craving strikes, this is my go-to for a cozy snack. It’s incredibly satisfying without being overly heavy, and it just feels like a warm, sweet hug. My family tradition is to always have a little extra cinnamon and a dusting of powdered sugar on top for serving, no matter the occasion. It adds that final touch that just makes it feel extra special and, of course, reminds us of those wonderful sopapillas!
Top Tips for Perfecting Your Sopapilla Cheesecake
Over the years of making this sopapilla cheesecake countless times, I’ve picked up a few tricks that I think really make a difference. First, let’s talk about the crescent roll dough. While most brands work, I find that the kind that comes in a sheet or has fewer perforations is easier to press into the pan without tearing. If yours tears, don’t stress! Just press the pieces together firmly; the filling will help seal it. For the cream cheese filling, really make sure your cream cheese is at room temperature. This is probably the most critical step for a super smooth, lump-free texture. If you forget to take it out, you can soften it gently in the microwave (low power for short bursts!), but avoid melting it. When you’re mixing the filling, don’t overmix once the eggs are in; just mix until combined, as overbeating can lead to cracks when it bakes. For the cinnamon-sugar topping, I like to mix my cinnamon and sugar in a small bowl beforehand so it’s ready to go. You’ll use about half on the bottom layer of dough and the rest on the top. This creates that delicious, slightly crisp, spiced crust. If you want an even richer glaze, use heavy cream instead of milk; it makes it wonderfully decadent! Another trick I’ve learned is that if your cheesecake seems to be browning too quickly on top, you can loosely tent it with aluminum foil for the last 10-15 minutes of baking. This protects the top while allowing the inside to cook through. When it comes to ingredient swaps, I’ve experimented! For a slightly different flavor profile, you could try adding a pinch of nutmeg or cardamom to the cinnamon-sugar mix. And if you’re feeling adventurous, a little bit of orange zest in the cream cheese filling can add a lovely brightness. The most important tip I can give you, though, is patience with cooling. While the urge to dive in while it’s warm is strong, letting it cool for at least an hour or two really allows the cheesecake to set up beautifully, making for cleaner slices and a better overall texture. But hey, if you want to eat it warm, I won’t judge! It’s still delicious.
Storing and Reheating Tips
Knowing how to store your delicious sopapilla cheesecake is key to enjoying it over a few days. If you happen to have any leftovers, which is rare in my house!, here’s what I do. At room temperature, the cheesecake will be perfectly fine for up to 2 days, provided it’s covered. I usually just use plastic wrap or aluminum foil to loosely cover the pan. This keeps it fresh and prevents it from drying out. If you live in a very warm climate, or if it’s quite humid, I’d err on the side of caution and refrigerate it sooner. For longer storage, your refrigerator is your best friend. You can keep it covered in the baking pan for up to 4-5 days. The flavors actually meld and deepen overnight, making it even tastier the next day! If you want to cut it into individual portions before refrigerating, that’s a great idea too. Just make sure to cover the cut surfaces well with plastic wrap to prevent them from drying out. I’ve even frozen this sopapilla cheesecake, and it freezes surprisingly well! You can freeze the whole un-glazed cheesecake or individual slices. For whole cakes or large portions, wrap it tightly in a layer of plastic wrap, then a layer of aluminum foil, or place it in an airtight freezer-safe container. It will keep for about 2-3 months. Thaw it overnight in the refrigerator before serving. If you’re freezing slices, wrap each one individually in plastic wrap and then place them in a freezer bag or container. A good rule of thumb for thawing frozen slices is to let them come to room temperature for about 30-60 minutes, or let them thaw in the fridge for a few hours. When it comes to the glaze, I usually add it *after* the cheesecake has cooled down a bit, but before serving or storing. If you’re planning to store it for more than a day or two, or freeze it, you might want to store the glaze separately and add it right before serving. This way, the glaze stays nice and fresh and doesn’t get soggy from sitting too long. Just whisk up your glaze ingredients and drizzle it on the chilled or room-temperature cake.
Frequently Asked Questions
Final Thoughts
So there you have it – the sopapilla cheesecake that has captured my heart (and stomach!). I truly believe this recipe is a gem because it delivers such incredible flavor and texture with surprising ease. It’s one of those dishes that makes people feel special, and it always brings a sense of comfort and joy to any table. Whether you’re a seasoned baker or just starting out, you can totally nail this. It’s forgiving, it’s adaptable, and most importantly, it’s utterly delicious. If you love this recipe, you might also enjoy my Creamy No-Bake Cheesecake Bars or my Easy Churro Bites for more cinnamon-sugar goodness! Give this sopapilla cheesecake a try, and I promise you won’t regret it. I can’t wait to hear all about how yours turns out! Please leave a comment below with your thoughts or any variations you tried. Happy baking, friends!

Sopapilla Cheesecake
Ingredients
Crust
- 2 cups all-purpose flour
- 0.5 cup granulated sugar
- 1 teaspoon baking powder
- 0.5 teaspoon salt
- 0.5 cup butter, melted
Cheesecake Filling
- 2 packages cream cheese, softened (8 oz each)
- 0.75 cup granulated sugar
- 2 large eggs
- 1 teaspoon vanilla extract
Topping
- 1 cup pecans, chopped
- 0.5 cup butter, melted
- 0.5 cup brown sugar
- 1 teaspoon cinnamon
Instructions
Preparation Steps
- Preheat oven to 350°F (175°C). Grease and flour a 9x13 inch baking pan.
- In a medium bowl, whisk together flour, granulated sugar, baking powder, and salt. Pour in the melted butter and mix until combined to form a crumbly dough.
- Press about two-thirds of the dough evenly into the bottom of the prepared baking pan.
- In a separate bowl, beat together the softened cream cheese and granulated sugar until smooth. Beat in the eggs one at a time, then stir in the vanilla extract.
- Pour the cream cheese mixture evenly over the crust in the pan.
- In a small bowl, combine the chopped pecans, melted butter, brown sugar, and cinnamon. Sprinkle this topping evenly over the cream cheese layer.
- Crumble the remaining dough over the topping. Bake for 35-40 minutes, or until the edges are golden brown and the center is set.
- Let cool completely before cutting into squares and serving.


